
Welcome To My German Equipment
Alterations Page Three
Smock Weathering
Helmet Cover Weathering
Jackboots Weathering
Binoculars Cover
Sniper Veil
Telescopic Sight Cover
Smock Weathering
1.
 2.
2.
 3.
3.
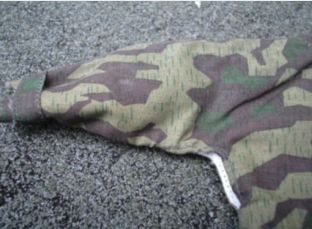
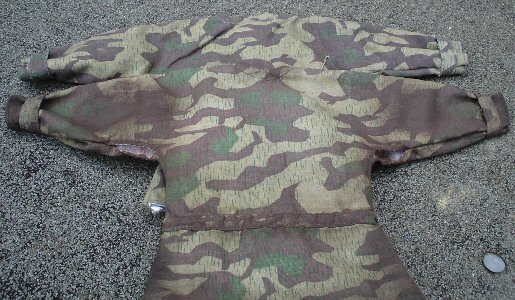
This is an
experiment I have tried on my Dragon Wehrmacht smock, with the same method that
I used on my Russian figure. The pictures above are of the new smock as I got it
in a trade.
4.
 5.
5.
 6.
6. 
With this smock I wanted
something different from the usual pastel chalk weathering, as I wanted to use
it in a future kitbash so I used the following method on it using some Faber-Castell
pastels. In Picture 4. to add the dirt to the uniform I first
I then rubbed over the edges with a Brown 280 chalk pastel, I rubbed this
in and then gave it a very light dust over with the Black 199 chalk pastel over
the top. This was also rubbed in to get a dirty edge as shown, on top of this I
then used a Brown Oil Pastel number 176 over the top, which was rubbed into the
edges, cuffs, underarms and collar.
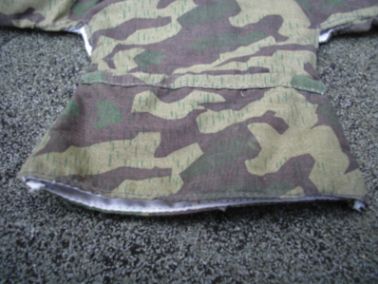
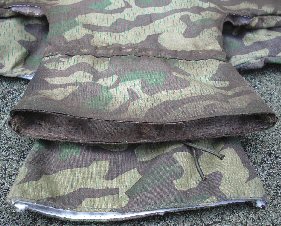
In pictures 5. & 6. with
some more heavy rubbing with my fingers on the smock it has brought out the shine as shown
above. This then gave me the in-grained dirty look that I wanted. This was also
added to the collar edges, cuffs, underarms, elbows and the edge of the front of
the jacket. I then used some Light Sand Tamiya weathering powders brushed
lightly over the rest of the jacket, to add highlights to the parts that have
not been touched by the pastels.
Note: With these pictures
5. & 6.
I have put the smock on top of my other new one, to show the differences between
them.
7.  8.
8.
 9.
9.

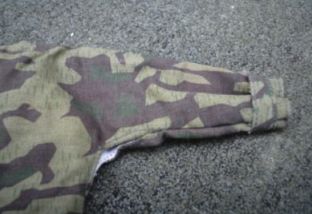
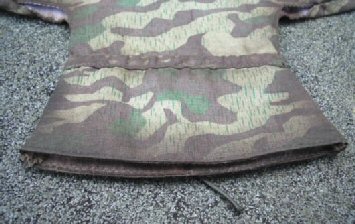
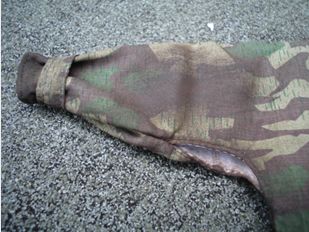
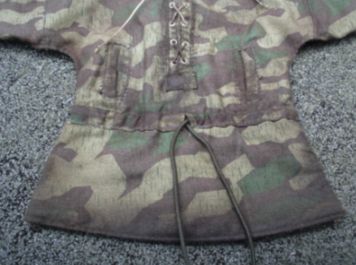
Pictures 7. 8. & 9.
are closer pictures of how I have used the chalks on this smock, along with the
light drybrush of the Light Sand Tamiya weathering powder.
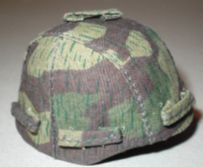
Helmet Cover Weathering
10.
 11.
11. 12.
12. 13.
13.
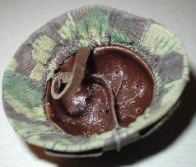
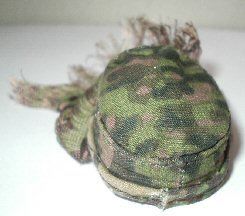
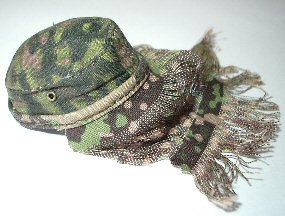
With a figure I am planning, I wanted a splinter cover on a German helmet, but I
could not get it to look right as it was too loose. So as an experiment I put some double sided tape
on the edge inside the helmet, I then put the helmet cover on and pulled it
tight pressing down on the inside edges. I found that it did help to hold the
material in place, and I got the shape I wanted as shown above.
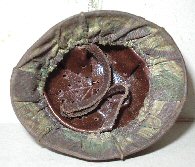
Note: This is not a permanent fixture, as
the edges do come loose over time and need to be pressed back down into place.
But I prefer to do it this way, rather than use some kind of
cyanoacrylate
glue. Pictures 10. &
11. are of the new cover fitted onto the
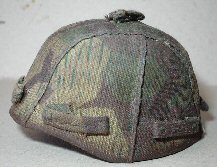
helmet, and pictures 12. &
13. are after I have used the same
weathering technique on it that I did for the smock.
Jackboots Weathering
14.
 15.
15.

The boots above are the DiD short jackboots and I also decided to have some
scuff marks on the toes. I did this by folding a small piece of sandpaper
in half so that it caused the cuts in the leather, and I sanded gently to cause
the scuff. Note: Be very careful as the
'pleather' material is thin and can easily tear. In Picture
15. I also repainted the metal parts on the
heels of the boots with the enamel
Gunmetal paint. and then used a Light Brown pastel chalk powder to add a dust
effect to the boots. On the toes of the boots I used a drybrush of grout powder,
as this helps to bring out the scuff mark.
Binoculars Cover
16.
 17.
17.
 18.
18.
 19.
19.
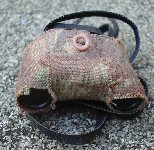
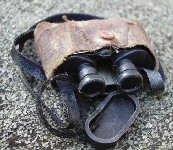
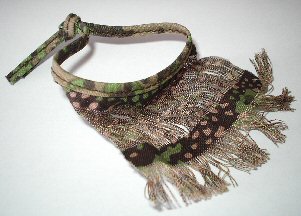
This cover was an experiment by me to see if I could make a cover similar to the
one shown on this page -
Cover. The Splinter material came from an old 1/6th scale zeltbahn I have,
which I cut up to make this. I did not take any measurements of the material as
this was my third go at getting it big enough to wrap around the binoculars.
Basically I cut out a 'T' shape, which I use the top part of the 'T' to wrap
around binoculars as shown in Picture 16. so
that part of the front lens are covered, but the adjuster at the back can be
left open. The ends are held in place with some double sided tape onto the top
of the binoculars as shown in Picture 17.
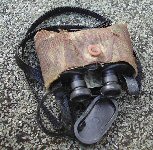
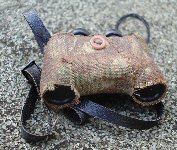
The lower part of the 'T' shape is then folded up from below over the front,
trimmed to shape and I sewed a button onto the top. Weathering was done the same
way as I did for the smock.
Note: I have not tried it with other
camouflage materials, but I expect that an SS, Italian or DAK cover can be made
the same way.
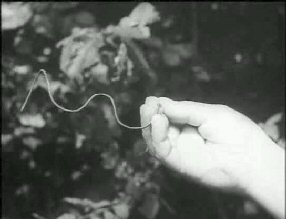
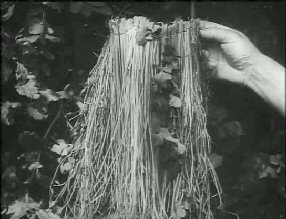
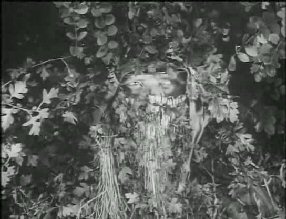
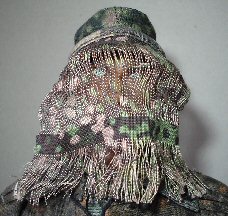
Sniper Veil
As an experiment I wanted something that was different for a figure
that I have not done before, and that is when I came up with the idea using a
Dragon sniper face veil and a Toys City camouflaged cap. The idea was based
on the reference pictures below, Picture
20.
is how a sniper has used a piece of wire bent into the shape of a pair of
glasses, Picture 21.
shows how some grasses have been tied to the frame and in Picture
22.
it shows the frame in use as a face veil.
20.
 21.
21.
 22.
22.
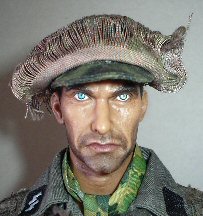
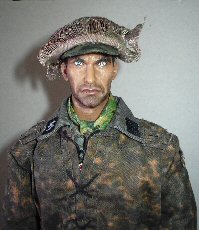
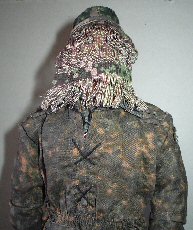
This is where the idea came together of combining the veil and the cap together
as a field modification, so as shown below I have sewn the veil to the edge of the cap.
Picture
23. is the loose
veil with the long straps which would be used to tie the veil the head of a
figure, for my kitbash I started to sew the front of the veil above the peak so
that when it hung down it was centred over the face. Picture
24. shows how I have
sewn the straps in place, and when I got to the back of the cap I had the remaining straps that
needed to be cut off.
23.  24.
24.
 25.
25. 
26.
 27.
27.  28.
28.  29.
29.
To cut off the excess straps, I laid them over each other at the back and with
some cutters and I snipped through both of them, so that when I sewed the ends to
the cap they laid flat. Picture
25. is of the front
of the cap with the veil fitted, in Picture
26. & 27. it is
raised over the cap, and in Picture
28. & 29. the veil
has been dropped down so that it now covers the face.
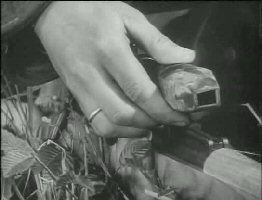
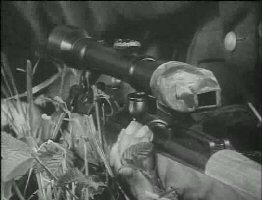
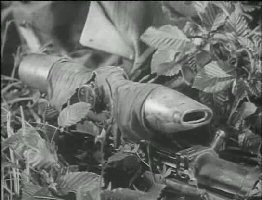
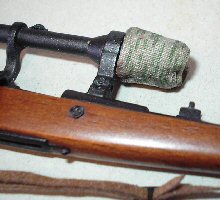
Telescopic Sight Cover
This is an item that again I have been considering making based on the pictures
below from my store of reference images, these show a telescopic sight and the
sniper's have made some different types of slip on lens covers for it. The
purpose of this is to conceal it from the enemy and to stop the glass lens
reflecting light.
To try to make the scope covers I have used some round plastic tube that I
heated with my lighter, and stretched it slightly to make it thinner similar to
the way I make
stretched
sprue so it is a tight fit over the top of the scope.
30.
 31.
31. 32.
32.  33.
33.
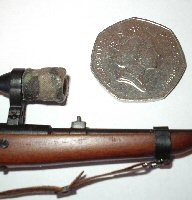
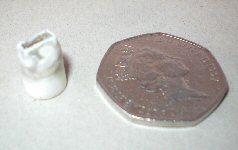
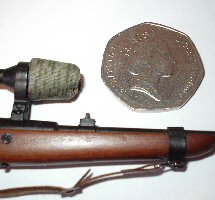
The rifle I am using for this section is the one from the DiD Ralf figure, and as shown in Picture
30. I have sanded
the tube slightly to get the surface even, also to give an idea of the size of
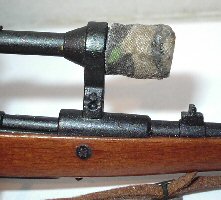
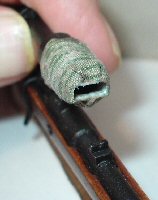
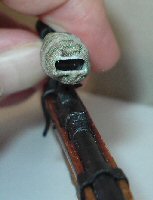
this I have placed a 50p coin next to the rifle. I then put some neat PVA glue on it
and wrapped the front and outside of the tube with some Dragon German
camouflaged material. Pressing it down making sure that the material stuck in
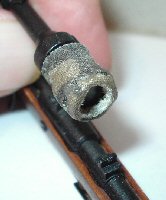
place, and making sure that the front was covered over so that when
it was dry I could use my model drill and a pointed grinding bit to make the
hole in the front as shown in Picture
32 &
33.
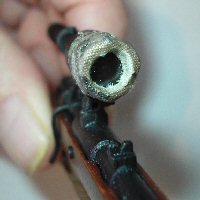
The other type of scope cover
I have made below is a combination of the one's shown in the reference pictures above
left with the flat slot, this was made differently to the other cover from two
pieces of stretched plastic tube which I have slid inside each other. Which I
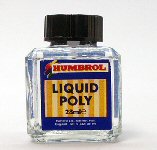
then brushed over the top of it all with the liquid plastic poly glue as shown
right, so that the plastic gradually melts it all into one piece.
Once the plastic cone has dried but is still soft I have placed it on the end of
the telescopic scope to get
 the shape, and I then shaped
the slot with my tweezers to make the open end of the cover as shown in Picture
34.
the shape, and I then shaped
the slot with my tweezers to make the open end of the cover as shown in Picture
34.
Note:
That this step took about two hours on and off to get the shape right, with a
combination of sanding, glueing and shaping again. I then left the cover
overnight to set the plastic and for it to dry fully.
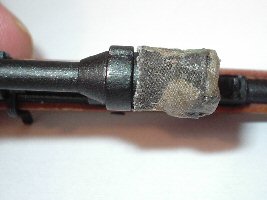
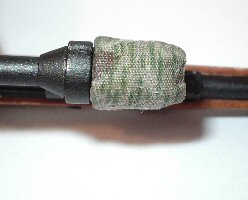
And as shown in Picture
35. I have wrapped
the scope cover in another piece of material using the same method
as the other cover. Again by putting some neat PVA glue on it and wrapped the
front and outside of the tube with some Dragon German camouflaged material.
Pressing it down making sure that the material stuck in place, Pictures
36. 37.
& 38. show how this scope cover looks on the
rifle.
34.
 35.
35.
 36.
36.  37.
37. 
38.
 39.
39.
This section is continued on
Page 4
