Welcome To My German Equipment
Alterations Page
Four
'A' Frame Dragon Crampons White Winter Uniform Soldier Story Boots
'A' Frame
The main
parts of the A frame are made by Dragon which I have altered slightly, by using
a page about the 'A' frame
assembly as reference.
The
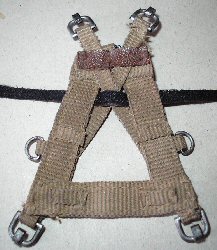
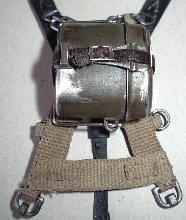
first thing I did as shown in Picture 1.
was to repaint the cloth material of the frame itself, as I wanted to get away
from the toy look it had. This I did by using some diluted Light Brown acrylic
paint to re-colour it, I also repainted the clips that connect to the 'Y' strap.
and I then gave the frame a drybrush with some Tamiya Light Sand weathering
powder, to add some highlights to it.
1.  2.
2.  3.
3.
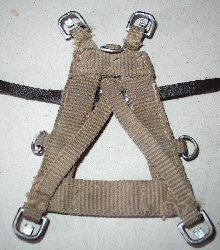
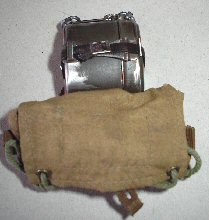
To attach the DiD mess tin to the frame in Picture 1.
shown from the front, and Picture 2. from
the back. I have used a picture from the reference page Picture
3. to show the way that
the strap is attached to the full size 'A' frame. On my 'A' frame I made some
small slits between the two pieces of material, so that I could pass the mess
tin strap through the frame to hold it in place the same way.
4.  5.
5.  6.
6.
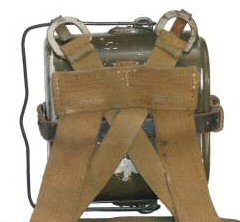
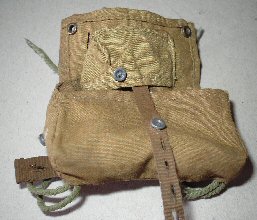
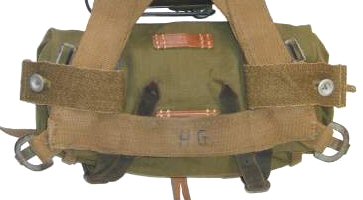
In Picture 4. I have attached the mess tin
to the 'A' frame, the bag for the A frame has
also been altered by repainting it with some diluted Model Color 70873 US Field
Drab acrylic paint as shown in Picture 5. I
left the pocket the original colour of the material, so it would be different to
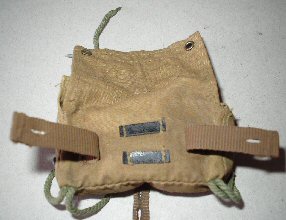
the rest of the bag. Picture 6. shows the
back of the bag with the side and the centre inside straps painted with Model
Color 70983 Flat Earth acrylic paint. I also repainted the threads used to tie
the bag together with some Tamiya XF-58 Olive Green acrylic paint.
7.
 8.
8.
 9.
9. 
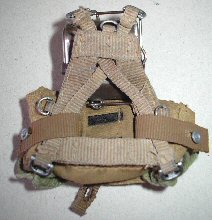
 In Picture
7. I have attached the bag to the 'A' frame
just like it is shown in Picture 8. from my
reference page. Picture 9. shows the bag
from the front, the straps and the bag was then drybrushed with some more of the
Light Sand weathering powder on to it to add highlights.
In Picture
7. I have attached the bag to the 'A' frame
just like it is shown in Picture 8. from my
reference page. Picture 9. shows the bag
from the front, the straps and the bag was then drybrushed with some more of the
Light Sand weathering powder on to it to add highlights.
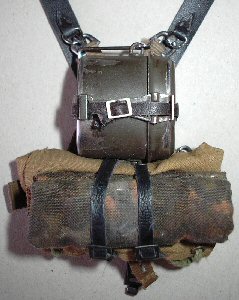
In the picture on the right I have the finished 'A' frame connected to a set of
'Y' straps, and the last item I fitted was a zeltbahn roll and two straps. The
straps were painted with some Model Color 540 Matt Medium acrylic paint to lose
the shine they had, once dry I also gave it a light drybrush with some Light
Sand weathering powder
I made the roll from a Dragon zeltbahn that I cut the middle part out of, so
that I could have a roll like this which is more in scale. A bonus from doing
this is that the material from the middle is in two pieces, so I had enough to
make two rolls like this.
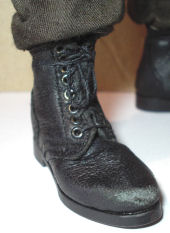
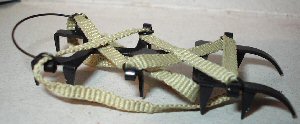
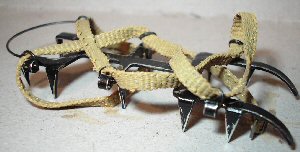
Dragon Crampons
The weathering of the crampons was quite easy since they are made of metal, and
for this in Picture 11. I just scraped along all of the edges with my model knife to remove the
paint. The straps were also repainted with some Model Color 873 US Field Drab
acrylic paint. The fitting of the crampons onto the boots was at times a real
trial for me, as I would have them almost ready to buckle up and the metal
support at the back would come out.
10.
 11.
11.
 12.
12.

In Picture 12. I
then had to refit them back into place, tighten up the straps and try to buckle up
again. And at the same time make sure that the front part of the strap was over
the toe of the boot. Note: I also lost count
of the times that I stuck the spikes into my fingers whilst doing this.
With the fitting of
the crampons on my figure, I found some excellent help from Patrick -
Crampons
Another excellent link from Patrick with
information about tying crampons to the boots is here -
Tying Crampons
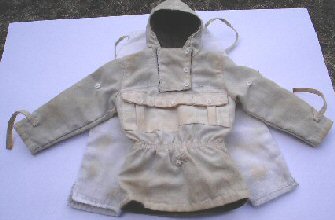
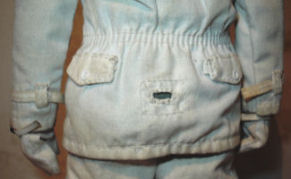
White Winter Uniform
The tunic for the figure as shown below in picture
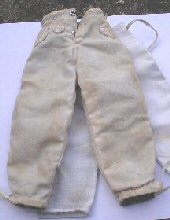
13. was made by Toys City with the trousers in
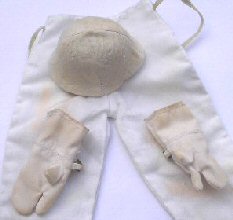
picture 14. from Dragon, in Picture
15. I have a Dragon winter helmet cover and a
pair of winter mittens. All of which have been placed on the top of another pair
of white winter trousers to show the weathering I have made to the uniform.
13.
 14.
14.  15.
15. 
To add a start of a weathering effect I have tried the Coffee
trick above as mentioned by Bob a Job. And I am impressed with how different the uniform looks now.
As it has added an overall discoloured dirty effect to the uniform, and by rubbing with my fingers on it, I can choose which places to keep the dirty marks. Usually I do not bother to put a uniform under the winter clothing. But for this figure I wanted to bulk out the material, so that the outer white uniform would crease up better.
16.  17.
17.  18.
18. 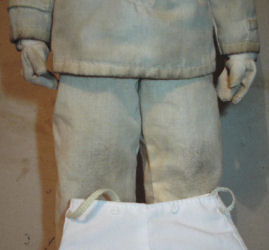
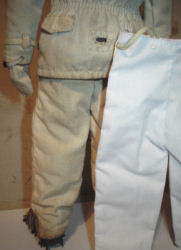
These pictures show how I have also added some
extra weathering with some Mud powders on top of some Brown pastel chalks, the
chalk was first added and rubbed in between my fingers on the bottom edges. I
then went over the top of this the lighter Mud weathering powder, so that it
highlighted the tops of the creases. Pictures 17.
& 18. show a pair of brand new white trousers
against the weathered uniform as a comparison. Note:
Another page I have made about weathering uniforms is here -
Weathered.
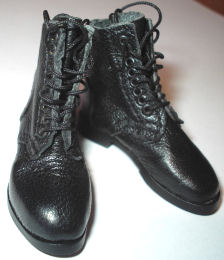
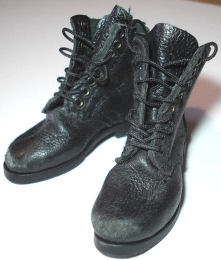
Soldier Story Boots

 20.
20.
 21.
21.