|

Welcome
To My Gebirgsjager Backpack Changes Page Three.
White Gebirgsjager Backpack
White Shoe Dye Colour
Tarrago Shoe Cream
White Gebirgsjager Backpack
An idea for my Gebirgsjager figures came to me
after watching the film Where Eagles Dare, where as shown on the right they used
some white backpacks to carry their equipment. So I got to wondering if I could
use some White artist's acrylic paint to re-colour the Dragon Wilhelm Engels
original green backpack colour. Because in real life I could not see these being
made exclusively in a white material. So they would have had to have been
possibly white washed to change the colour, so that they could be used in alpine
environment.
Re-colouring Material
I found two methods on the OneSixth UK forum about re-colouring materials, one was done by jbcat -
Blanco and the other was by Old Git -
Shoe Cream. So I have followed their ideas to change the colour of my
backpack.
Strap Alterations
I have already carried out
two sets of alterations to
the other backpacks I have here, so with the last one I have I decided to see if
I could change the colour of it instead. I am going to change the straps to the
one's in Method 2,
which have the buckles in the bottom corners. But instead of adding a pair of
secondary straps to the backpack, I am just using the pair of straps already on
the backpack, to connect to the new buckles on the bottom corners.
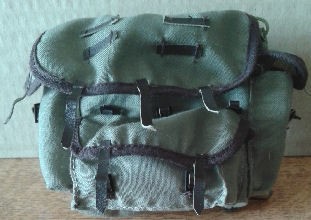
Method 3.
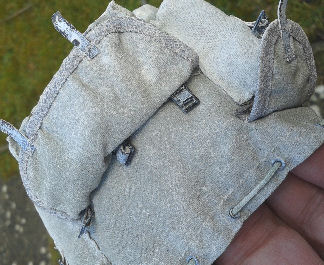
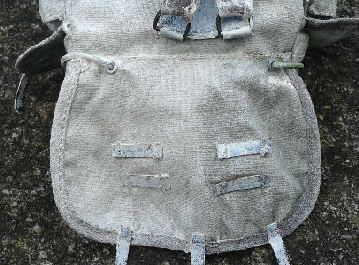
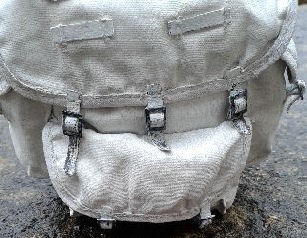
Picture 1. below is of the straps as they come
fitted to the backpack, with these I am not altering them all I will do is I
will remove the metal hooks. So that the strap ends can be fitted into the
buckle on each of the bottom corners of the backpack, as shown in Picture
2.
1.
 2. 2.
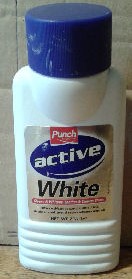
White Shoe Dye Colour
My first attempt is a major experiment by me, as I
did not have any Tarrago shoe cream and at the possible risk of
ruining a perfectly good backpack. I decided to try use some White fabric shoe dye on it,
the pictures below show how I have progressed with this method. Picture
3. is the fabric shoe dye I used, Picture
4.
is the original backpack before I have
tried to re-colour it. Picture 5. is after an application of the shoe
dye on the pack to see how it is absorbed by the
material.
3.
 4. 4.
 5. 5.
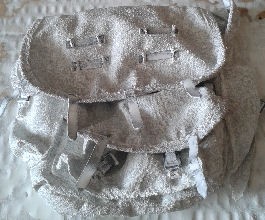
 The picture on the right is
the first coat, after I have covered the whole pack with the white shoe dye,
which has also involved using a hard paintbrush to scrub the dye into the pack.
I have had to let it dry for a few hours as is a bit patchy, so I will have to add
a second coat of the shoe dye
to re-colour the brown edges of the flaps. As well as to try to get a complete
overall white colour. The picture on the right is
the first coat, after I have covered the whole pack with the white shoe dye,
which has also involved using a hard paintbrush to scrub the dye into the pack.
I have had to let it dry for a few hours as is a bit patchy, so I will have to add
a second coat of the shoe dye
to re-colour the brown edges of the flaps. As well as to try to get a complete
overall white colour.
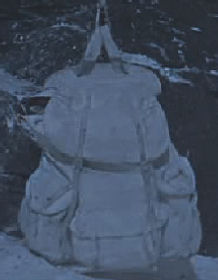
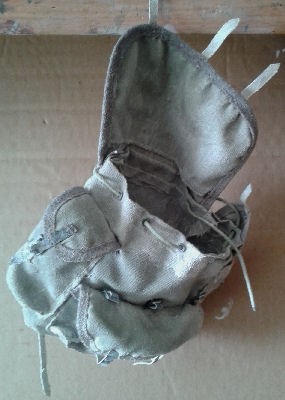
I left the backpack to dry overnight after
applying the shoe dye a third time, I realised that the dye is too thin so I
have had to re-apply some more of the dye. I tried again and I left the backpack
to dry overnight for a second time, and I found that the end result is very
similar to the picture on the right. And that instead of a White colour that I
wanted, I have ended up with a sort of washed out Grey instead.
6.  7.
7. 
Pictures
6.
&
7.
show the backpack where I have taken the photos
outside. To show the Grey look it has instead of the White colour that I thought
it had when it was indoors, as shown in the picture above right.
Tarrago Shoe Cream
My second attempt to
re-colour the backpack and to try to get a better effect and coverage for
the White colour, I bought some of the
Tarrago shoe cream I also found on their
website that they also have a
colour chart.
The picture on the right again with the photo
taken outside, this shows where I have used the shoe cream on the left. Compared
to the original shoe dye colour on the right half of the backpack flap. To show a better picture of the colour
differences, I have added the Pictures 8. &
9. below, where I have re-painted one of the
side pockets on the backpack. And even I was surprised at the how much brighter
the Tarrago shoe cream is. To cover the backpack with the cream, I have used a
stiff paintbrush to paint it on and rub it into the material.
And to try to get an even coverage of the cream, I have painted the front and one side. I then left it aside to dry
to get an idea of how the White colour has covered the backpack.
Note: I washed my hands and the paintbrush
in water, and I found that the cream is water based, which helped to clean
everything easier. After leaving the backpack for about 3 hours to dry, I then
painted the back and the other side.
8.
 9. 9.
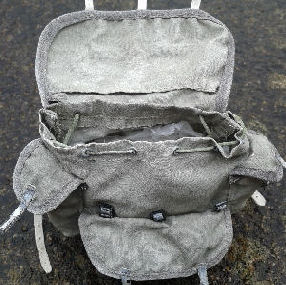
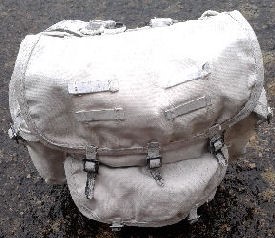
Below are pictures I have again taken outside to
get a better idea of how the cream has been absorbed into the backpack, and I
have found that even after giving the backpack two coats of the shoe cream. That
there are still some small Grey patches that need to be covered again.
Finished Backpack
10.
 11. 11.
 12. 12.
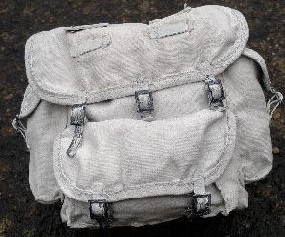
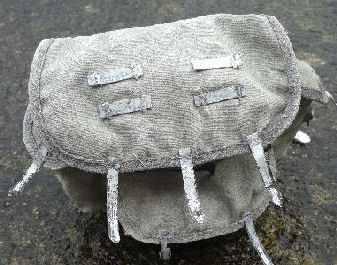
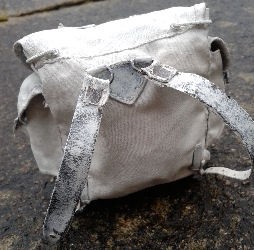
I have put Picture 10.
as a comparison to show what the White colour shoe dye looks like, and the
results that I got with it. And in Pictures 11.
to 15. the results by using the Tarrago shoe
cream with a much better and more even colour.
13.  14. 14.
 15. 15.
I found that the material had stiffened slightly, but not as bad as I have had when I have
painted some material with acrylic paint. So I scrunched up the backpack in my
hands, to loosen up the stiffness of the material. By doing this I found that
some of the shoe cream needed to be repainted slightly, so I used it
to touch up these Grey spots.
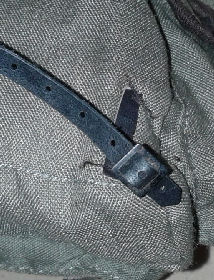
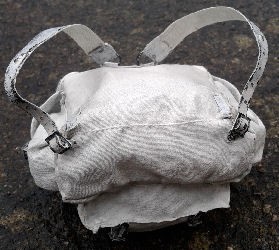
Backpack Straps
The pleather straps had some of the original White shoe dye
paint on them, from where I had tried to re-colour them before. I decided not to
repaint them as I had intended to do, instead I sanded the straps
slightly to represent wear on them, where they would be put through the buckles.
As well as wear on the main straps in Picture 15.
which would be done when it was being handled. As I am thinking that with a white washed backpack like this, the first part to
show signs of wear would be the straps. The second part would be the buckles,
and for these I scratched each of them with my fingernails to remove the shoe
cream and shoe dye.
Many thanks to
Heeresbergführer for the pictures and the
detailed help with my rucksack changes.
And thanks to both jbcat
and Old Git for their ideas with the shoe
cream. | 