Please read this fully first, as this is my
best way of explaining how I make my figure bases.
Also, it contains some different methods I
have used, depending on my figure's pose.
This is my page, on how I make my bases for my 1/6th scale figures. I have been
meaning to make this page for ages, but never seemed to get around to it. And
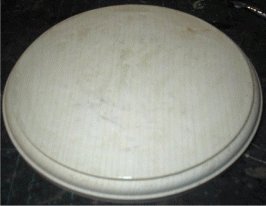
after being asked how I make them, I have finally got around to making this. The base I am using for this
figure is a 6" round plaque. This is an excellent size of base for a single figure, as
it gives me enough room to add the landscape details to the base, without it
taking up too much room on my shelf.
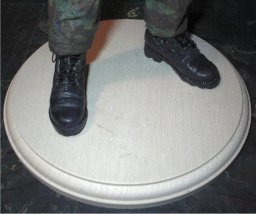
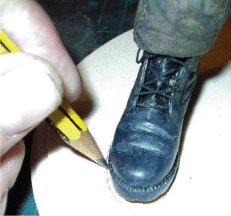
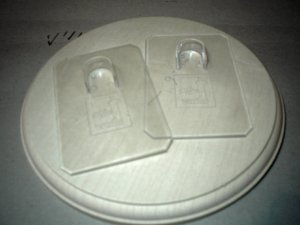
In the picture above left, is a
basic 6" base, and for comparison I have
placed a figure on the plaque in the next picture. This shows how a figure fits
onto the base and the space around the feet for the landscape. For my 2 figure
base that I want to make with my US paratrooper .30 cal crew, the larger 10"
square base will be needed.
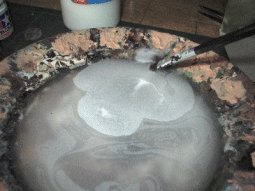
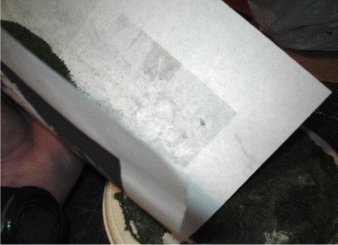
Priming the base (See update
below)
One of the
problems with using wooden bases for 1/6th scale landscapes, is that if they are
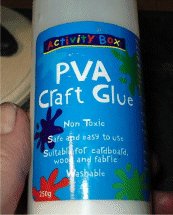
used without priming it. The base will warp and not lay flat on your shelf. So,
to seal the base against water from the Polyfilla mix (Plaster of Paris), I use
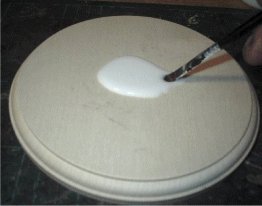
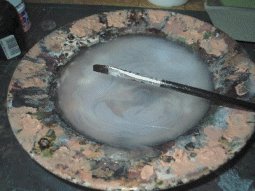
clear varnish. This is done as shown in the pictures above;
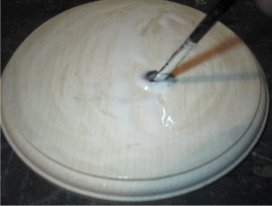
firstly with just placing some varnish onto the base, then use a brush to spread it
around to cover the base top. The final picture above right shows the base with
the varnish drying out. Even though I do not make the landscape right up to the base
edge, I still paint the varnish on the edge. This way the water cannot 'creep'
under and penetrate the wood. Also, with priming the base in this way, it makes
a rough surface for the next step, and it allows the Polyfilla (Plaster of
Paris) mix to stick better to the base. Note:
I leave this to dry overnight, as depending on the size of the base, you may
have to give it 2 coats of the varnish to make sure it is sealed.
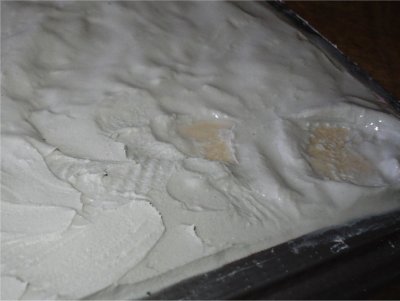
This update will help to explain what I mean about not sealing the base
properly. Because I thought I had done with my Ardennes diorama and that it
would be alright now once it had fully dried, to add more of the PVA and plaster
mix onto the base on top of the dried material I had already applied. But was I
mistaken...
As I thought that I would just build up the landscape a bit and cover the small
cracks that had appeared, but because I had not sealed the base properly and I
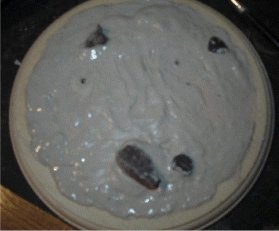
was adding more plaster and water to it. The result is shown on the right here.
A is where the added groundwork has cracked
again because the base has bowed upwards in the middle. And
B is showing the slight bow that developed in
the wooden base. This has annoyed me immensely, as I thought that I had stopped
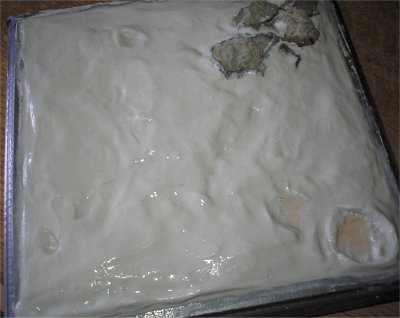
this from happening because of the amount of neat PVA that I had used to seal
the base. But I think what is occurring is that as I am adding more plaster mix
to the base, the protective layer of PVA I thought I had, has become liquid
again due to the water which makes it useless.
Important Note: I have never come across
this happening before with my bases, so I can only think that because of the
amount of plaster that I am using to make the shape of the snow landscape. And
the base not being sealed properly, this is why I am having this many problems
with this diorama. So with all of my bases from now on, I am going to use a
non-water based varnish on the base first to seal it. That way I can add
more of the plaster mix to the base, without the worry of the base bowing on me.
An extra link that
could help to explain the next step.
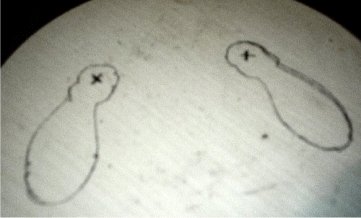
This an important stage in the making of a diorama base, as
you have to make sure you have room for the feet of the figure. I do this by
placing the figure onto the bare base, then drawing around the boots.
Fixing the figures to the base -
Part One
Pose One Update -
Fixing a figure's feet flat on the ground
Another
excellent method I have found out about regarding making bases is from this
tutorial as made by Tony Barton -
Tony Barton Bases. And when I actually met this gentleman, he explained that
to fix his figures to his bases he drills a small hole in the heel of the figure
and in the base. He then uses some thin metal rod which he places in the hole in
the base, and then just slots the heels of the figure onto the end of the rod
that protrudes out. Note:
If you use a drill bit to make the hole in the base, use the same diameter rod
to make a tight fit both in the hole and the heels of the figure.
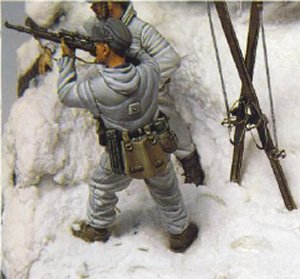
This method
I have found is the best way if you want the figure to stand flat on the ground,
as shown in the picture on the right. This was one of the pictures that I took
of Tony's amazing figures that I saw at the York show I attended.
Pose Two Update -
Fixing a figure's feet into the ground
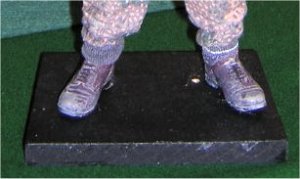
The altered
method I have recently found for making sure that I have a secure model on the
base, is by using the plastic stands that are supplied with DML figures for the
feet. This makes sure that the figure cannot move and it sets the pose for me.
In the picture on the right I have placed two of the stands on the base, the
heel supports would line up with the marks that I would have made above. Note:
Because of the shape of the round base the stands overlap, so these will have to
be cut down so that they both lie flat making sure that they don't protrude too
far out into the base edges.
The reason
as to why I have changed the method of securing my figures is because over time,
I have found the ankles weaken if the pose puts the figure's legs under any
strain. And with the screws that I used before in the feet it seems to add to
the strain, especially if the figure is wearing a metal helmet or carrying a lot
of equipment or a heavy model metal machine gun. Plus the undoing of the screws
can be a very awkward job, if you ever have to carry out any repairs to the
figure.
Making the landscape
Note:
Firstly, place some newspaper under the base, as this saves the surface you are
working on from being damaged, and in the later stages of this tutorial, you
will be able to reuse some of the landscape materials.
Amended
Note: I make this plaster 'mix' up as you
normally would if using the powder material for the plaster, but while I making
it up I mix in some neat PVA glue in with it as well. As I have found that it
bonds the material to the base easier, making it part of the wood and I have
found that if the base is primed well enough there is less chance of the base
bowing out of shape. The PVA glue can also be added to the ready mixed plaster
material as well.
I always make sure that I do not go right up to the edge of the base with it, as
I like the look of the irregular shape of the diorama, rather than having a
completely round one.
Amended
Note: I now make the 'mix' up small patches at
first, as I prefer to add too little rather than too much. I then just spread it
around on the base to make the basic shape for the landscape. Building it up
around the heel supports of the plastic stands, as this way it looks like the
figure has sunk into the ground due to it's weight. Plus the Plaster 'mix' helps
to fix the plastic stands in place to keep the figure upright.
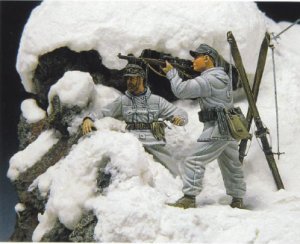
The weight effect can be seen with the pictures above I obtained from a book I
have on 1/35th scale figures, in these you can see that the models are part of
the landscape. So building up the plaster mix around the feet helps with the
illusion.
Fixing a figure's feet into the ground using both my method and Tony's
This is a combination of my method of sinking the figure into the ground.
And Tony's method of using the metal rod in the figure's heel, remembering to
make sure that the base is primed well first. Because this method as shown
involves working with water and PVA directly onto the wooden base.
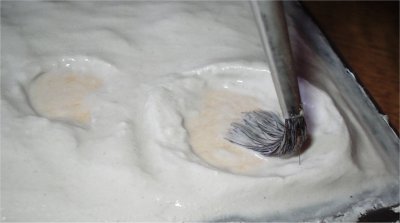
In the pictures above I have placed the figure
onto the base, as I want to check the position and to get the feet right on the
base. In the first picture above I have pressed the foot into the mix, so in the
second picture when it is removed it leaves a footprint. To bind all the plaster
into the base, I then mixed up some water and PVA glue and painted it over the
whole of the plaster. The purpose of this is to remove all the lines and marks
from the plaster mix as shown on the right above. Also with the stones that I
added to the base, when I am painting on the PVA I can smooth the mix around them to make them look like they are part of the landscape, rather than them
just plonked into it.
These pictures show the feet again after I have
painted the PVA on, as now I want to emphasise the weight of the figure on the
snow I also do this where the knee would be as well. So to do this I again pose
the figure and press the feet into the plaster remove it
again, then as I am doing in the last picture above, make ridges around where the
foot
will be. So that the figure is part of the base, which adds to the weight
effect.
Note: Once you have made the landscape up on the base, everything
is dry and you are happy with the pose. The you just drill a small hole into the
base to insert the metal rod, and then place the figure's heels onto the
protruding end.
To see the effect of this better, you can see how i have made my Snow bases with
this method on the following pages.
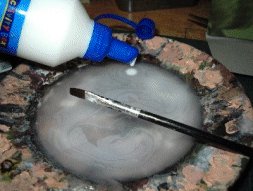
Mixing PVA glue and water for
use in sculpting the landscape
The three images above show how I have prepared the glue
and water mix, in the left picture below I have a saucer of water and I am
adding the PVA glue to it. The second picture shows how the glue dilutes down in
the water, and after adding a little bit more the picture below right shows the
mix ready to use. (Note: Make sure you use a
saucer that the wife will not miss)
Amended
Note: Make this mix slightly thicker than
shown for sculpting the base, as it helps to bond the plaster 'mix' together, as
I find it is easier to mix the water to the PVA glue
Note: Because of the amount of water being
used, a good primer on the base is essential to stop any warping of the base.
Sculpting the landscape
Note: Make
sure you have a cloth ready to clean your fingers and brushes during these
stages.
This is done after the plaster 'mix' has been placed on the
base, and to do this I use PVA glue and water mixed together as shown in the
pictures above. This has two advantages, as it allows me to sculpt the
diorama, plus it stops the plaster from cracking as it dries. As when I made my
dioramas years ago, this was one of my main problems as the untreated plaster
just fell off the base as I placed my 1/35th scale model figures on it.
Note: When this plaster 'mix' finally dries, it
is as hard as concrete. So take your time, and plan ahead on what you want to
make. Because if you make a mistake through rushing, and it dries out, you will
have a heck of a job getting the stuff off the base again.
Also, at this stage if you want tyre tracks, tank tracks or
footprints in the groundwork, this is when I do it. For tyres, you just
roll it across the groundwork. For tank tracks, if you cannot take the tracks
off the vehicle. I would push the track into the groundwork and then take it
off, move along and press the track down again where the last mark was made.
This way you should have a continuous track mark in the 'mix'.
And as you lift off the track, it will take off some of the
'mix', this can be used to represent the churned up earth where the vehicle
passed by.
Note: The next steps are done with the groundwork wet or semi hardening.
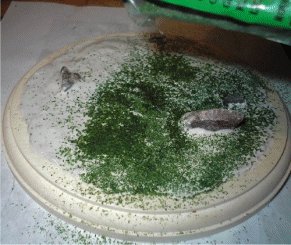
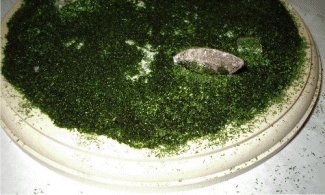
Adding grass, stones and
details
This stage is where I add the material to make up the
diorama itself, such as the grass, stones and bushes. This just a case of
placing the stones into the 'mix', making sure that there are no gaps around the
base of them. As you want them being part of the ground, not just placed on the
landscape. Unless, you are building holes or small caves under them. Depending
on the size of the stone, I sculpt the base around the stone, so the groundwork
comes up around the rock.
Amended
Note: Sometimes if I am using large stones, I
use neat PVA glue, as this strengthens and binds the base, the stone and the
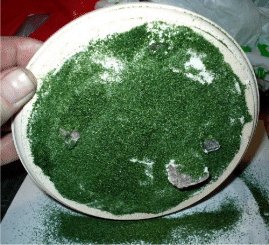
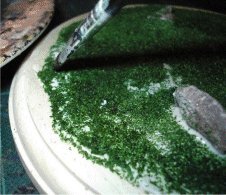
groundwork together. Adding the grass and pebbles onto the base, is done by
shaking some of it out of a bag onto the 'mix', then pressing down gently with
your finger to help the material to stick (above left). To see how much of the
base is covered by the scatter material, I put the base on it's side (middle
picture) and I shake it lightly.
The picture above right shows the saved scatter on the paper I used.
To further help the material to stick to the base, I
use a thinner watery mix of PVA glue and brush it onto the material. You will find
that some of the grass material will come off on the brush, just add a little
bit more to replace it.
Note: Don't worry about
the material getting darker, this is because of the water in it, it will dry
back the original colour.
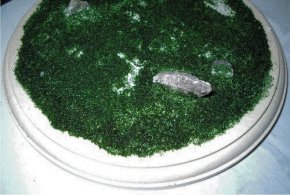
Any parts of the base that are not covered by the material,
can either be covered by using some more of the PVA and then adding some more
ground scatter to it. This is shown in the three pictures above, because I have
an irregular edge to the groundwork, it can be difficult getting the scatter to
stick to it. The pictures above show how I work with the edge of the landscape.
Above left shows where I am adding the PVA mix to the edge, above middle shows
more of the scatter added to the landscape, above right shows after I have blown
lightly onto the edge to remove the loose scatter leaving the edge covered.
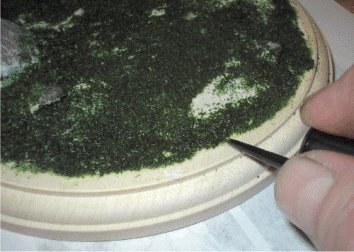
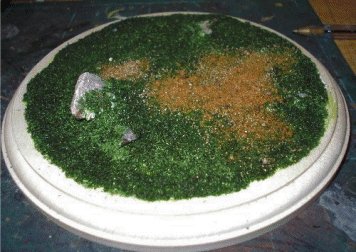
In the picture above left, I am using a plastic pen cover
to define the edge better, this is done by removing any loose scatter and by
pressing inwards against the edge of the plaster 'mix'. In the picture above
right, I have added some sand material onto the landscape to break up the
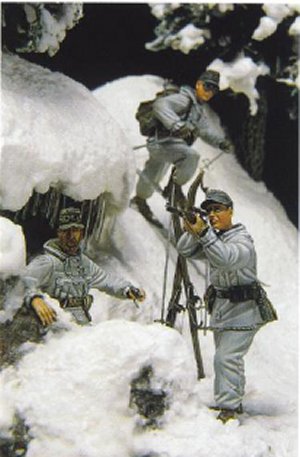
colour. When I made the German paratrooper diorama, I wanted a
small pool of water around the foot. this was made with neat PVA. dripped into a
prepared dip in the groundwork which was then left to dry. Once it has dried it
goes clear, showing the colour of the ground work through it.
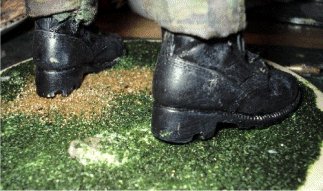
Fixing the figures to the base
- Part Two
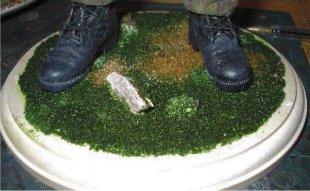
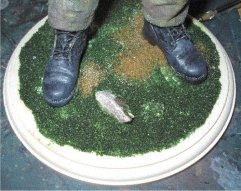
Amended
Note: With the pictures above I used my old
method of using screws to fix the figures to the base, and in the right picture
above you can see the gap between the boot and the groundwork. But if you use
the method of pressing the boots into the wet groundwork when you make the base,
you will lose this because you have added the Weight Effect and the figure
becomes part of the base.
Figure and base detailing update
Fixing the figures to the base
- Part Three
Amended
Note: If you want to add a water effect as
described below, make sure that you have sealed the base well first. And I find
the plastic stands for the heels are better for this, as I really helps to give
the impression that the figure is standing in either the mud or the water.
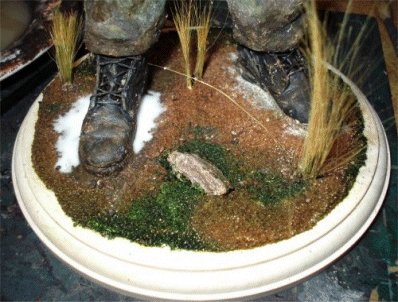
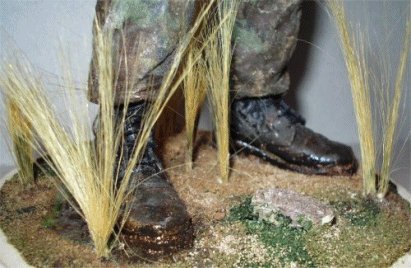
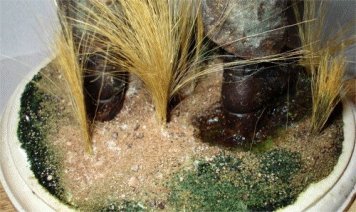
Now I have decided to add
some more details to the landscape, this was to build up the plaster 'mix'
around the boots, and add some more different types of scatter to the base and
this can be seen with the pictures below. I also added some rushes to the
landscape to add an extra effect to it, this was done by getting my pointed
tweezers and making a small hole in the wet groundwork. I then added some PVA
glue to the hole and placed the rushes into it, once I was happy that they were
straight, I added some more scatter and pressed the groundwork around the base
of them to hold them in place.
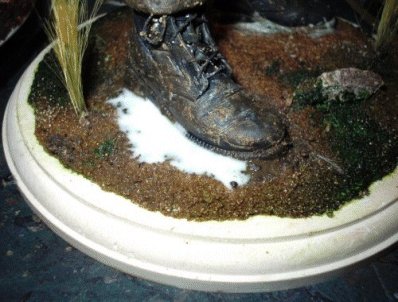
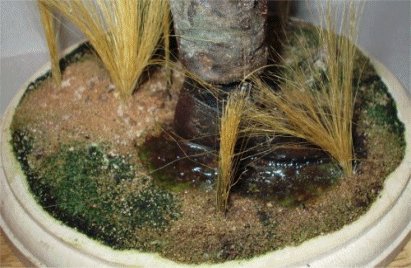
I have also a dip around the boot shown below left, and
then dripped neat PVA glue into it, as I wanted the figure to look like he is
standing in a puddle which he will do once the glue dries clear. Another bonus
to doing this effect is that once everything has dried fully, the glue will bond
the landscape, base and boot together making the figure more solidly fixed to
the base.
I have been told of a product, that is far better to use for making water effects in dioramas.
This is called Woodland Scenics water products, and I am
hoping to try out the Realistic Water or Water Effects products in the near
future. A website I have found for these
products is http://www.ecscenics.co.uk/,to
see these products go to Water from the left hand side menu.
In these pictures below I have also added some of the plaster 'mix' to the
uniform, this is done by just getting a small piece on the edge of my saucer,
wetting it and then brushing it onto the uniform. Paying particular attention to
add it to the trouser bottoms, knees, lightly to the backside and the bottom of
the jacket edges this was then left to dry. Once I was happy with the effect, I
then got some brown acrylic paint and repainted the 'mud' patches. Some were
painted with a neat paint, whereas other bits were painted with a diluted paint.
This then gives the effect of different coloured mud patches on the uniform.
This is where you have to experiment with the paint to get the effect you want,
and if for example you wanted wet mud, I would carefully paint the patch with
clear gloss varnish.
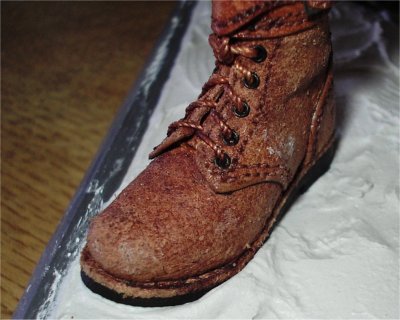
I have also added some of the plaster 'mix' to the boots
and again I used the diluted paint to colour the mud patches. These I will be
drybrushing with a lighter brown colour on the top of the boot to represent
dried mud. And the lower patches and boot edges will be painted with clear gloss
varnish to make those look like wet mud. Along with the dried PVA 'puddle' to
make the water that the figure is standing is look wet.
Note: It may take more
than 2 or 3 coats of the varnish to get the shine you want, because as I found
with my Falklands radio figure, the shine dulls off over time and may need
re-coating again.
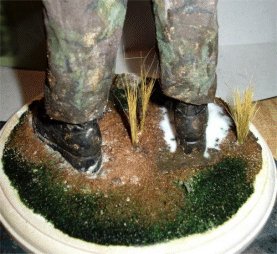
Figure and base detailing update
Fixing the figures to the base
- Part Four
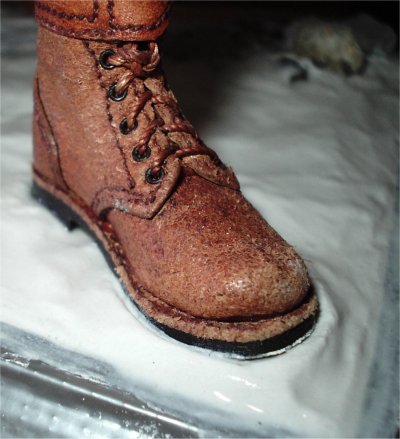
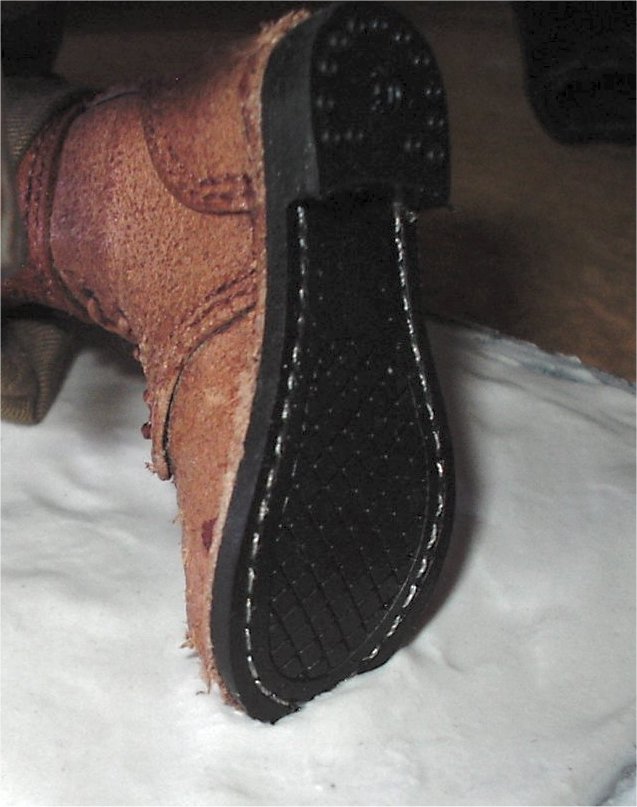
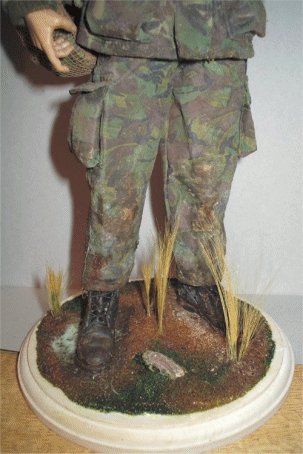
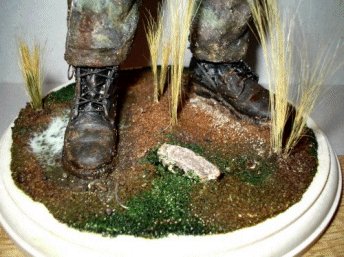
These pictures show the final finished figure and
base, the pictures above show the PVA glue after it had dried and I gave it two
coats of acrylic gloss varnish. Remembering to paint the lower parts of the boot
with the varnish, to make it look like it is wet. I also added some of the
varnish to the sole of the other boot, to sort of balance it up.
Other figure's and bases I have
made
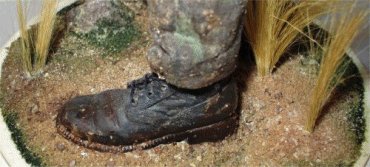
These are pictures of how I have made my other figure's
bases. the first two below show how I have used the plaster 'mix' around the
boots, to make it look like the model is standing in mud.
I also added some gloss
varnish to the base to look like water and wet mud. I also added some of the wet
plaster 'mix' to the boots and trouser bottoms. This was painted with the brown
colour to look like mud. And again the trousers were drybrushed with a lighter
colour to simulate dried mud. The mud around the boots was then painted with the
gloss varnish. But, I did find that after a few days the gloss seemed to
disappear, so I had to repaint it again. In all I think that I had to give that
area maybe 5 coats of varnish to keep the gloss.
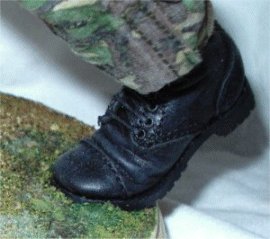
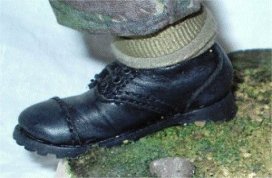
The other pictures show how I have got the boots to appear
like they have 'sunk' into the groundwork. The method for this is,
while the mix for the ground
is still tacky. I then placed the figure onto the base, and pressed down on each
boot. This will leave an imprint in the ground, and it also causes the
groundwork to squish out of the sides of the boot. And as a bonus, I found that
it will leave some of the groundwork on the sides of the boots. I took the
figure off the base, and cleaned up the underneath of the boots, but I left the
mix on the sides to dry. As I wanted to use this to represent mud on the boots
once it is painted the same colour as the ground mud. Then once I have fixed the
figure to the base with the screws, it looks like the figure is in the
groundwork because of it's weight rather than perched on top of it.