This diorama came about, after seeing one made by
tiger calico on the
Sixth Army Group forum. And it got me thinking about can I make something
similar? Diorama link -
Close combat
in Arnhem So rather than try to copy the excellent work, I decided to have
the two figures in a bayonet duel instead.
I have had a lot of help with the posing for these
figures from the Sixth Army forum
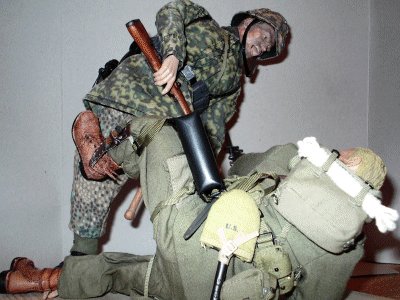
Duel
Because as I am a civilian, and I have never served
in any of the forces, I had no idea about the use or defence against bayonets.
And a lot of the pose that I was after, came about after using the advice given
to me.
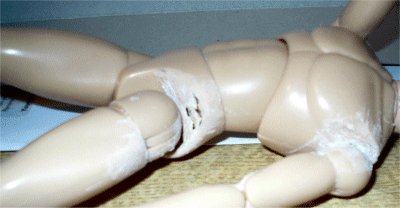
The
first problem I had with trying to get the poses correct, was that the US para
would not 'bend' into the position I wanted it in. So to get around this, I used
the page I made of Ed Robinson's excellent body alterations
Body Modifications
For this I had to use my 'Dremel' type of drill to remove some of the
body around the hip, shoulder and neck joints. This was done in small stages, as
I did not want to destroy the figure.
So, I removed some of the body, set the figure,
removed some more, set again until I could get the pose. As the position I
wanted for the para is for him to look like he has blocked the bayonet thrust,
and had then rolled to the right pulling the German off balance. And has now
raised his leg to push the German further away from him. What I am trying to
capture here, is a sort of moment in time, with the German off balance and being
also pushed back.
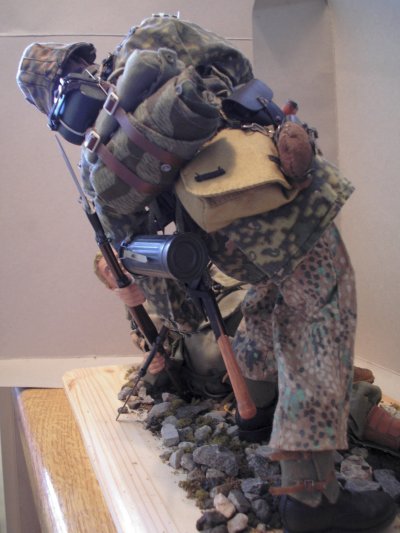
Figures Used for this diorama
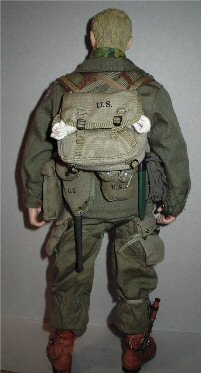
German Soldier
The German soldier is a boxed DiD Kurt Dorr, the uniform etc and
parts are from the figure. The only things I have added to it, are an 'A' frame
on his back, onto this I have added a cloth bag, a cut down rolled zeltbahn and
a mess tin. Plus, a pair of DML laced boots from the
Dietrich Koppe
figure, as this was to me the only thing that was missing.
At the moment all I have done to change anything, is to repaint the headsculpt
to a slightly lighter shade of flesh. As to me the colour seemed a little too
dark. The eyes have also been repainted, but I have to get some gloss varnish to
finish them off. Also, I sewed the gaiter ends together to get them tight enough
around the boots, which allowed me to tighten up the straps, but not put them
under any stress so they would break.
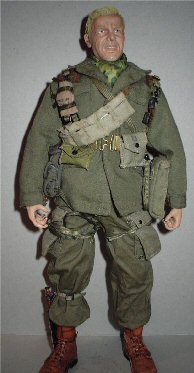
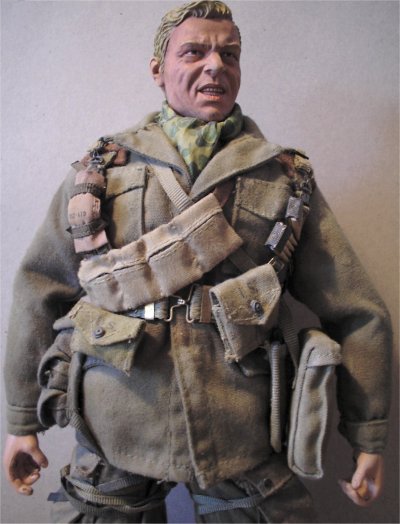
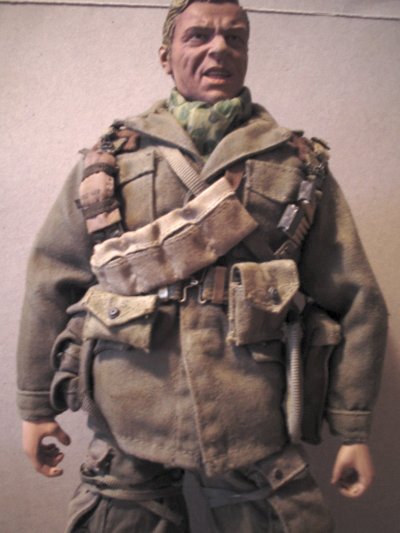
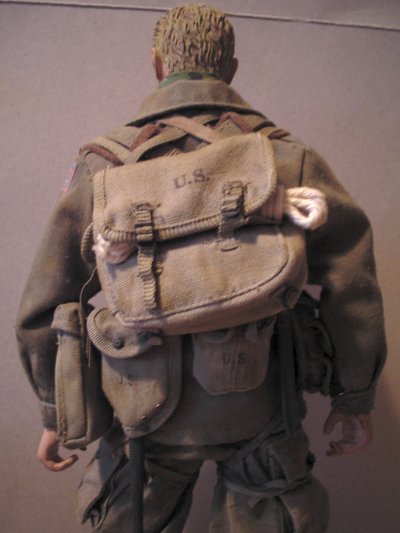
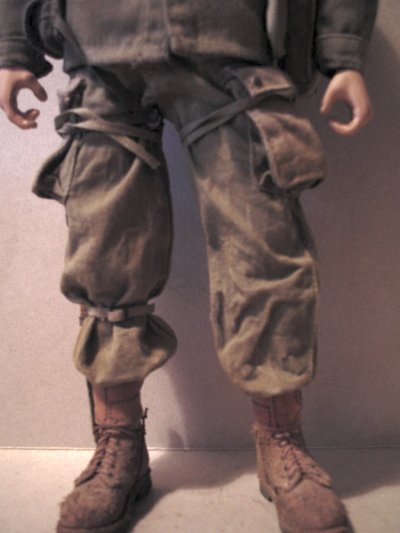
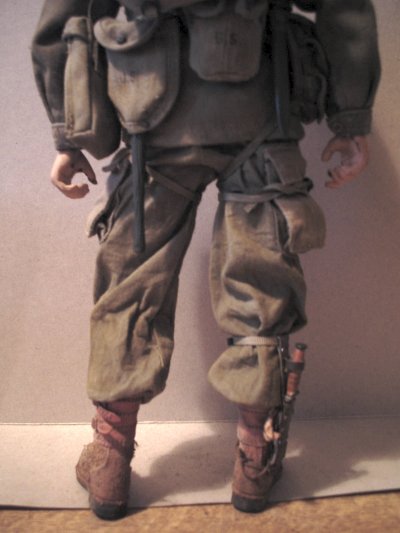
US Soldier
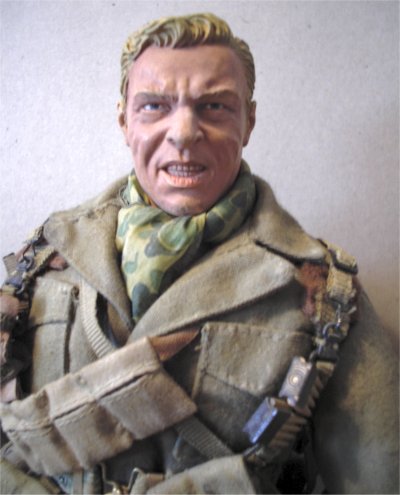
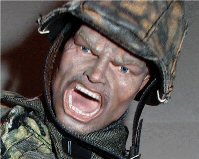
The US para is based on the
DML Bobby Dalton figure. I was going to use a Sepp Kiefer head, but I preferred
the determined look of the Bobby head. As to me it has a look of " I am
winning!" This again was repainted including the eyes, which also need work done
on them with some gloss varnish. The uniform is I think a Frank Laird one, and
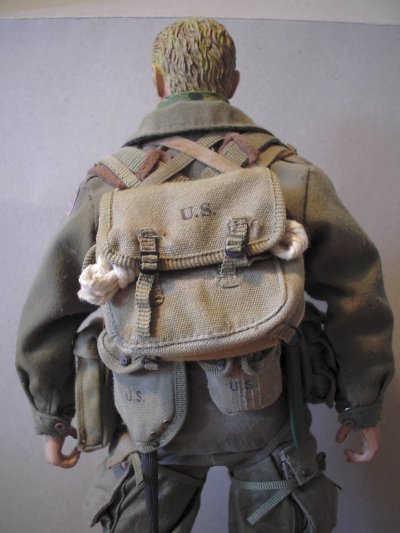
the rest of the parts are from my spares box, and a real mix of parts from both
DML and the recent DiD releases. Such as an ammo belt with pouches, shoulder
holster, webbing and musette bag are from DML. The shovel & cover, water bottle
and gas mask bag came from DiD. The boots I used for this figure are the Newline
Miniatures double buckle one's.
The base for the diorama
This is a 12" x 9" pine base and was made for me to a special
order by
S &J
Woodcraft . The base had to be this size, mainly because of the lying
down position of the US para, with trying to keep the overhang of the para's
rifle and bayonet to a minimum off the base. Coupled with the standing pose of
the German soldier as well.
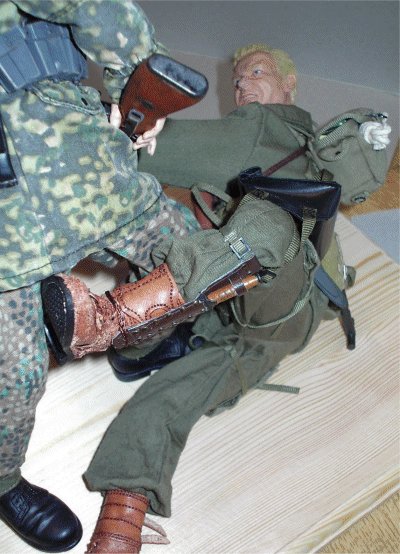
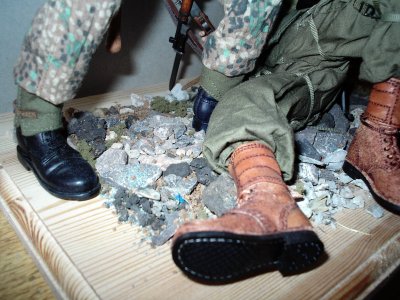
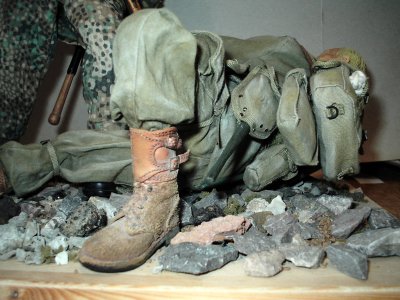
All of the pictures so far, are of my attempts to get the
positions right, and finding out exactly how the equipment on the US para will
affect his pose. Because, I have found that I can get the German positioned
exactly as I want him, but the para will not link in to make the setup right for
me. One benefit I have found after all of the help I have been given, is that
the German can be positioned off centre (almost falling over). But he is held up
by the metal DiD bayonet, which I have got placed onto the base. Another thing
that I have had to do to set the poses, is tape up the joints, and this is a
real pain to do.
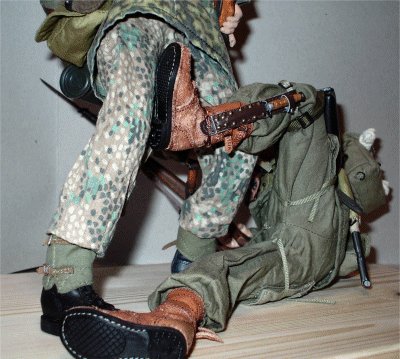
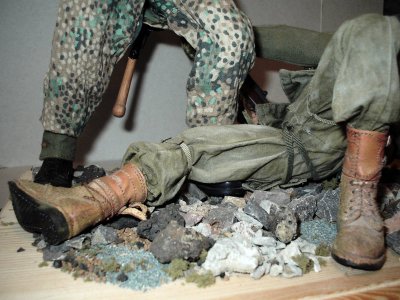
As I can get the poses right with the nude figures, but you just
try to get it dressed from the positions above! So, I have had to dress the
figures, partially un-dress them and then tape up the joints, re-position,
adjust, re-tape and even walk away... Because at one point the whole lot was
going to go out the window... And that is before I even mention the weak/loose
hip joints on the Kurt Dorr figure... And all of this is because I want, the
raised leg on the US para, as to me it adds to the effect of the moment.
Update
I finally got myself some spare time, so I wanted to try to work
out what the base would look like with the figures on it. With some of the
groundwork laid out, basically because I was getting a bit bored just looking at
the bare wood. And if I did not do something with it, it may sit here forever
like that.
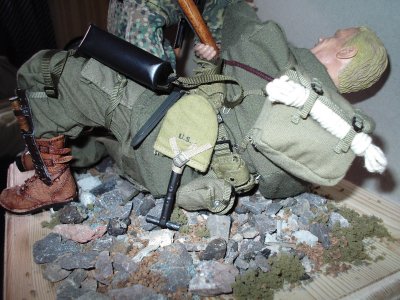
In the pictures above I have laid some of the stones I had, to
see how the US figure would lay on them. And to see how I can place the German figure
with them as well. One thing I did find out now, is that the raised leg looked
sort of out of position, so I have changed it to the pictures above right and
below. Another idea I am toying with at the moment, is when I make plaster mix
up for the bulk of the groundwork. Is to mix in some grout with it to add a
dusty look to it, maybe also adding some ground down pastel chalks as well to
break up the same colour of the grout.
Because with the leg in the lower position as above, it does make
the figure look like he is pushing the German backwards off balance. Also with
the stones in place like this I can finally get an idea, of how the belt
equipment on the US figure sits on them. Which allows me to pose the figure
better, and find out where the German figure will go.
To add some effect to the base, I have decided to have it as a
slope, with the higher part on the right behind the US figure. At this moment, I
am not sure how I can make this, maybe I could get a square piece of balsa wood
stuck onto the base. Then build the groundwork over this sloping downwards. The
only problem I can think of with doing this, is that the German figure would
only be fixed to the base by one foot.
Other alterations that I want to do to the US figure is change
the ammo belt for the new DiD Charles Winstone one, because of the better lift
dot clips. Maybe change the webbing, and remove the gas mask bag from the leg as
well.
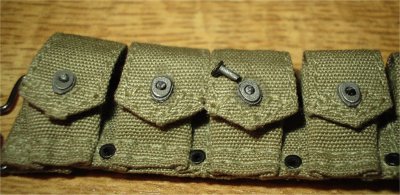
Update
While I was starting to get some other kit together for the US
figure, I decided to use the ammo belt from the Winstone figure. And I had the
bright idea for adding some ammo clips to the pouches, and in my usual ham
fisted way I broke off three of the pips that hold the pouch flaps in place. So,
I had to make a repair
to them.
The picture on the right, shows one of the 'spikes' I have had to
make to replace the lower pip part of the lift dot. And in the same picture far
right you can see the 'spike' fitted and 'mushroomed' off to seal the pouch
closed.
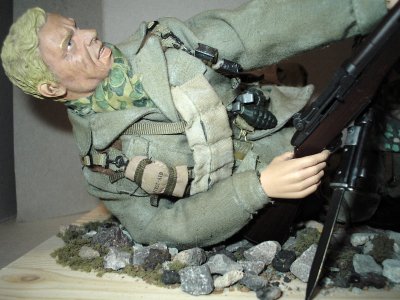
US Soldier
I again got myself some spare time, so I went to work on dirtying
up the US figure for this diorama. The pictures below left and centre show the
pre-dusting state.
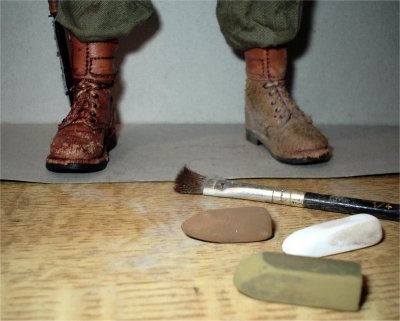
The picture above right shows the Newline boots I used, with the
left one as new and the right one with pastel and grout dust on it. These boots
have amazed me, with the way that they have taken the dust onto them. The rough
texture of the leather is perfect for adding both the pastels and grout. Also,
in the picture it shows the colours of the chalk pastels that I used, to get the
effect I did it was just a case of adding the colours, blending, scrubbing with
the old paintbrush and a lot of trial and error.
Because the diorama I want to make will be in an urban
environment, I wanted to make the figures look dusty. So with a little
reluctance, I set about trying to 'dust up' the figure. Again I just used the
same pastels and the grout, to get the look of the figure above. And it is only
by looking back at the photos above of the new uniform, did I realise just how
much it had changed. In all for this process, it took me about 5 hours to get
the figure to look like this, and another understanding of the skill that
tiger calico has with the dioramas that he has
made. This to me makes this hobby more enjoyable, because I am looking at proof
that I can make something other than boxed figures. So, if I can do it, I am
certain that other modellers can do the same. And if goes wrong.... Wash the
uniform and you will be back at square one.
Update
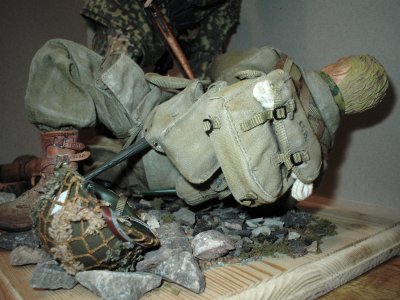
These pictures show how I have placed the US soldier back
into the diorama. This was a bit of a problem, as I had changed the belt order
on him, and I had to refer to these pictures to get the pose right again.
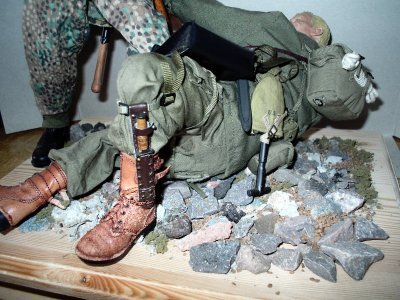
The pictures above show various shots, of how I have had to
re-arrange the base material to get the US soldier to lay right. And then try to
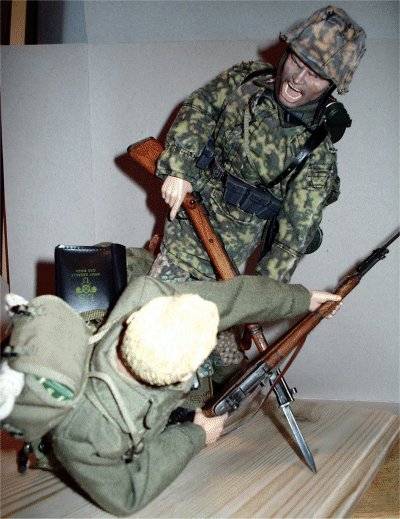
get the German soldier in the pose I want as well. Because, one of the main
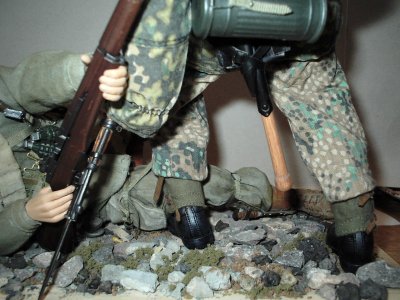
things I want with the whole diorama, is the leaning pose that can be seen with
the German soldier in the picture on the right. Which is trying to get it into a
pose that is over the centre of gravity.
As to me it seems to add to the effect of the German soldier,
being pushed backwards. Especially as now I have dropped down the leg of the US
soldier from my original pose that I wanted. So it looks like he is adding to
the effect of the German that is about to fall backwards. Because to me I am
thinking that the block that the has been put on the German's bayonet is at it's
limit, because of it being pushed into the ground.
(Which incidentally is the only thing that is keeping the
German figure from falling over...)
Many thanks to DiD for the Kurt Door rifle and bayonet, as they
are both made of metal, and allow me to get my figure into this pose. Something
that I feel would be impossible with normal plastic parts. And to DML for the
gripping hands.
Update
To help explain how I have set the pose with my German figure, I
have made a page about how
I changed the DiD hands for DML one's. This helped to make sure that the hands
are kept in place on the rifle.
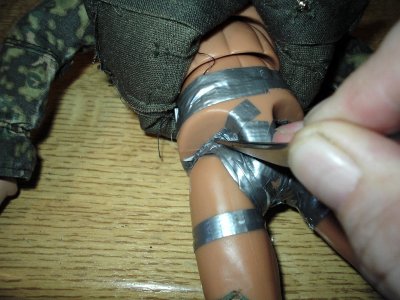
German Soldier
This update is about how I have set the pose for the German
figure. To keep the pose I wanted for the figure, I have had to tape up the
joints. This is done as shown below with strips of Duct Tape, as this gives me
the stiffness in the joints of the figure, but it still allows me to pose it as
I want.
In the picture above, I am forcing the tape into the joint with
my tweezers, this helps to make the joint stiffer, I prefer to use this method.
Because if I used something like Superglue, it would set the pose, but not allow
me to re-position the figure if needed. I also found out after I had positioned
the figure as above, that the shoulder joints allowed the rifle to slip
downwards. So, I have had to do the same taping up of the shoulder joints to
keep that position.
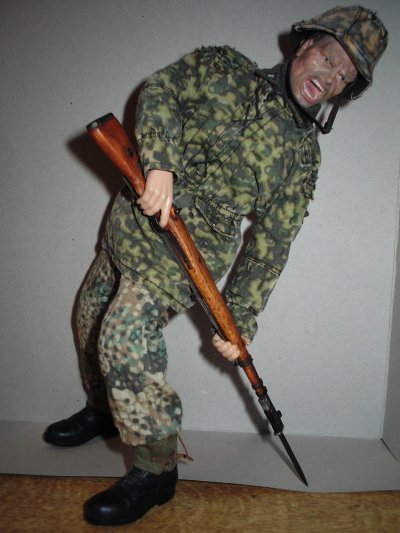
One final thing that I have done with the pose, is bend the
figure backwards slightly more from the waist. As the taped joints have allowed
me to pose the legs in a more straight position if that sounds right. And add
the effect of him falling backwards from the waist upwards, because of the
equipment on his back. Whilst, still being supported in that position with the
help of the bayonet and rifle.

 The
first problem I had with trying to get the poses correct, was that the US para
would not 'bend' into the position I wanted it in. So to get around this, I used
the page I made of Ed Robinson's excellent body alterations
The
first problem I had with trying to get the poses correct, was that the US para
would not 'bend' into the position I wanted it in. So to get around this, I used
the page I made of Ed Robinson's excellent body alterations
 German Soldier
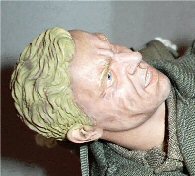 The US para is based on the
DML Bobby Dalton figure. I was going to use a Sepp Kiefer head, but I preferred
the determined look of the Bobby head. As to me it has a look of " I am
winning!" This again was repainted including the eyes, which also need work done
on them with some gloss varnish. The uniform is I think a Frank Laird one, and
the rest of the parts are from my spares box, and a real mix of parts from both
DML and the recent DiD releases. Such as an ammo belt with pouches, shoulder
holster, webbing and musette bag are from DML. The shovel & cover, water bottle
and gas mask bag came from DiD. The boots I used for this figure are the Newline
Miniatures double buckle one's.
The US para is based on the
DML Bobby Dalton figure. I was going to use a Sepp Kiefer head, but I preferred
the determined look of the Bobby head. As to me it has a look of " I am
winning!" This again was repainted including the eyes, which also need work done
on them with some gloss varnish. The uniform is I think a Frank Laird one, and
the rest of the parts are from my spares box, and a real mix of parts from both
DML and the recent DiD releases. Such as an ammo belt with pouches, shoulder
holster, webbing and musette bag are from DML. The shovel & cover, water bottle
and gas mask bag came from DiD. The boots I used for this figure are the Newline
Miniatures double buckle one's.