|
This diorama has suddenly become a two page
article. Because, I was getting a bit worried about how big this would become.
And after making the base for this diorama today, and taking 42 pictures as I
made it, I realised that I would have to make another page instead. As it might
make it easier to follow how I went about making this base, plus I could also
link from my Bases page to this, to show how I constructed this model.
The basics of how I created and added the
groundwork is covered on my
Bases page. But for this diorama, I have decided to go into more depth about
how I created this one. In the pictures below I have added the plaster mix to
the base, and I am shaping the wavy edge to the
 groundwork. As I don't want to
have a straight edge level with the wooden one. groundwork. As I don't want to
have a straight edge level with the wooden one.
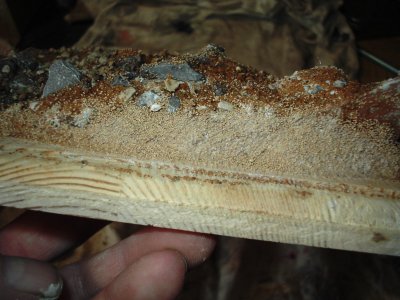
Priming the Base
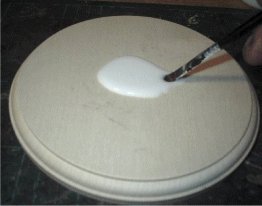
One of the problems with using wooden bases for 1/6th scale
landscapes, is that if they are used without priming it. The base will warp and
not lay flat on your shelf. So, to seal the base against water from the plaster. I use neat PVA glue, as shown
right. This is
done as shown in the picture, firstly with just placing some PVA onto the
base, then use a brush to spread it around to cover the base top. Even though I do
not make the landscape right up to the base edge, I still paint the PVA glue on
the edge. This way the water cannot 'creep' under and penetrate the wood. Also,
with priming the base in this way, it makes a rough surface for the next step,
and it allows the plaster mix to stick better to the
base.
Note: I leave this to dry overnight,
as depending on the size of the base, you may have to give it 2 coats of the PVA
glue to make sure it is sealed. Clear furniture varnish can also be used to seal
the base.
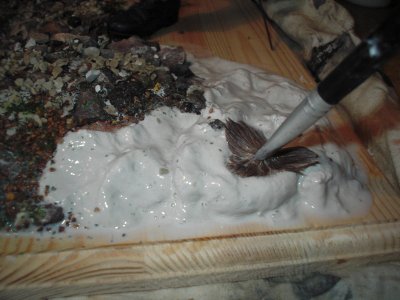
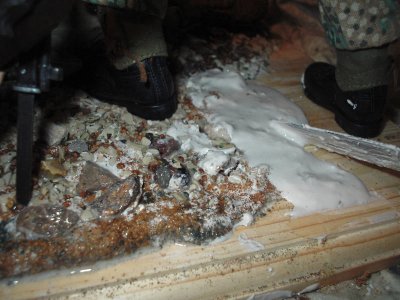
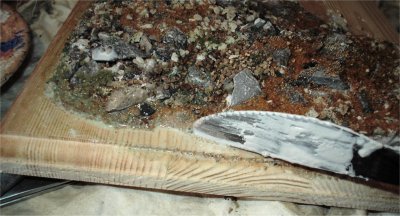
In the picture right, the groundwork edge can be
seen better where I have used the plastic strip to shape it. In the picture
below left, you can see where the PVA and water mix has soaked through the
plaster to the edges of the groundwork. This happens because of the thinned PVA
that I have used to make the level of the groundwork in the middle of the base,
has soaked through the plaster onto the wooden base and spread out to the edges.
To stop this from happening, I use a small piece
of cloth to soak up the excess water as I work along the edge. I then tip the
base upwards slightly to add some of the powder groundwork material to the edge
to soak up the residual water. This is shown in the picture below right, and
this helps me to keep the shape that I want the ground work to be.
For this diorama I wanted a sandy edge to the
groundwork instead of the grassy edges of my other bases, so I used some of the
fine sand I obtained from Games Workshop.
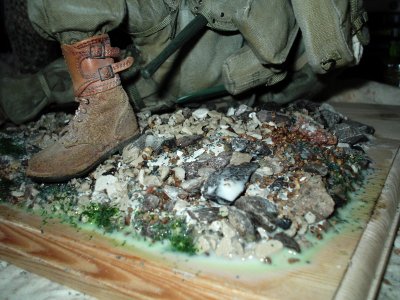
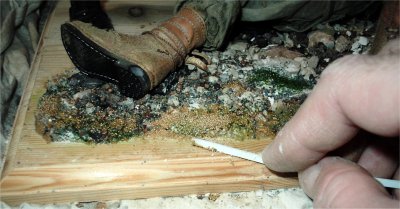
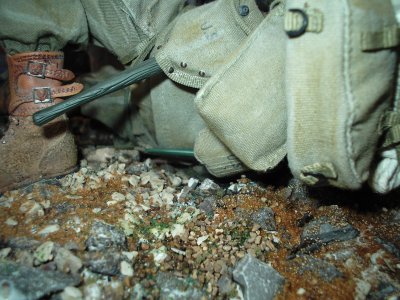
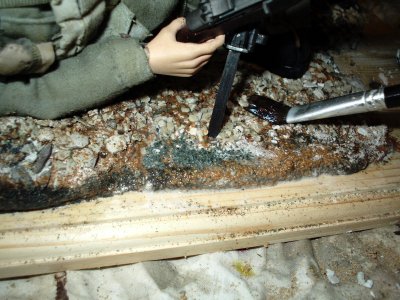
In these pictures I have added the figures to the
base to work out how I can pose them with the groundwork. For the US soldier I
wanted his arm to look like he is pressing into the landscape. Which gives the
impression of his weight on the ground. And I wanted to find out what parts of
the figure and his equipment would be touching it as well. So once I had worked
that out, I added some more of the plaster mix to the base, and then shaped it
with my paintbrush and the diluted PVA mix.
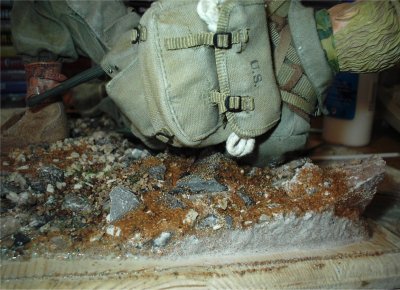
I then added the various sized stones and cat
litter I had to the plaster, making sure that they are smoothed into the
groundwork, rather than just sitting on top of it. This was then wiped over with
a slightly thicker PVA mix to set them in place. I also added some of the sand
and other materials to the base to add some different colours to the whole
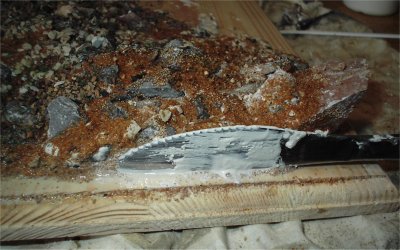
effect. In the pictures below, I have created a raised edge to the groundwork,
and I am making a straight edge with a knife. Pressing inwards slightly and
dragging sideways to make it. Again once I was happy with it, I tipped the base
upwards slightly, to add the sand to the plaster edge.
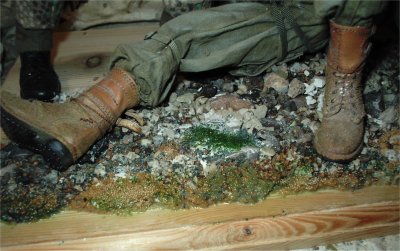
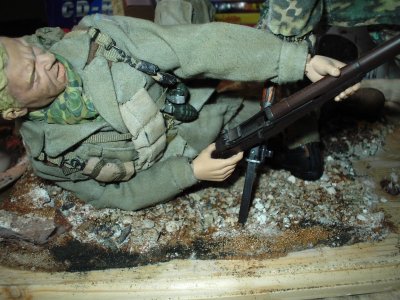
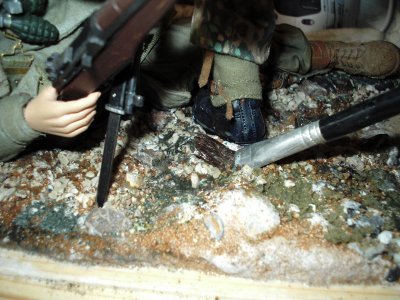
Once I had done that, I then put the US soldier
back onto the base, to see how he would sit on the groundwork. Checking that the
whole side of the figure is resting on it, and with a little bit of adjusting of
the groundwork, I got the shoulder, elbow and foot pressing down just where I
wanted them to be.
With a little bit of pressure applied to the
inside of the US figures elbow, I got it looking like he has actually sunk into
the groundwork due to his weight. The problem with doing this and with the way
that I had made the rest of the groundwork, is that now the German soldier could
not be positioned the way I wanted.
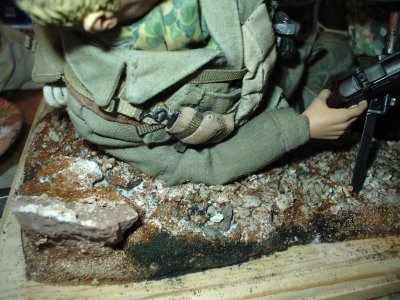
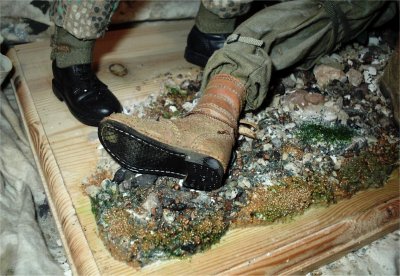
Because I was happy with position of the US
soldier, moving him now was not a possibility. So the only alternative I had was
to re-arrange the groundwork to suit the second figure. This was done by
removing some of the landscape around the middle of the US soldier, without
altering his position. This allowed me to put the German soldier's foot back
where I wanted it, and allowed me to balance him again on the bayonet edge as I
had him originally.
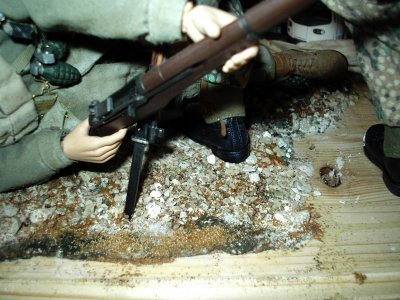
Now I realised that I would have to make the
groundwork up around the figures whilst they were in position, this is shown in
the pictures below. By this stage of the procedure, I was getting to the stage
where I wish I had never started this diorama. And how much easier it would be
if I just modelled boxed figures instead of putting myself through this!!!
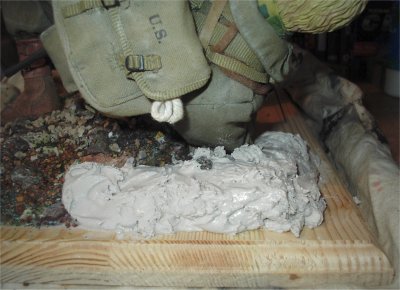
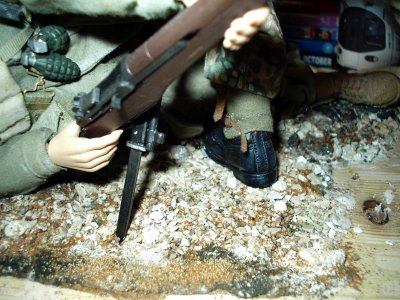
The picture below left shows the plaster being
added around the boots of the German figure to make the ground up, the other
picture shows after I have added the scenery material. Which I am pressing into
the ridges around the boot to again give the impression of the figures weight.
These pictures show how after adding the scenery
material, I have had to sculpt the landscape to what I want it to look like.
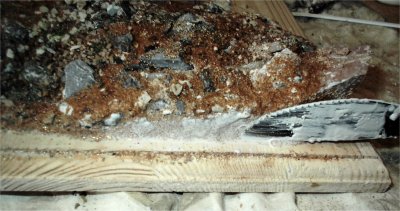
Note: Don't use the family silver for this, as
my wife was a little annoyed that I was using a dinner knife to set the edge of
the groundwork....
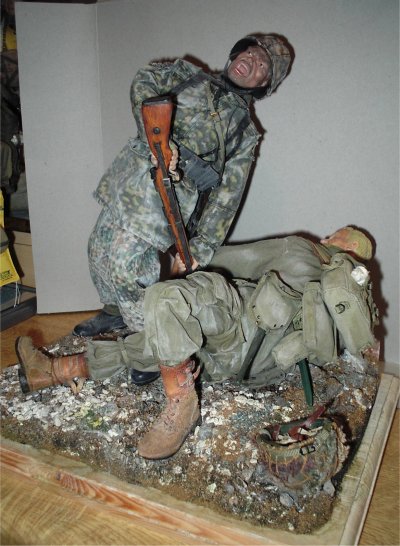
Finished Diorama
This is the finished diorama, I have used some
thinned PVA glue and water to keep the folds in the uniforms as shown on my
PVA page. I then added some
pastel and grout dust to the figures, this is shown on my
Dusty Uniforms page. This
has been a bit of an ordeal making this setup, as I have had to learn a lot
about close quarter fighting with bayonets.
Plus how they are used and defended against as
well. I would like to thank all the people who helped me with this diorama. As
it has turned out better than I thought it would. The figures are just placed
onto the diorama, as I it would be too much work to try to get the screws
through the base to hold them in place now.
| 