|
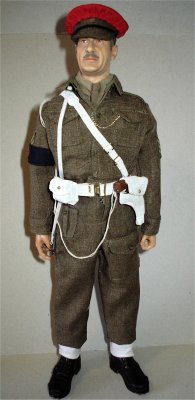
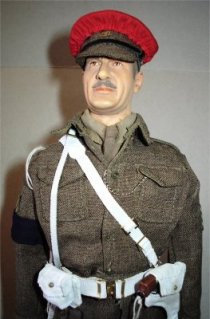
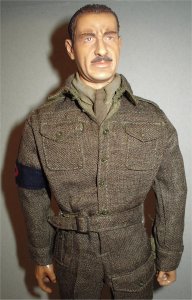
This figure is the DML British Army WW2 military
policeman figure, this is a very nice figure although it does not come with a
pistol, holster or an ammunition pouch. And for these items I had my Harry
Collins figure 'donate' his pistol and holster, the ammunition pouch I
managed to obtain off of e-bay.
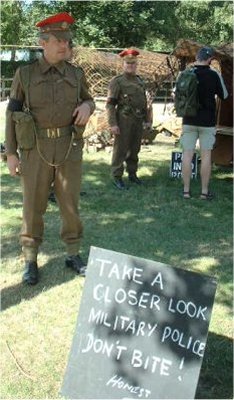
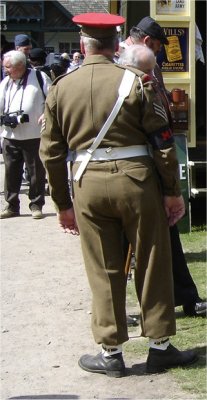

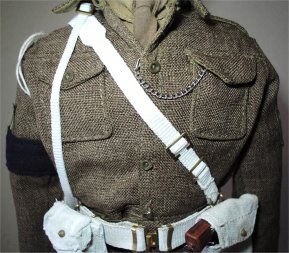
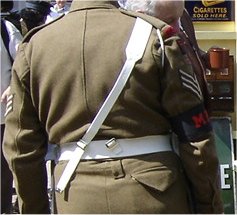
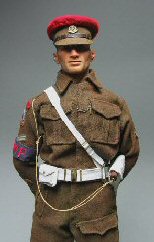
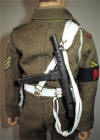
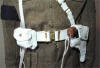
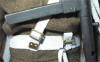
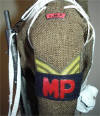
With this figure I have had a bit of a hard job
trying to find any reference pictures of a WW2 British military policemen. But
after asking for some help, I have had the first three pictures above very
kindly supplied by Peter Marshall, and they are an excellent reference
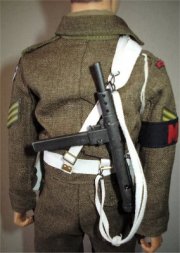
source for the webbing equipment and how it is fastened. Especially with the
third picture of the back of the MP, as the buckle arrangement is totally
different to the one's supplied with the figure.
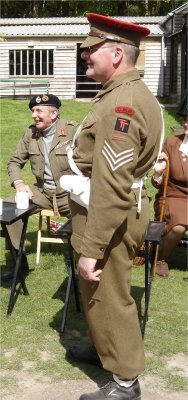
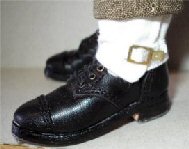
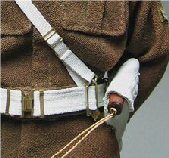
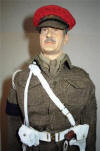
the picture on the right above was supplied by Neil
(Steveandrews666)
and it is of a re-enactor portraying an MP, and I would like to thank him for
allowing me to use it here. Also he has pointed out an excellent piece of
information regarding the shirt and tie as below.
If you search the internet auction sites for
the shirt and tie from the last two DML US M.P's you will see that the shades of
khaki are similar to the photo. I shouldn't worry which particular US M.P you
get the shirt and tie from either- as those two figures had exactly the same
uniform anyway (apart from the obvious leggings).
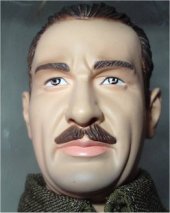
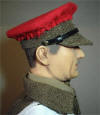
Headsculpt
I do like this headsculpt as it is very well
detailed especially with the moulded moustache it has, and to me it looks like a
typical British soldier from the WW2 era.
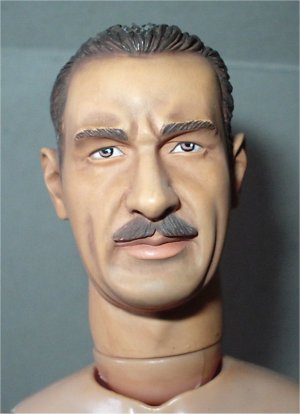
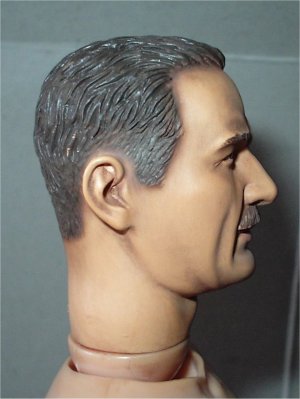
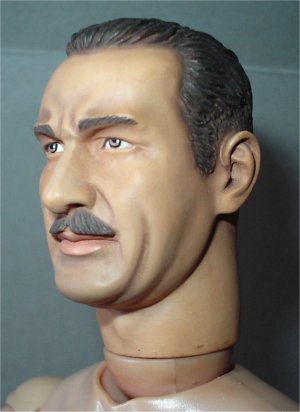
This headsculpt was again given a usual brown
pastel wash which I left to dry slightly and then wiped off, I also did some
experimentation with a red pastel chalk mixed in with the brown to add a bit of
colour to the face. This again was left to dry slightly and then wiped off, it
did add some colour but not enough for me, so I just touched the top of the
cheek bones with some wet red pastel and blended it in. Finally I gave it a
light drybrush with some cream pastel, to bring out the highlights and by
accident it added a
slight grey haired look to the hairline on the side of the head and the
moustache.
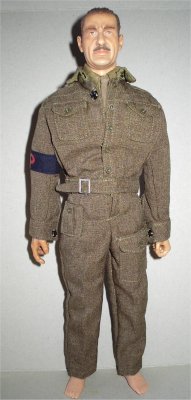
Uniform & Figure Assembly
I have a very limited knowledge with details for
what the full size uniform should look like, although the type of material used
for this figure it is quite thin it is nicely detailed. The only problem that I
have found with it is the trousers, as they are massive at the bottom and they
have caused me no end of problems with trying to get the bottoms bloused over
the gaiters. Note: I have had some excellent
help from a fellow modeller Paul, who has taken in and re-sewn the trousers legs
for me.
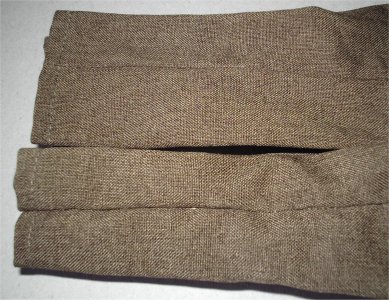
The pictures above show the altered trousers, and
how they are now much improved on what they were like out of the box. Especially
when you look at the picture above, as this shows the original trousers at
the top with the altered one's below. Note:
I would like to thank Paul for doing this for me, as it is a vast improvement on
the trousers.
The picture above right shows the figure with the
shirt and tie, to get this to set right I put a couple of stitches through the
shirt collars under the tie to hold them in place. The blouse had the top black
popper inside removed, I then ironed the creases into the front of the tunic,
placed it onto the figure and then stitched it closed where the tunic would be
fastened on the second button from the top. Note:
Making sure that the inside part of the tunic is under where the button would
be, so it looks like the button is holding it closed.
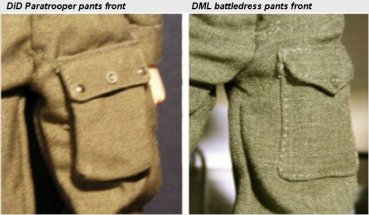
Differences between regular
army trousers and paratrooper trousers
Regarding the differences between normal WW2
British infantry trousers and the paratrooper versions, as I was considering
using the new DiD paratrooper uniform and I have had some
excellent help from (spitfire) as below.
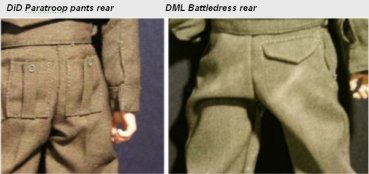
The difference is that the paratrooper version
has a gusset to the leg pocket, allowing it to expand more, whereas the regular
BD trousers does not have the gusset. The confusion comes from the fact that
both versions have the pocket in the same place. I believe that the paratrooper
pants also have 2 pockets at the back, where regular BD pants have only
one on the right. I have DiD's para figure, and as I said in reply to your
question over at SAG, the colour of the
uniform is not the same as the colour of DML's BD. As for shirts, DiD produced
one for John Coleman, but it seems a little dark to me. You could certainly use
the US MP shirt, because although the pockets are not quite the same, you won't
see them under the BD blouse anyway. Unfortunately with the DML BD, unless you
can find some really early version, you are stuck with taking in the leg about
1/4 in.
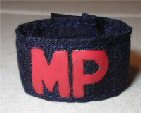 MP Armband MP Armband
With the armband for this figure, I read somewhere
that the red letting was too dark so in the picture on the right, I have painted
over the letters with some acrylic Carmine Red to lighten them.
Boots
The plastic boots that came with the figure were
the first things to get removed, as I am not a fan of these and I much prefer
having laced boots with all of my figures now, as i feel it gives a better
detail to the figures. The one's I have used
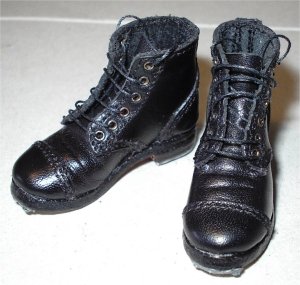 are the
Newline hobnailed boots, as these are an immense improvement on the plastic
type. I was in two minds about which company's gaiters to use since the Newline
boots came with a pair, but after
looking at the DML gaiters, I think it is easier to use those rather than
re-colour the Newline one's. are the
Newline hobnailed boots, as these are an immense improvement on the plastic
type. I was in two minds about which company's gaiters to use since the Newline
boots came with a pair, but after
looking at the DML gaiters, I think it is easier to use those rather than
re-colour the Newline one's.
The picture on the right shows the Newline boots
after I have used some thinner thread for the laces, plus I have used some shoe
polish on them which I have then given them a slight shine with a cloth
polishing attachment in my model drill.
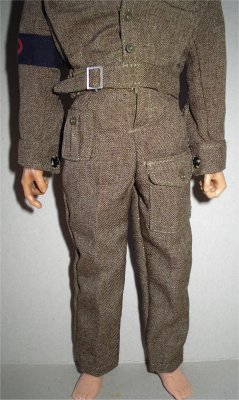
Blousing trousers
With the
blousing of the trousers over the boots, this has been a real trial of my
patience with this figure.
Because of the width of the trouser legs at the
bottom as the trousers come from the box.
 And now that Paul has altered
them for me, this is a lot easier to do. Note:
What I ended up doing was just folding the trouser ends up inside and then just
having them hang over the gaiters. And now that Paul has altered
them for me, this is a lot easier to do. Note:
What I ended up doing was just folding the trouser ends up inside and then just
having them hang over the gaiters.
The gaiters were pulled as tight as I could get
them, with the bottom buckle stitched in place, I then cut the strap back and
added a brass buckle end to it.
Note: I now realised why I have not done many British figure
kitbashes, because the blousing alone with this figure almost drove me to give
up on this figure. And if Dragon ever see this please for the sake of my
sanity, make the trousers narrower in the leg at the bottom.
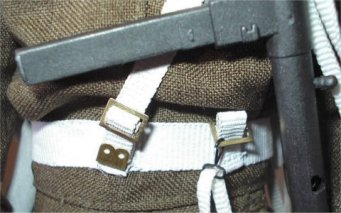
White webbing and Web Belt
 With the webbing for this figure I wondered about
the belt and if it was right or not, so I asked Tony Barton for his advice and
he pointed me to his page on the OSS forum about how he makes his 37 pattern
webbing. Also he explained that the buckles have to be on the back of the belt
as this was I believe standard issue. Note:
I have also found some excellent information by Tony Barton about the cross
strap, and how the rear buckle is not needed -
Rear Buckle. With the webbing for this figure I wondered about
the belt and if it was right or not, so I asked Tony Barton for his advice and
he pointed me to his page on the OSS forum about how he makes his 37 pattern
webbing. Also he explained that the buckles have to be on the back of the belt
as this was I believe standard issue. Note:
I have also found some excellent information by Tony Barton about the cross
strap, and how the rear buckle is not needed -
Rear Buckle.
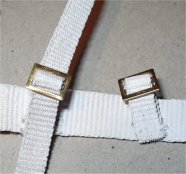
And to confirm this I have the picture on the
right, showing how the cross strap connects properly to the belt, so I
have removed the buckle as supplied with the figure. And I have the cross strap
fastened into the left belt buckle below instead. So
I bought the webbing set for the DML Kenneth Laird figure, as this has a nice
long strap which will suit my purpose exactly.
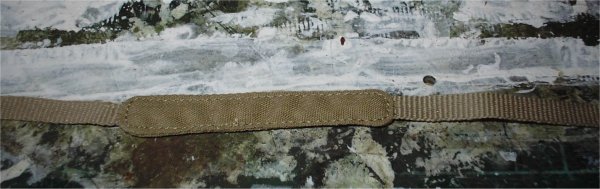
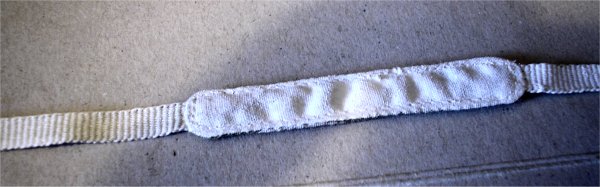
The pictures below show the strap
as it came when I bought it, and on the right after I have re-painted it with
the white acrylic paint. To fit this I have to take apart the cross strap as
supplied, and then replace it with the new one and fit the new strap in it's place.
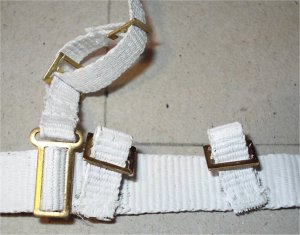
 The pictures
above left shows the new Dragon
canvas belt with the rear buckles, that I bought to replace the belt that comes
with the figure. The first picture shows the buckle on the front of the belt,
with the replacement shoulder strap in place. The next picture shows the same
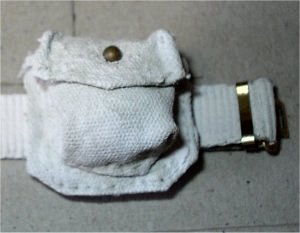
strap on the back of the belt, which is now fastened to the belt buckle. The centre picture shows the DML Harry Collins pistol and
holster, and the picture above right shows the ammo pouch I also got when I
bought the belt. The pictures
above left shows the new Dragon
canvas belt with the rear buckles, that I bought to replace the belt that comes
with the figure. The first picture shows the buckle on the front of the belt,
with the replacement shoulder strap in place. The next picture shows the same
strap on the back of the belt, which is now fastened to the belt buckle. The centre picture shows the DML Harry Collins pistol and
holster, and the picture above right shows the ammo pouch I also got when I
bought the belt.
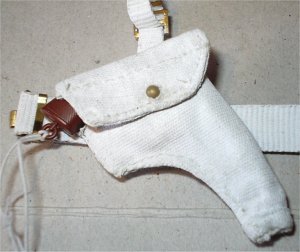
Note: Because
I have replaced the shoulder strap, I have had to take apart the front strap
connection as supplied with the figure, and fasten the new strap in it's place.
In the picture shown right, the strap has to end up behind the belt. One thing I
have found out is that the new strap is too long, so once I have the figure
assembled I will adjust the strap so that the
pad
is central on the shoulder and then trim the ends to size.
 All of which were repainted with some acrylic white paint, as
this was an experiment by me in doing this rather than the shoe whitener that I
used with my US MP figure. Note: I
did get some of the white paint on the buckles and
buttons, but by just lightly scraping on it with my knife blade it came off
easily. So now that I have the shoulder strap with the
wider pad on it fitted onto the webbing, it
looks very similar to the one as shown right by
Tony Barton. All of which were repainted with some acrylic white paint, as
this was an experiment by me in doing this rather than the shoe whitener that I
used with my US MP figure. Note: I
did get some of the white paint on the buckles and
buttons, but by just lightly scraping on it with my knife blade it came off
easily. So now that I have the shoulder strap with the
wider pad on it fitted onto the webbing, it
looks very similar to the one as shown right by
Tony Barton.
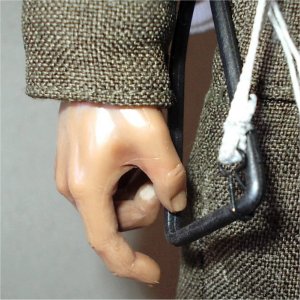
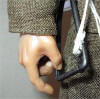
Lanyards
The only lanyard I have on this figure is the one
for the pistol, and this was placed through the epaulette then looped under the
arm and tied together to form the loop around the shoulder.
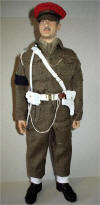
Finished Figure
This is my finished figure with the additional
webbing added to it, the safety strap for the Sten gun was hooked onto the
buckle on the rear of the ammunition belt, because it looked to me to be the
only place it could go and the the gun was then slung over the shoulder. The
thread for the whistle I replaced with a small length of chain I had. The strap
going over the shoulder for the belt was cut back, and I added a spare brass end
I had to it. Finally I gave the face another light drybrush of some Cream and
Brown pastel chalks, since some of it had rubbed off when I made the figure.

I would like to thank Peter Marshall for all of his excellent reference pictures of the MP's.
Neil
(Steveandrews666)
for the picture of the British MP above.
(spitfire) for the excellent reference
help and the pictures of the differences in the uniforms.
Tony Barton for his help
with the webbing.
Plus a very big thank you to Paul, for all
of his help with the alterations to the trousers.
|