|
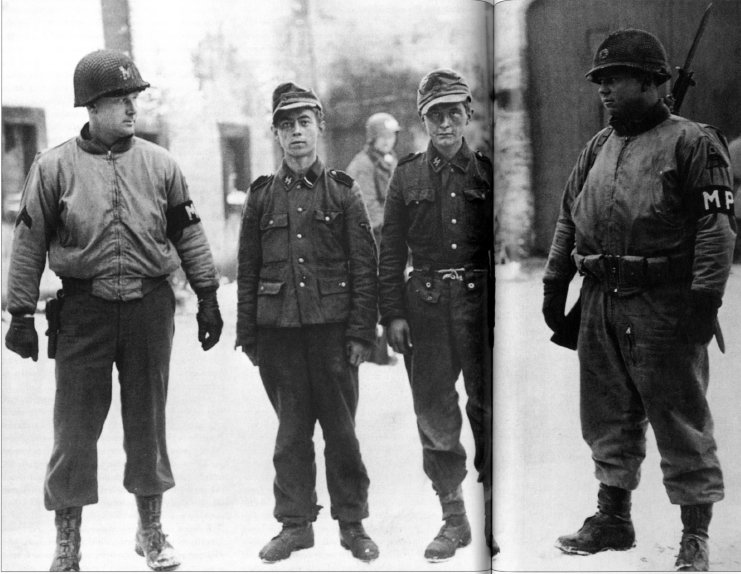 This page is about how I made my US MP figure look
bigger, the reason for this figure is that I wanted a model that looked
like the one in the picture on the right. Because as soon as I saw the MP on the
far right and I found about the release of the Hermann Weber figure, I just had
to make figure's like the one's in this picture. This page is about how I made my US MP figure look
bigger, the reason for this figure is that I wanted a model that looked
like the one in the picture on the right. Because as soon as I saw the MP on the
far right and I found about the release of the Hermann Weber figure, I just had
to make figure's like the one's in this picture.
The German figure I made is on my
Hermann Weber page
including how I adapted the 1/6th full size uniform and boots to fit the smaller
figure.
With the US MP figure I was looking at buying a
nude muscular body like some of the Hot Toys figures, but the problem with doing
this is that the clothing I would have wanted to use may not fit that figure.
So after some thought about how I was actually
going to make the model, I got to wondering about if I could pad the body out
instead to make it look bulkier. As I had remembered that somewhere I had read
about how someone had used crepe bandage to make the figure look bigger. And as
usual with me when I want an article or the instructions for something I can't
find them, so I have had to make this page up on how I made my figure look like
the MP on the far right in this picture.
Padding Out The Figure
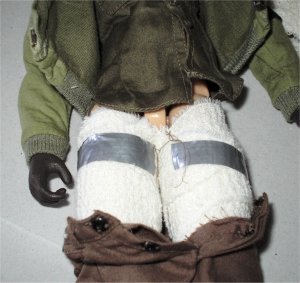
In the pictures below, you can see the stages of
how I applied the crepe bandage to the upper thighs of the figure to make them
look bigger. The first pictures below left and centre are of the standard figure
with the uniform on it, the last picture below right is with the bandage cut to
length so that it wrapped around the legs twice and then held in place with some
Duct Tape.
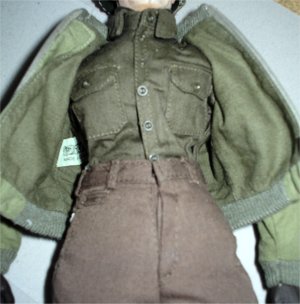
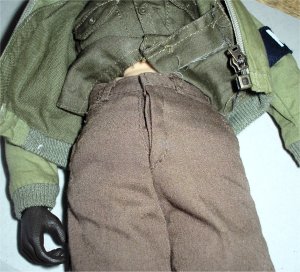
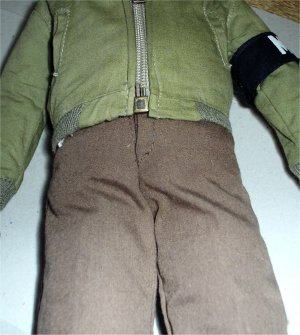
In the pictures below I have pulled the trousers
up over the legs, so I can now pad out the belly and waist area of the figure.
For this as shown in the picture below left, I have cut some more bandage to
roughly twice the diameter of the figure and folded it in half lengthways so it
would only cover the front part of the model. I then placed it over the waist of
the figure and tucked it into the back of the trousers. (As I only want the bulk
to be seen at the front of the figure)
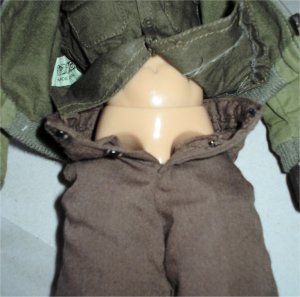
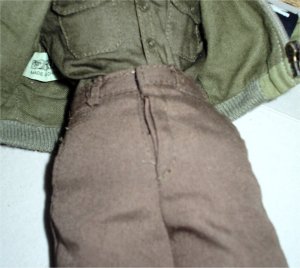
I then pulled the trousers up over the top of this
and fastened the buttons up to see just how bulkier the model had become.
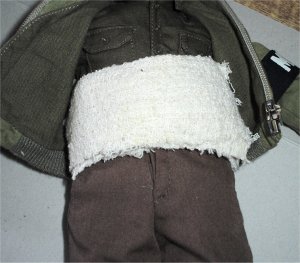
Note: If I remember rightly I believe I added
another smaller piece over the top of this, so that the waist protruded out as
far as the thighs. The next pictures below show the trousers pulled up over the
bandage and fastened in place, making sure that the bandage padding was below
the top button on the waistband.
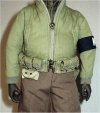
The purpose of making sure that the waistband
could fasten up as normal is shown in these pictures, because I wanted to add
the padding to make the 'pot belly' effect on my figure. Plus I also wanted to
make sure that when I put the ammunition belt on my figure, it would be slightly
tighter than it should be so that it pulled itself into the gap between the
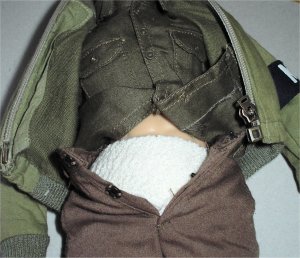
waist padding and the belly padding. To make the 'pot belly' I again cut up some
of the crepe bandage and folded it over and tucked it into the back part of the
jacket. This is where a lot of the trial and error comes into play, as I found
that I needed three pieces on top of each other to get the desired effect I
wanted.
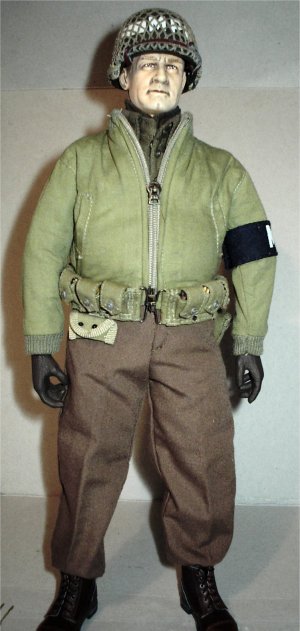
In the middle picture above I have done up the
jacket zip over the top of the belly padding, and by pressing down on the top of
the padding I can shape the 'pot belly'. And this is where the semi-tight
ammunition belt adds to the effect, because when it is fastened it pulls itself
into the thinner part of the waistband of the trousers. Which in turn helps to
emphasise the padding on the waist and the belly. Note:
I have also found out by accident that if I pull the back of the jacket down and
raise up the back part of the ammunition belt, it makes the front of the belt
protrude outwards at the top. And with some adjustment to the 'pot belly'
padding it really adds to the effect of a slightly overweight figure.
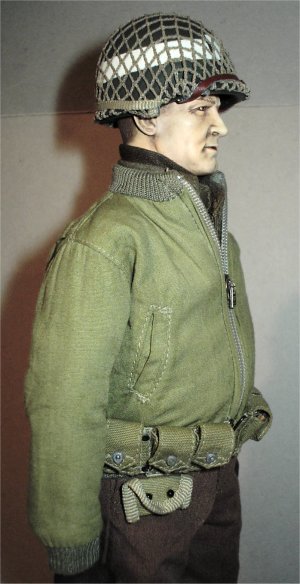
The body I used for this kitbash is the new DML
Tom Grieger Neo 3 one, and I have found that with the extra movement that has
been built into the shoulder joints. I can make the figure look even more
bulkier in the top part of the body as I can pose the shoulders raised up to add
to the bulky effect that I wanted. One final thing that I may try with this
figure is to add a small piece of bandage to each shoulder either side of the
neck, to see if I can add some slight bulk to the top part of the body.
Note: One
final thing I have noticed in doing this kitbash, is to make sure that the head
is kept in proportion to the rest of the body. Because I tried this with some of
my other headsculpts, and I found that a thin face just does not look right
against the bulk of the body.
| 