|
Welcome
To My DiD M1 Carbine Page.
Sights Conversion
This page is about how I have changed the M1
carbine that came with the DiD Edward Stiner figure, from a Korean war version,
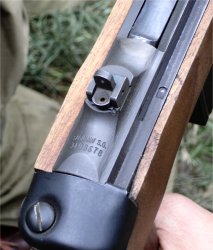
to a WW2 version. The picture on the right shows the WW2 sights on the weapon
which is a fixed sight, whereas the version on the model is of the later
adjustable sights.
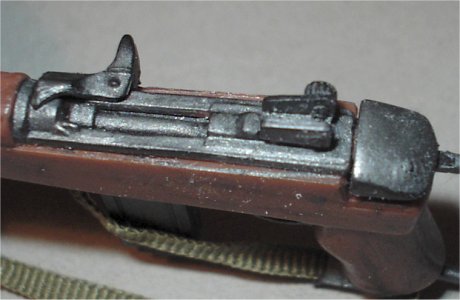
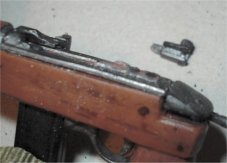
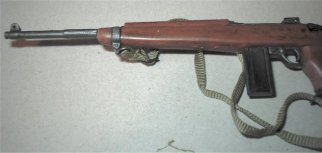
In the first picture below left it shows the
sights as they come with the model of the weapon, and you can see that it is
totally different with the adjusting wheel on the side and the flat top to the
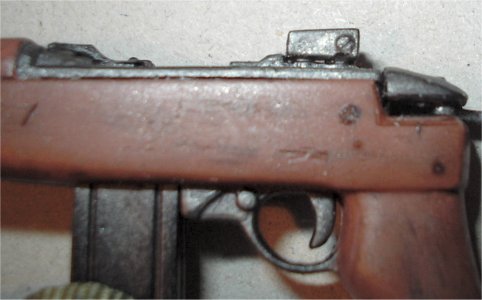
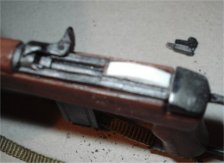
rifle below the sights. The second picture shows the side view of the model, to
get a better idea of the incorrect sight.
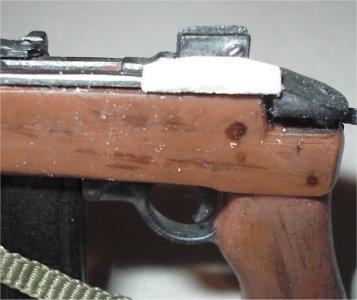
In the third picture I have cut a piece of plastic
strip, so that it is long enough to go between the join at the back of the
rifle, and the front just before the ejection port. Making sure that the width
of it, is the same as the sights that are already in place. Because once I cut
off the original sights and sand it flat, this piece of plastic will go on top
of the rifle in it's place. Also to replicate the chamfers, I sanded an angle
onto each end of the strip.
In these pictures below going from the left, I
have cut off the sights as supplied and put them aside to use later, and the top
part of the carbine was sanded flat to make sure that the plastic strip will lay
flat on top of the rifle. The plastic strip as shown below right, was test
fitted for size and the chamfers at each end were sanded again to make a flat
spot in the middle. Note: I also sanded the base of the strip flat to reduce the
overall height of it, otherwise the altered sights will be too high. This was
then glued in place making sure that it is straight on the top.

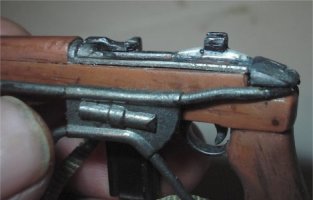
With the pictures below I have carefully cut the
'U' shaped part so that it now sits on top of the flat part of the replacement
plastic strip, as it was too long to use as it is. I then cut off the adjusting
wheels on both sides of the original model sights. The 'U' shaped part was then
glued onto the plastic strip, again making sure that it is straight and both
sides are level, because the cutting down with a razor saw has weakened the
sides of the 'U' shape slightly.
Once I had the altered sight glued on top of the
plastic strip, I lined it all up making sure that it is all straight, then the
whole rifle was set aside to dry fully. Note:
It is important that the sights are left to set fully, because I found them to
be very fragile while the glue was drying.
Once everything had been left for a few hours to
set fully, I then cut out a thin piece of plastic card to make the middle part
of the fixed sights. The size of this very small and is the inside width of the
'U' shaped part, as this part of the sight has to sit inside. Also it has to be
rounded at the top, similar to the picture of the real sight at the top of the
page. Note: To get it the right height once
I had the correct width, I cut it over length and by test fitting it into the
'U' part and gradually cut off the bottom until I was happy that the piece was
the correct height as shown above right.
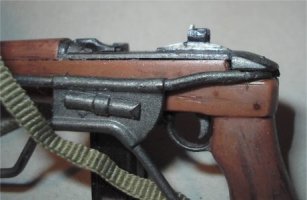
This was then gently glued into place at the
inside and front of the 'U' piece, then this again was checked to make sure it
was all straight and then left aside to set. Once everything had dried off
overnight, I then got a needle and made a small hole in the centre part of the
sight. Then the whole thing was given a coat of some Gunmetal enamel paint, once
dry then a light brushing of some Oily Steel weathering powders.
Bayonet Lug Removal
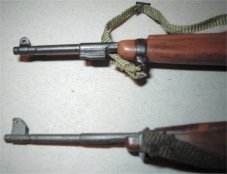
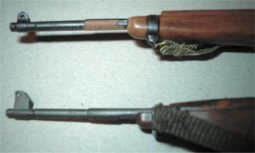
The other item that I have had to change on this
carbine is to remove the bayonet lug on the front of the barrel, in the pictures
above I have on the left. The DiD rifle at the top and a Dragon rifle below it.
In the second picture I have carefully used my razor saw to cut off the lug,
just below the round part of the barrel. I then carefully sanded the barrel to a
round profile as shown in the middle picture, and in the last picture above
right I have repainted the barrel with some Gunmetal enamel paint, once that was
dry it was then a light brushing of some Oily Steel weathering powders.
Many thanks to Paul
(.308) for all of his help explaining the
differences in the rifle sights to me. | 