|
Welcome
To My Albert Ross Class A Uniform Page
This page is about how I have assembled my Albert
Ross figure in the Class A uniform, this is a very nice set and is a figure that
I have been after for a while to complete my US paratrooper collection. Using my
reference pages I am hoping to have a lot of detail included on this figure,
especially with the spare DML shirt I have with the collar insignia and maybe
with some changes to the cap piping colour. Note:
One important thing I have already found out the hard way with this figure is,
don't undo the tie fully if you take it off the shirt, as it can be awkward to
knot it back together again.
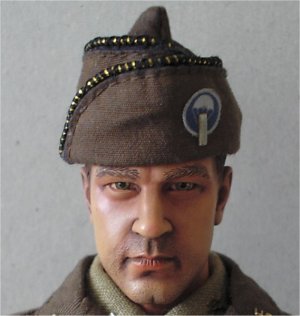
Headsculpt

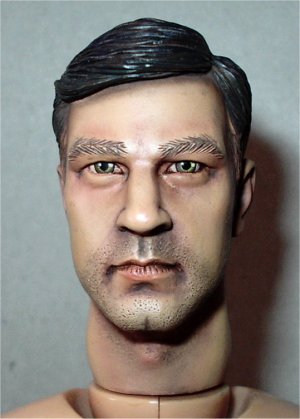

These pictures are the before and after I gave the
headsculpt a pastel wash, what I like the most from the end result is the way
the pastel chalk has picked up on the fine detail for the beard area. This head
is a great improvement from DiD as I now have a nice 5 o' clock shadow on this
figure. Once I am happy with the effect I want to get, I then give the head a
light drybrush of some cream coloured pastel chalk, to both add highlights and
to lose the shiny effect. The last thing I do is wipe the eyes with a damp
paintbrush to remove the chalk, let it dry and I add a drop of gloss varnish
onto each iris.
Note: A sort
of tutorial about the pastel wash is on this
page.
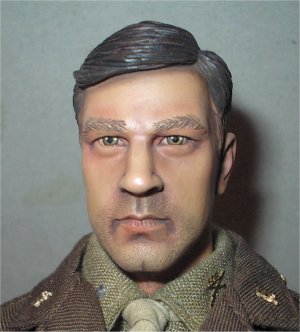
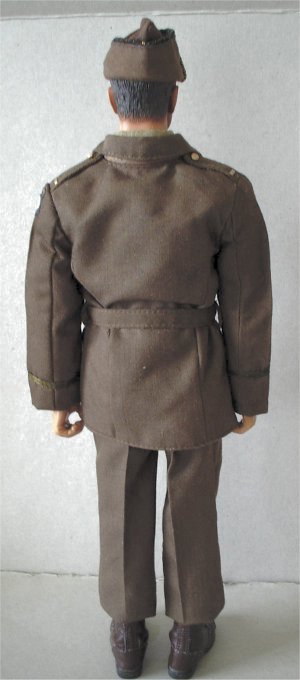
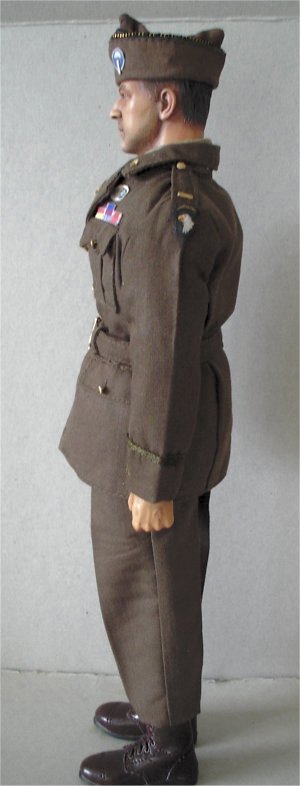
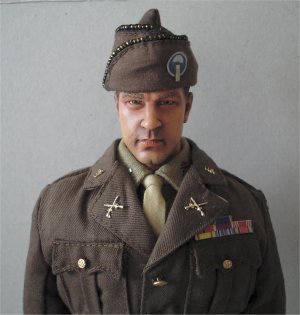
Uniform
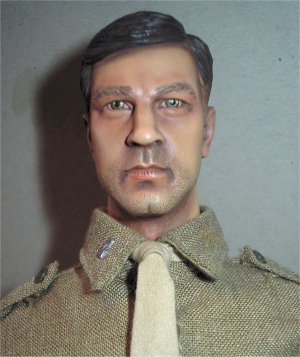
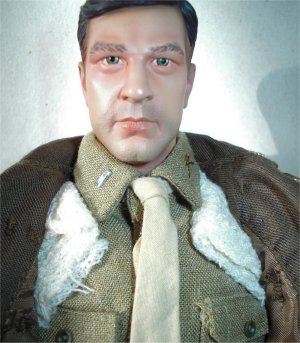
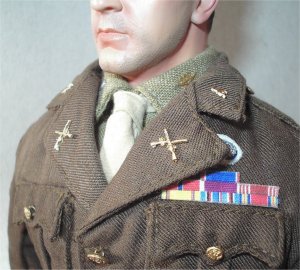
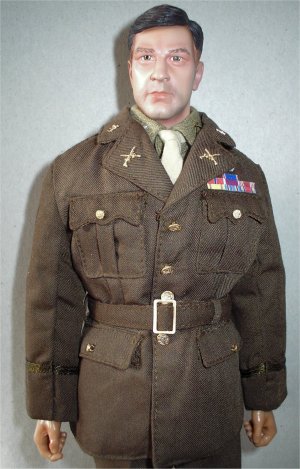
With the uniform itself I have not done any major
changes to it as I want to keep it as it is, the only thing I have added is
another shirt I had in my spares box which has the collar insignia on it.
Note: To get the tie to lay the way I wanted
it I put a couple of stitches into the bottom of it through the shirt as well to
pull it tight. I have also had to add some slight padding to the front chest and
shoulders, this is because of the drape of the jacket in that area just does not
look right to me.
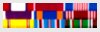
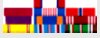
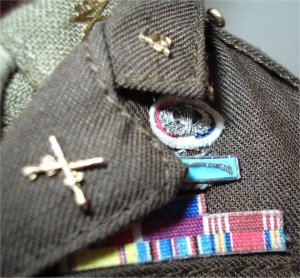
The above picture is one I took of the medal images
that were sent to me by Paul. I have first tried them out onto normal printing paper
first to
check for the sizes. And then printed them out onto some sticky backed cotton
paper at the highest setting. I have also replaced the oval badge that the
airborne wings came fixed to, because I felt that the badge was overscale with
the sewn edge. The airborne wings were fixed back onto the oval I
made, by again backing it with some double sided tape and pressing it in place.
I wanted to replace the rifle and the US insignia on the collar, but at the
moment I am leaving them as they are although I may give them a coat of gloss
varnish.
Note: Be careful when you are taking the
jacket on and off because on my figure the epaulette insignia on one of the
shoulders came off. This was not a problem because all I did was put the
insignia onto some double sided tape, cut around it, pulled off the backing and
re-applied it to the shoulder. Also be careful of the crossed rifle insignia, as
this is only held on by the centre I believe.
Printable Medal Images


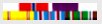
 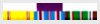

These images above were very kindly supplied by
Paul for me to use with my figures, and I have asked for his permission for them
to placed here to share with our fellow modellers. I have resized them and they can
be printed out as they are for use on WW2 US military uniforms.
Note: To save these images to your computer,
right click on each of the images and select Save Picture As, they are not for any commercial use
and they remain the copyright property of Paul.
Boots
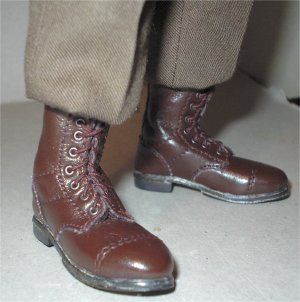

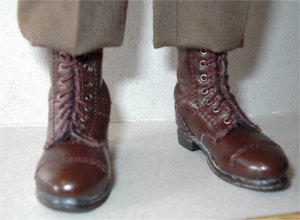
The boots on this figure did not look the part to
me so I tried to see what they would look like if I used some dark brown shoe
polish on them. This has added a flat even overall colour to the boots covering
both the stitching and the laces, the boots were then polished to get a shine
with my Dremel drill with a polishing cloth attachment.
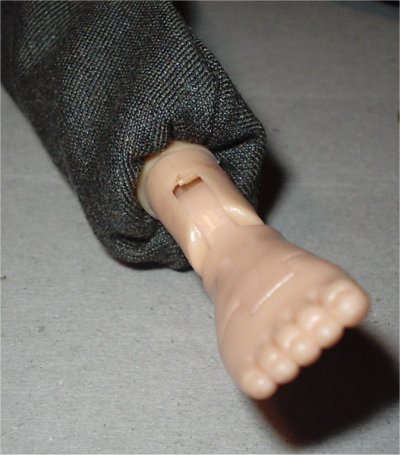
Trousers
The trousers were ironed to put a crease in them
and then bloused out over the boots with the help of the small dental rubber
rings as shown on this
page. A quick
explanation about how I did the blousing is in the pictures below. To start I
put some of the rings on the bare leg, I then have pulled the trouser leg down
so it is inside out on the leg, I then put two of the rings over the trouser (as
they are prone to breaking) and then pull the trousers back up as normal. I then
fit the boots and tie the laces, I then pull the trouser leg bottoms down on to
the top of the boots adjusting the turn up to length.
Once that is done the trousers now look like the
above pictures, with the
them bloused out over the boot tops.

 Garrison cap Garrison cap
This has been a trial and a half to try to get the
piping correct for an officers cap, as I have tried various ways of replicating
it, and in the process I have already ruined one cap. I asked a question about
the threads and how I can get them small enough on the OSS forum. And from the
excellent help I received I was pointed to a sale on ebay for some very thin black and gold
elastic bracelet cord by Neil.
I have received the my order of the cord today and
to say I am amazed is an understatement because it is an exact fit in
replacement for the white piping. And it is far smaller than anything that I
could have twisted together from thread. The picture above shows my best attempt
at twisting the threads together, compared to the elastic cord that I bought

The pictures above are of how I sewed the elastic
cord onto the cap in place of the white piping, to make sure that I did not ruin
the hat I used a piece of plastic to protect it when I was cutting the piping
off with my model knife.
The cord was then laid in place and I put a few stitches of black cotton to hold
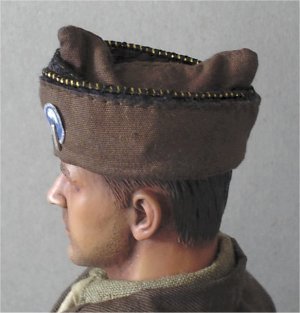
it in place. With the cap badge I took off the insignia bar which I think is
glued on, this was then put on some double sided tape and cut out, the backing
was removed. This was then placed back on top the new cap badge, which was
printed out on some cotton paper because I felt that the DiD badge was
overscale.
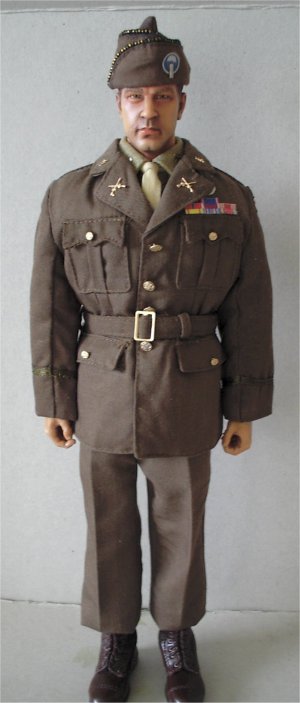
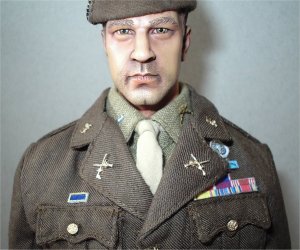
This is the finished figure with the altered cap
and the medals applied to the jacket, also a shoulder patch that I printed out
as well. And once again I would like thank Paul and Neil for all of their
help with making this figure.

Since I first started this website I have governed
myself with three basic rules. 1. Always
give credit and add names to the items and people who have helped me.
2. Try to help as many modellers as possible.
3. Try not to show off about any of my
figures. Note: But I am afraid that it is
with deep regret that I have to break my Third rule, as I have just received
some badges from Paul for my figure here, and I just had to show them in the
photos above.
As they are the hand made Presidential citation
badge in the middle picture, and the Rifleman badge in the picture above right
directly below the silver wings. I cannot begin to describe my thanks and
admiration to Paul for these items, because to be honest I have never seen such
craftsmanship made before in any scale. And now this figure has taken pride of
place in my collection.
Many thanks to Paul (.308)
and
Neil
(The Ulsterman) for their very generous help
with my figure.
| 