|
Welcome
To My Cobblestone Base Page
This page is about how I went about making the cobblestone
base for my Carry diorama, the main idea for it came after I saw the base made
by Ian (Pictoplasma).
One of the pictures is shown on the right, to
display the excellent base that he made.
Below is the method he used to make the cobbles,
which has been very kindly supplied to help me to make my base.
Its made out of that block of clay you can buy in art shops. Cut into roughly
same size, smaller, larger bits. When dry glue onto base in a random pattern to
sort of match a cobblestone street. Mix up some tile grout [I add some sand to
the mix to get some texture] and rub mix into the gaps. Wipe off as you go with
a damp sponge or cloth as this will give the impression of the filling between
the blocks. When dry paint or spray as you wish. I used the games workshop
colours codex grey and fortress grey drybrushed over the top. Various oil paint
washes of different browns add the look of dirt, grime and also give it depth.
Leaves are made from real ones using the little paper punches from art shops or
stationers.
Making the cobbles
Note:
When making something like this with
clay on a wooden base, do not leave the wet clay to dry on the base as the
dampness will cause the wood to warp if it is not sealed beforehand.
I saw a page on the OSW forum about how
ScanmanDan used a frame to make bricks for his
diorama, so to make mine I decided
to use his idea as below. Note: Many thanks
to Ian for helping to find the webpage above for me, because I had lost the link
I had to it.
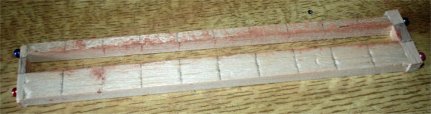
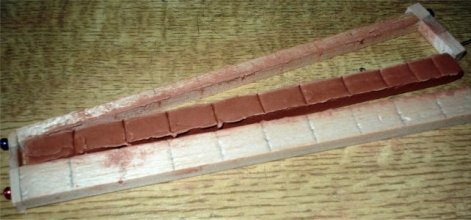
The dimensions for the balsa wood frame above are
as follows:
The overall outside length of the frame is 180mm
(as I wanted to make 10 bricks at a time)
The outside width of the frame is 30mm long.
This then gave me an internal dimension of
approximately 170mm
long and 10mm wide for the strip of clay for the bricks.
On the top of the frame
I also marked it freehand at approximately 15mm intervals. So that when the clay
is removed, each brick will be about 15mm long by 10mm wide. I also used some
dressmakers pins to hold the whole frame together, because the frame needs to be
taken apart each time you make the bricks to release the clay. The clay material
I used is by an Italian company called
DAS Clay and it is the type that will dry in the open air, and will not need
any heat to cure. I got mine from Hobbycraft here in the UK.
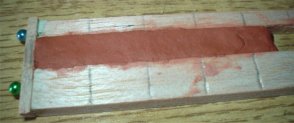
In the picture above right I have the frame level
on my workbench, and I have pressed a strip of the clay into the centre gap to
start to make the bricks making sure that it is in the flat in the frame.
Note: I found it is easier if the work
surface is slightly damp under the frame, as this stops the clay from sticking
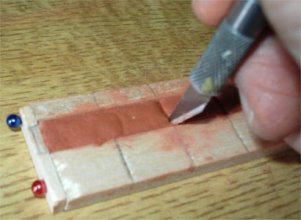
to it. In the picture below left I have the inside of the frame full of clay and
the top smoothed down, I then used my model knife with a slight digging and
cutting action (to stop the clay from pulling out) to cut out the individual
bricks. In the picture below right, I have left the clay to dry slightly and
then removed the pin from one end of the frame, this then allows the clay to
drop out as a line of bricks.
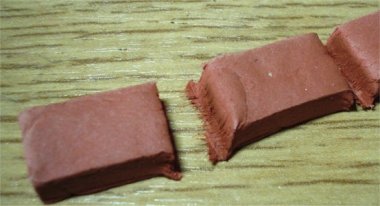
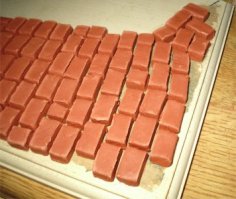
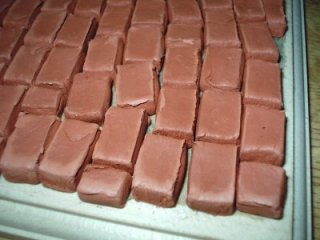
The pictures above show on the left the bricks
after I have cut them apart with my knife, I then rounded the edges off with my
fingers to smooth them to the brick shape. I then laid them in a pattern on my
wooden base as shown above, since I was unsure of how many I would need to
fill the road part of the base.
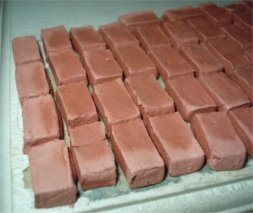
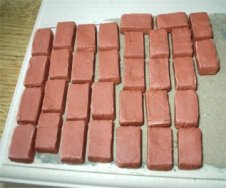
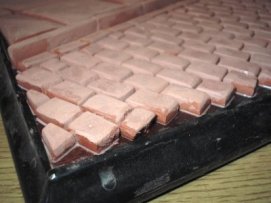
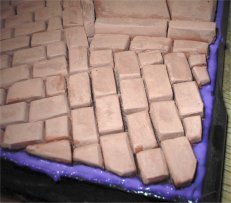
 When I finished making the amount of bricks I
needed for my base, I then gently pressed on each one to flatten them out
slightly to create a random look to them. As I did not want each one to be at
the same level, so some edges were pressed harder than others, so the one next
to it was slightly higher. These were all then left overnight to dry off fully.
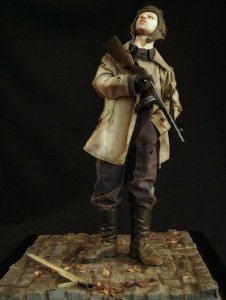
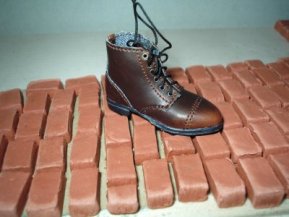
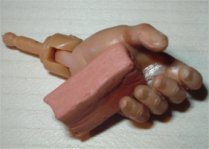
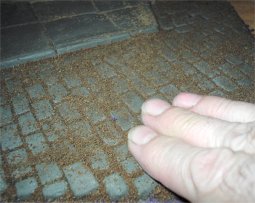
To demonstrate what the bricks look like, I have the pictures here to show a
DiD 1/6th scale US boot on them, and by more luck than judgement a brick in a
spare hand I have. Once the bricks have dried off fully, I am going
to use a small sanding stick to round off the edges slightly. And then use
something like tiling grout as mentioned by Ian above to set the stones on the base. When I finished making the amount of bricks I
needed for my base, I then gently pressed on each one to flatten them out
slightly to create a random look to them. As I did not want each one to be at
the same level, so some edges were pressed harder than others, so the one next
to it was slightly higher. These were all then left overnight to dry off fully.
To demonstrate what the bricks look like, I have the pictures here to show a
DiD 1/6th scale US boot on them, and by more luck than judgement a brick in a
spare hand I have. Once the bricks have dried off fully, I am going
to use a small sanding stick to round off the edges slightly. And then use
something like tiling grout as mentioned by Ian above to set the stones on the base.
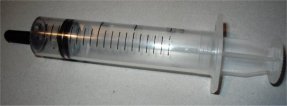
I was thinking about how I am going to do the
grout mix in between the bricks, and when I was going through my cupboard I
came across an old syringe I have that I used to fill up my printer cartridges.
And I got to wondering if this can be used to get in between each brick instead
of just coating the base. So if I can get the grout mix thin enough to pass
through the nozzle, this may make the job a whole lot easier.
Some very good tips I have had
from Paul
I might suggest if you do this in the future
trying to use a very thin wire to cut the clay. You may need to wet the wire
with water and cut it using a gentle sawing motion. That should give you cleaner
cut ends.
As for the filler between the bricks, my
approach would be this. I would glue the bricks in to place using a consistent
spacer to get the gaps even. Coin's perhaps? Something of that nature that would
give you the consistency of spacing. I'm not sure about using thinned down
plaster, it has been my experience with thinned plaster of having problems with
it setting, or when it does, the mixture weakens and it will crack and fall
apart.

There are a couple of other things I would use,
either the grout as originally planned or a wall spackle, (the kind you would
use to fill holes in walls with). Even a caulk that would be used with tile,
around sinks, and bath tubs, they come in different colors as well so you could
probably find one that would even be close to the right color.
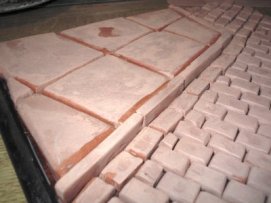
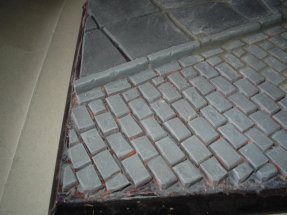
The picture on the right shows how the base is
progressing, as I have re-arranged the bricks so that none of them are in line
with the base edges, what I mean about this is shown on my
Figure Posing page.
The kerbstones did make me think for a moment or
two about how I would make them, and then I realised that one side of the clay
from the mould is bigger. So the kerbstones were made in the same mould as the
bricks, but as one long strip instead and then placed on the base on the taller
edge. I then laid it out beside the bricks, and
marked where I wanted each stone cut.
 Note:
When making something like this with
clay on a wooden base, do not leave the wet clay to dry on the base as the
dampness will cause the wood to warp if it is not sealed beforehand. Note:
When making something like this with
clay on a wooden base, do not leave the wet clay to dry on the base as the
dampness will cause the wood to warp if it is not sealed beforehand.
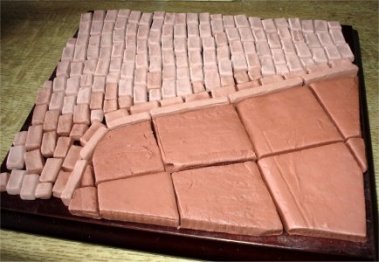
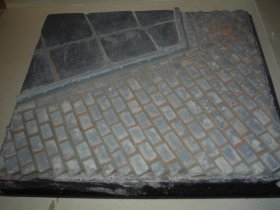
The next step in making my diorama base was to
make the paving stones. These were cut from the large block of clay, by slicing
into the remainder of the factory made block of clay at the same height as the
kerbstones.
This then will give you a large square of thick
clay, which I laid onto the remaining space on the base, and marked out with my
knife the base edges and where I wanted the paving stones to be cut.
Once I had cut out the shapes that wanted I
smoothed the edges slightly and assembled them back onto the wooden base to
check that they all lined up as I wanted them to so that they look like paving
stones. Once I was happy with the layout of the stone shapes, I took them off
the base to dry. Note: I may alter the shape
of the curve on the kerbstones, because looking at it now I don't like the tiny
pointed paving stone offcuts in the bottom left of the above picture.
Fixing the cobbles to the base
With fixing the cobbles to the base I tried the
grout and the plaster mix, but none of them seemed to work well enough for me,
as the bricks kept falling off the base when I added others. So in the end I
have used some neat PVA glue on the bottom of the bricks, I then placed them on
the base and adjusted the spacing roughly with my model knife blade.
Note: Make
sure that the wooden base is sealed with a varnish before doing this, otherwise
the base may warp. Also I have used some black tape on the base edges, this is
to prevent any damage to them.
Note: If you
intend to do any sanding of the bricks to shape, use a large sanding stick (the
type that the ladies use to sand their fingernails), and gather the dust
together in a pile and save it in a small plastic bag. Because this can be used
as brick dust on either this or other dioramas.
Once I had all of the bricks, kerbstones and
paving stones as I wanted them, I went around the edges of all the four sides of
the base with some diluted PVA glue. This is shown on the picture above left,
and this helps to seal the bricks to the base better. I also did this to the
paving stones to make sure that the PVA glue gets under all of the pieces, to
seal them fully to the base. When that was fully dried off, I then sanded over
the top of all the stones with the large sanding stick (the type that the ladies
use to sand their fingernails), I found this to be an excellent tool for getting
the surface of all the bricks at the same height. Also, if it used on it's side
along each of the base edges, it will sand all of the brick edges into a
straight line so they are even to the base edges.
To protect the base from any paint that I intend
to use, I have painted some
Maskol on the bare edges of the wooden base around the brick edges, as shown
in the picture above right. The bricks, kerbstones and paving stones have to
be painted with a Grey colour all over, and I intend to then drybrush them with
lighter shades to add highlights. I then have to do the grouting in between each
of the bricks I am going to use the same method as described by Ian, plus
I will also add some sand material in the mix to add a different colour to the
grout.
Painting the cobbles
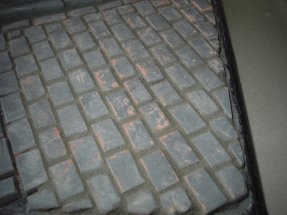
These four pictures show how I have painted the
clay cobbles, in the first picture above I have given everything a base coat of
Games Workshop Codex Grey. This added a very nice base colour to the clay to
give it a basic stone look, I then gave everything a drybrush of Games Workshop
Fortress Grey, and that added some highlights to the stones edges and rough
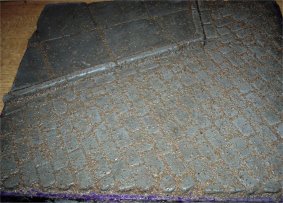
texture. In the second picture in the centre above, I have
added the grout to the gaps in all of the stones, and as can be seen it has
taken some of the paint off when I rubbed the grout off of the top of the
bricks. In the third picture above right, this is the result of the grout after
it has dried off slightly, and it has added a very nice worn and highlight
detail to the paving and kerbstones.
Note: I found
out by accident that if I wipe the grout with a tissue, it removes the bulk of
it I don't need. But to spread the grout to get the highlight effects I used a
large hard bristled fan paintbrush, and that helped to press the grout into the
gaps.
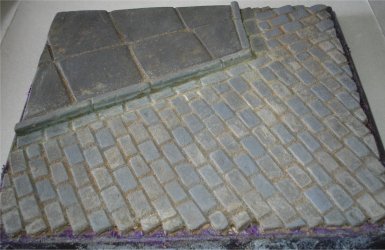
The picture above right shows the complete base after
most of the grout has dried off, which has added an effect to the clay that is
far better than I expected it to be. Where the original clay colour is showing
through in this picture, it has been caused by my running a pointed wooden end
of a paintbrush along all of the brick gaps. This was done to press the grout
into the gaps, plus also to leave me a slight gap to add some fine sand that I
am intending to place on top of the grout.
Note:
Before I do this I will drybrush the bricks with the Codex Grey paint again, so
that they are all covered and then give it a wash of the grout to get back the
highlight effect again.
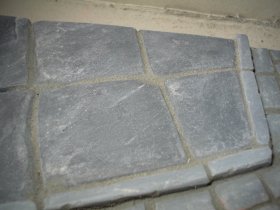
Adding sand to the cobbles


These pictures show how I added some sand into the
gaps that were left from the grout I used, I first spread the sand over all over
the cobbles and paving stones, I then pressed down on it with my fingers to push
it into the gaps. Making sure that it also was pressed into the edges of the
bricks as well.
The picture on the right shows the sand in place,
and to bind it all together I have given the everything a coat of diluted PVA
glue. While this was drying I then just brushed gently over the top with a large
fan brush, to remove some of the sand that I did not need. When that was all
dry, I then went over the top with the fan brush to remove any sand left on top
of the bricks and paving stones.
The end result of this is below with the finished
base, which again has had a light drybrush of the Codex Grey over the cobble
bricks, to colour the clay still showing through. I also used a slightly watered
down paint as well to pick out the individual bricks, and then I gave it a wash
over of some watered down acrylic brown paint, and finally I gave the base a
drybrush of some dry grout.
Update
- Finished Base

The only thing left to do now is to remove the
tape and the Maskol, then use it with my
Carrying Casualty kitbash and add some groundwork
material as above right.
Many thanks to Pictoplasma for
the idea and the help in making the bricks for my cobblestone base.
Also ScanmanDan who had the superb idea for the wooden frame, and Paul
(.308) for the very helpful tips. | 