|


Welcome
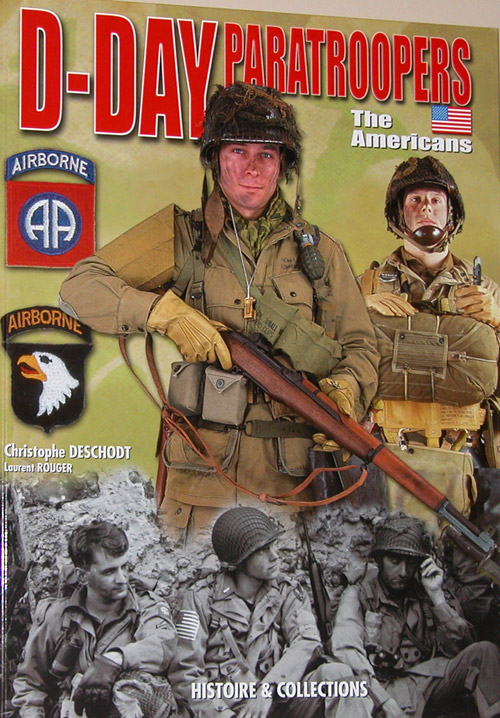
To My Corbin Black Paratrooper Kitbash Page One.
I have just got hold of an excellent book on the
WW2 US paratroopers - D-Day Paratroopers, The Americans by Histoire &
Collections. The detail in this book is just amazing, and
if you are modelling these figures, I feel that it is an essential reference
book to have, as I have obtained a lot of new ideas for my future figures from
it. ISBN No - 2-915239-29-0
This page is about how I put together my DiD Corbin Black
figure. This model is what I have wanted in my collection for a long long time,
and as a result I am going all out on it. Because as soon as I saw the ammo
belt, I thought I just had to have a .30 cal crew, so I could use those items.
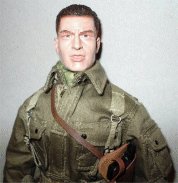
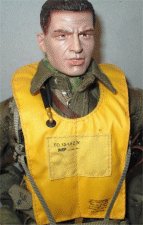
The first thing I did was to repaint the head, as the camo paint on his face was
bugging me big time! So here is the face before and after I did the repaint.
This figure is amazing with the amount of work and detail that has gone into it,
which I hope I can show as I go through how I have made my figures up. This is
how I have made my Corbin figure up so far, with the uniform as supplied and the
belt equipment, all I have added is a DML Josh Ackerman pouch on the side of the
figure and a short bayonet. As well as a net and some scrim on the helmet, a scarf and a shoulder
holster that I got in a trade, with the DiD pistol fitted.
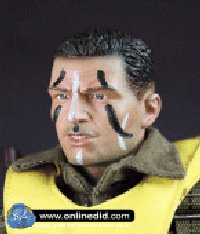 
Figure Review
The jacket even has a hooked clip to keep the collar
closed. All of the pockets are complete, and can be easily filled with tissue to
bulk them out. Without having to undo the stitching on the one side, under the
black button. The jacket belt is even a separate item as well. And the figure
can even be posed with a hand in the trousers pocket if needed. The webbing is
great, all made from cloth including the belt itself. I am amazed at the metal
clips for the parachute harness. Even I should have no problems with these, even
with my heavy handed attempts to do them up. The spare chute has even got little
black clips to hold the white cord in place. As well as the metal clips for the
harness connections, and it is heavy enough to hang correctly.
The helmet is a work of art, with all the straps and the elastic ring holding
the internal webbing together. This will make the helmet fitting easier, if I
can get the chin strap done up. While at the same time pressing down on the
helmet, to widen the internal webbing around the head. The musette bag and
despatch bags have little plastic locks on them. I will have to be very careful
with those, in case I break them. And I do like the pockets in both of these
items, lots of room for bits and pieces. Those plastic locks are also on the
water bottle cover and the first aid pouch. The leg knife is actually made of
metal and is heavy as well, with a very nicely detailed scabbard. The boots are
great, and I am not going to undo the laces as they could be awkward to tie back
up again. The gas mask bag is well made, and adjusts easily, so hopefully I
should have no problems with that.
If I have to find fault with any thing on this figure it is the Thompson gun,
because when the magazine is removed. The body becomes weaker and is slightly
flexible. Finally, the only things that I feel this figure needs are a cloth bag
for the Thompson clips, a rifle drop bag and the Soldat 2 large leg bag. Then
you have an updated Soldat 2, but with a heck of a lot more detail, without
having to spend a fortune on parts.
Since I first made this pair of figures I have
wanted to put them on a base, but to do that I would have to weather the
uniforms first. So after giving it some thought, I stripped them both down again
so I could wash the uniforms to lose some of the colour from them. This is when
I realised just how much kit I had put on the figures. And it was when I put it
all together like this, I then wished that I had never started doing this.
The kit list for both figures is as follows: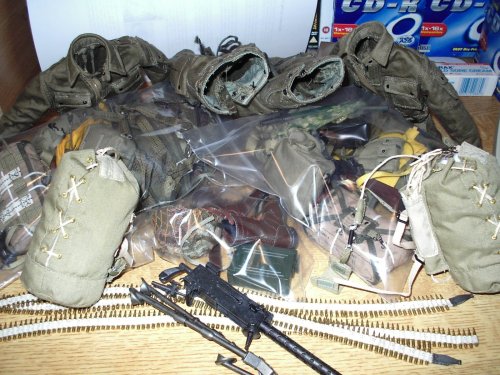
2 x jackets and trousers
2 x pairs of gloves
2 x helmets
2 x Mae West vests
2 x pairs of boots
2 x leg knives
2 x belts and webbing straps
2 x water bottles
2 x bayonets
2 x first aid pouches
2 x shovels
2 x .45 pistols and holsters
2 x musette bags
2 x despatch bags
2 x gas mask bags
1 x pair of binoculars
1 x Thompson machine gun and ammunition pouch with
clips
1 x 'Grease' gun and ammunition pouch with clips
1 x .30 cal machine gun and stand
2 x large drop bags
 5 x .30 cal ammunition belts 5 x .30 cal ammunition belts
2 x main and reserve parachutes
1 x .30 cal ammunition container
The picture on the right shows the figures
stripped down, with the uniforms washed and put back onto them. I have lost some
of the colour from the uniforms and they have creased up nicely. I put them back
onto the figures slightly wet, as this lets some of the creases dry out in
place. The next thing I have to do is when they are dry, is fill out the pockets with tissue to bulk
them out.
The figures are standing on the blank base that I
bought for this kitbash, I got his from the same company that I get all my bases
from. http://www.dalescraft.com
This is one of their sycamore plaques numbered
PL710 - sized at 7 inches by 10 inches, and it gives me a lot of room for both
figures and the drop bags as well. The groundwork for this base is going to be
made up to be like the concrete found on airfields.
Base Build
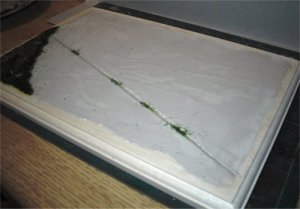
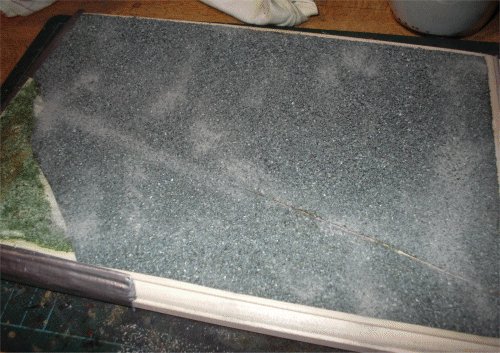
This is the base I am using and I have covered the
base in the plaster 'mix'. I made a raised area in the bottom left to simulate a
grassed area, the rest will be the concrete as found on airfields. The line is
the gap I made to look like the gap between the concrete plates, with some weeds
sprouting from between them.

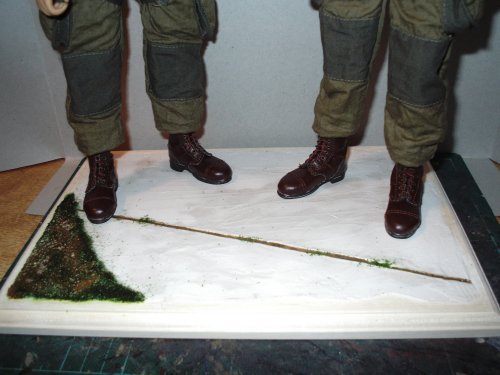
I was going to use a plaster 'mix' and a coating
of sand for the ground, but the only problem I found with doing it that way, was
that I would have to repaint the sand once dry. So I had to look for something
else to use, and I was shown some model railway landscape materials, one of
which was a granite type of matting. This is shown above after being cut to
shape and glued down, making sure the edges were level with the base edges.
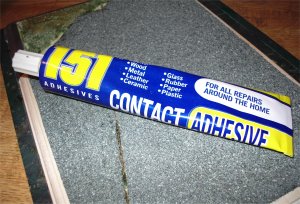
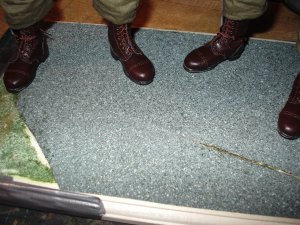
The pictures above show the glue I used to fix the
matting, also a test fit of the figures onto the base. Once this has dried I am
going to redo the grassed area to cover the edges of the matting, and put some
more brown paint into the gap between the concrete plates.
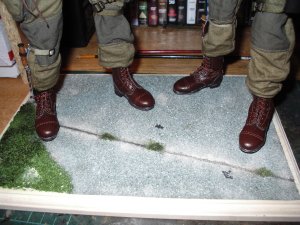
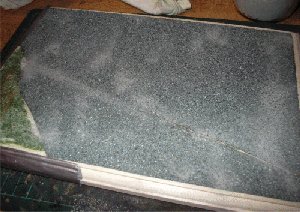
The picture above left, is the base after I have
used some ordinary tiling grout on it, to bring out the highlights of the granite matting. This
idea was given to me by Terry ('The
Bhoy'), and I am amazed at the results of it. The method for applying it was
directly from a container as it is, by drybrushing it onto the top and edges of
the matting. In the picture above right, I
have touched up the grassed area slightly, put some of the flock into the
concrete crack, and also run some brown paint into it as well. To add further
depth to the crack, I run a pencil along the line to help colour it.
Corbin Black Figure Build
The .30 calibre Machine Gun
Loader
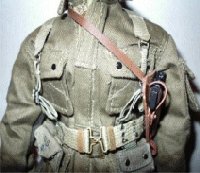

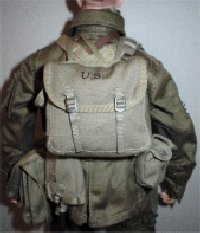
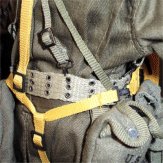
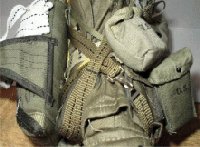
These pictures show how I have built up the figure. the
one's above show the belt and the equipment fitted to it.
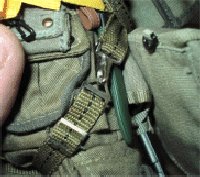
Note: Be careful when fitting the shoulder
straps to the belt, as the clips are well made, but can easily be broken.
Note: Also take care if you have to bring in
the belt, as the brass parts that hold the fabric together, they may
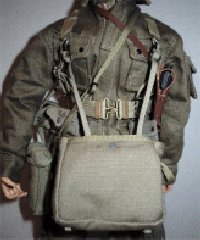
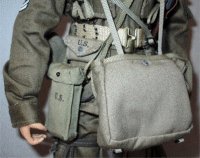
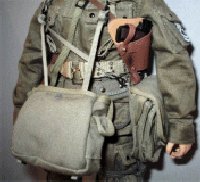
break if you bend them too much. The pictures below show after I have fitted the musette bag, the straps were adjusted as far as they would go. Then I attached
it to the rings on the shoulder webbing. The second picture demonstrates how I
have flipped the bag over the head, and it now sits on the back. This can be
used if you want to show the para on the ground after the drop. The next two
pictures, show the additional bags I have fitted to the figure. The 3rd picture
below, shows the ammo pouch I have used to hold the magazines for the weapon I
am going to use with this model. The other picture shows the despatch bag that
is supplied with the figure fitted.
The Figure's Equipment
 The Mae West vest The Mae West vest
Note: If you are using a Mae
West vest with the paratrooper figure, this goes on before the parachute and the
parachute harness straps go over the top of the Mae West vest.
I apologise for not adding this section before, but I was
informed incorrectly that the vest went over the parachute. And after it was
explained to me how the equipment was worn, I have had to change my figure
around. So that the Mae West vest is now under the parachute harness.
Note: The Mae West vest goes on before the
parachute on both figures.
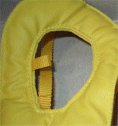
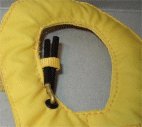
These pictures show the fitting of the Mae West vest, and
it was at this moment I discovered an annoyance regarding the DiD vest. Because as the pictures below show, the left hand image is
of the DiD one and it shows the lack of the inflating tubes compared to the DML
vest. So because of this small part missing, I decided to use my spare DML vests
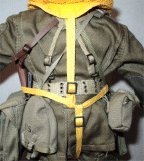
for these figures, as the parachute will not cover up the missing tubes. The next 3 pictures show the DML vest fitted, making sure that the straps
for the musette bag go over the bottom of the vest. The other images show the
rear straps connected, with the adjustment made to them to take out the slack,
also shown is the clasp for the final connection.
The Parachute
The
Reserve Parachute
I have been informed today of an error in this tutorial. In the
images above it shows the reserve chute attached to
the parachute straps by the hooks. But what it fails to show, is that the belly
band goes through the loops on the back of the reserve chute to hold it in
place. This is something that I have often wondered about with my figures,
because to me the reserve seemed to 'flap about' with only the hooks connected.
But after receiving some excellent advice from
USMCPrice on the Sixth Army Forum, this
question has finally been answered.


The pictures above show the belly band going through the spare
parachute loops and what it looks like finished.
Note: He also explained in detail
below about why the reserve chute is connected to the belly band.
I've
never jumped a T5 but I have jumped a T7, T10 and MC1-1 and they are all rigged
with the belly band through loops on the back of the reserve. I am sure the T5
would have had to be rigged this way also because the two hooks connecting the
reserve to the main parachute harness would not be sufficiently strong to
support the weight of the jumper and his equipment. When the reserve is deployed
it suspends the jumper from his abdomen, belly up with his body parallel to the
deck, without the belly band that's a lot of weight and force placed upon two
small hooks.
This is the parachute that comes supplied with Corbin
Black, and I have to admit it is a work of art. It is well made, very highly
detailed and the metal clips for the connections just blew me away.
Note: Although the clips are metal, I had to
use a knife blade to open up the gap enough to get the connection made. At the
same time making sure that I did not open it too far, so the clip and connection
kept coming apart. If this does happen as did with me, I then used some long
nosed pliers gently, to close the gap again.
This parachute is similar in assembly to the DML Jeb
figure, and I have made a PDF about how to fit it on my
Jeb Parachute page.
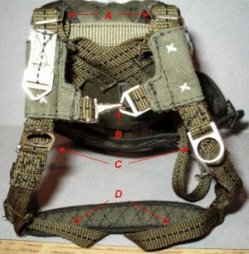
References for the images below are - A - Shoulder strap
adjusters, B - Centre chest lock,
C - Reserve parachute connectors,
D - Straps that come up through the legs,
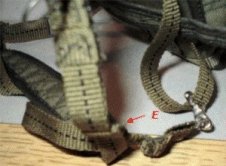
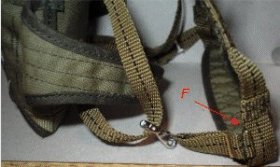
E & F- Show
the leg straps threaded through the other strap to connect up.
Note: See Step 4 of the Jeb tutorial for a
more detailed explanation.
Note: Be
careful with the with the white metal clips, as these have to be opened up
slightly, so that the clip will go together. Take care doing this, because if
you open it too wide or bend it too many times it will break. And to me there is
no way that I can think of getting a replacement for it. This goes for the spare
parachute clips as well.
The pictures below show the straps mentioned above threaded
through and connected up. The picture left is of the left hand side of the
figure, and the benefit of the metal clips really come into their own here. As
the chute and straps can take a lot more pulling about, to get them to fit.
Note: Still be careful about how you do pull it all about, because
something may still break or bend. Note:
Beware of the metal clips and edges, because when you do grip them too hard, you
may end up cutting a finger instead. Note: Be careful
of dislodging one of the excellent Lift Dot Fasteners, because if you do I doubt
you will ever find it.
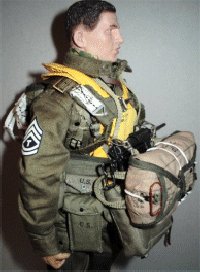
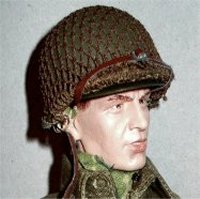
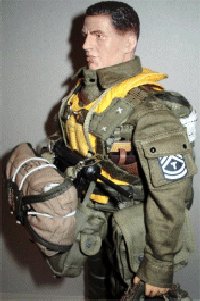
This is how I have made the figure up so far, with the
spare chute added to the parachute webbing. The helmet was covered with a spare
netting and it has some spare scrim added to it as well, the last thing I did to
the helmet was to add the first aid pad. Note:
Be careful if you put the front brown strap on the helmet edge, as it is thin
vinyl and it may break if it is forced into place.
I had a bit of luck with the Soldat 2 large bag, as I found
them for sale on a US model shop website, and in a moment of impulse I ended up
buying 4 of them. Which gives me the final fully loaded look for this figure,
that I was hoping for when I first started making it.
Because I was going to give the loader a Thompson gun, but
I wanted something different for the gunner figure. So, I thought about a
'grease gun' instead, rather than a rifle or carbine. The sling was adjusted on
it, and the gun was slotted in under the connections for the spare chute. The
same thought was given to the binoculars, because they would not fit under the
Mae West, so I put the straps under the centre chest lock. To replicate the way
that I think it would be done, because you would not want anything to fly up
into your face, once you hit the airstream from the aircraft. The rank chevrons
came from DML.
Note: I finally got
hold of some of the Soldat 2 large drop bags, and I have used these with these
figures and they really do add the final touch to them.
Continued on Page Two -
Corbin Black Kitbash Page 2
| |