|
Welcome
To My Flamethrower
Repainting
Page.
This is my repaint I have done on the Dragon M1A1
flamethrower, I obtained this item through a trade I did some time ago now, and
I believe that it came with the DML Sonny figure. The first thing I did with
this item, was to sand off the seam lines on the tanks, as they stood out like a
sore thumb to me. Once I had done that I repainted the tanks with a base colour paint was from
the Revell enamel paint range number 46 matt NATO olive, as this was the nearest
that I could find at the time for WW2 US military paint colours.
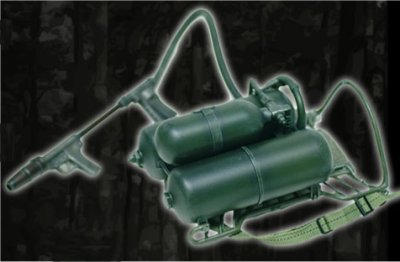
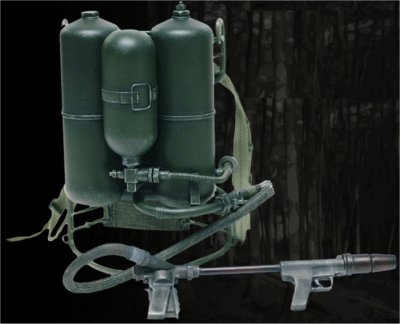
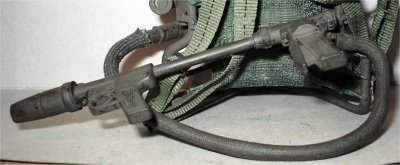
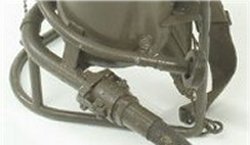
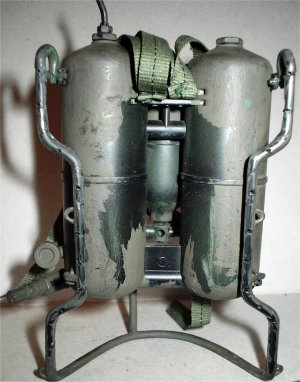
The pictures above are of the flamethrower unit as
supplied with the figure, it is a nice piece but the main problem I found with
it is the way the hose from the tanks creases up when bent as shown in the
picture above right. This was one of the main problems with the unit that
stopped me from using it in a kitbash, because the hose would not look right
with a fold in it like that. So that was my second problem with the unit, just
how to get the hose to stay in shape when it was bent or positioned on a figure.
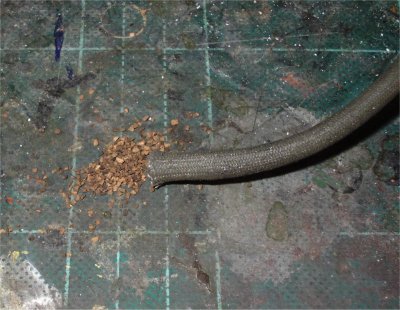
Flamethrower Hose
It was when I was looking for a small part for
another kitbash, that the idea came to me about the hose... Fill it with some very fine railway modelling
gravel...
To do this I removed the hose end from the tank
unit so I just had the control unit still attached, I then got a small pile of
the gravel and pushed it slowly into the open end of the hose. Then after
putting it in I took hold of the open hose end and shook it to make sure that the
gravel went all the way down, added some more gravel, shook again until I was
almost at the end of the hose. This is where I got a paintbrush and pressed it
into the hose to compact the material inside, when I was happy with the shape of
the hose and that when I bent it no creases appeared. I got a small piece of
tissue scrunched it up and plugged the hose end with it, making sure I still had
enough left to put back onto the tank unit.
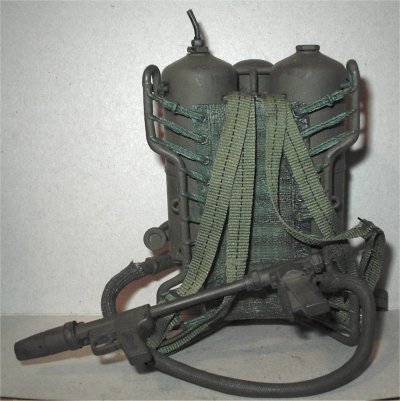
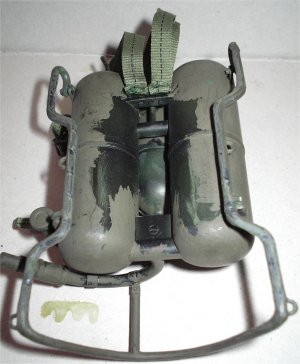
These pictures are of the base coat repainted flamethrower
unit and hose with the much better bends in it now. I still have to repaint the
centre part and the straps, then give the whole unit a drybrush of a lighter
base coat.
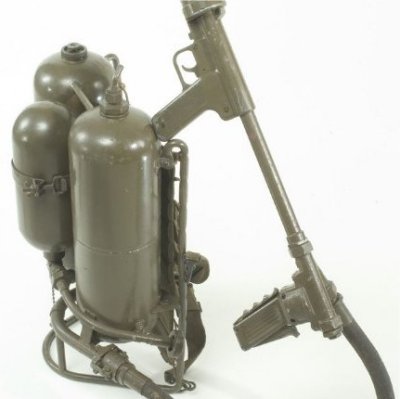
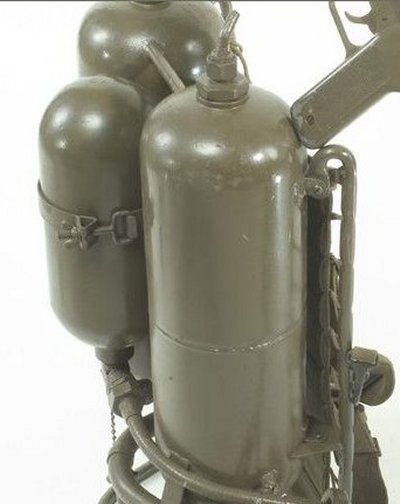
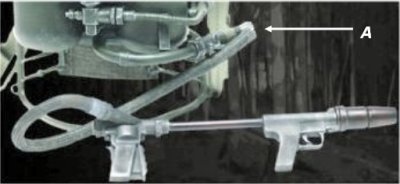
Another problem that I found in doing this
project, is actually finding a decent reference image to use to see just how
accurate the Dragon flamethrower is. Luckily, I managed to find a picture and
from that I made the three images above. The two main pictures I wanted was of
the clip around the middle tank and the connection for the hose to the tank
unit.
The clip on the model's middle tank is different,
and I have just added a small piece of plastic onto the band to
represent the part that would be pressed down to hold the tank in place. The
hose end will have a small piece of Duct Tape cut to size and wrapped around it,
both to hold the hose in place and make it look like the crimped end as shown
above.
Flamethrower Back Padding
 The moulded plastic pad part on the flamethrower
unit was another item that was beginning to annoy me, as it would have taken a
bit of time to repaint it to what I wanted and even then it may not look right.
So out came my model knife and I cut it out as shown above left, after first
checking that the canvas straps were not attached to it. The moulded plastic pad part on the flamethrower
unit was another item that was beginning to annoy me, as it would have taken a
bit of time to repaint it to what I wanted and even then it may not look right.
So out came my model knife and I cut it out as shown above left, after first
checking that the canvas straps were not attached to it.
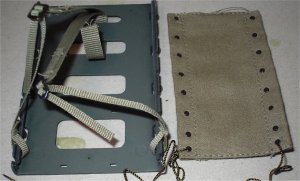
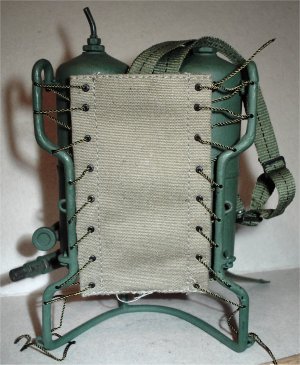
The reason for doing this is that I had a mad
moment and wanted to replace the plastic piece, with the cloth pad from a spare
backpack carrier I have. The centre picture above shows the carrier and pad
separated which was just a case of untying the threads, with the picture above
right of the cloth pad in place on the flamethrower unit to check for size.
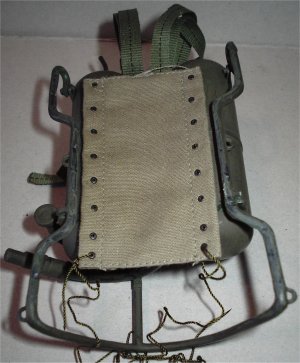
Once I was happy that the pad was lined up
correctly I put a pencil mark on each of the side rails where I wanted the holes
for the threads to go. Then I got out my model makers drill and then made 8 holes
on each side, so that I could tie the canvas pad in place. The picture on the
right shows the holes in place and the rails drying off, because I had to glue
them back in place, as they came apart during the drilling process.
Now I had the back off the unit I could see which
parts I had not painted, plus I could also get at the seam lines better to sand
them off. Once I had done that, I then had to repaint the unit again with a base
coat. A bonus I found in replacing the back pad, was that now I had just the
metal parts of the flamethrower and doing the drybrushing of it would be a lot
easier. It was only after having the unit in front of me, did I realise
 that the
colour that I originally used was too dark. So seeing as I had to repaint it
again, this time I used Revell enamel paint range number 39
matt Dark Green. that the
colour that I originally used was too dark. So seeing as I had to repaint it
again, this time I used Revell enamel paint range number 39
matt Dark Green.
The picture on the right shows where I have tried
the cloth pad for size on the flamethrower unit, as I wanted to makes sure that
I have the holes lined up correctly so I could tie the pad in place. I have also
tried the unit out for size on one of my figures, and with the new cloth pad in
place, the whole unit now sits better on the figure's back and to me it looks
much better than the plastic part that was originally in place.
All that needs to be done now is for me to take
the pad back off and drybrush the whole flamethrower and control unit. Apart
from that the repainting and changes to the unit are finished.
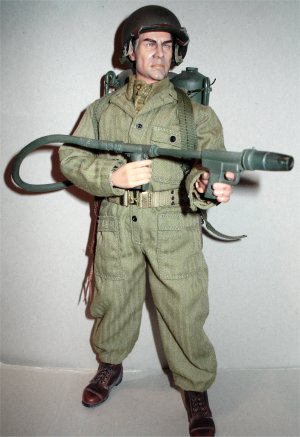
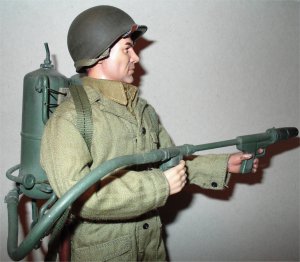
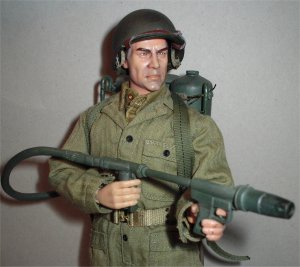
The pictures below show how I have tried out the
flamethrower unit on one of my kitbashes, to see what it looks like and to see
how the loop on the hose hangs. The ballast in the hose has helped a lot to add
some weight and remove the creases, also the whole unit does pull in tighter on
the figure's back with the cloth pad. To get the figure's left hand to hold the
trigger unit, I separated the fingers with my knife blade so I could make that a
trigger finger.
| 