|
Welcome
To My Flocked Gloves Page.
Many thanks to
(John) Boot25 for the original idea for these gloves.
This page is about how I have
tried the technique I saw on the Sixth Army forum, where John used some model
railway flock material to replicate a pair of woollen gloves. This got me
wondering if I replicate the excellent work done by him on the gloves, because I
have been finding it very difficult to locate any pairs of the 1/6th woollen
gloves.
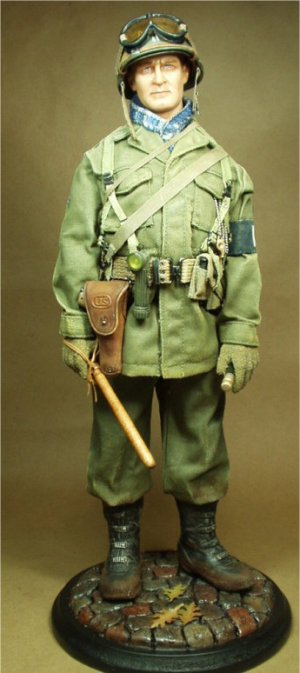
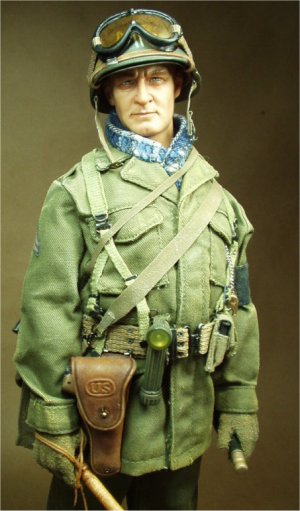
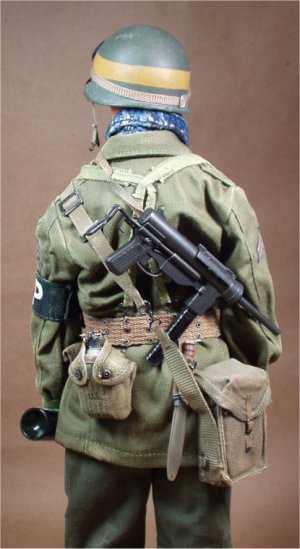
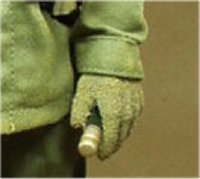
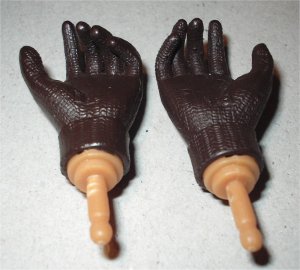
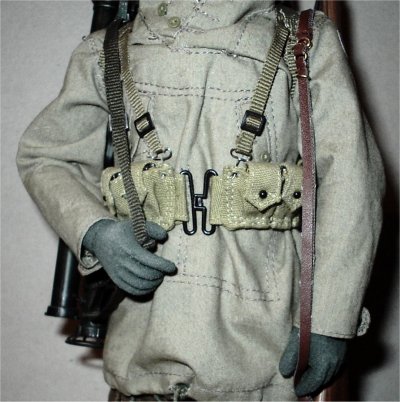
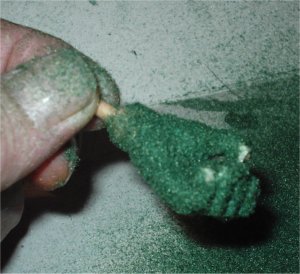
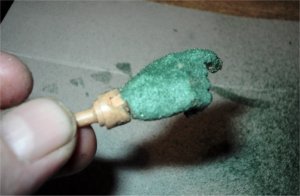
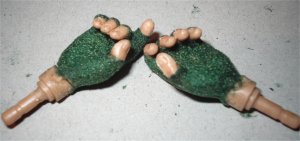
The pictures below are of the excellent figure
made by Boot25 of a late war US MP, and from those pictures I have got a close
up of the flocked gloves that he made below right. I have asked for his
permission to use these images, and I class it as an honour that I have been
allowed to use them, since a lot of the work done by him has inspired me to
make the changes to my figures.
My Attempt At The Full Flocked Gloves
& The Fingerless Gloves
Important Note:
After looking back on the re-painting of the
gloves, I have come to the conclusion that it destroys the whole idea of the
material or woollen look to the gloves. Because it makes the flock material lay
too flat and makes the gloves look like the plastic one's. So if you are going
to flock a pair of gloves or hands, I recommend that you do as Boot25 has done
and find a flock material exactly like the colour you want the gloves to be.
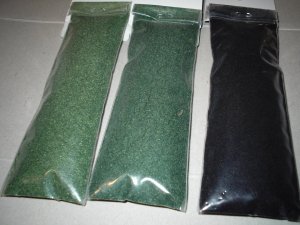
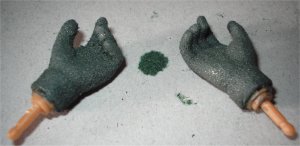
In the pictures above I have on the left the basic
from the box plastic gloves which although they would look good repainted, they
would still lack that material look to them that the woollen gloves would give.
The middle picture is the flock material that I bought for the gloves which is
not exactly the correct colour of green, I had to get this in an attempt to see
if I could make the flocked gloves and maybe deal with the colour problem
afterwards. The picture on the right is the plastic glove painted with the PVA
glue, at first I tried a diluted mix of PVA and water but I found that I was too
thin to allow the flock material to stick to the glove. So I washed it off under
a tap and started again.


So back at the start again I put some neat PVA
glue into my saucer with a dash of water to dilute it slightly, this was then
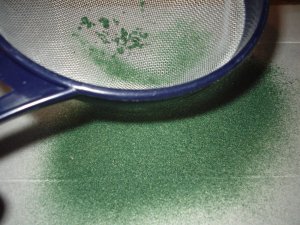
painted onto the glove. Note: Another thing
that I found out earlier was that the flock material was too 'heavy' to use as
is straight from the packet, so I had to put it through a sieve as shown above
left, so that I had a much finer flock material being applied to the painted
glove. The centre picture shows where after sieving the flock onto the glove I
am re-using the material again by putting it back into the sieve.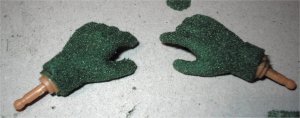
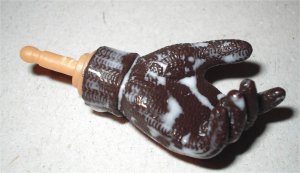
The last picture above right shows the flocked
glove compared to the original plastic glove, because the material has been put
though the sieve it has laid down a finer layer on the PVA. So it has kept the
finger detail.
Note: To get
the glove covered completely it has taken me four rotations of the following
cycle. 1. Of putting the flock material into
the sieve and shaking it over the glove, shaking the glove and gently blowing
off the excess flock material to see which parts have not been covered.
2. Then applying the PVA glue onto the
missed spots 3. Adding the excess back into
the sieve and re-applying it back onto the glove again.
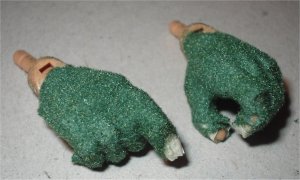
The end result of both gloves is shown above right
and I am very impressed with the outcome after all of the hard work to get it
right. I am waiting for the gloves to dry off fully and I am hoping that once
they are, I may be able to apply some darker green acrylic paint to them to make
them match the colour of the gloves by Boot25.
I have just noticed that after 5 hours the flock
material is drying off nicely, and that the gloves can
now be handled without the material coming off. Plus it seems to have pulled
itself down onto the gloves so that the fingers and joints look better. The big
experiment will be when I try to paint them to match John's gloves colour, as I am
hoping that it will not take off the flock material.
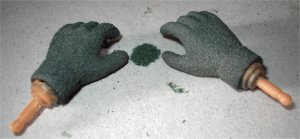
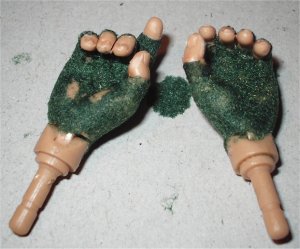
The pictures below show the flocked gloves after I
have repainted them with Humbrol Enamel paint No 66 to get the more of a
military look to them. The original flock colour is the spot in between the
hands.
Now that I have done this I have another 2 pairs
of these plastic gloved hands that I have to do as well. As I am very impressed
with the results, one thing I may have to do is get a smaller sieve because the
one I used was a bit too big and as a result I made a bit of a mess doing this.
Note: Also make sure that you don't use the
one from the family kitchen like I did... Because my good lady hit the roof when
she found out.
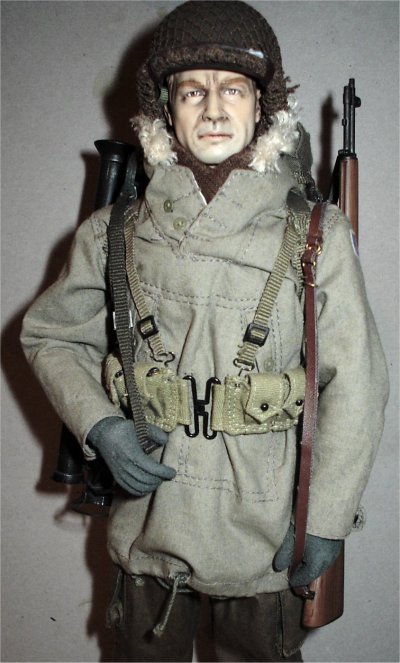
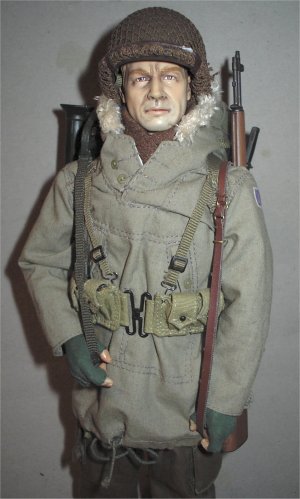
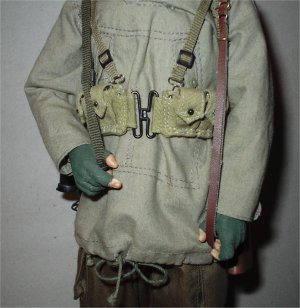
These pictures show the gloved hands on my US
mountain figure and I have just given them a dust over with some grout to bring
out the detail. One thing I have noticed since I repainted the gloves, is that I
picked up the wrong tin because they look too grey to me, so they will have to
re-painted again at some time.
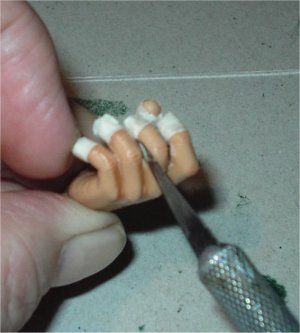
Flocked Fingerless Gloves
After having a success with the gloved hands above
I began to wonder if I could do the same with a pair of fingerless gloves, so I
found a pair of bare hands from the spares box and I used my knife to separate
the fingers. I found that they don't need to be split all the way down to the
hand, all they need is enough room to allow me to tape off the finger ends as
shown. Note: Applying the tape can be a bit
of a trial, but I found that a thin strip of masking tape cut about just about
long enough to wrap around once to mask off the finger ends.
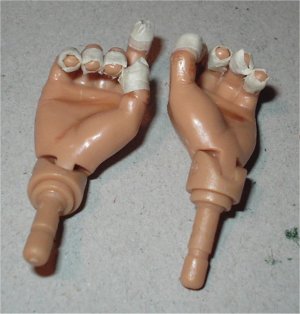
Once I had taped the ends off I made sure that the
edges of the tape are pressed firmly down onto the fingers, the purpose of this
is to make sure that the flock and PVA does not get underneath it, plus also
when I take the tape off when the hand has fully dried I should have a straight
line of flock as an edge. The picture above right, shows the first application
of the flock onto the hand which I had already painted with the PVA glue.
The picture above left shows after I have touched
up the bare parts of the hand with more PVA glue, and applied another coat of
the flock sieved onto it. I have found through doing this that a light
application is best at first of the flock material, because you can see what
parts need to be re-painted. This is shown with the middle picture where the
lighter part is the glue showing through, which needs more flock adding to it
after I have gently tapped the peg end and blown the loose flock off.
Note: I had to repaint the centre of the
hand a couple of times with the glue to get the flock material inside the
fingers. The last picture above shows the flock covered hands with the masked
off ends, which have now been set aside to dry off fully.
The hands above have dried off and I have removed
the tape on the finger ends. Note: Be
careful taking the tape off as it has to be removed away from the flock or
pulled towards the finger nails. Because when I did this for the first time the
edge of the flock lifted slightly to come off the hand, this was not a problem
as all I did was to apply some PVA glue under it and gently touch it back into
place.
In the picture above left these are some patches
that came off as I was touching the hands, this was not a problem as I just
applied some more PVA and some sieved flock as shown above right.
The pictures above show the gloves dried, grouted
and attached to a figure.
Many thanks to John
(Boot25) for the original idea. | 