|
This page is about how I have changed the US
helmets on my figures, as I wanted something different rather than the stock
one's out of the box. Also, the elastic straps were bugging me on some of them,
and I got to wondering if they could be changed. As I have been comparing all of
them against the Corbin helmet. Reference material for the different types of WW2
US helmets can be found on this website,
go the US section and then the Headgear one. As it has a lot more pictures and
information than I can supply.
Fitting Helmet Netting
MP Helmet Changes Bazooka Figure Helmet Medic
Helmet
Helmet Scrim
Helmet Netting
Medic Helmet
Helmet
Images
Fitting Helmet Netting
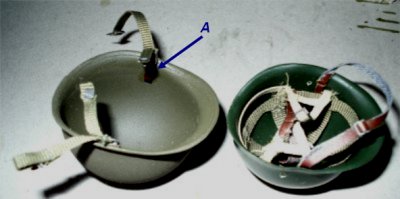
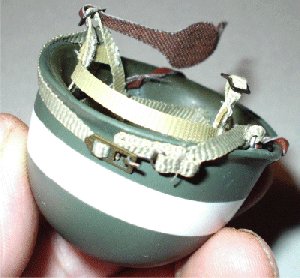
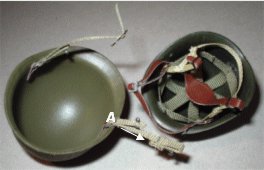
This is my way of fitting the netting to a DiD or
Dragon US helmet, firstly I separate the inner shell from the outer helmet as
shown below left. What you have to careful of when doing this is the inner
straps
A
can come off the outer shell, when this has
happened to me all I did was use some Super Glue to fasten it back in place.
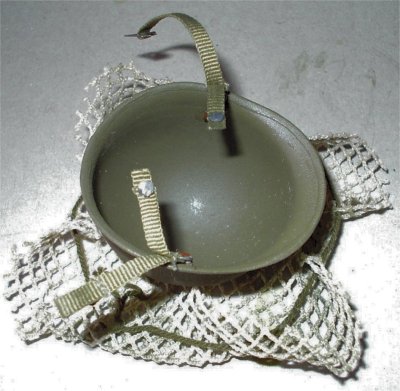
Once you have them apart I then lay the helmet
shell onto the netting material and then thread the helmet straps
B
through the netting as shown above right. This can be a bit fiddly, but make
sure that the thread on the netting material is above the straps as also shown
above.
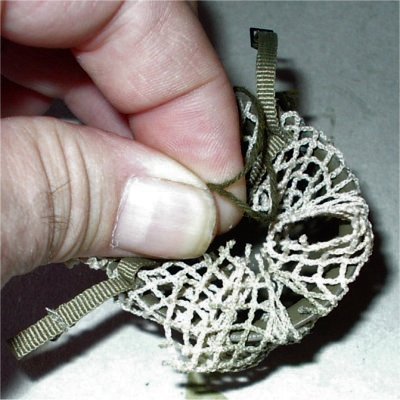
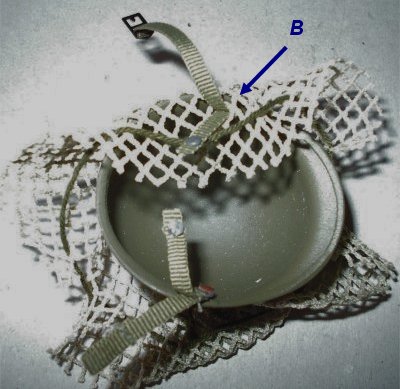
In the picture above left
C shows the strap in front of the thread on the helmet netting,
the reason for this is because in the middle picture above you have to pull the
thread tight to gather up the loose netting. This then allows it to shape around
the helmet shell as shown above right. Now to make sure that the netting stays
as it is, I push the thread and surplus netting into the helmet shell, and then
place the inner shell into it trapping it all in place.
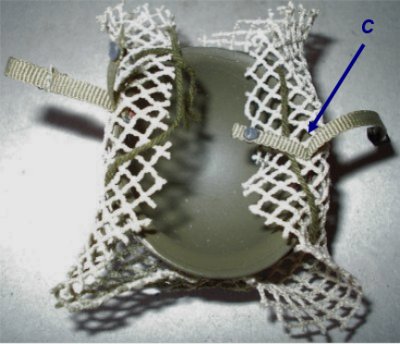
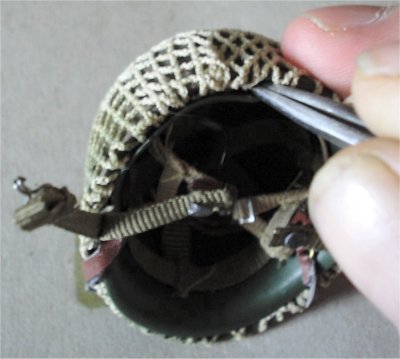
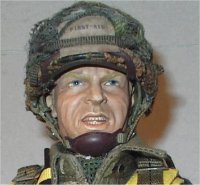
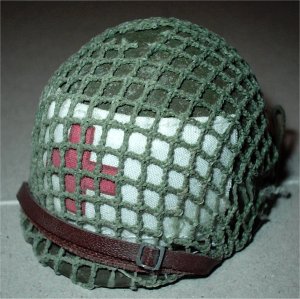
Note: As this
helmet I am using is a paratrooper one, I make sure that the triangular webbing
straps are level so that when it is on the figure these hang down equal on the
side of the figure's head.
Also what I am doing in the picture above right,
is using my tweezers to pull the loose netting material tight and pushing it in
between the helmet inner and outer shells.

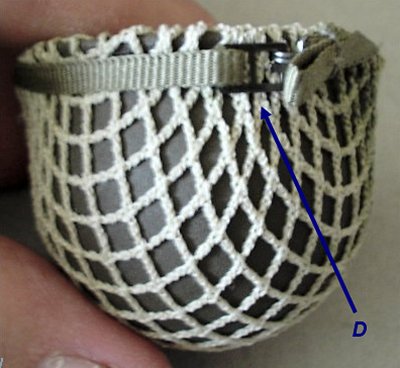
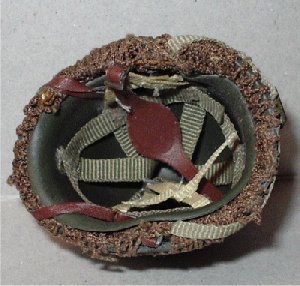
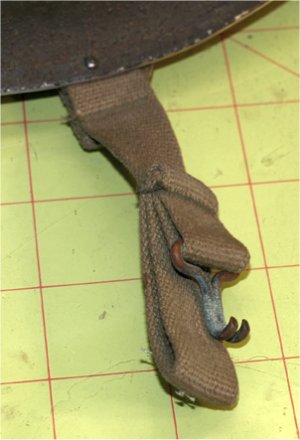
 The picture above left shows the inner shell in
place, with the smaller side straps with the metal pips pushed into the holes in
the inner shell. Note: Before I connect
these I usually make the holes slightly bigger, as I have found that if I don't
do this the pip can deform and break off. D above shows the long webbing straps
connected at the back of the helmet, these can be a pain to connect as I have to
almost take them to the adjustment where it is coming apart to get it connected.
Note: I have also had to pull gently on
these at times to get some extra length from the part that connects to the outer
shell, again be very careful doing this in case the strap breaks away. The picture above left shows the inner shell in
place, with the smaller side straps with the metal pips pushed into the holes in
the inner shell. Note: Before I connect
these I usually make the holes slightly bigger, as I have found that if I don't
do this the pip can deform and break off. D above shows the long webbing straps
connected at the back of the helmet, these can be a pain to connect as I have to
almost take them to the adjustment where it is coming apart to get it connected.
Note: I have also had to pull gently on
these at times to get some extra length from the part that connects to the outer
shell, again be very careful doing this in case the strap breaks away.
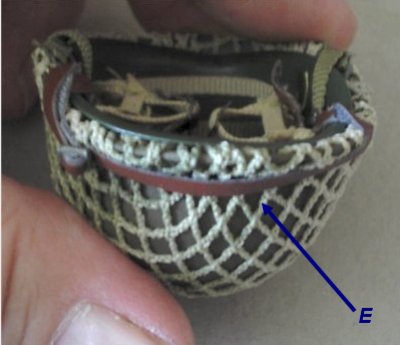
The picture above right E
shows the front strap adjusted over the top of the netting and the
outer shell, this again can be fragile so don't force it, just adjust the buckle
and it should just slip over.
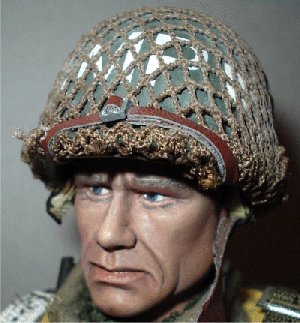
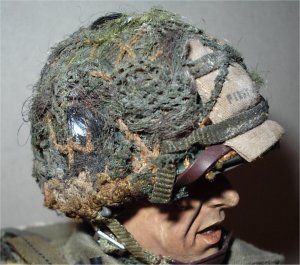
This then is the helmet netting finished and in
place, if you want to paint the netting I usually do it now with some diluted dark green
or brown acrylic paint, as this gets rid of the white colouring of the net
material. I then give it a brush over with some grout to add a dusty look to it.
The straps are also painted with a slightly darker colour to add contrast.
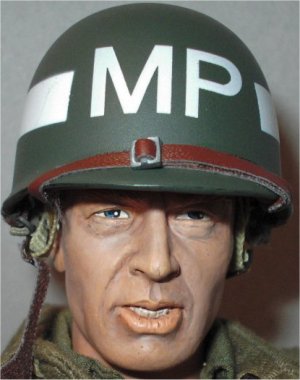
MP Helmet Changes
This is a tutorial I have made up on how I
changed the US helmet shell from the DML figure, with the inner from the
Corbin Black figure. I had to do this as I wanted a US jump helmet for my MP
figure, with the MP markings on it. And after taking both helmets apart, I was
pleasantly surprised that the Corbin helmet inner slotted nicely into the DML
one.
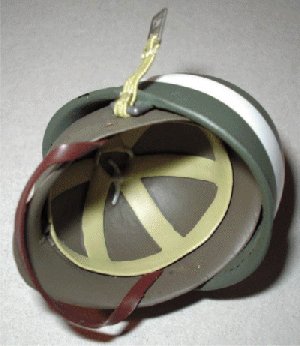
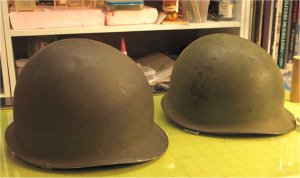
The helmet above is the one from a DML carded
set, which had to have the inner shell prised gently out of it. This then left
me with the outer shell top right. The lugs on the inside of the helmet that
hold the straps, I then cut off and sanded smooth. At the same time making sure
that I did not remove any of the paint on the helmet edges, as I did not want to
try to have to match up the original paint with mine.
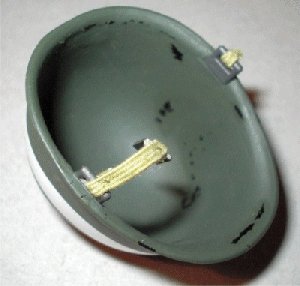
This is the DiD Corbin Black helmet I used,
the picture above left shows the inner shell with the canvas straps.
These were
gently taken off the shell, and then superglued into the DML helmet shell.
Making sure that they match the positions from the Corbin helmet, once that was
dry I then eased the Corbin inner shell into the DML outer. I then folded over
the straps marked A above, and pushed them into place on the inner shell.
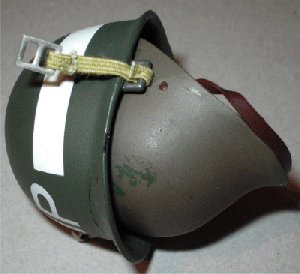
Below are pictures of the finished helmet, which I have covered with a spare
net. To do this I had to take inner back out, cover the outer shell. Then thread
the straps through the netting, then placed the inner shell back in trapping the
netting in place. This was then
given a light dusting of grout to make it look worn.

Bazooka Figure
Helmet
Unfortunately, for this one I did not take any pictures as I made it.
The helmet is from DML, I used this outer shell because of the Spade emblem on
the sides. A bbi inner helmet was fitted inside with the elastic
straps cut off and replaced with webbing straps. I also fitted a helmet net and
tied a first aid pouch to it, then I threaded some jute strips which I repainted to camouflage it.
This was then given a light dusting of grout to make it look dirty.

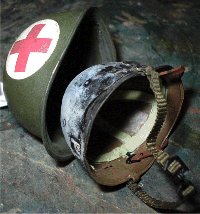
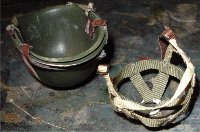
Medic Helmet
Below, is the bbi medic helmet taken apart, and I have just found
out that the outer bbi helmet shell is slightly smaller, than the DiD inner
shell. To get around this, I put the DiD shell into some boiled water to
make the plastic softer, and then pressed it fully into the bbi helmet. This is
shown with the third picture below, and in the process the canvas straps
came off which actually came in handy later. Another problem I found after doing
this is that the liner was not level to the edge of the outer shell. So to get
around this, I trimmed the inner edges with a knife and then sanded it to bring
it level with the outer helmet.
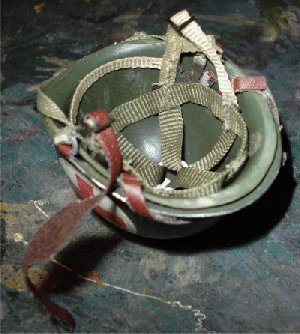
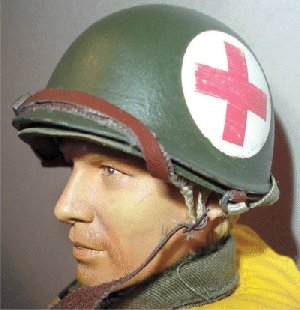
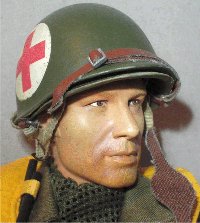
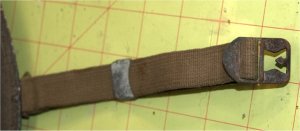
The next thing I had to do was to cut off the straps from the
inner shell and reposition them as shown above right, to make all of them level with the smaller
outer shell. Once these had dried, I then just put the canvas straps back into
the helmet and positioned them so that they looked right as below.
Helmet Scrim
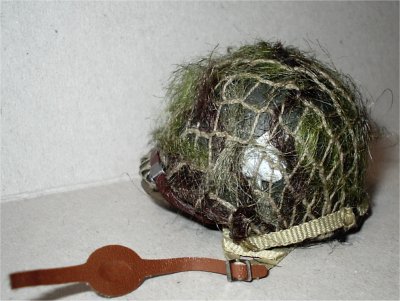
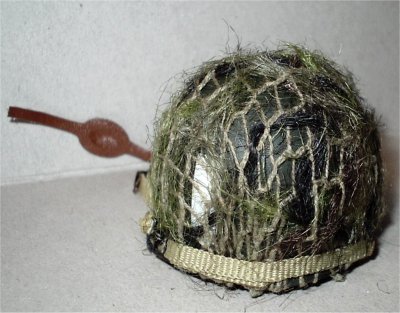
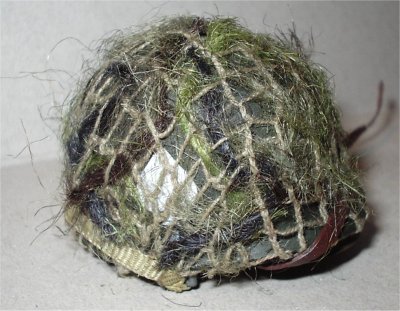
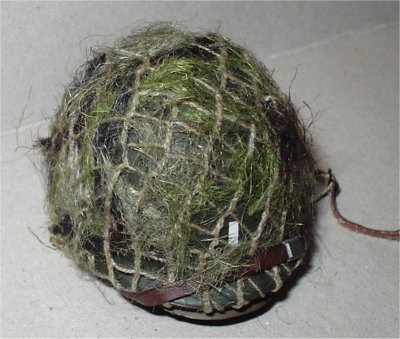
This is the helmet I am using for my Pre-Jump
paratrooper, and for this figure I wanted something different for the
helmet. So used some Jute thread that I bought some time ago from Opsgear, this
is just like a type of woollen thread. All I did to add the scrim to the helmet,
is thread it over and under the netting across the helmet. I have added some
more thread to the helmet since these pictures were taken. As want to partly
conceal the unit emblems on the side of the helmet.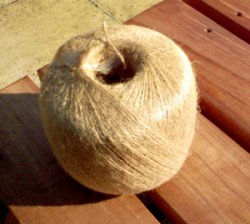
Then once happy with that, I used a pair of
scissors to cut partway through the Jute thread. Then I used my tweezers to
spread the threads about to get the effect above. The good thing about the Jute
is that it came in different colours, so I
can sort of mix and match it to suit myself.
The only problem is now that Opsgear have stopped
selling 1/6th items, I am going to have to look elsewhere for this material. One
of the options I am looking at is the full size material, and whether it can be
used instead.
Update
I found this
link about how to make full size Ghillie Suits -
Suits On that page they mention about Jute string as shown on the right, and
I wish I had found this page before. Because it is far easier and cheaper to buy
a large bale of the twine, and then dye or paint it myself.
Helmet Netting
A tip I heard about some while ago from
ActionMan but had never tried myself, was
about making some helmet netting out of a 1/6th scale string vest. I decided to
have a go at making this, because I have no luck finding a material that I could
use for the netting.
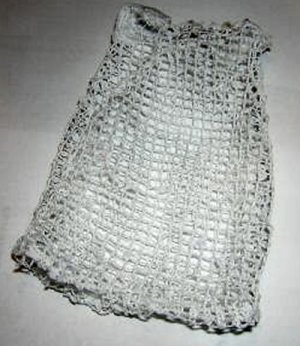
For this I found a couple of the British vests, as
the material is very similar to the netting that came with some of the DiD
figures. I then took apart the sewn edges and cut off the material for the
shoulder straps, so that I ended up with two halves as above right. With careful
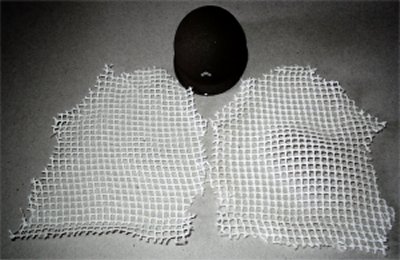
cutting and removing of the threads, I can get two helmet nets from one vest.
Colouring for the netting to lose the white
material can be done, either at the end or while you have the material as shown
below left.
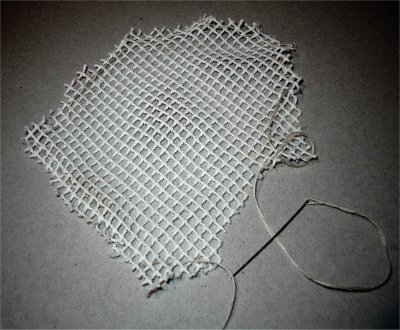
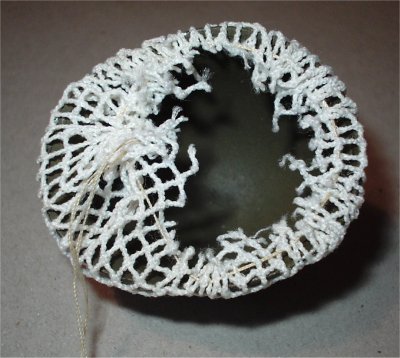
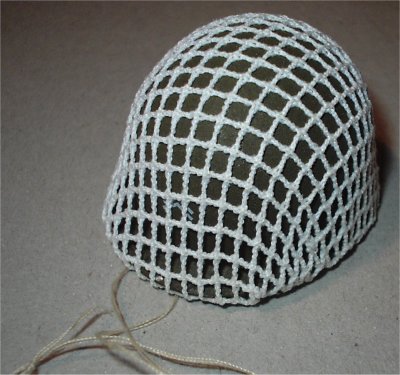
The next step is to thread a needle, tie both ends together to make it stronger and thread it through the
holes in the material. Making sure that you keep as close to the edge as
possible, as this gives you more material to use. Then get the helmet cover and
place the material over it and pull the thread slowly tight, as shown in the
middle picture above. You will have to move the material about to make sure it
covers the helmet shell, and that the threads are on the inside of the lip. Now,
tie the thread ends together (but not too tight) and you will have a helmet net
as shown above right. Now insert the inner helmet shell to trap the material
edges and thread inside, and you have finished.
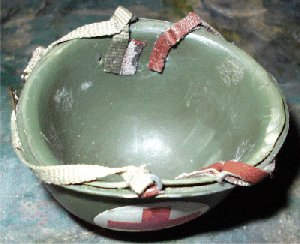
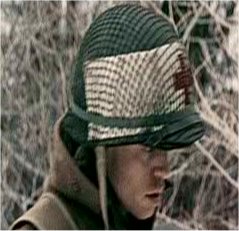
Medic Helmet
This helmet is a small adaptation based on a medic
helmet that was worn in the film I have called Saints & Soldiers, two
screenshots from it are shown below.
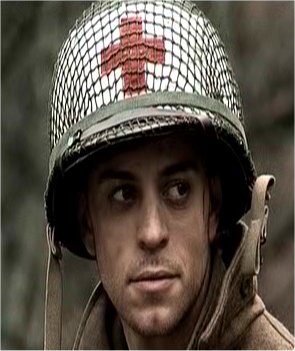
The helmet just consists of a DiD metal helmet
some netting I had spare and a medic armband, and all I did for this was place
the armband around the helmet and then pulled the netting over it to keep it in
place.
Helmet Images
These images below were very kindly supplied by
Paul (.308)
and I believe that they show close ups of the
helmet straps, helmet bales plus the helmet shape and liner of a standard
WW2 US helmet.
Helmet shell and liner above left, helmet straps
centre and right.
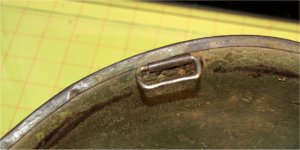
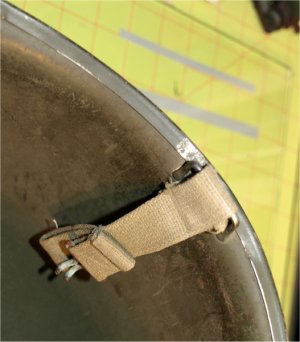
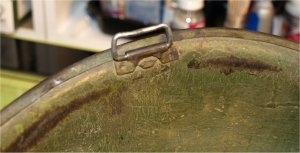
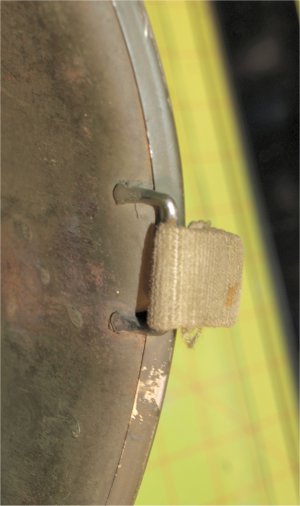
 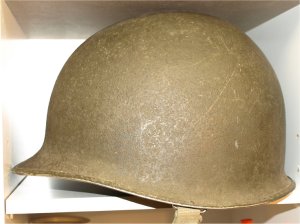
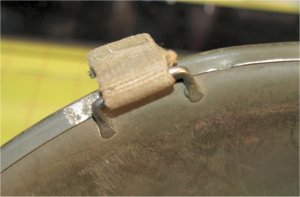
Helmet shells with images of the helmet
straps and helmet bales.
Many thanks to Paul (.308)
for
supplying the images above.
|
