|
Welcome
To My German Insignia Page.
This page is one that I have had a few people ask
me about and I never seemed to have the time to make it, so I have finally
decided to make the time and hopefully be able to help out some modellers in the
process. I only have the Ebner uniform at the moment with the one tunic badge,
but I am trying to get some others so I can display how to fit those.
Did Shoulder Tabs
Did Tunic Badges Toys City Shoulder Boards
Cuff Titles
Blousing Trousers
Belts
DiD Shoulder Tabs
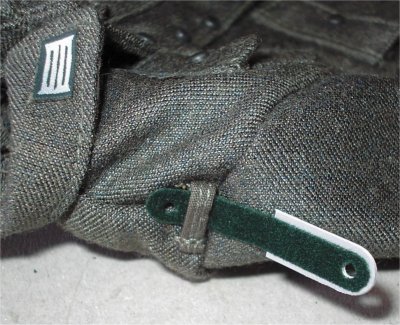
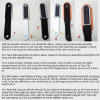
The shoulder tab in the pictures above are from
the DiD Hans Ebner figure and show the way that I have
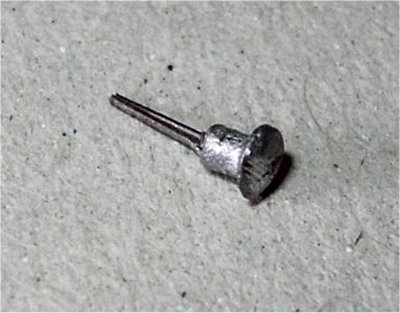
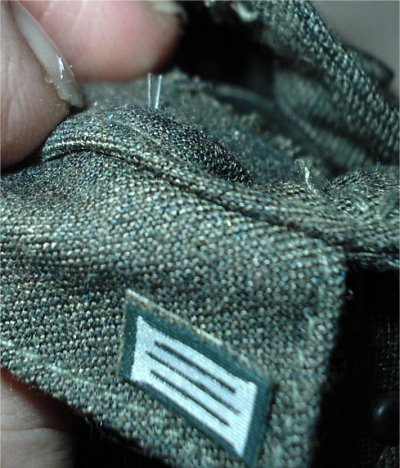
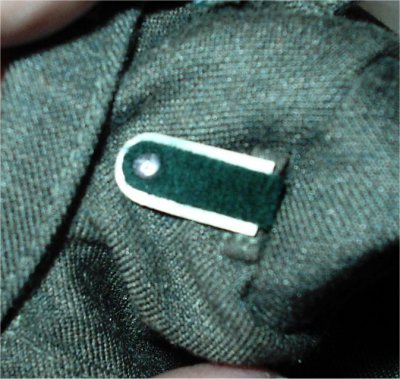 assembled them onto the figure's jacket, firstly I have put the fabric half of
the tab through the loop on the shoulder. Then I folded the other half of the
epaulette over the top of and lined up the holes for the pin, the middle picture
shows the pin itself which has two prongs on it, this is then pushed through the
epaulette holes and through the material.
assembled them onto the figure's jacket, firstly I have put the fabric half of
the tab through the loop on the shoulder. Then I folded the other half of the
epaulette over the top of and lined up the holes for the pin, the middle picture
shows the pin itself which has two prongs on it, this is then pushed through the
epaulette holes and through the material.
Note: Make
sure that when you do push the pin into the material, that you keep your fingers
out of the way.
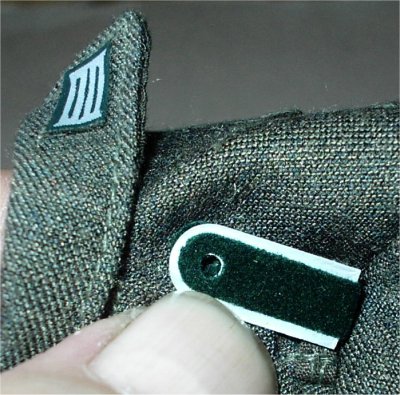
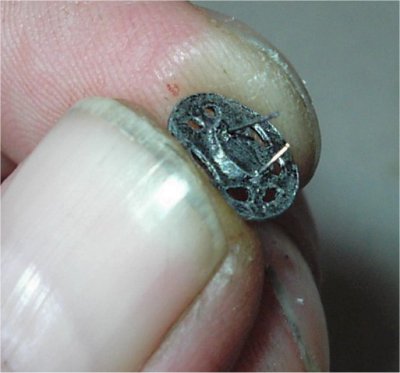
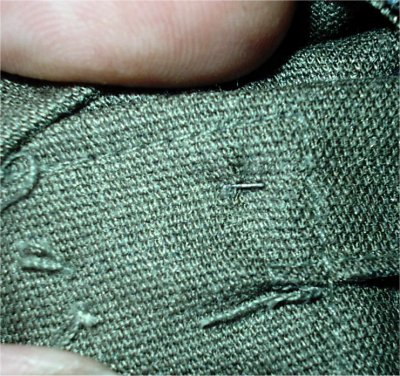
The 4th picture above right shows the inside of
the jacket with the pins sticking through, these are then just pushed flat onto
the inner material to hold the epaulette flat on the outside of the jacket, as
shown on the picture above right. I found that it is easier to use a knife blade
to separate the prongs and then push them flat, that way it saves on you hurting
your fingers.
Reizbar on the SAG forum
provided this information about the Dragon shoulder tabs.
The shoulder tabs are attached with a nut and
bolt after passing through a loop in the uniform.
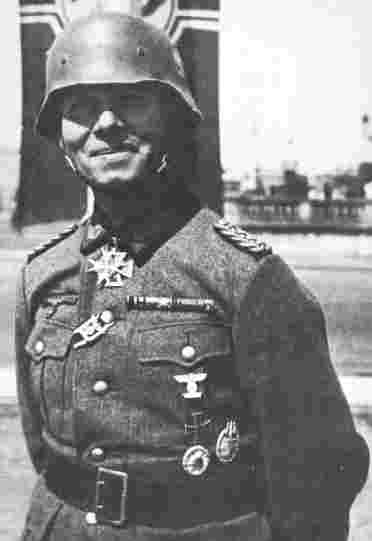
DiD Tunic Badges
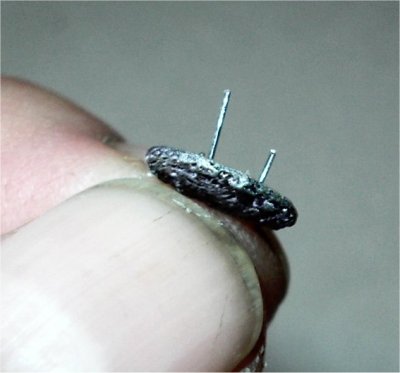
 This
is a DiD Assault badge for the tunic and I am very impressed with the level of
detail on it, as it is more in scale that
the one's that are offered by Dragon. Once again there are two pins on the
reverse of the badge that have to be carefully
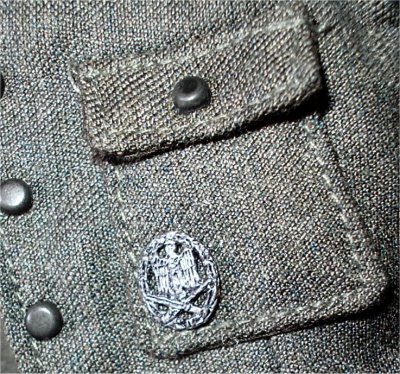
folded out as in the second picture above. The badge is then placed on the tunic
as the picture on the right and then the pins are pushed through the material,
on the inside of the jacket is a second flap of material which I moved out of
the way so that the smaller of the pins
showed through. These were again carefully bent flat on the inside to hold the
badge in place. Note: You may need to press
slightly hard on the badge from the outside, so that the smaller pin shows
through. This
is a DiD Assault badge for the tunic and I am very impressed with the level of
detail on it, as it is more in scale that
the one's that are offered by Dragon. Once again there are two pins on the
reverse of the badge that have to be carefully
folded out as in the second picture above. The badge is then placed on the tunic
as the picture on the right and then the pins are pushed through the material,
on the inside of the jacket is a second flap of material which I moved out of
the way so that the smaller of the pins
showed through. These were again carefully bent flat on the inside to hold the
badge in place. Note: You may need to press
slightly hard on the badge from the outside, so that the smaller pin shows
through.
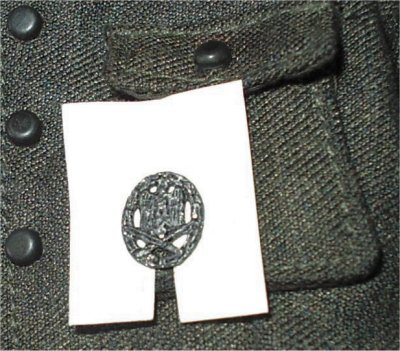
In the picture shown on the right, I have cut out
a small piece of paper and made a slot in it, so that I can slide it behind the
badge. The purpose for doing this is that once it is in place I can rub a pencil
lightly over the top of the badge This highlights the detail on the badge and
the paper stops the uniform from being discoloured.
With the Dragon tunic badges that I have used on
my figures, I found that the pins for going through the uniform material are
very big compared to the DiD one's. For these I have thinned them down slightly
by scraping them with the edge of a knife blade making a slight point on the
ends. I then made two small holes in the tunic material and pushed the badge
through them, I then heated a knife blade slightly with a candle and melted the
prong ends so that they kept the badge in place.
German Badge Information -
Badges
The pictures below came from
Tylers
Military Site


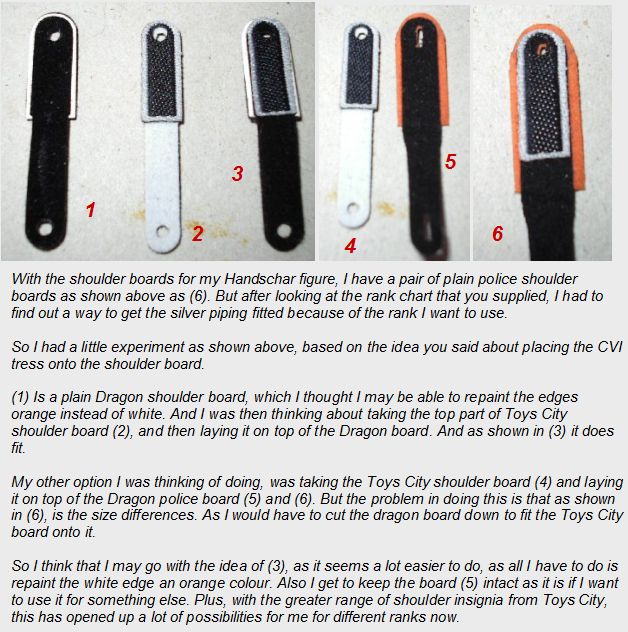
 Toys City Shoulder Boards Toys City Shoulder Boards
I had an discussion by e-mail with
Stephan about altering the Dragon German
shoulder boards, and from the information about how he changes the boards on his
figures. He gave me an idea about adding the top parts of the
Toys City
shoulder boards onto the top of a Dragon shoulder board. And in the picture on
the right, I have tried it and it does work as the Toys City shoulder board,
fits very nicely onto the top of the Dragon board.
So now if I paint the Dragon shoulder board edge a
colour I need, such as Blue, Green, Yellow, I can possibly then have any of the
Toys City insignia ranks on top.
Cuff Titles
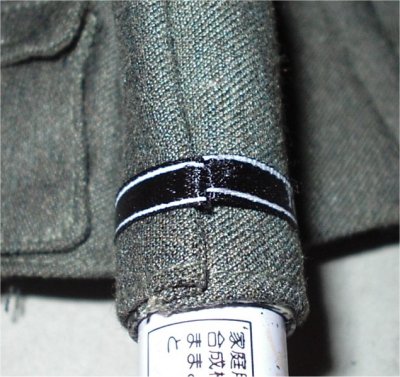
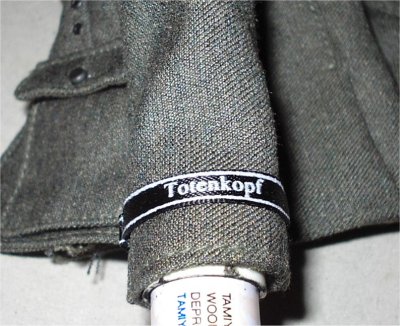

With fitting a cuff title to a German tunic, I
have to admit that I have very limited experience in actually doing this, and my
way that I found of fitting them may be different to other modellers. The title
in the pictures above I believe it is a DiD one but from what figure I don't
know because I found in the bottom of one of my spares boxes. In the first
picture above the title had already been sewn into a loop for me, but with my
figure I have usually place a paint pen into the sleeve to fill it out, wrap the
title around the sleeve fairly tightly and then put one stitch into the title
where the ends join on the sleeve seam. Note:
Making sure that the words line up with the shoulder tab as in the third picture
above.
I then put a few more stitches into the title to
hold the ends together, once I have finished that I cut off the thread and turn
the title inside out to remove the long left over pieces, cutting close to the
stitches to keep the join as small as possible. Once I am happy with that and
the join is in the seam and the words are centred, I then get some white glue
and a fine paintbrush, I then slide the title onto the sleeve and put some of
the glue under the title and press down to get it to stick. Once I have done
that all the way round, I get a small weight like a book and rest it onto the
join in the title to press it into the sleeve seam. I then leave that overnight
with the pen in place to set and I have one title fixed to the sleeve.
Another method that I have heard about but not
tried, is for a small cut to be made in the sleeve seam and the title wrapped
around the arm and the ends tucked inside the seam cut, which is then sewn back
together to keep the title tight and in place.
Market Garden on the SAG forum
provided this information about the cuff titles.
As for the cuff titles, most of them were
placed 15cm from the edge of the sleeve, or 2.5cm at 1/6th scale. I usually sew
the cuff titles on, so that they will fold/bend with the fabric of the sleeve
and give a more realistic appearance. I 'dry' fit the cuff title first, inside
out, and sew the ends together, creating a 'tail' that is ironed back out of the
way and trimmed if necessary so that no part of the 'tail' is visible when
turned right side out. I then use a very small basting stitch along the outer
band of black to secure the cuff title to the sleeve at the 2.5 cm mark.
Reizbar on the SAG forum
provided this information about the cuff titles.
I'm not sure what the exact distance from the
end of the sleeve to the cuff title is, I mostly just eyeball it from pictures.
To attach them I use one of my wife's lipstick containers and put it into the
sleeve and then use Elmer's white glue to secure it in place.
Pangaea95 on the SAG forum
provided this information about the cuff titles.
For the majority of insignia I use two sided
hemming tape, cufftittles, shoulder patches, breast eagle, collar tabs, but
basically you can make your own peal and stick insignia from any sort of
cloth/synthetic patch etc.
Fabritac also comes in handy, not just for insignia but also for gluing on
medals, secret is, you apply some Fabritac on the areas where you cut the pins
off the back of the medal, then carefully position on uniform without pressing
down on it, lay the medal in place and let it sit, the glue will only grab the
surface of the cloth, and won't soak in. The reason I do this is so I can pull
the medal off if I wish, and there will not be any residue left from the glue.
Blousing Trousers
With the blousing of trousers on my figures, this
is another idea that I use that I sort of found out about by accident. Because
my son was being treated by an orthodontist and he had to use some braces on his
teeth, and in the course of this treatment he had to use some tiny rubber rings
to hold the brace in place. And it was only when I found yet another one of the
rings on the floor whilst I was kitbashing, did the thought occur to me about a
use for them.
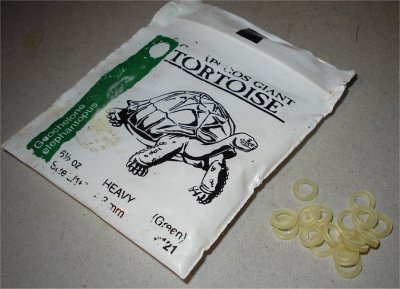
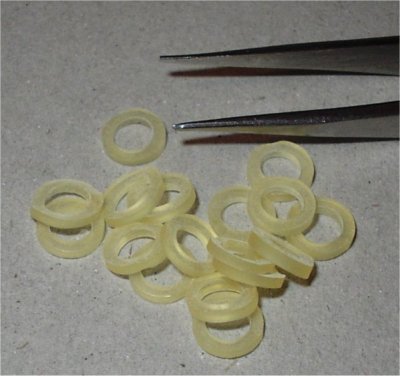
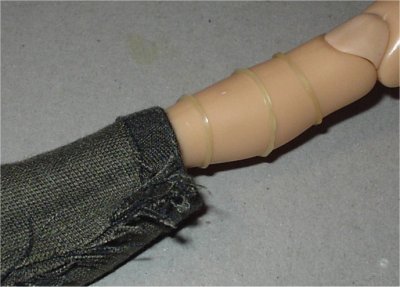
Note: The
order in which I do this is the rings go on the leg first, the trousers as
normal over them and then the boots are put on after the trousers are pulled
back up. The pictures above are the rings
as they came from the packet, the middle picture shows them for a size
comparison with my tweezers. With these rings I put three of them on the leg in
case one breaks.

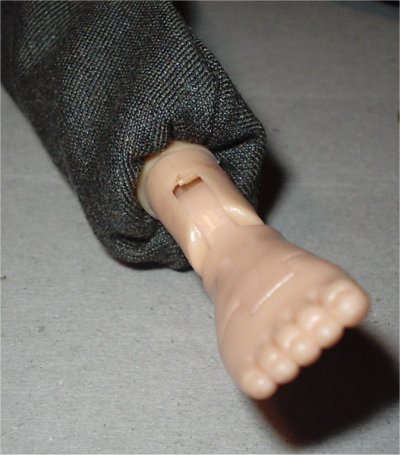
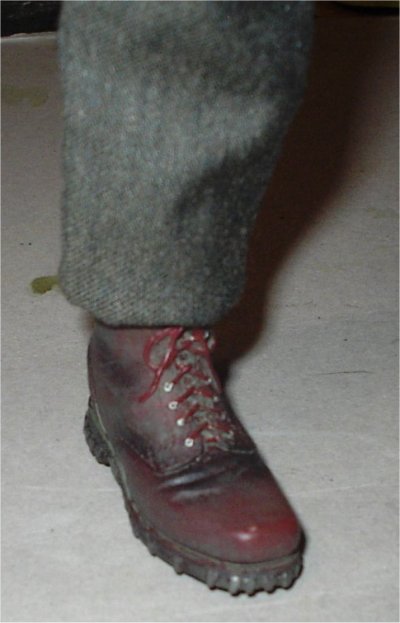
In the picture above I have pulled the trouser leg
down so it is inside out on the leg, I then put two of the rings over the
trouser and then pull the trousers back up as normal. Once that is done the
trousers now look like the middle picture, and the final picture above shows the
trousers bloused out over the boot top.
Pangaea95 provided this
information about blousing trousers.
Getting the pants to blouse right over the
boots/gaitors, before putting the boots on I'll tape the bottom of the pant legs
to the figure, just below the top of where the boot or gaitors/leggings would
come to on the figures leg. Then you can put the boots and gaitors/leggings on,
and blouse the pants over without them coming untucked.
Belts
Pangaea95 again provided this
information about belts.
For the equipment belts, adjust belt size (new
pattern) push belt back through buckle, careful not to lose little pin, loop
belt through to size, then put pin back in before pulling tight, you may want to
try a little larger pin than used as if you pull to tight the buckle will slide
off. Next put the gear on the belt, get in position then put on fig, then put on
the support straps starting with the rear center, clip front straps to ammo
pouches on either side of front, and adjust. When ammo pouches aren't used, you
can clip to belt, or use support belt loops with the D rings to attach to. The
assault frame you would attach your gear first, messtin, zelt, etc, after you
would attach to the D rings at the top of the support (Y) straps, and with the
side utility straps passed under the arms from the front. Tweezers are an
essential tool!
If you get into uber detail like I do, you can use the tunics with the little
belt support hook holes, get some of the support hooks from Soldat 1 or Alfonse,
and use them in place of, or in conjunction with the Y-straps. I get them to
stay in place with a piece of tape on the backside, when the tunic is on no one
sees the tape.
Putting the uniform on is pretty much the same as any figure, I like layering
the clothing which helps things to blouse nice, as well as helps to cover joints
when bent, the little extra padding can help smooth an elbow of knee out.
I would like to say thank you to all of the
modellers that have helped with the making of this page.
|