|

Welcome
To My Gebirgsjager Ropes & Knots Page One
This page and page 2 were made to try to condense together some
of the information I have been able to gather, regarding how to tie the
knots and the harnesses as used by the Gebirgsjager troops in WW2.
Note: I have put the information
here for my fellow modellers to use. Please note that the original ideas for
this were not mine, although
I have used them with my
Mountaineer figure and I just wanted to pass on the details.
Please note:
That I found the 1.5mm scale
polyester rope from
Takelgarn Modellbau is the best size for the chest harness, and the 2.0mm
scale rope is best for the larger main climbing ropes with my figures. Also the
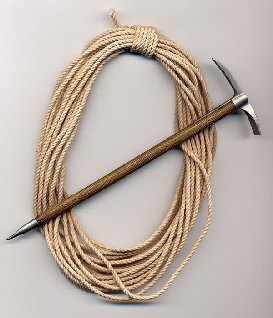
0.4mm scale rope I used to thread through the hammer end.
Waist & Shoulder Harness Rope Assembly
Belay Rope Assembly
Waist &
Shoulder Harness Rope Assembly
Note: This is
the first part of a tutorial which was put together by (Patrick)
Heeresbergführer, and he
has very kindly allowed me to use it here on my webpage. Patrick's comments are
below in italics.
1.
 2. 2.
 3. 3.
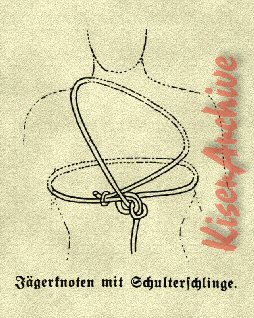
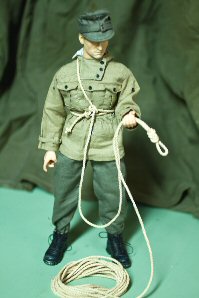
1. In this tutorial, we'll start off with a
standard way of tying into a rope for rock climbing used by the German
Gebirgsjägers...though this is a fairly standard technique used in
mountaineering until the 1950's. This can be used with a 2-man roped climbing
team...climbing vertical rock, or by a 3-man roped team when crossing snow
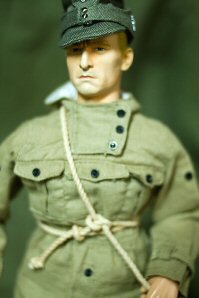
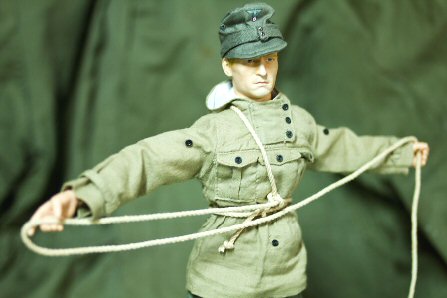
fields and glaciers. This is called a "Jägerknoten mit Schulterschlinge"
(bowline knot with shoulder sling).
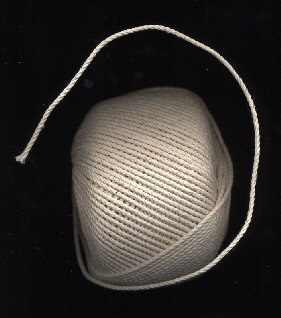
2. & 3. For 1/6th scale climbing rope, I have found
that twisted cotton string dyed in tea makes the best. A standard period
climbing rope was 10-12mm in diameter and 30-40 meters in length.
4.
 5. 5.
 6. 6.

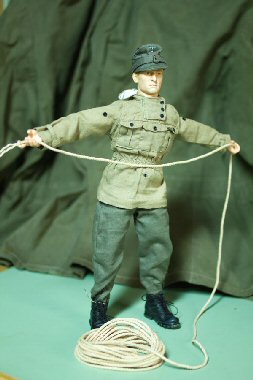
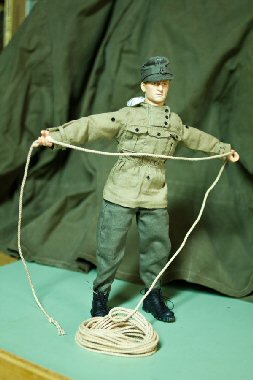
4. &
5. Now let's try this in 1/6th
scale...first take your scale rope and draw out two arm span lengths that will
be needed to make the "Jägerknoten mit Schulterschlinge."
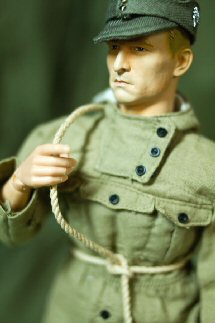
6. Take the rope and bring it around the figure's waist.
7.
 8. 8.
 9. 9.
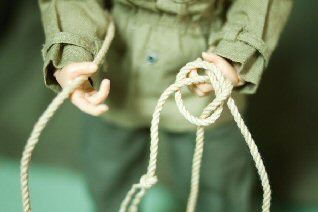
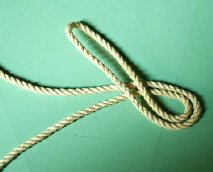
7. To tie
the "Jägerknoten," first make a loop on the portion of the rope that goes to the
main bulk of the climbing rope. 8.
Now take the end of the rope...the rabbit...and bring it out of the hole, around the
tree, and back through the hole...old boy scout trick to remember how to tie
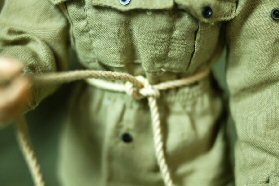
this! 9. Tighten
up the knot around the waist.
10.
 11. 11.
 12. 12.
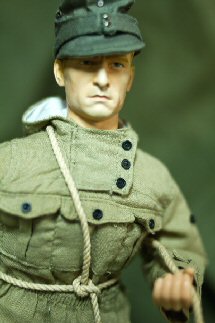
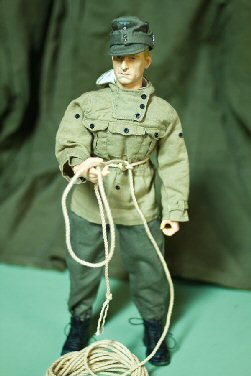
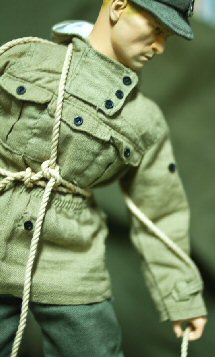
10. Gather
up the loose end of the rope. 11.
Bring the end of the rope over the right shoulder...
12. and under the left arm.
13.
 14. 14.
 15. 15.
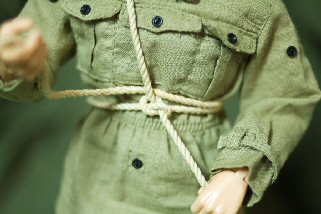
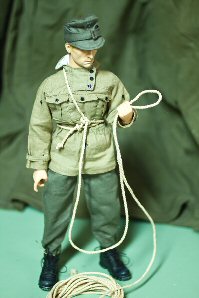
13. View of
the back. 14. Slide the end of the rope
under the shoulder sling... 15. And tie off
the end of the rope. This completes the "Jägerknoten mit Schulterschlinge." Now
your Gebirgsjäger is ready to..."climb every mountain, follow every
dream"...woops, dreaming of the Alps again!
The original forum post by Heeresbergführer
for this tutorial is here -
Mountaineering
Belay Rope Assembly
Note: This is
the second part of the tutorial was put together by (Patrick)
Heeresbergführer. And this has helped me
immensely with my mountaineer kitbash. Patrick's comments are again below in
italics.
Next up on our schedule is how to set up a top
belay position. But first, here's a little info from Wikipedia on "Lead
Climbing:"
In lead climbing, one person, called the
"leader", will climb from the ground up with rope directly attached to his or
her harness (and not through a top anchor) while the other, called the "second",
"belays" the leader by feeding out enough rope to allow upward progression
without undue slack. As the leader progresses, he clips the rope through
intermediate points of protection such as active cams, or passive protection
such as nuts [In the 1940's only pitons were used as protection]. The leader
also may clip into pre-drilled bolts; this limits the length of a potential
fall.
Because the climbing rope is of a fixed length, the leader can only climb a
certain distance. Thus longer routes are broken up into several "pitches"; this
is called "multi-pitching". At the top of a pitch, the "leader" sets up an
anchor and then belays the "second" up to the anchor; as the "second" follows
the route taken by the "leader" she removes the equipment placed along the way
in order to use it again on the next "pitch." Once both are at the anchor, the
"leader" begins climbing the next pitch and so on until the top is reached.
In either case, upon completion of a route, climbers can walk back down (if an
alternate descent path exists) or rappel (abseil) down with the rope.
1.
 2.
2.
 3. 3.
1 .So,
the leader has made it to the first pitch. Now, he sets up an anchor point to
belay the "second." First, he measures out an arm span of rope...
2.
&
3. ...and gathers a loop in his
left hand.
4.  5.
5.
 6. 6.
 7. 7.

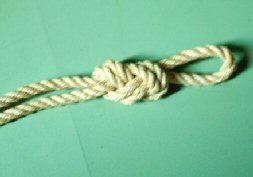
4.
&
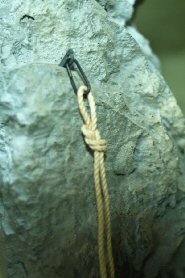
5. Then he ties a "figure 8" knot
to fix the loop. 6.
&
7. Now the rope is ready to be
clipped into the anchor point...
8.  9. 9. 10. 10.
 11.
11.
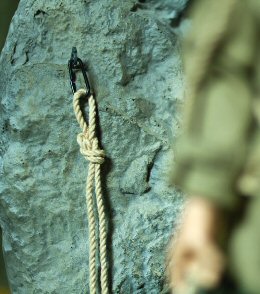
8. & 9.
Which is usually a piton and a
carabiner placed into the rock behind the leader.
10. &
11. With his anchor set, the leader
can belay the second...
With these tutorials I have now been able to
complete my mountaineer kitbash, and I still cannot get over how easy Patrick
has made it look.
Note: Because of the size of this project and to help the pages load
faster, I have had to spread the information over two pages.
Continued on Page Two -
Knots Page 2
Scale model rope suppliers
Takelgarn Modellbau - For the 1.5mm and 2.0mm polyester scale rope (best
scale rope)
Cornwall Model Boats - For the Hemp rigging thread similar to the type used
by Patrick
This page has been made with the very generous
help of Heeresbergführer (Patrick
Kiser)
And I would like to say thank
you for all of the
original ideas, and for allowing me to use his pictures here.
| 