|
Welcome
To My DiD Lift Dots Repair Page.
I have made up this page to try to demonstrate how
I have had to do a repair, to the excellent DiD lift dots buckles on the recent
US figure releases. This came about after I wanted, to have the Charles
Winstone ammo belt on my Bayonet figure filled with rifle clips. And it was when
I was doing the clips back up that the little pip broke off, so this is how I
went about making a repair to them.
Note:
Please read this page fully, before you attempt the repair, as I have placed some warning notes below.
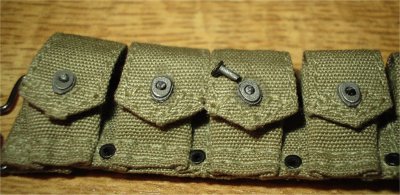
This is the DiD Charles Winstone ammo belt that I
intend to use on my figure, and in the picture below you can see the three lift
dots that I have had to repair (first two left of centre and first on the
right).

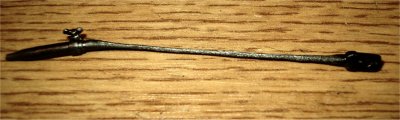
The picture above left shows the piece of
stretched sprue, that used to make the rivet for the lift dot buckle in the
above picture right. To explain how I made the thin strip of plastic above:
How to stretch sprue
Stretching Sprue
Get a piece of round sprue, these are the plastic
frames that hold the parts for model construction kits. Get a source of heat, like a candle or a lighter, light it and
hold the sprue about one and a half inches above flame in horizontal position.
Hold the sprue above the flame about half way along, the trick is to not have it
too close, or leave it in place for too long. After a few seconds the plastic
will start to bend, remove from the heat source, and grip the sagging end and
immediately start to pull it apart very slowly. Applying steady pressure until
you have the plastic as thin as you want, if you pull too hard, it will break
and curl up, which is not what we want.
What we need is a thin long strip of plastic as
shown above, also as the sprue cools it will become more difficult to pull. Keep
up the light pressure on the sprue, and I gently blow on it to speed this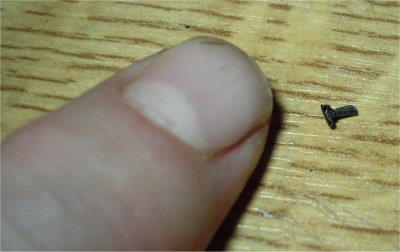 process up. Once I have the sprue at the right thickness that
I wanted for the buckle, I then cut it to a length of about 3/4" long (20mm)
which is slightly over length for what I want, I then apply a little bit of heat
to one end of the piece of plastic. Just enough for it melt slightly, and while
still warm I press the heated end down onto my workbench. This flattens out the
end to make the head of the rivet.
process up. Once I have the sprue at the right thickness that
I wanted for the buckle, I then cut it to a length of about 3/4" long (20mm)
which is slightly over length for what I want, I then apply a little bit of heat
to one end of the piece of plastic. Just enough for it melt slightly, and while
still warm I press the heated end down onto my workbench. This flattens out the
end to make the head of the rivet.
The finished plastic rivet can be seen in the
picture right, to give you an idea for the size of it. I then take out the
broken white metal rivet from the inside of the ammo pouch, and push the new
rivet through the hole in it's place.
Note: This
where you have to be careful doing this, because to close the flap for the ammo
pouch you have to put the 'spike' of the rivet through the other half of the
lift dot connector. Because as I found the outer half can break off from the
material, as it is not very well glued onto the fabric.
Note: So make sure when you put the 'spike' through the top half of
the lift dot connector, it does not fall off. Once the 'spike' is
through the eye of the top part, I then cut it down slightly as I intentionally
made it too long, and
then applied a gentle heat from my lighter flame to 'mushroom the 'spike' end to seal the ammo pouch
closed. All that is left for me to do now, is just touch up the head of the
'spike' with some Gunmetal paint, and it should look just like the others.
Note: If you
do use the heat method to seal the lift dot shut, make sure that the flame is
not placed to near to the ammo pouch itself. You could also cut the 'spike' to length slightly
over the top lift dot connector, and use a little dab of superglue to keep the
connector closed.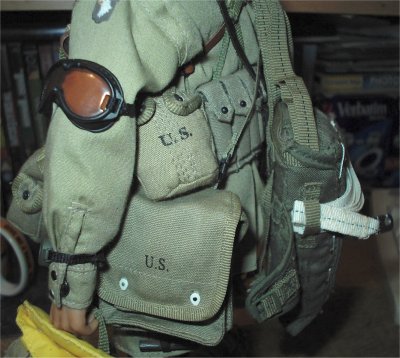
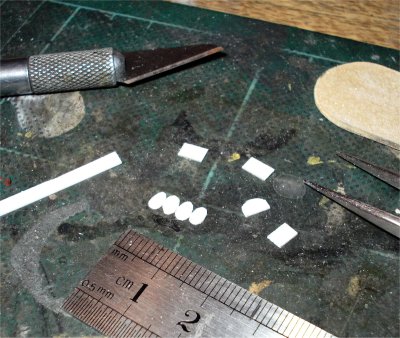
Update on how I made the Lift
Dot lock piece
In the picture right, it shows how I have
had to make my own lift dot lock tabs. I had to make these because when I was
adjusting some of the other equipment on this figure, I found that I had lost one of them. And
as I only have enough CVI parts left for the other equipment, I had no
alternative but to attempt this.
To make them, I used a spare DiD lift dot which I
placed next to some thin plastic sheet, which I cut to the correct width and length
as in the picture below left. I then held the piece in my tweezers, and shaped
it with some sanding pad centre picture below.
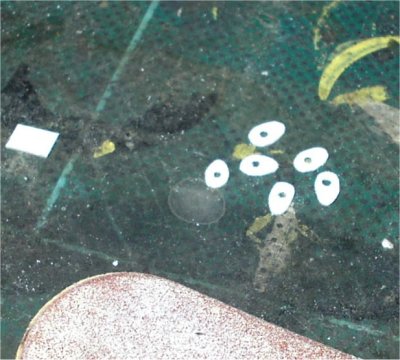
With the flat lock part made, I then made a hole in the
centre for the inner peg of the lift dot, and pressed it in place. I then cut
the peg part to length, and used a flame from my lighter to make the end round
off to lock the bag closed. I just have to paint them with some Gunmetal paint
to finish them off.

| 