|
Welcome
To My Albert Ross M42 Uniform Page.
This is my third page based on the DiD Albert Ross
figure, this boxed figure amazed me when it was released because of the amount
of pieces that have been supplied with it. I have a
review page which I made up
with some excellent help from other modellers, which I feel will help us all
with this model. With this figure I am going to make him into a pre-jump US
paratrooper. Note: The problem that arose
with making this figure, is that now that he is finished I have the equivalent
of a DiD Soldat 2 airborne paratrooper.
Headsculpt
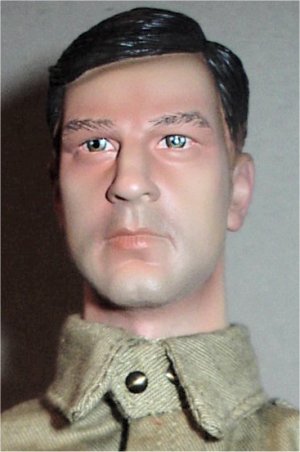
The headsculpt for this figure had the same
treatment carried out on it that I did with my Class A figure. The only extras
that I have tried to do to it, was that I painted some Flesh Tint acrylic paint
onto the nose and cheeks to add highlights, but this was lost when I did the
drybrush of the face with some cream pastel chalk.
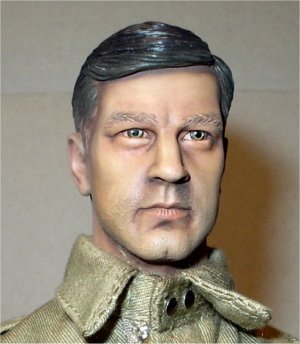
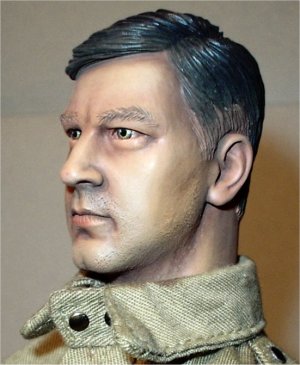
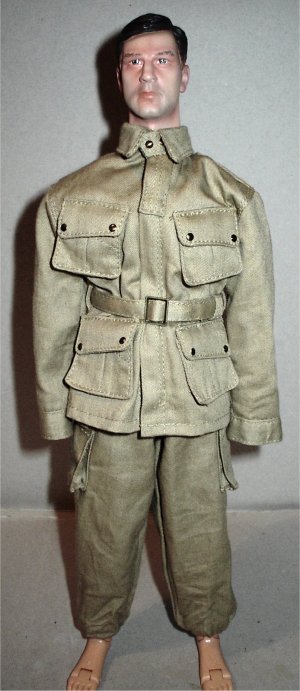
M42 Uniform
This section is about how I do my first steps to
make sure that the M42 uniform looks right on all my figures, especially with
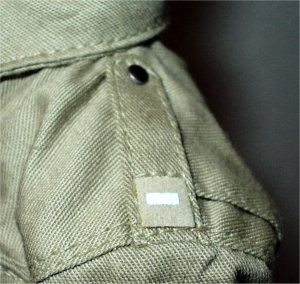
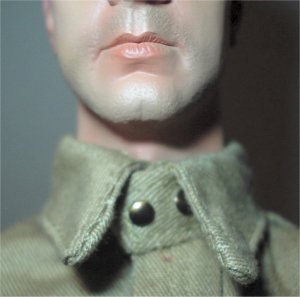
the trademark baggy trousers for the US paratroopers. In the last two pictures
below it shows the shoulder and collar detail of the uniform, the shoulder rank
insignia I am not sure of as I have heard that it is not correct.
Note: The collar is very tight if you wish
to fasten the clip, I found that by pushing on the loop side with some tweezers
and pulling on the hook side with my fingers the collar can be done up.
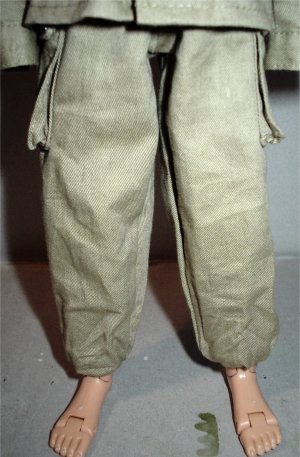
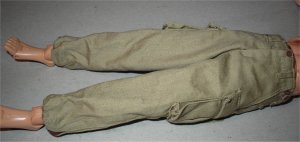
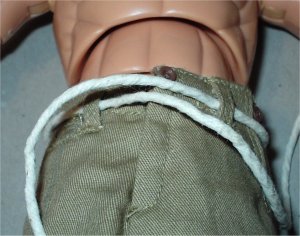
This is how I have made sure that I have both the
trousers ready to blouse over the boots, plus I have also made sure that the
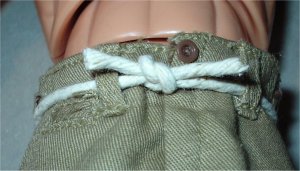
waist is tight so the trousers stay up. I have found that with the waistbands
and how loose they can be on most 1/6th figures, I usually find that by
putting some string thorough the waist loops and tie it off tight I can keep
them in place. Note: Another thing I do with
the waistbands is, I cut off as many of the buttons as I can and keep them in a
small bag as spares, since they won't be seen plus it is almost impossible to
get replacements in this size.
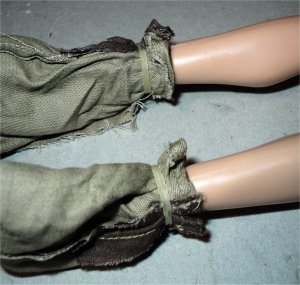
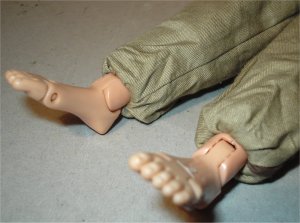
The pictures above show in the top row how I have
again used the small rubber rings as shown on my
Blousing
section, to make sure that the trousers hang correctly over the boots.
Note: With my US paratrooper figures I like
to make sure that the rings on the inside of the trousers legs are as low as
possible, this way when I fit the boots and slide the trouser legs up to the
tops of the boots. I get a nice baggy look to them and lots of nice creases as
well. With the string tied around the waist as above (which won't be seen) I
don't have to worry about the trousers falling down.
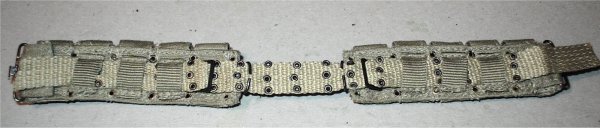
.30 cal cartridge belt
I remember reading somewhere on the Sixth Army
Group forum, about how someone changed the belt that came with this cartridge
belt for the other standard waist belt. So I got to wondering if I could do it
as well? Mainly because I am always thinking how I can make my figures equipment
look different.
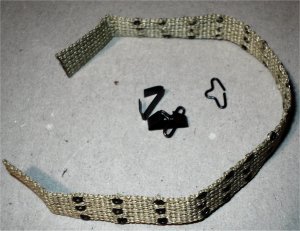
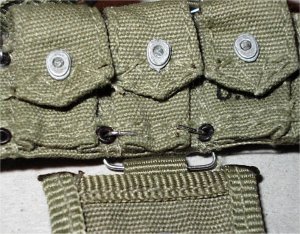
The first thing I did was to take the normal belt
apart as above left, I then took out the strap from the cartridge belt and
swapped them over, it was a bit of a tight fit to get the belt in place with the
grommets but as above right it can be done.
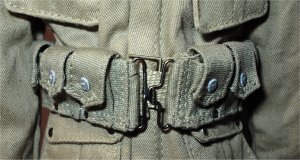
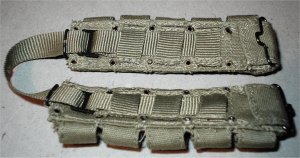
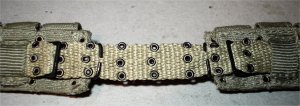
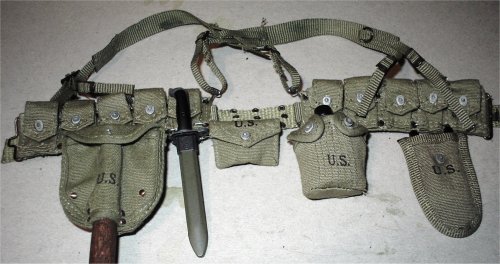
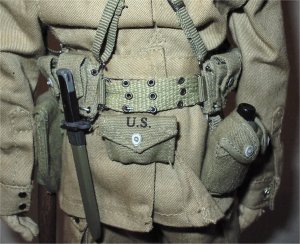
The pictures above show the belt in place which
has the ends overhanging, these will be folded over later back into the first of
the three canvas straps for the cartridge pouches. The final picture above show
the belt in place which I will adjust so that I can hang the first aid pouch in
the middle at the back.
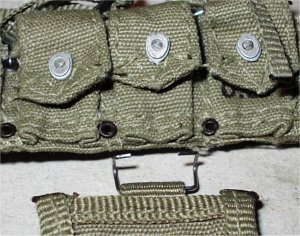
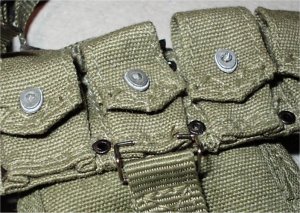
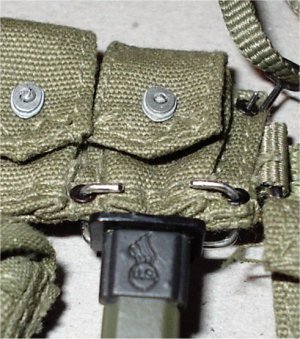
The first two pictures above show how the clips
for the belt equipment are too small to fit onto the .30 cal ammo pouches, the
third picture above shows the wire cutter pouch with a new clip I made from 30
amp fuse wire. The pictures below show the bayonet fitted to the belt, the other
pictures are of all the equipment attached.
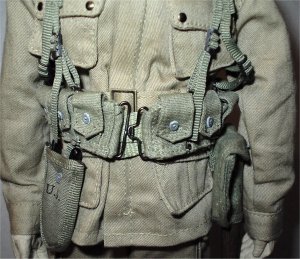
Making a DiD Soldat 2 Figure
After completing this figure I again realised why
I seldom make fully loaded paratroopers for my collection, as I had almost
forgotten just how much they can really try my patience. To make this figure I
have to build it up in layers with the first thing I put on it was the shoulder
webbing and the ammunition belt, over the top of this I then put the shoulder
holster.
The gas mask case came next, the top strap I
adjusted out almost to the full length so it will go around the figure's waist,
this was then adjusted for tightness, the bottom strap was put around the leg
again adjusted for tightness.

Over the top of these items I then put the GP bag
over the shoulder, which is on the left hand side as the figure is facing you,
and the despatch bag was placed on the right hand side again facing you, both
were adjusted to sit right against the belt equipment. I also fitted the musette
bag onto the shoulder webbing straps. Note:
The straps on the musette bag I found were too short for what I wanted to do
with it hanging down in front, so cut them off and replaced them with some
longer webbing material. These were then adjusted so that the bag would sit
lower down under the reserve parachute.
Note: I don't
have a photo of this stage as I may have deleted it, during the photo session.
Although the straps can be seen in the centre pictures above. The parachute and
reserve that I have use for my figure came from my last boxed Corbin Black, the
instructions on how to fit this are on my
Jeb parachute page.
Important Note: The only parachute straps
that need to be fastened are the centre clip above and the leg straps, as you
still have to fit the Mae West vest yet.
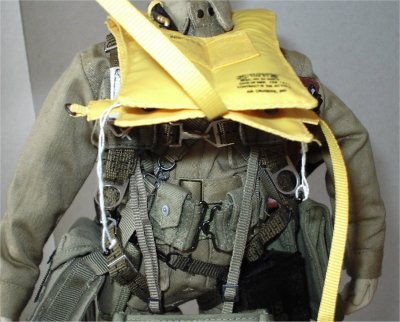
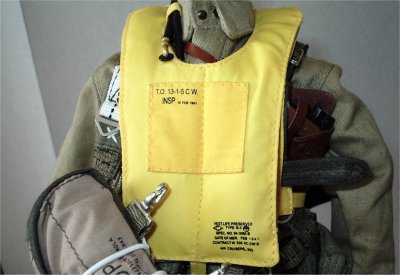
Note: The vest
I used for this figure is from Dragon as it has the inflation pipes, unlike the
DiD vest which has them missing
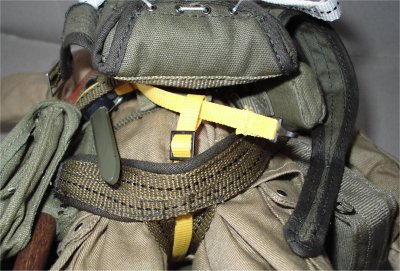
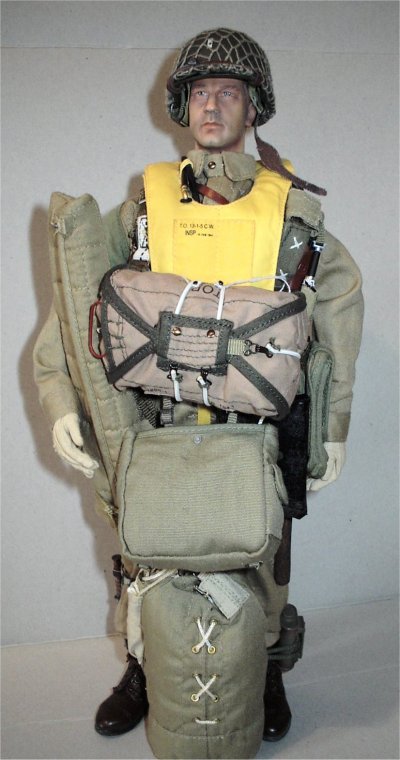
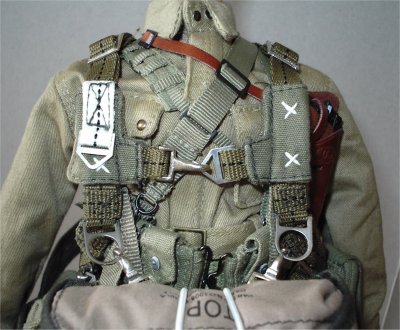
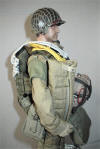
This I feel is the most stressful time that can
come from this hobby, because the Mae West vest has to be placed over the head,
the top strap has to fed down the back of the figure under the rear parachute
straps so it hangs down to connect up with the waist strap. The centre waist
strap has to go over or around the belt equipment, under the parachute side
straps and connect up with the strap loop from the neck. Also you have to bring
up the lower strap loop through the legs, through the two parachute straps as
shown in the middle picture above, under the main parachute bottom strap, this
again has to allow the centre waist strap to go though it to hold it in place.
Note: Some
adjustment may be needed on the top and bottom looped straps to get the centre
strap to go through them. In the final picture above I have connected up
the centre strap with the other side of the vest.
Important note: Don't pull too hard on the straps as they are only
plastic and they can break, if the strap will not reach make sure that you have
gone under all of the belt equipment as this can cause problems. If necessary
undo the centre vest strap and put it under any equipment or parachute straps to
give you more room.
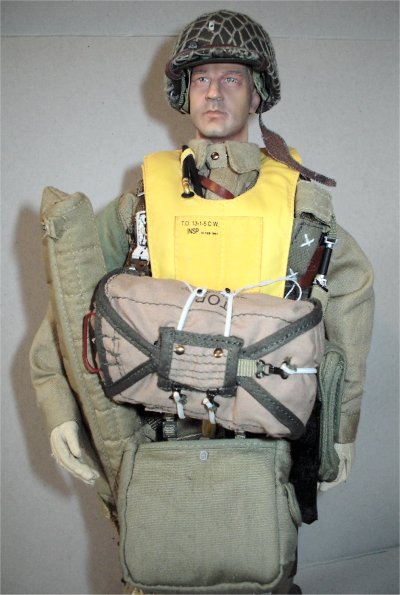
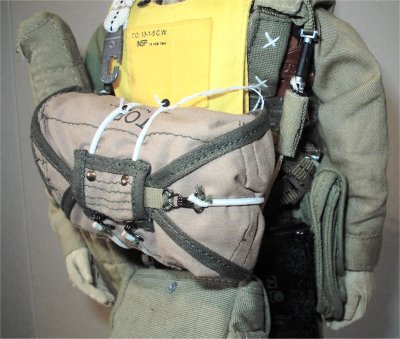
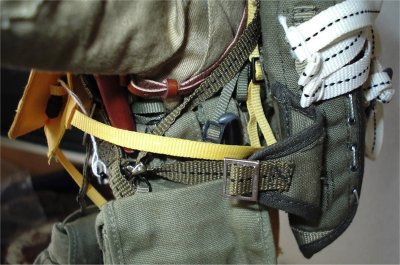
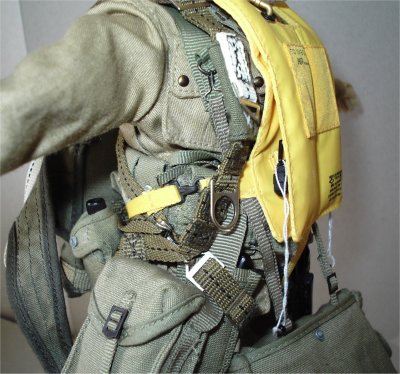
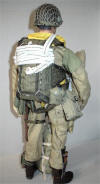
The last strap that needs to be fastened on the
parachute is the belly band as shown below, it is here that my patience really
started to wear thin. Note: Because after I
have done some research on how the Mae West vest was worn, I found out that if
the straps are placed over the vest then it cannot be inflated in an emergency.
So the centre lock and the belly band straps have to be put on under the vest.
For these steps with all of the other straps fastened, I pulled the band forward
and placed the reserve chute loop through it as shown above left. The belly band
was then threaded though under the vest, over the belt and parachute straps
until it came out the other side as in the centre picture below.
Note: Make
sure that both sides of the belly strap are under any of the belt equipment, as
this can affect how much strap you have left to fasten into the buckle. Also you
may find as I did that there may be only be a little bit of the strap left to do
up, just re-adjust the parachute slightly also the straps and you should have
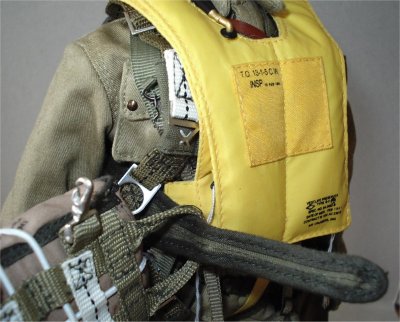
enough to fasten the belly band. The only other thing to do was to connect up
the reserve chute hooks to the main parachute webbing, and the figure was almost
finished. Note: I also made sure that the
white cords from the Mae West vest were attached under the elastic on the
reserve parachute, as these are used to inflate the vest if needed.
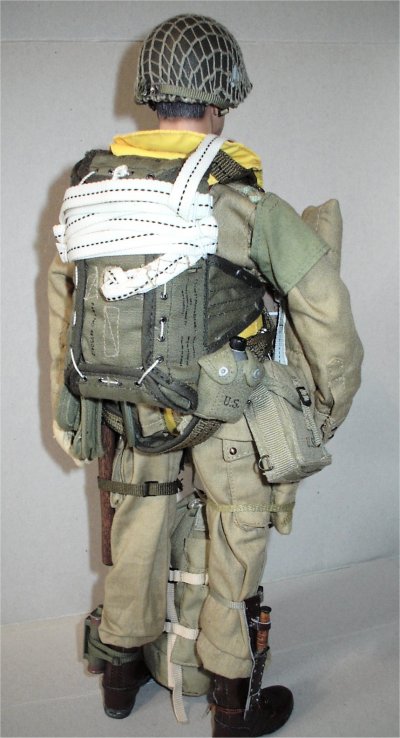
Remember that the belly band
has to go under any belt equipment such as the water bottle and the shovel.
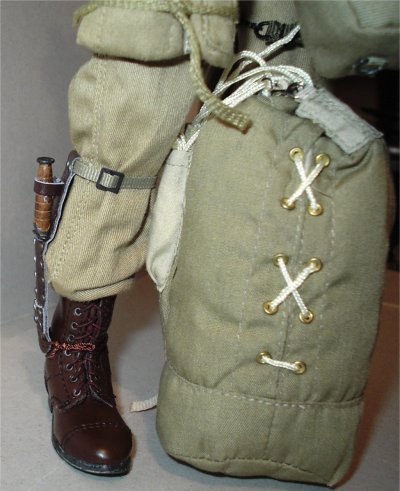
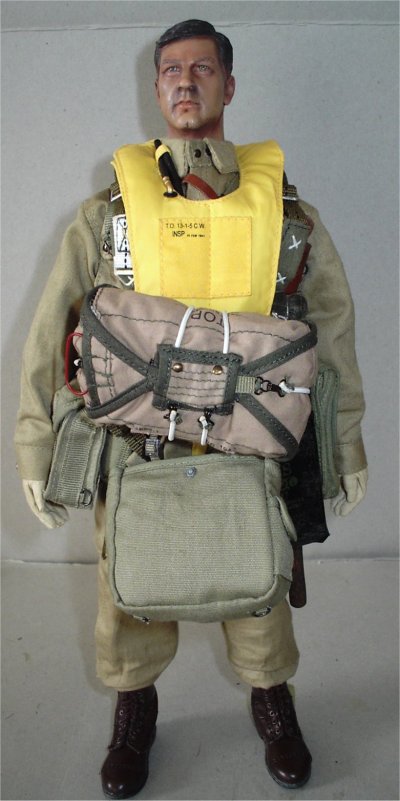
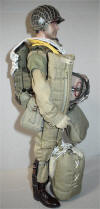
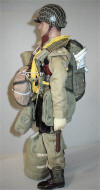
Once I had everything fastened and connected it
was just a case of adding the final pieces to the model, on the shoulder I added
a gas detector brassard, a rifle in a drop case, a knife and Hawkins bomb to
each leg and a Soldat 2 leg bag. The helmet is from DiD with a spare net
covering on it, the insignia is a pair of water slide decals from CVI.
Update
I have been supplied with the following excellent
information from Kevin, courtesy of the
Screaming Eagles Re-Enactment
group, and I would like to say a very big thank you to him for the details. As
he has answered a lot of my questions that I asked of the group, regarding how
the equipment was worn by the soldiers and I just had to pass it on to my fellow
modellers. Note: A very interesting part of
the text below is about how the Mae West vest was worn if you are left handed,
this has surprised me as I have never thought about that before, and I assumed
that the vest could only be worn one way.
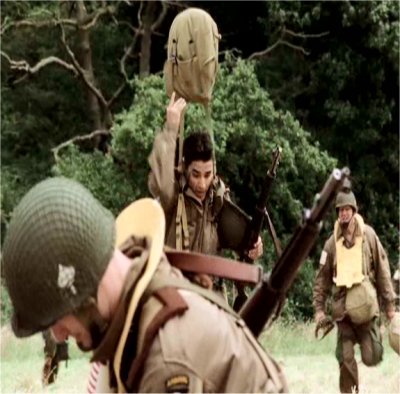
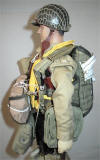
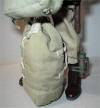
If your Paratrooper is wearing a M42 jump suit
then he should be jumping into Normandy with a T5 parachute. Not a T7 quick
release box type. The way that this would have been worn was to put on all your
equipment first, with the musette bag clipped on to your webbing and hanging
down in front of the crouch buckles facing towards the crouch so that the bag
can just be thrown over the head upon landing and will be facing the correct
way. (Note: See the picture right)
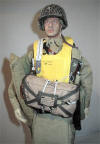
Then the parachute goes on, but do not buckle up yet. Now put on the Mae West
this should be a B4 life preserver with only 2 straps. The front strap goes
between the musette bag straps and under the crouch and underneath the parachute
not over it. The side strap goes around underneath the parachute from the left
and buckles up on the right, if you are left handed put the Mae West on
backwards as it has a rubber pipe on both sides to inflate it yourself.
The top of the vest should stay over your parachute harness.
Now buckle up the parachute harness across your chest over the Mae West and clip
on reserve chute to chest harness over Mae West. Now pass the belly band through
the straps on the back of the reserve chute and buckle up on the left hand side
over the Mae West.
Some paratroopers would sling their weapon and pass the belly band over it.
Next take the static line over your left shoulder and tuck behind reserve chute
ready to hook up.
The reason why you jumped rigged up this way is if your main chute failed then
you could still use the reserve. If you landed in the drink then you cut off the
chute with the M2 switch blade carried in the pocket on the neck of your M42
jump suit.
Unfortunately this set up was not a great success as the Germans had opened the
locks and flooded the fields in Normandy and a lot of Paratroopers drowned
tangled up in their canopy's. But having said that my uncle was a Sailor on the
HMS TarTar on D-day and they picked up the 506th's Pathfinders out of the
Channel who had been shot down, so it worked for others.
Hope this has been of some use.
Update
I have had a reply back from another re-enactor,
regarding the type of knife which would be used to cut the parachute's canvas
straps in an emergency.
The M2 was merely used to cut any entangled
parachute cord or chute material. The M3 was to be used to cut the actual
harness. You would be there all day cutting through the canvas with a M2.


Links I found for pictures of
pre-drop US paratrooper re-enactors
http://enfernormand.free.fr/sagy_2007.htm
http://enfernormand.free.fr/sagy_couleurs.htm
http://enfernormand.free.fr/sagy_2007_le_reportage.htm
http://pagesperso-orange.fr/enfer.normand/ferteallais.htm
http://pagesperso-orange.fr/enfer.normand/cholet.htm
Many thanks to Kevin of the
Screaming Eagles Re-Enactment group for the information.
|