|
Welcome
To My Train Maintainer Page.
This page is about a kitbash I made based on a
Train Maintainer figure, no names or companies will be used in this description
as this is to protect me. I will say that this figure came about because
I was getting slightly bored with the US airborne figures, and I needed to find
something to rekindle my enthusiasm in the hobby. So while I was walking about
at work thinking about this, I caught a reflection of myself in a train window and I got to
wondering if I could make a model of a 'mess' like that?
Headsculpt
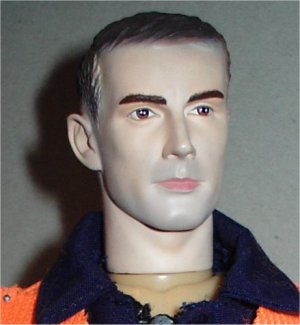
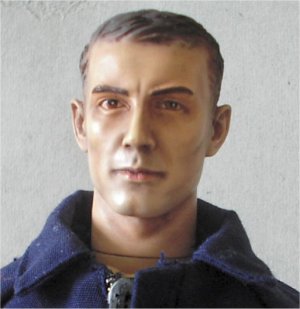
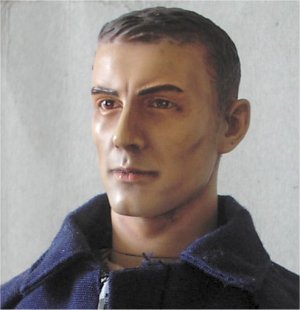
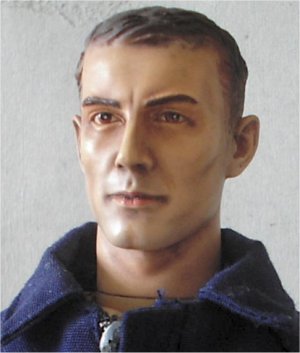
These are the before and after Kenneth Laird headsculpt
pictures, all I have done is add a very slight repaint to the cheeks, nose and
forehead with some artists acrylic paint. And then given the head some washes
with watered down pastel chalks, which were allowed to dry slightly and then
wiped off with a damp tissue to leave the chalk in the facial creases. The
centre of the eyes and the bottom lip were touched up with some gloss clear
varnish.
Note: How I
did this is explained on my page
here. (Scroll down to the
05th March 2007 update)
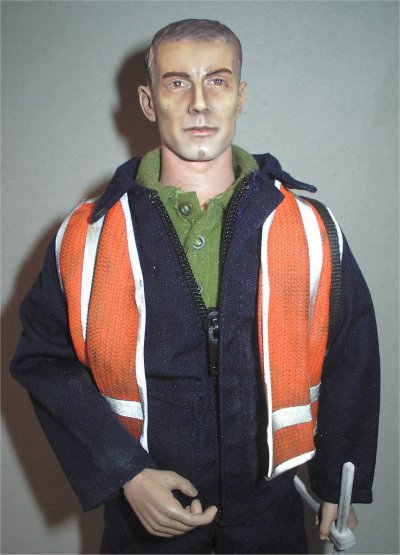
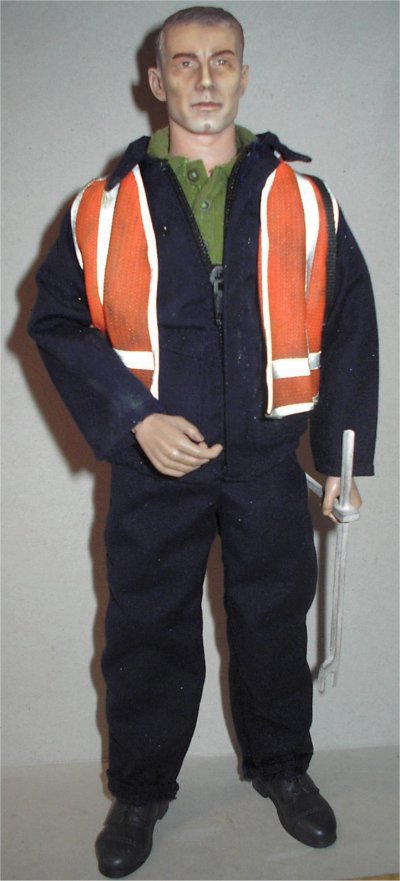
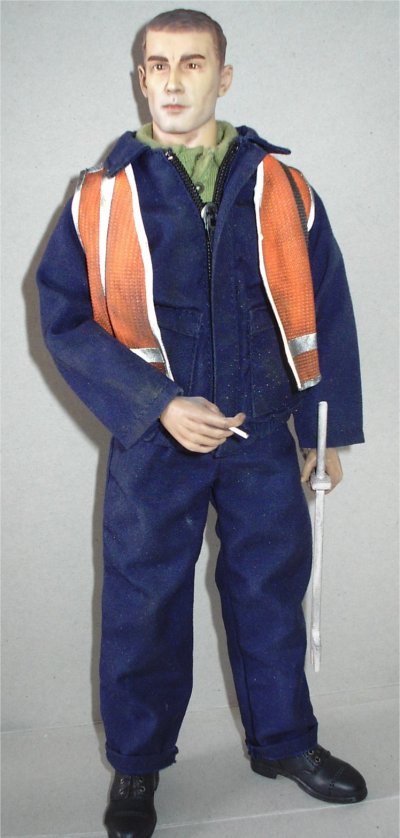
Overalls
Getting the main part of this kitbash the uniform
was the hardest part, because I originally wanted to have the figure in a fleece
jacket, but after having some excellent help from various different forum members. I
decided that the changes I would have had to make to them was not worth the
effort, so I decided to use the Hot Toys Michael Schofield prison uniform
instead. As this was almost identical to the one I wear
although it is a darker blue than I wanted, I have decided to keep the colour as
it is. Getting the loose uniform was a bit of a trial, because when I looked
around there were no companies that would sell the uniform separately, but a
chance e-mail sent to Toys 2 I found
out the owner would be willing to sell the uniform to me. I must say that
including postage it was not cheap, but I just had to have it and when I
compared the price to a boxed figure I went ahead and bought the uniform. I am
still trying to source a shirt for the figure, but at the moment I am unsure as
to what one I want.
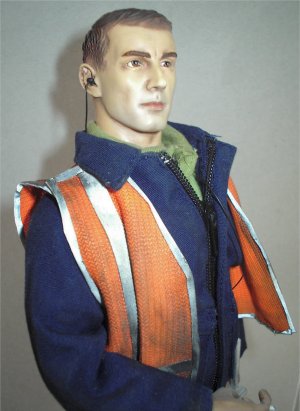
Vest Update
I was in conversation by PM with a fellow modeller
on a forum recently, and I showed him this page about how I made my Hi-Vi vest
for my figure. And it was then that I realised that I have lost, the templates
that I used to make the vest. So I have taken the vest off my figure and drawn
round it, to provide the template as shown in the PDF document below.
Note: I recommend cutting out the paper
templates first to get the size and shape correct, before you commit to cutting
out the shapes from the material you want to use.
Hi-Vi Vest Template -
 Vest.PDF
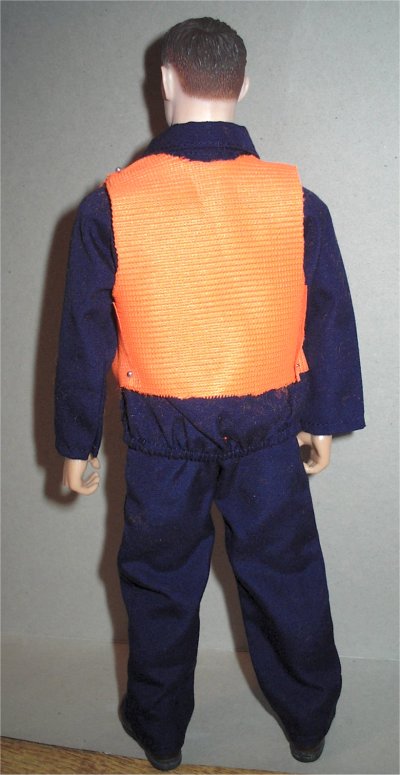
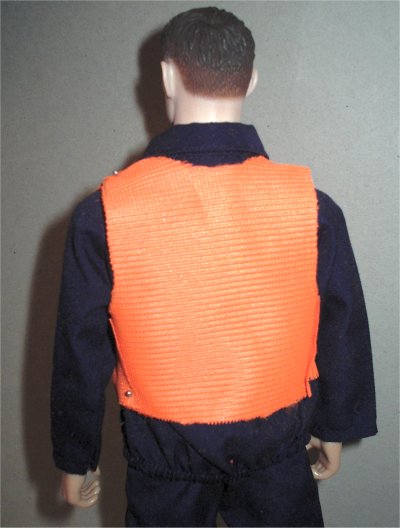
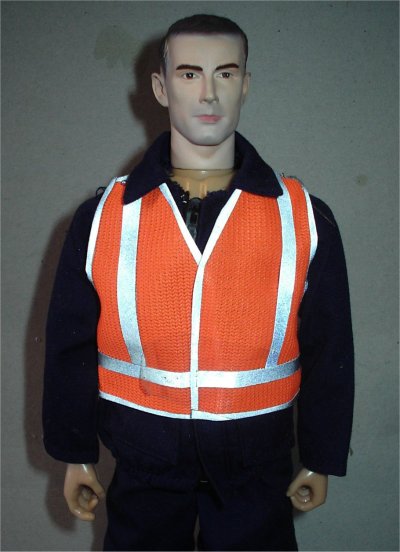
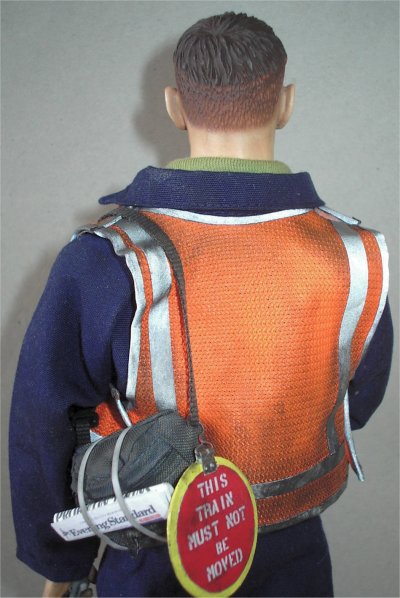
High-Visibility Vest
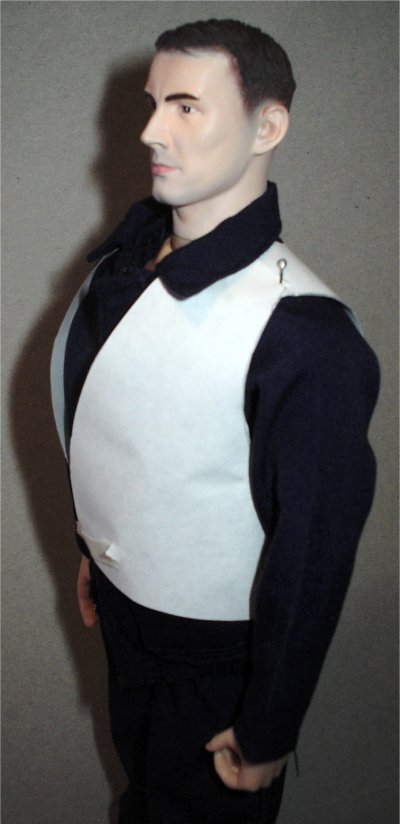
The next thing that has to made for this kitbash
is the High-Visibility vest (Hi-Vi vest) that I wear, this is the single biggest
problem I have found with this figure because I have to make it myself. As I
have not found anywhere a company or shop that sells the Day Glo bright orange
cloth, so using
a full size vest I just happen to have lying around. I made a paper pattern up as above to
make sure that it looks right, before I cut out the shapes from the full size
material.
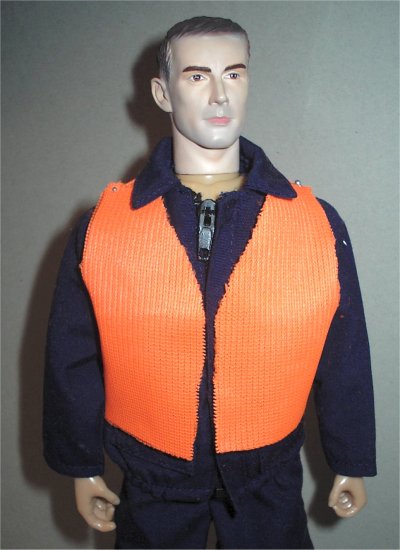

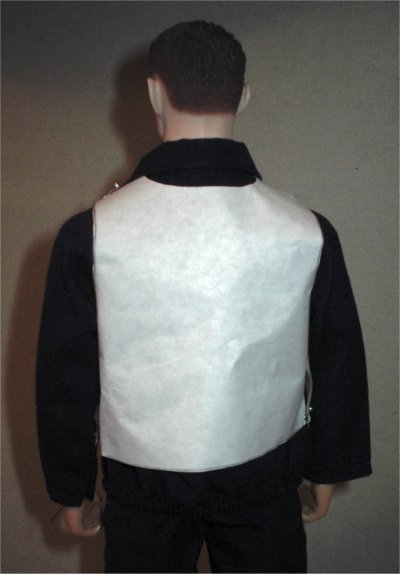
The pictures above are of the material cut out and
pinned loosely onto the figure, and it was not until I had done this did I
realise that this is a figure that is certainly going to stand out in my
collection. The reflective tape has yet to be added to the material, I was
thinking of using the stripes on the real vest, but I found that they are heat
sealed into the material so I have had to find a separate source for them. Also
I will have to cut out a very thin strip for each of the edges, because they
have frayed slightly when I was cutting out the shapes. I have done a search for
the reflective strips and I came across this
site, and because of the excellent price for the material I placed an order.
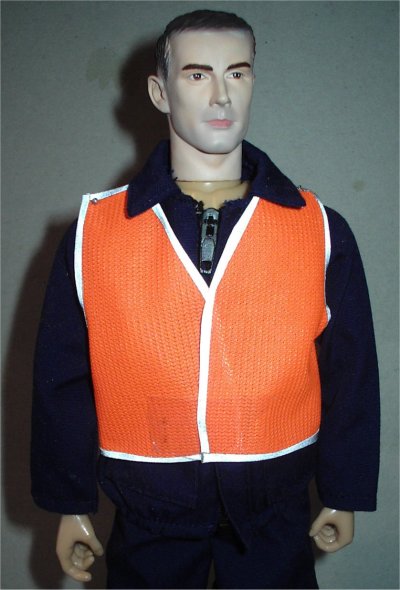
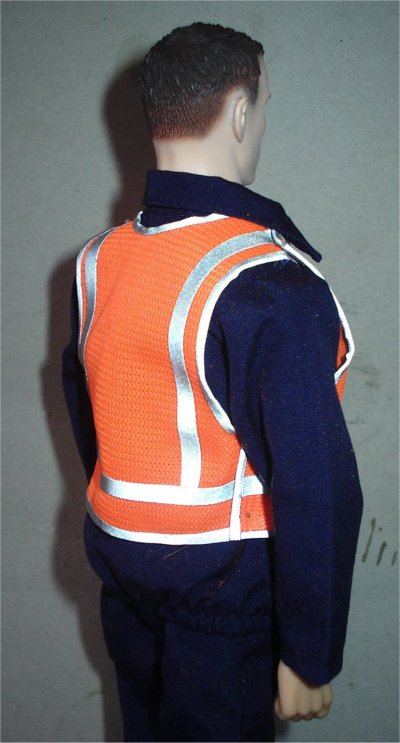
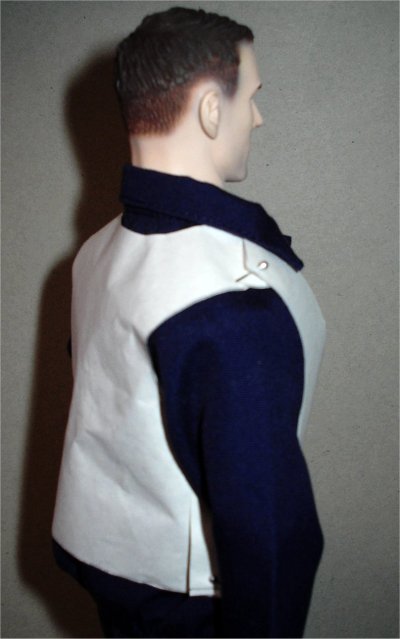
These pictures above are of the reflective tape being
added to the vest material, which has caused me problems with the camera I am
using if I use the flash. In the first picture above, I have edged the vest with
the tape and it has been a pain getting the material cut thin
enough to fold over and getting it to stick
to the vest edges. The other pictures show the completed vest with the
horizontal and vertical stripes added. The worst part of making this vest, are
getting the stripes to line up on each of the individual parts of the vest,
particularly so
that the horizontal line is at the same level all the way round. At the moment I have the vest pinned together on
the figure as I have to figure out how to fasten it together, one idea I am
think of is using some double sided tape to represent the velcro on the real
vest.
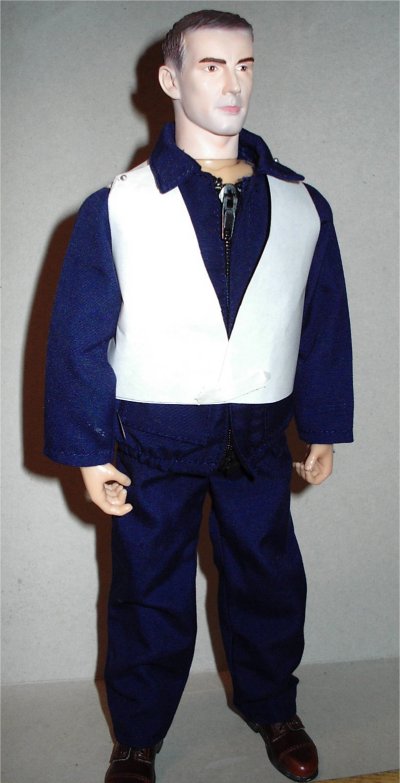
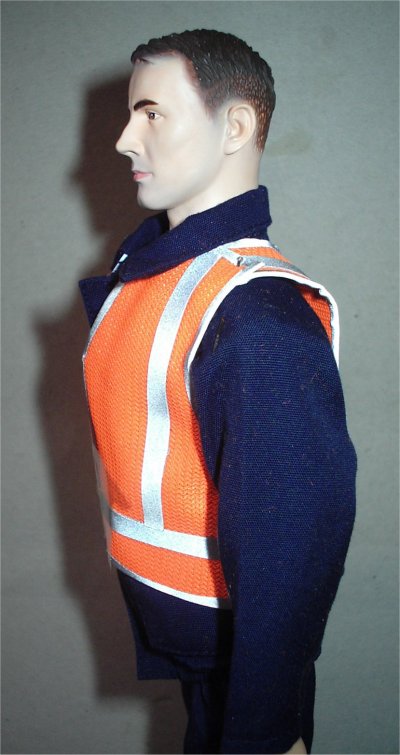
Note: This is what the figure and
Hi-Vi vest should look like, but after a few weeks of train maintaining the vest
looks like the pictures below.
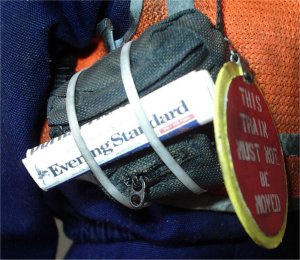
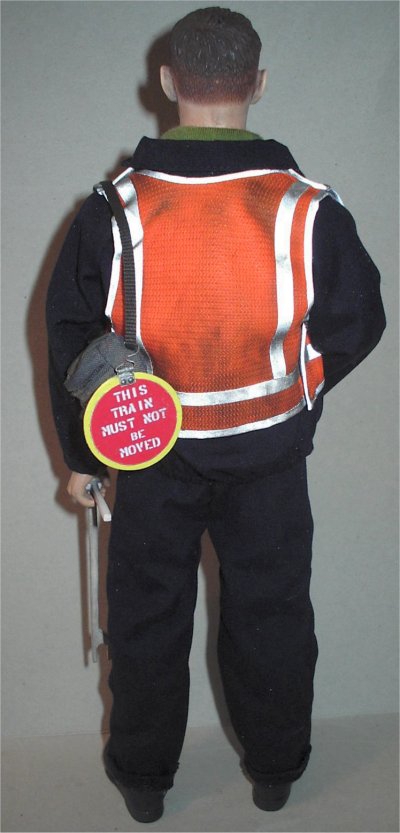
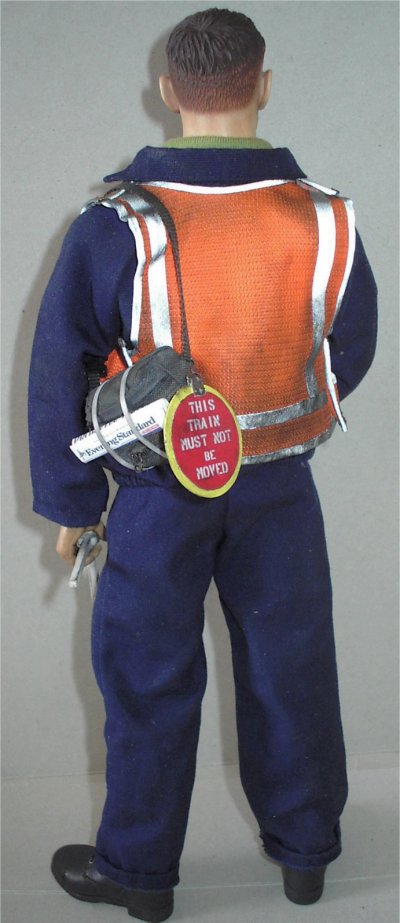
Safety Equipment
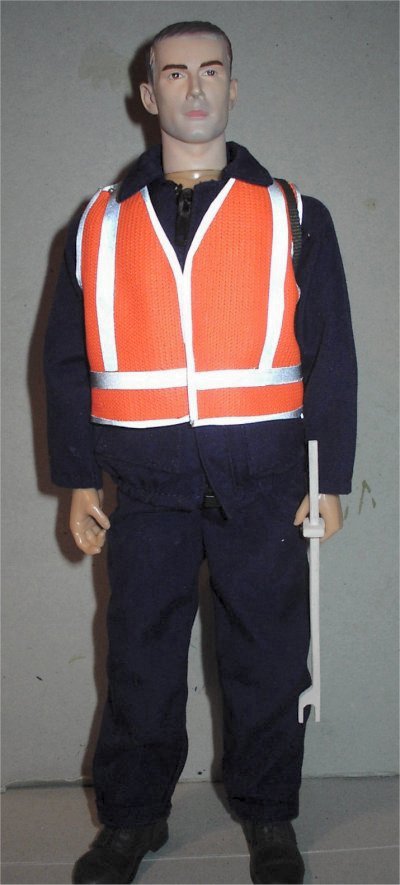
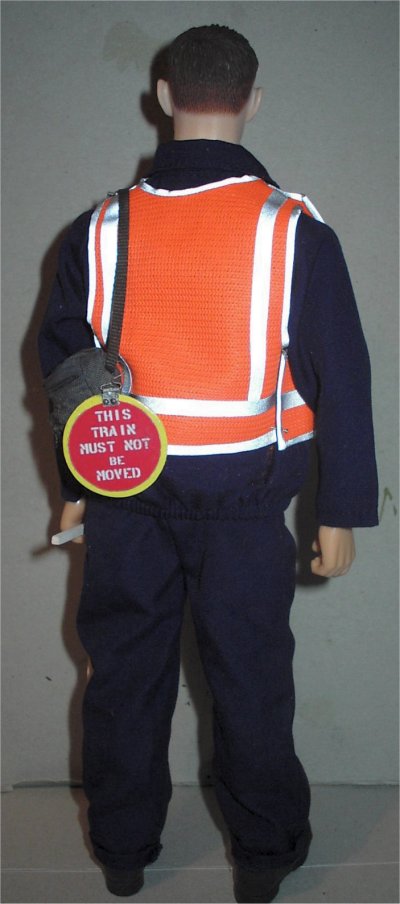
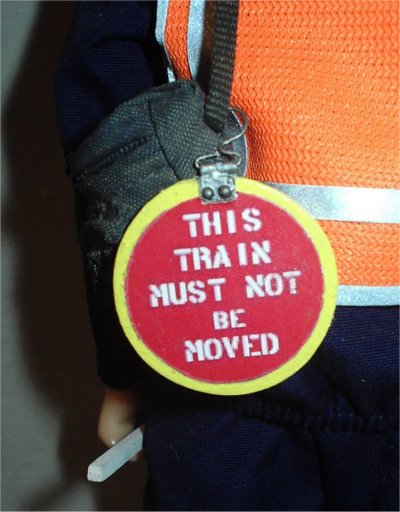
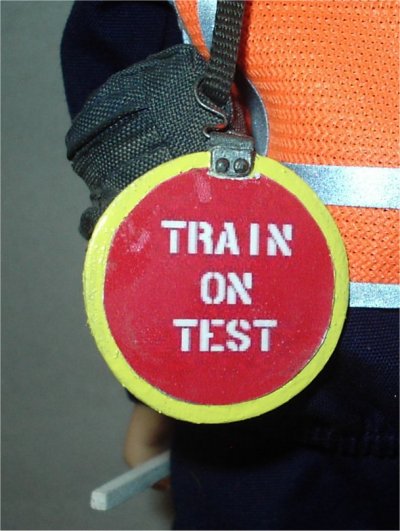
These items have both had to be scratchbuilt by me
for this figure, the round item hanging from the bag is called a Target and
these are placed on the front of the trains while they are being tested. This
was made from plastic with the outer part painted yellow and the inner part
printed out on some photo paper, the worst part of this was getting the right
font for it.
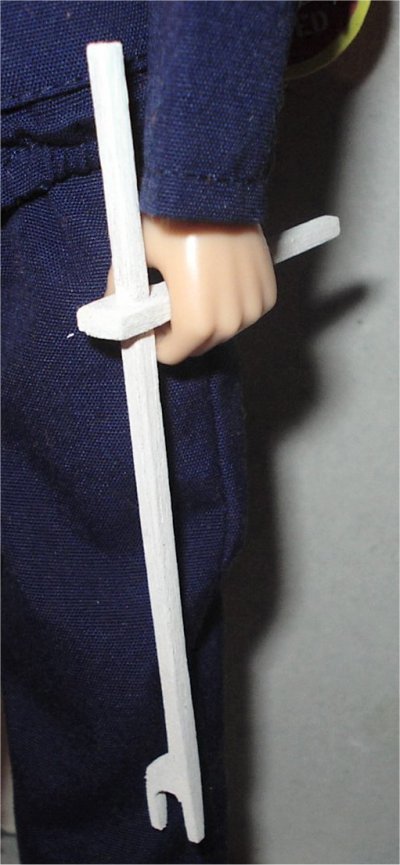
The other item above right is a Tripstick which is
used to test part of the train's braking system, this was made from two pieces
of balsa wood cut and shaped, glued together and painted.
Tool Bag
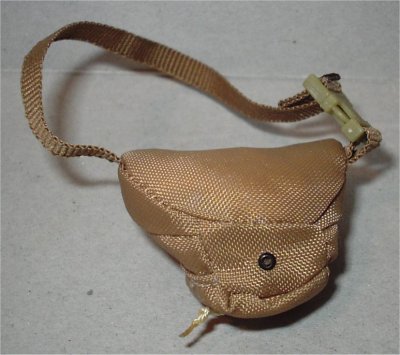
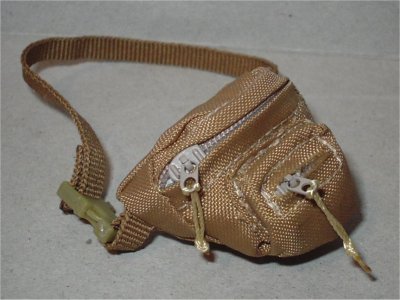
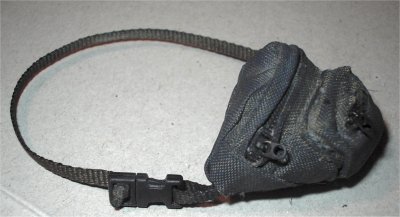
This is the bum bag as I got it above, and this was the
single item that allowed me to make this kitbash because I was not sure if
anyone actually made one in 1/6th scale. And after asking on the OSS forum about
it, I got this one from greg3 and it is identical to the one I use in the course
of my work. In the picture above right I have repainted it a blue colour with
acrylic paint, the straps have been replaced with some longer webbing material
repainted black as it was too short plus the plastic clip and zips were
also repainted at the same time.
Around the middle of it above right are two plastic straps that I have on my real bag, and
the purpose of these are to hold a newspaper in place. And the reason why the
bag is slung over the shoulder, is because with the amount of tools and bits etc
I have in it the bag would not stay done up around my waist. To replicate the
weight of the bag on this figure, I have filled it with fishing weights to get
the right look.
Boots
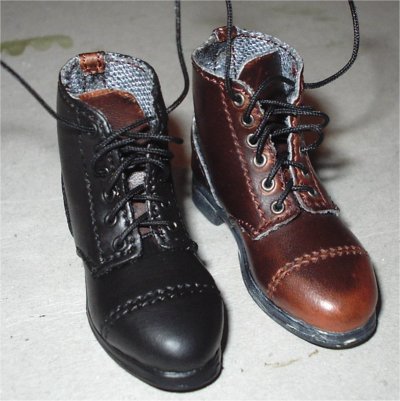
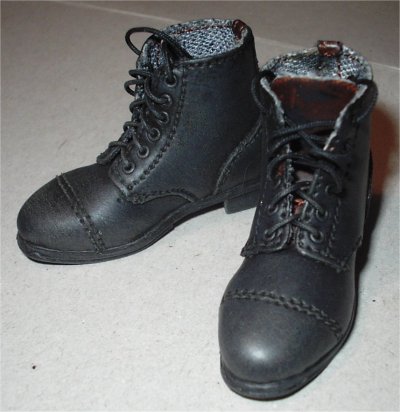

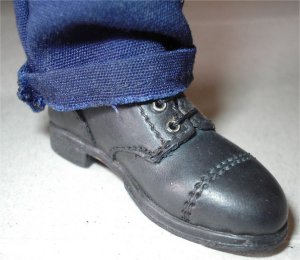
The short boots that I have used in this kitbash
are from DiD. These were first roughed up with some fine sandpaper to make them
look older, as mine do look a bit worse for wear but they are too comfortable
for me to change them for another pair. A benefit of using the sandpaper is that
it helps the acrylic paint to adhere better to the type of vinyl that these
boots are made from. I then repainted them black and gave
them a drybrushing with some Mud weathering powders, they were then given a grout treatment to make them look like mine.
The eyelets were then scraped with a knife blade to get the metal to show
through.
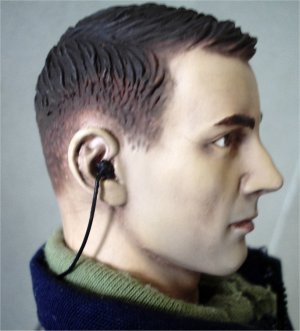 MP3 Player MP3 Player
For replicating this all I have done is make an
earpiece and a small wire around the back of the neck, which goes down to the
jacket pocket. The earpiece was the hardest part to make of this item because I
did not want to ruin a good set of 1/6th headphones, so I stretched some sprue
and cut off a small pointed end to fit into the ear.
I then used a needle to make a hole in it to place
the wire, this was then glued together and shaped to fit around the figure's
neck. I painted it all with a Matt Black acrylic paint and positioned it as
shown.
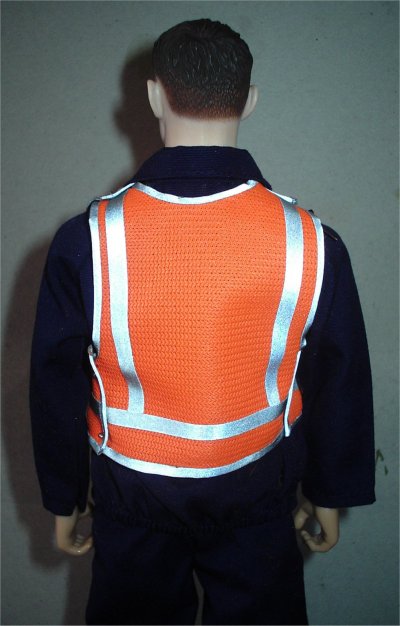
Dirty Overalls
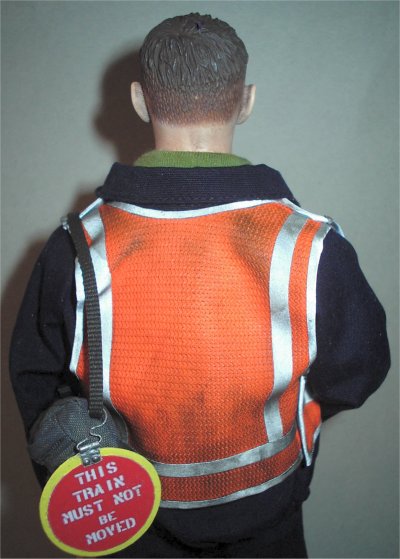
This is what the overalls and Hi-Vi vest looks like after a
spell of train maintaining, the vest
is always the first part of the uniform that gets dirty, no matter how much you try to
keep it clean. I have also applied some Tamiya powders to the
overalls, to try to replicate the dust and dirt from the trains. I still have to
add some grout and light coloured pastels to the vest and overalls to bring out
the highlights and the top of the folds. As with all my figures that I am making
at the moment I have given all the clothing a PVA wash to set the folds in
place. especially with the HI-Vi vest because no matter what I tried I could not
get it to drape correctly.
The pictures above show the clothing after I have
applied a grout drybrush to them, I also used a very light blue pastel chalk on
the top of the folds. I also used a lighter beige pastel which has helped to bring out the darker colour I used
before on the vest.
I would like to say a very big thank you to both Greg (greg3)
for helping me with the bum bag
And
Eric from Toys 2 for selling me the loose
uniform.
| 