Russian Spetsnaz Medic
Pouches
DAM Boot Laces
Universal Belt Pouches
DAM Korund VM Armour Vest
With my kitbashes of Russian Spetsnaz figures,
I am always on the lookout for reference material. And any new ideas to make my
boxed figures different, and I read about an idea by
Scimitar Mcmlxv about a Black Korund VM armour vest.
A very good webpage he found is here -
Korund VM Vest which shows the Black vest.
The original Green 1/6th vest shown here is one I
bought loose from the DAM Vympel figure, and as an experiment I have used some
Tarrago Black shoe cream to re-colour it. The picture on the right, shows my
original experiment to see how the cream would cover the material, by rubbing it
in with a tissue.

Tarrago Shoe Cream Idea
I must say that the original idea to use this
cream in this manner was not mine, as it was a method that I first saw used on
the OneSixth UK forum by both
Jbcat and
Old Git. A link to the company that makes the shoe cream is
here, and a colour chart for the cream
is here.
The pictures above show the original Green vest
front and rear, with the next pictures showing the same vest after I used the
Black shoe cream on it.
Originally I used a tissue that was put into the
cream and rubbed it in, on the reverse of the vest. So that if it did not work
as I wanted, I would still have the original Green colour on the front.
Method
But by using the tissue to apply the cream, I
found that it can cover the material, but it does not seem to go deep into it.
So after re-reading the OneSixth UK forum post again, I looked at something else
to use to apply it to the material. So I used a toothbrush to apply it. With the
toothbrush I found that I could easily scrub the cream into the material,
especially in the edges and onto the velcro material. It also helped to make
sure that the cream got into the material behind the pocket flaps. I also had to
take the vest apart on the velcro parts, to get the cream into all the edges and
inside the pockets.
I have not polished it or rubbed it with a clean
cloth, as I want to keep the dull matt finish it has, so I just left it to dry.
Which I found does not take long, in fact by the time I had finished
re-colouring the front of the vest some parts were already dry. Which has helped
to show up the pieces that needed to be touched up again.
 Russian Spetsnaz Medic Pouches
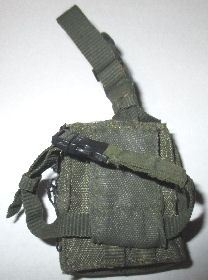
This is a leg pouch that I have wanted to make for
my latest Spetsnaz kitbashes, since I have seen it used by
dantte
with his
Vympel figure as shown right. As a result I wanted to make a similar
pouch for my Vympel figure. I have done some research into this pouch, and from
what I have found it is a medical pouch, and I have found the following links.
Medic Pouch,
Medic Pouch.
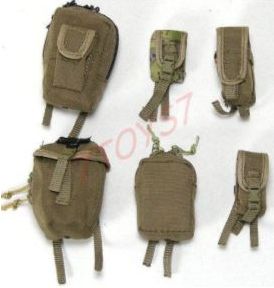
With this particular pouch I have done some
research on them, and from this I have made the following four pouches for
myself. And based on the discussion with
dantte
about this pouch it was mentioned it was made from
a base of a Toys City US Navy Corpsman pouch.
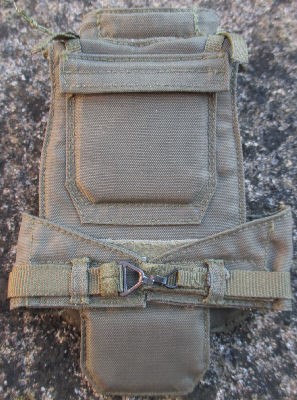
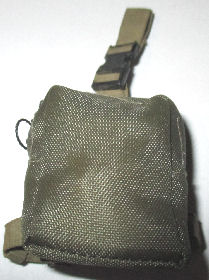
Leg Pouch One
With this pouch as that was the nearest that I
could find that looked like my reference pictures. As well as the same pouch
that
dantte
used with his figure. I have had to cut the top
flap cut off to leave the main pouch as shown below in Picture
1. And as shown in Picture 2.
I have used a separate Molle leg holder that I bought separately, which I have
sewn onto the back of the Corpsman pouch. It also came with the strap to go
around the leg, as well as the additional strap for the waist belt on the top of
the pouch. Once I had finished the pouch and straps, I then
mixed up some acrylic paint to try to match the original pouch colour, So that
the whole unit was of a similar colour.
1.  2.
2.  3.
3.
 4.
4.
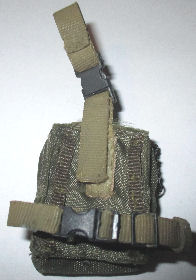
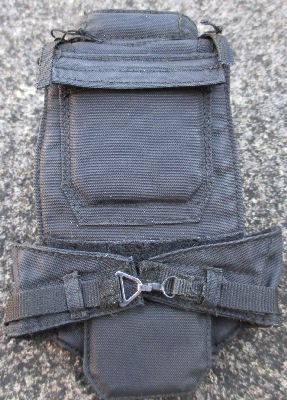
Leg Pouch Two
In Picture 3.
this is made from another Toys City US Navy Corpsman pouch as above, but for
this pouch I have sewn the straps directly to it. Firstly I sewed two Brown
straps onto the back of the pouch, leaving a gap at the bottom so that I could
then pass the leg strap through it.
The additional strap to hang the pouch from the
waist belt, was also sewn directly onto the back as shown in Picture
4. These straps were painted with acrylic
paint in a Tan colour.
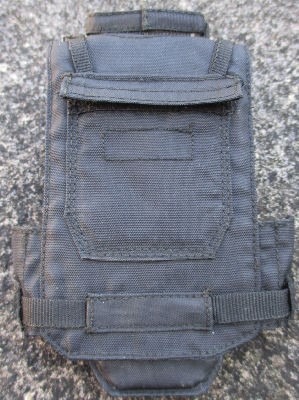
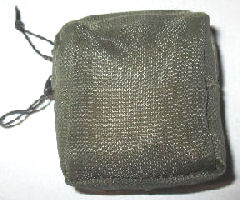
Waist Pouch One
5.
 6.
6.
 7.
7.
 8.
8.

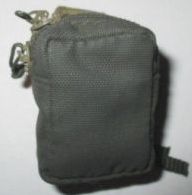
This is my third attempt in Pictures
5. & 6.
at a modern Russian medic pouch for my figures, and on this occasion I have just
added two thicker straps sewn directly onto the back of the pouch. I have left
two gaps in the strap, so that I can thread a belt though the gaps so it can be
worn on the figure's waist along with other pouches. The purpose of the two
gaps, is that I can adjust the height of the pouch on the belt. Again, the
acrylic paint was mixed to almost match the original pouch colour.
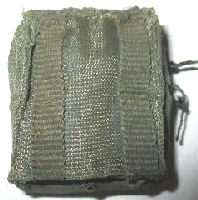
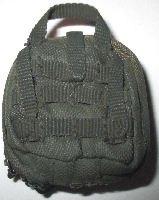
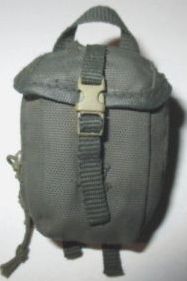
Waist Pouch Two
In Pictures 7.
& 8. is my fourth medic pouch based on my
reference material, this is one that I have bought loose. But for this pouch I
have sewn a central buckle strap to hold it together, I have also sewn a webbing
handle at the top. Once I had finished it I then re-painted it with an Olive
Green acrylic paint, because the webbing straps I added were of a different
colour.
DAM Boot Laces
With my DAM Vympel
figure I am working on, I am going to take out the supplied laces, as I felt
that they looked out of scale with the boots and I am going to replace them with
a strong black thick thread I have. Which is about half the thickness of the
original laces, and to me they are now more in scale. I did this because the more I looked at the original laces the more
they looked overscale to me. Especially when I tried to tie the laces as the
knot looked massive.
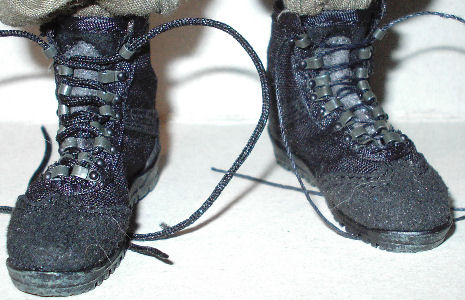
So in Picture
9.
I have on the left boot the
original DAM lace, but on the right boot I have changed the lace to the thinner
and longer thread. Which now gives me more thread to wrap around the boot top,
before I tie a knot.
Note: I have found that the DAM boots are very well made, with the
eyelets for the laces securely fixed into the boot material. But care will have
to be taken when I tie the laces, as I do not want to pull the eyelets out by
pulling on the thread too hard.
9.
 10.
10.

In Picture
10. my pair of DAM Vympel boots have been
re-laced. Please Note: That I had one of the
eyelets break on me, the sharp eyed among you will see it. So I had to make a
new pin for the eyelet from some stretched sprue, so that I could refit the
eyelet to the boot. As a result I have also had to crimp the other eyelet pins
in place, with some gentle pressure from a pair of long nosed pliers on top of
the pin.
 Universal Belt Pouches
I was looking at my DAM Vityaz figure, and in particular the large belt pouches
as shown on the right that the figure comes with. And I realised that two pairs
of pouches that I bought loose, that came from the DAM USMC 26th assault force
figure. Has a pair of large pouches that are very similar in both size and the
fastenings, to the Vityaz pouches. So I got to wondering if they could be used
with my figures.
So after seeing a two pictures about a Russian
universal pouch. I then realised that the four Tan pouches I bought. Could be
re-painted with some Olive Green acrylic paint, to represent the picture in the
link, which would also be of a similar colour to my other pouches above. So in
the pictures below I have shown how I have changed the pouches,
11.  12.
12. 
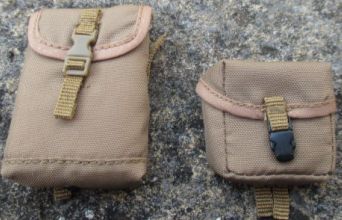
Picture 11. is of the original pouches with
the different buckle colours, with
Picture 12. showing the re-painted large and
small pouches. The paint I used for the main body of the pouches was Tamiya
acrylic XF-13 J.A Green. Which is the
nearest match that I can find to match with my other pouches, without having to
mix different paint shades to get what I want. The straps and lid edges were
re-painted with Tamiya acrylic XF-74 Olive Drab (JDSDF) which is a darker
green. The large pouch buckle was first re-coloured with a Black permanent
marker pen, which acted like a primer for the Black acrylic paint. To weather
the pouches, I used a light drybrush of Tamiya Green weathering powder as well
as Tamiya Light Sand.
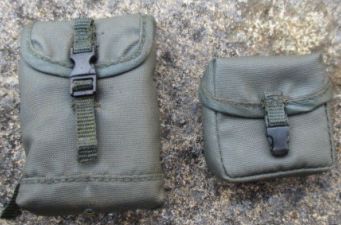
13.
 14.
14.

Picture 13. shows the Soldier Story 1/6 US
Air Force TACP pouches I bought, that have some that are similar to the pouch
pictures linked to above. Picture 14. shows
the pouches after I have altered and repainted them the same way I did in Picture
12.
This section is continued on
Page Four
Many thanks to Jbcat
and Old Git for the original shoe cream idea
I have used here.
Many thanks to Scimitar
Mcmlxv for his
idea about changing the colour of this vest.
Many thanks to
dantte
for the information about the leg pouch.
