|

Welcome To My Modern Equipment
Alterations Page
Six
Dam Royal Marine Pouch Alterations
Dam Royal Marine Bergen Alterations
Dam Royal Marine Pouch Alterations
With the figure's pouches I have weathered each
of them differently, some lighter and some darker to add variety to them.
Although one will be left fairly new, suggesting it could be a replacement
pouch.
Making the pouches look older
1.
 2. 2.
Webbing Pouches
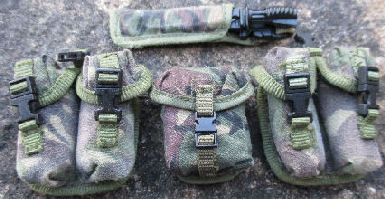
In the pictures above I have begun to weather the
individual pouches. Picture 1. on the
left and right are two Dragon DPM pouches. These have been sanded lightly to
simulate wear, I have also done the same to the DAM bayonet cover. As a
comparison in the middle is one of DAM pouches, that came straight from the box.
Note: Do not
press too hard onto the material, as it is very easy to go too far, and then
scrub through the DPM pattern and leave plain white areas.
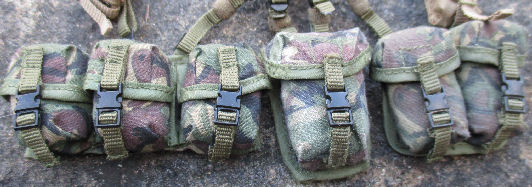
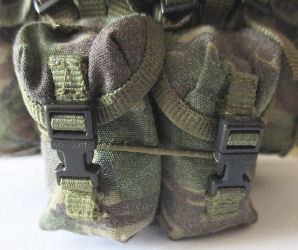
In Picture 2.
are the new DAM pouches from the boxed set that are connected to the shoulder
webbing harness, on the left is the three pouch pack that has been left
untouched. The centre water bottle pouch has just been sanded lightly to look
worn.
The twin pouches on the right, have just had a
light dusting or some Tamiya Light Sand weathering powder. The purpose of doing
this is remove the new look the pouches had, and to hopefully show different
states of wear with some old and some new.
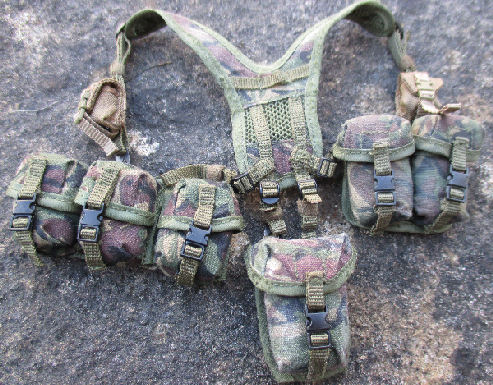
Webbing Harness
I have also done the same with the webbing
harness, firstly with a light sanding of all of the edges of it, as I am aiming
for a slight worn and tattered look to them. I pressed slightly harder with the
sandpaper in some places, to get to show a torn edge through wear. I also
gently sanded the DPM material to make it look older.
Webbing Pouches On The Figure.
The
next stage that am doing with these pouches and harness is add some dirt stains
to them, I will be adding slightly more dirt to the older pouches.
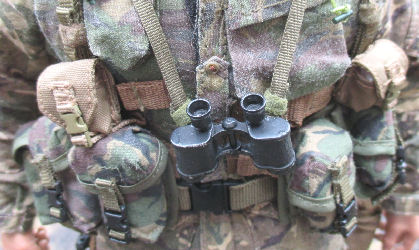
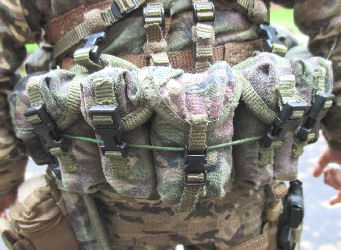
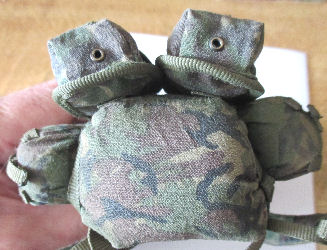
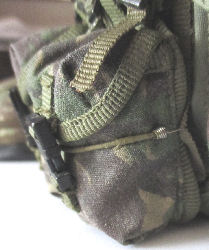
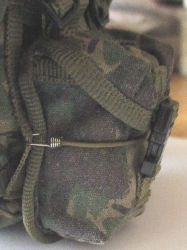
The pictures above show how I have fitted the
pouches to the figure, but it is hard to show the slight differences between
each of the weathered pouches. I have also used a re-painted bungee cord to keep
the rear waist pouches in place.
Dam Royal Marine
Bergen Alterations
After doing the changes
to the pouches, I then had to do something similar to the bergen backpack that
came with the figure. And to start to weather the pack, I have given it a very
light rub over with some sandpaper. Which has helped to dull down the overall
new look that the pack originally had. Note: Do not
press too hard onto the material, as it is very easy to go too far, and then
scrub through the DPM pattern and leave plain white areas.
I then gave the base of
the main pack as well as the base of the two smaller pouches, a slight scrub
with the Tamiya Mud weathering powder to add dirt staining. I then gave the
whole bergen a drybrush with the Tamiya Light Sand weathering powder, to add a
dusty effect and to also bring out the edges.
Dragon Pouches
With the two extra
pouches I am fitting to the backpack, I have weathered one more than the other
so that they do not match. Plus trying to make sure that they do not match the
backpack as well.
2.  3.
3.  4.
4.
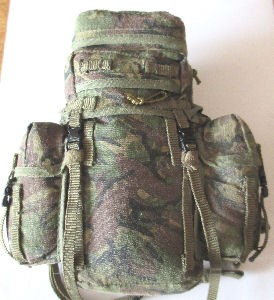
The following photos show how I have fitted the equipment and pouches to the
bergen, Picture 2. is the pack after I have
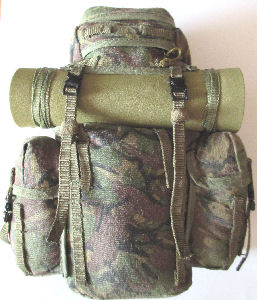
weathered it, and in Picture 3. I have
added the bedroll under the top flap of the bergen. Picture
4. shows the new strap I made, that I am
going to use to hold the two extra pouches in place. The strap is also threaded
through some loops on the bergen, so that everything will be held tight.
5.  6.
6.
 7.
7.
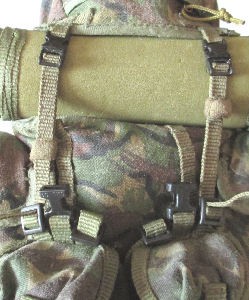
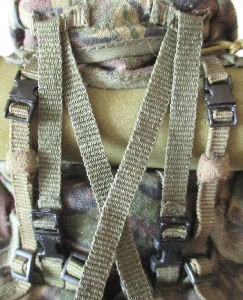
Picture 5. shows the two pouches held in
place at the bottom, to start to hold the pouches at the top. In Picture
6. I have started to attach the straps from
the top flap of the bergen, onto the outer buckles of the Dragon pouches.
Picture 7. shows the buckles connected up.
8.
 9.
9.  10.
10.
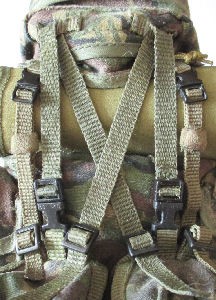
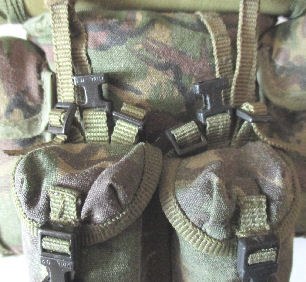
Picture 8. has the centre fastex buckles and
new strap, connected up to also hold the two pouches onto the bergen. Picture
9. has the strap ends, threaded through two
loops on the bergen top flap. Note: This
where I have had a 'Happy Accident' with the bergen assembly, as the straps
accidentally crossed over and I realised that in Picture
10. I could connect the straps to the outer buckles of the Dragon
pouches.
11.  12. 12. 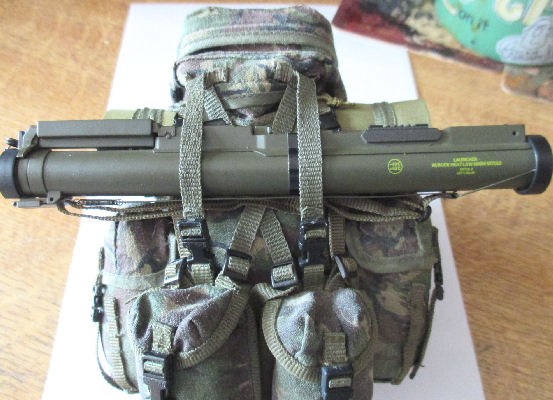
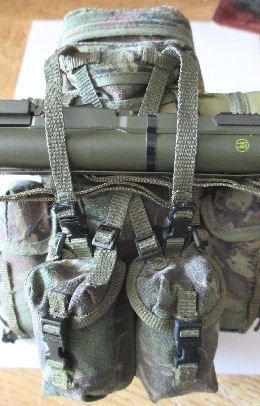
I now want to add the
DAM rocket launcher to the bergen, as I have seen in some of my reference
pictures. So in Picture 11. I have slackened
the two straps and placed the launcher under them. Picture
12. shows the launcher held in place, once the straps have been
pulled tight.
Note: With the setup like this, I only have to undo the black
fastex buckles, get the launcher and bedroll off of the bergen.
13.
 14.
14.  15. 15.
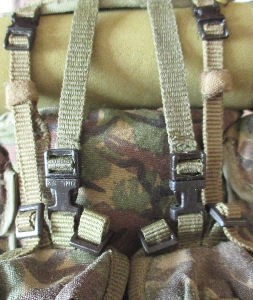
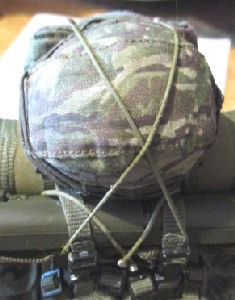
In the pictures above I
have added a re-painted elasticated bungee cord, that I have left over from my
Russian paratrooper
kitbash. The cords came fitted onto the spare reserve parachute that I had left
over, and after seeing them used like this in my reference pictures. I have
fitted it, to help keep the pouches in place, by hooking each end of the cord
onto the bergen behind the pouches. Note: I
had to re-paint some parts of the cord once it was stretched, to make sure that
the original red colour did not show through.
16.
 17.
17. 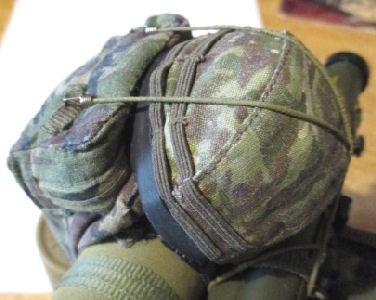
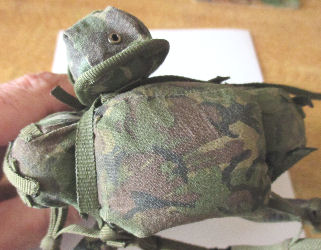
In Picture
16. & 17. another pair of
longer re-painted bungee cords,
were used to hold the rocket launcher in place. And after trying to work out how
I could add the helmet to the bergen, I got to wonder if it could be held in
place under the cords. Luckily they would stretch enough, to get the helmet in place.
This section is continued on
Page Seven
Thank
you to Dutch Holland and
Heavee Dee for all of the help I have had with my
Royal Marine figure. | 