|
Welcome
To My Gebirgsjager Mountaineer Page One.
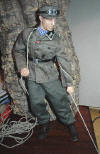
This figure is one that I have been putting off
making for quite a while now, mainly because of the work that I feel is involved in
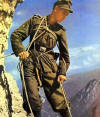
making it. As it is based around the picture on the right from the cover of one
of my reference books, Weapons and Equipment of the German Mountain Troops In
WW2 by Roland Kaltenegger. And not only do have to kitbash the
figure, I have to also make the diorama that he stands on as well.
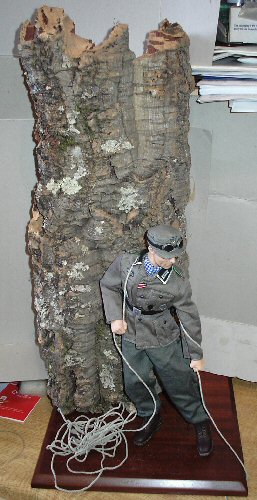
And to give you an idea of the size of it as a
diorama and kitbash, the base it will all stand on is 10" x 10", the figure is
12" tall and I want him to stand on a ledge on the side of a mountain. So the
rock face that I will have behind him will have to be at the
least 17" tall. So
that when the rock (cork bark) is in place, it will hopefully look like the
picture as shown right.
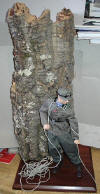
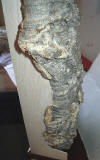
The pictures below are of my very basic
layout of the cork bark, base and the figure. And from this I have to make the
flat sides for the rock face out of balsa wood, similar to the way that I made
the diorama for my
Climber kitbash.
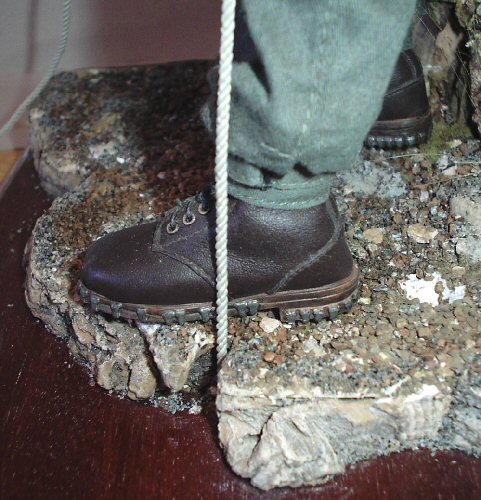
Note: Another
idea that I came up with is regarding the rope that the figure will hold, which
is going off the edge of the ledge. As I want it to go over the edge of the
ledge and through the base. To do this I
intend to drill a small hole in the base, thread the rope though, enlarge the
hole underneath so I can knot the rope. Then bring it back up through the
figure's hands so that I can keep it as tight as in the reference photograph as above.
Mountain Diorama
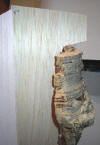
 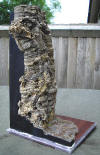
With this diorama because I have had to put so
much work into it, and also try to keep this page to a reasonable size, I have
made another webpage about how I constructed it -
mountaineer. Basically it is the
same as the other Mountain
page that I made, but this time I have got a bit carried away with it and it is a lot larger as
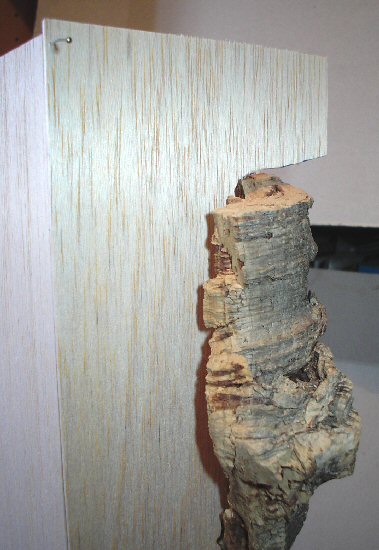
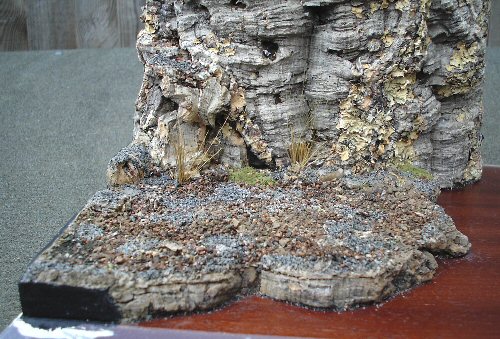
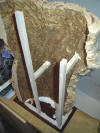
shown above. With the top of the cork bark I have cut this off flat, and put some
balsa wood on top painted the same as the sides. Also as shown in the last three
pictures above, I have the top part of one side of the rock face wrapping around
the balsa sheet side, whereas at the bottom the sheet is over the top of the
rock. And because of the height of the cork bark that I have used, I have had to
assemble some internal stiffeners to help support the balsa wood sides.
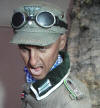
Headsculpt and Body
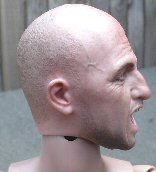
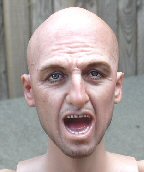
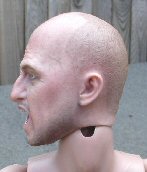
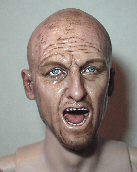
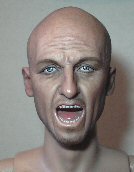
I have changed my mind about the body I am using with this
figure, because I found that the diorama still lacked something. So now I am
using the Soldier Story Panzergrenadier one that I obtained loose, as it has a
very well moulded shouting head which hopefully will look like the soldier is
shouting instructions down to the climber he is helping. And as usual the head
has been given a pastel wash, and afterwards a drybrush of some Flesh coloured
pastel chalk.
Hands
With this figure I found that the Dragon hands can be easily used
with this body, because the pins for the wrist joints are the same size as the
Soldier Story one's. I can also use the DiD hands with this type of body as
well, by replacing the DiD
wrist pin with a
Dragon one. I have also found that the after market resin
fist hands I want use, can
also be adapted for use with this figure. By just sanding down the diameter of
the wrist pin on
the hands, so that they are a tight fit into the wrist joint.
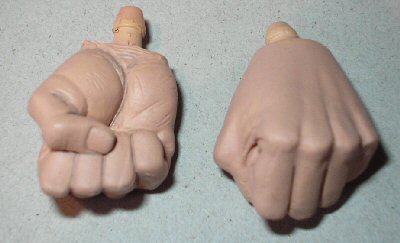
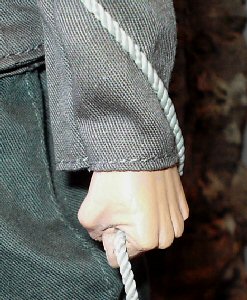
For the correct look of the grip of the hands on the rope, I am
using some resin fist hands that I bought loose some time ago as shown below.
But because they are solid hands I have had to carefully drill through them so that I can get the look of the rope being held by the hands.
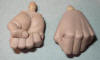
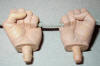

To do this I used my model drill to make a small hole on each side of the fist, this is to make sure that the exit holes for the
rope are in the place I want. After I have the two holes I then carefully used a 2.0mm drill the same size as the scale rope to join them together, so that the rope
can be threaded through the fists as shown above. I found that I had to enlarge the holes very slightly
to get the rope through. Note: I dipped the
rope end in some superglue to stop it fraying, wiped it and wound it tight
between my fingers, so that I had a solid end to pass through the fists.
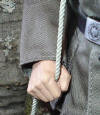
It was a tight fit to get the rope through, but
once I had done it I have the tight look to the rope that I wanted.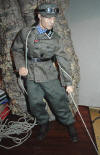
The picture on the right shows the figure in the planning stages, and how I have placed the rope through the hands and
around the figure. As I needed to work out the pose for it
on the base, plus I wanted to see how the rope would look on the model. And I am
very pleasantly surprised, to find out that the fist hands will hold the rope just
like the reference picture above. Plus with the holes in the hands being
slightly tight on the rope, I can get a tense look to the rope around the
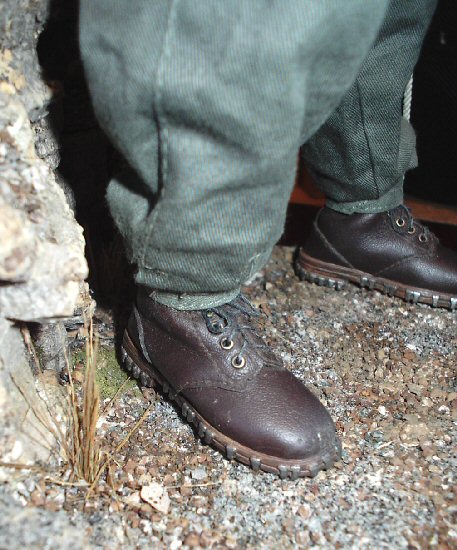
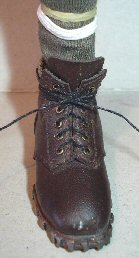
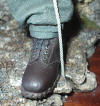
figure's arm and shoulder. Boots
For this figure I have used a pair of Toys City
boots and puttees, which as usual have been altered from the new factory look
they had, to a pair of boots that have been worn for a while. I again also
replaced the laces as the one's that they come with are too short for me, as I
cannot get the loops in them. I have two PDF's I made showing my
boot changes and
boot
alterations.
1.
 2. 2.
 3. 3. 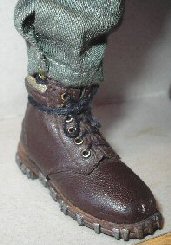 4.
4.  5.
5. 
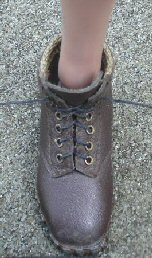
I did find that with the Soldier Story body the ankles are very
narrow, and as shown above there is quite a gap between the boot top and the
ankle. So to make this smaller I used a pair of socks I had in my spares boxes,
which has helped to bulk out the top of the ankle joint.
1. Is the bare ankle inside
the boot to show the gap, 2. Is the boot
laces wrapped around the boot, and with the sock it has helped to fill the gap.
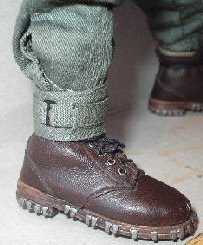
3. This is the boot with the laces tied off
into a bow as I did on my
Boots page, so that
I can get the puttees on the figure better. Also I have taken out the thread and
sewn the bottom of the trouser leg together. 4.
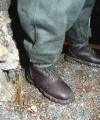
& 5. Show the puttee tied around the boot.
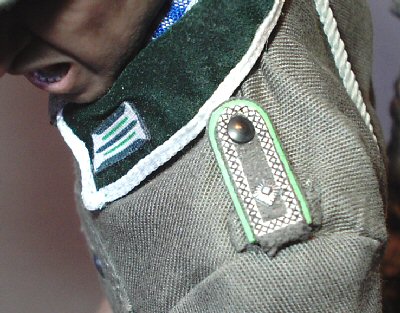
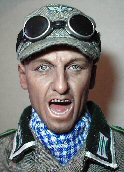
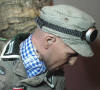
Uniform
The tunic is from the Dragon Hans Leiter figure
with the white collar tresse that I got loose, the gebirgsjager trousers are
also from Dragon. I have also used a Dragon
Alfons Robmuller M43 cap with the mountain insignia on the side, I do prefer to
use these as they are smaller, plus the material is also thinner than the caps made
by other manufacturers which to me is also more in scale.
6.
 7.
7.
 8.
8.
 9.
9.
 10.
10.
 11.
11.
 12.
12.
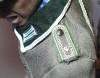
These pictures show the uniform on the figure,
which I have given a drybrush of some Tamiya Light Sand weathering powder to
help bring out the edges and creases. 6. 7.
& 8. Are the Toys City boots which has also
been drybrushed, to help bring out the laces detail. 9.
Is the CVI collar insignia and the Dragon shoulder board, with a Toys City pip
to show the rank of
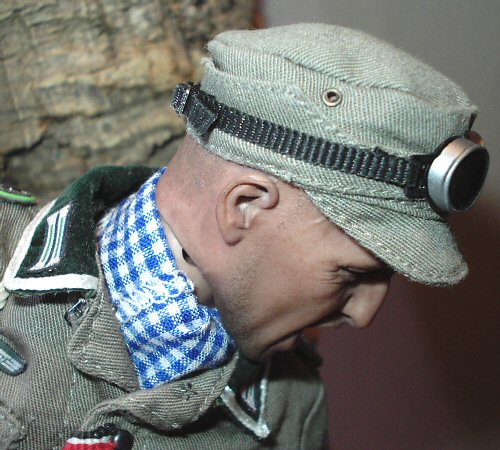
Feldwebel (Master Sergeant). 10. &
11. Shows the head and neck connection which
I am concealing with a scarf, and also the Dragon M43 cap again drybrushed to
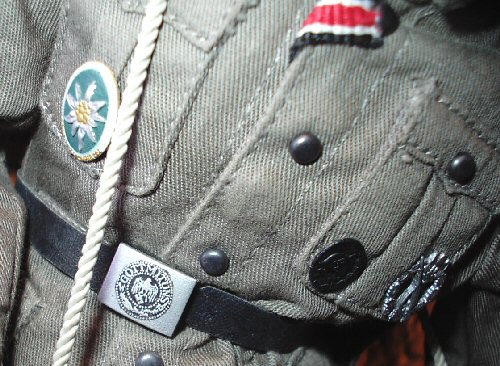
bring out the edge detail. 12. Shows the Toys
City belt with the
detail brought out on it, and the awards on the tunic.
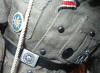
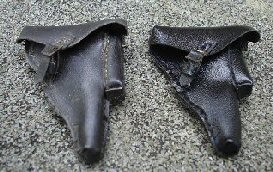 Equipment and Weapons Equipment and Weapons
With the equipment for this figure I have had kept it to a minimum, so that the figure looks close to the original
reference picture. As it looks like the soldier is training, so the equipment
that he would carry would be a little as possible. So for this kitbash the only pieces I have used are the belt and what looks
like a pistol and holster. I have also altered both the belt and the holster, in
a similar way to the one shown on the right, and how I did this is shown on my
Equipment Alterations
page.
The ropes I have used came from
Misken Models and for the
main rope I have used the 2.0mm Beige size, for the rope holding the piton
hammer I used the 0.4mm size.
Note: If I
have done my calculations right, the scale equivalent of the 5 meters of 2.0mm
rope in 1/6th is just over 98 feet in length.
1.1 size - 5 metres = 196.86 inches =
16.405 feet, 1/6th size - 196.86 inches scaled up to 1/1 = 1181.16 inches
divided by 12 = 98.43 feet.
Scale
Conversion Calculator and
Measurement
Converter.
Because of the size of this project and to help the pages load
faster, I have had to spread the information over two pages.
Continued on Page Two -
Mountaineer Page 2
I cannot thank Heeresbergführer
enough
for all of the
superb pictures, and the very detailed help with this Gebirgsjager figure.
I would like to thank
RogueJK for his excellent help with my
future German figures.
And a thank you to everyone who helped with this forum topic -
Mountain |