|
 Welcome
To My Gebirgsjager Pioneer Page. Welcome
To My Gebirgsjager Pioneer Page.
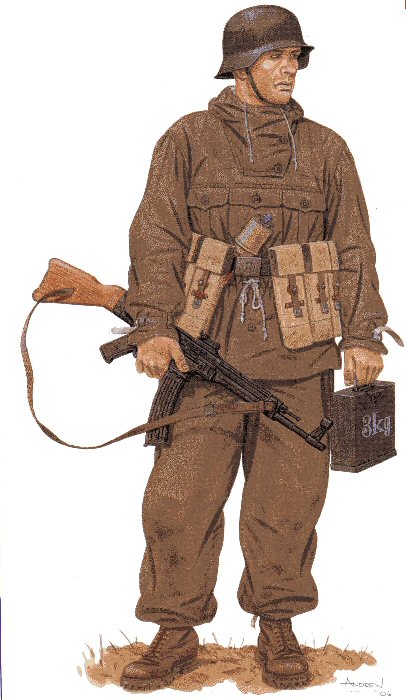
This figure is another Gebirgsjager that I wanted to kitbash, based on the
picture on the right. But after having problems with the uniform I wanted to
use, I have had to change it. Also, as usual with me I do like my figure's to be fully loaded, so again I
have used a lot of kit from various different manufacturer's. I was going to
have 2 DiD large pouches of explosives on the belt at the back of the figure,
but after receiving some very good help from Heersbergfuhrer, I
decided to use a single hand held bag of
explosives instead.
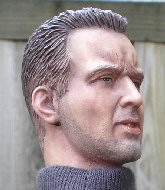
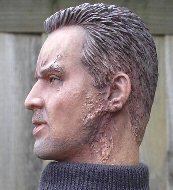
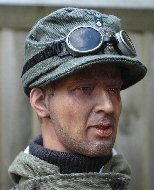
Headsculpt
The headsculpt that I have used for this figure is
again a DiD one, and it came in the set of four heads. And for this kitbash it
just seemed to be the right one for a pioneer because of the facial injuries.
This head again was given a wash over with the Brown pastel chalk wash, making
sure that I got it into the scar detail. The only problem was that each time I
wiped the face it also took off a lot of the chalk from the scars, so I used a
smaller pointed brush to apply the wash and it let it dry slightly longer. I
then gave it a wipe over and it did leave more of the brown in this particular
area.

I then did a drybrush of the Flesh coloured pastel
over the face as I usually do, making sure that I only went very lightly over
the scar detail. Since I did not want to cover up the Brown colour too much, and
to be honest I did go wrong with it. So I had to use a clean brush and some
fresh water and I had to go back and gently wipe the area clean. When it was dry
I added the Brown again, then the Flesh over the top but I used a wider
fan brush to add the Flesh colour, which also helped to blend in the colours on
the face.
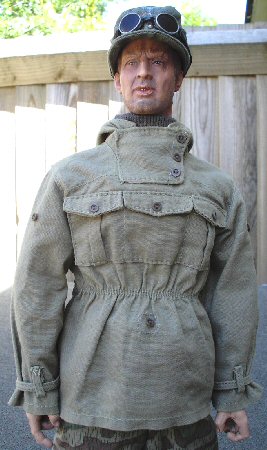
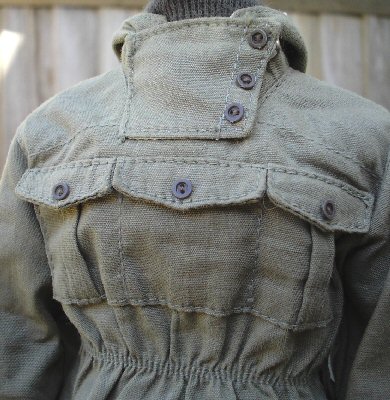
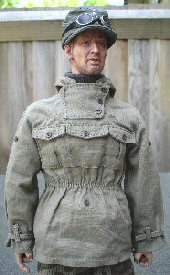
Uniform
The uniform for this kitbash consists of a roll neck jumper
and a Gebirgsjager tunic and trousers. The
problem is that I cannot check who made the jacket now, as it was difficult enough to
get it onto the figure, and I don't really want to take it all back off again.
But I do have an idea that it may have been made by Toys City.

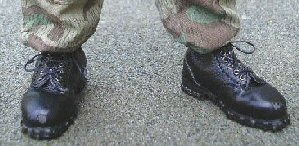
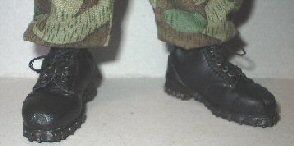
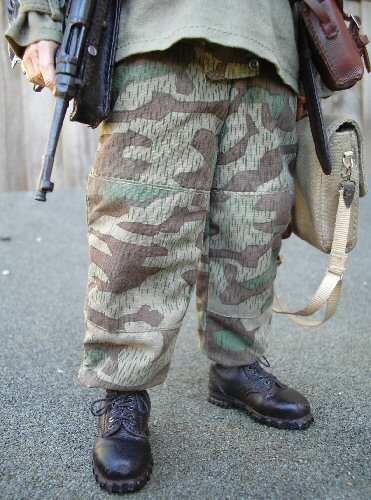
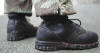
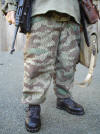
 For this figure I used a pair of DiD mountain
boots, as I wanted something different from the usual Toys City brown boots. The pictures above show the boots before and after
I have painted over them with the acrylic Model Color Matt Medium paint. I have
found that this paint is very good for dulling down the new shiny look they
have, plus it dries both clear and with a matt finish. So I don't have to
worry about matching the paint colours of the item that I am re-painting.
Important note: I have also added a scuff
mark to the front of these DiD boots, but I do advise being very careful
doing this with the boots. Since the 'pleather' material is a lot thinner than
the Toys City boots and it tears very easily, so if you try this be very gentle
with the sandpaper. For this figure I used a pair of DiD mountain
boots, as I wanted something different from the usual Toys City brown boots. The pictures above show the boots before and after
I have painted over them with the acrylic Model Color Matt Medium paint. I have
found that this paint is very good for dulling down the new shiny look they
have, plus it dries both clear and with a matt finish. So I don't have to
worry about matching the paint colours of the item that I am re-painting.
Important note: I have also added a scuff
mark to the front of these DiD boots, but I do advise being very careful
doing this with the boots. Since the 'pleather' material is a lot thinner than
the Toys City boots and it tears very easily, so if you try this be very gentle
with the sandpaper.
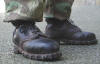
The picture on the right shows how I have used the
Brown pastel chalk to add a dust effect to the boots, this is applied with a
flat brush to get the chalk into the edges and sole cleats. I then use a large
fan brush to blend it in, and also to remove some of the dust from the flat
parts of the boots. I then use a dry tissue to carefully wipe over all of the
flat parts of the boots, to remove some more of the dust so I only have the dust
detail as shown.
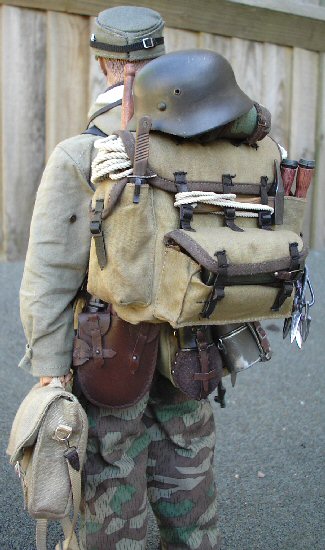
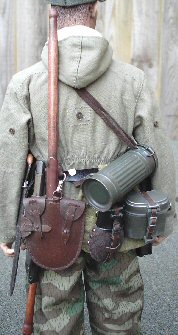
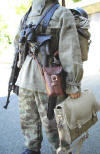
Equipment
This is as usual a real mixture of parts for the
different 1/6th companies, most of which was either bought as loose parts or
received as trades.
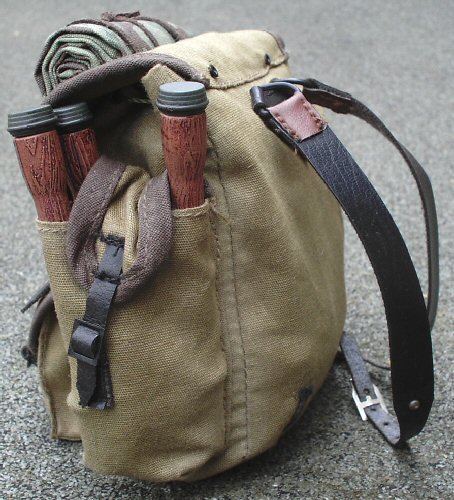
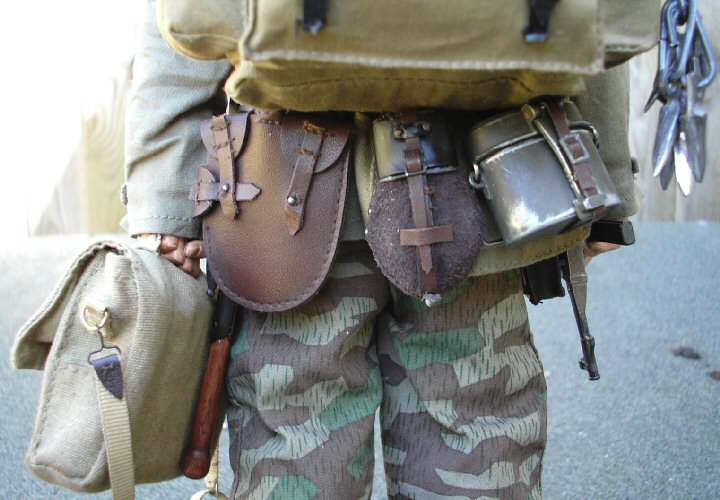
The belt, bread bag, mess tin, water bottle,
binoculars, short shovel, bayonet, saw, pioneer shovel and wire cutters were made by DiD. The other
parts like the pistol holster were made by Toys City.
  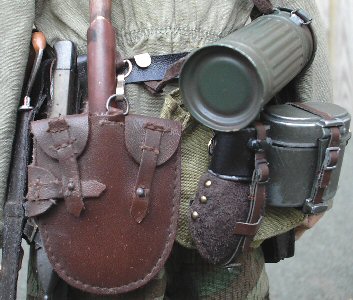
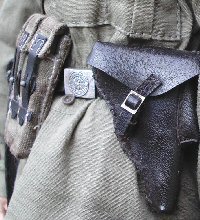
With all of the equipment I have for my figure's
they are all altered in some way as on my
Alterations page, plus as shown above the DiD wire cutter case
and the saw cover were re-painted with some Black artist acrylic paint to dull
them down. And once that was dry I went over them with a light drybrush of a
Brown pastel chalk. The long pioneer shovel cover was repainted with some
Daler-Rowney Burnt
Umber 223 artists acrylic paint, I then went over the top with some Brown
pastel chalk.
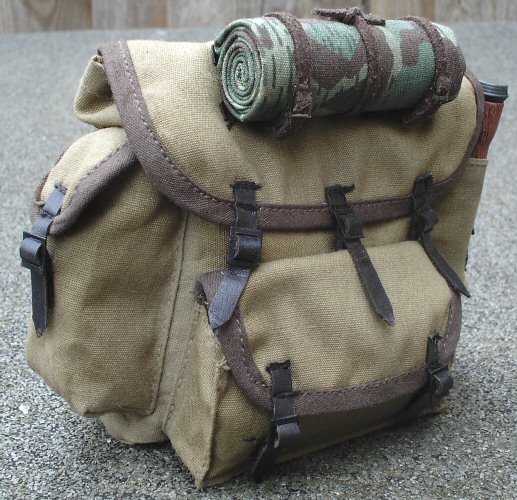
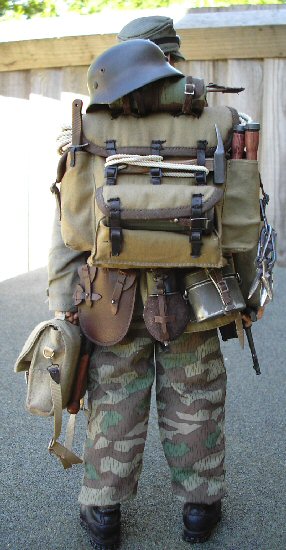
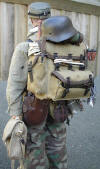
The two packs that I want to use with my kitbash
are shown below, the left one is the Toys City Gebirgsjager backpack, on
the top of this I have added a DiD zeltbahn cover. For this bag I wanted a
slightly different colour to the backpack as on my other figures. To do this I
rubbed some Brown and White pastels onto my sanding pad, mixed it together and
put my finger into it a lightly rubbed it into the material to get the slightly
different colour as shown. I then gave the whole bag a light brush over with a
large dry fan brush, to get rid of any loose chalk.
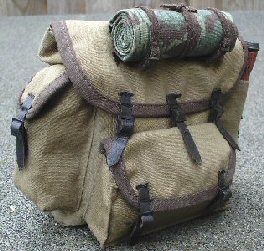
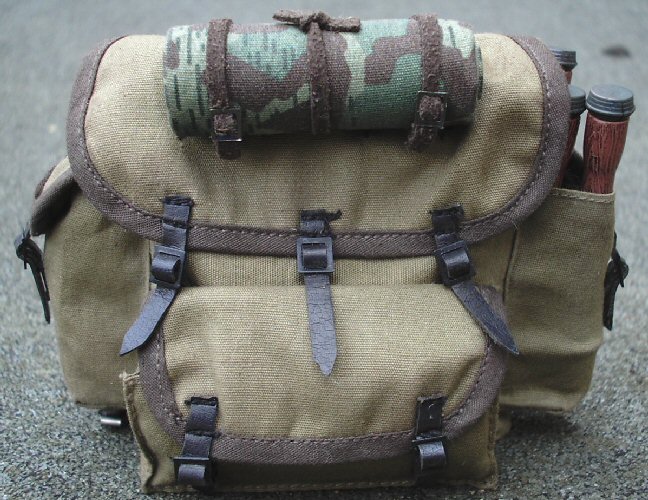
I then got a cotton bud and the Tamiya Light Sand
weathering powder, and then lightly rubbed over each of the seams and edges of
the pack to lighten them slightly. This can be seen in the pictures above, so it
gives the impression of the whole bag being dirty, but the seams and folds
around the pouches are lighter because the dirt has not got into them. The bag
then was given a light brush over again
with the large fan brush, to blend all of the colours in together.
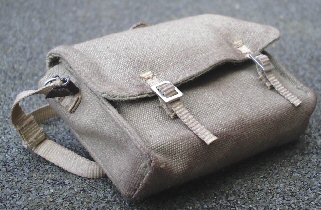
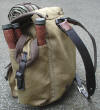
The second bag is from Dragon, and again I also
gave this the same treatment as the backpack above. But this time because it is lighter colour I used
more of the White pastel in the mix before I rubbed it over with my finger. I
also rubbed it slightly harder with the
chalks into the edges, the seams of the bag, the bottom plus also the straps on
the front, the shoulder strap and the handle. Then make the bag look a bit more aged, I then
used the Tamiya Light Sand weathering powder on a cotton bud and rubbed it into
the flap edges, side seams and the strap edges to get a lighter colour over the
top of the darker Brown chalks. This was all then blended in with a large fan
brush.
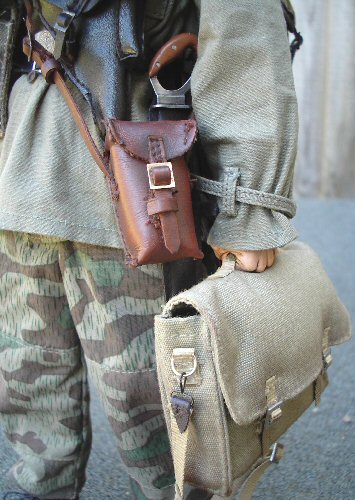
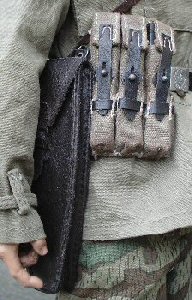
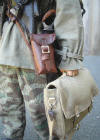
With the second bag that I want to use to carry
the explosives in, I have packed it out with the blocks and padding to make it
look full, but then came the problem of making it look heavy enough. It was then
that I found on eBay the fist hands as shown below left sold by
Black Ash 1/6th Kit, so I decided to buy two pairs of the hands to see if I
could use them.
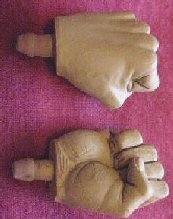
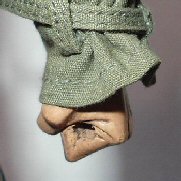
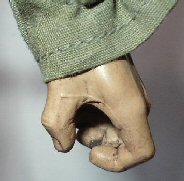

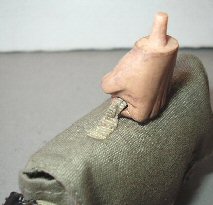
The next two pictures show how the fist hand
compares to the DiD hand I was going to use. The only three problems that I found
I had were firstly the peg for the arm had to have the wide end at the top
sanded so that the peg is straight, a hole had to be very carefully drilled in the fist so it
could hold the bag strap. And both the fist and the other DiD hand had to be
painted with some Flesh acrylic paint, so that they both match. Plus they both
had to have a Brown pastel wash applied to them before use.
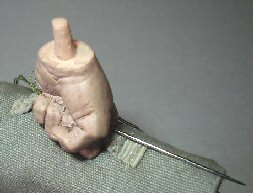
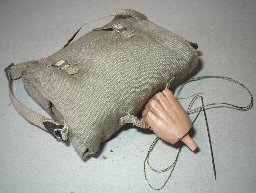

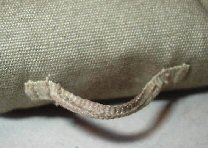
In the pictures above I have firstly cut the carry
strap in half, so that each end can fit into the hole that I drilled. I then got
some thread and sewed it to one end of the carry strap, pushed it through the
drilled hole into the carry strap on the other side as shown in the picture
above left. The next picture shows a bigger picture of the bag, the next two
pictures show the fist hand once I have sewn both halves together and tied off
the thread. The final picture above right shows the finished hand which has been
plugged into the arm socket.
Weapons
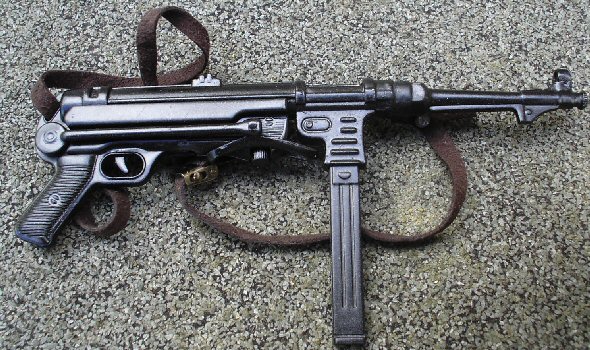
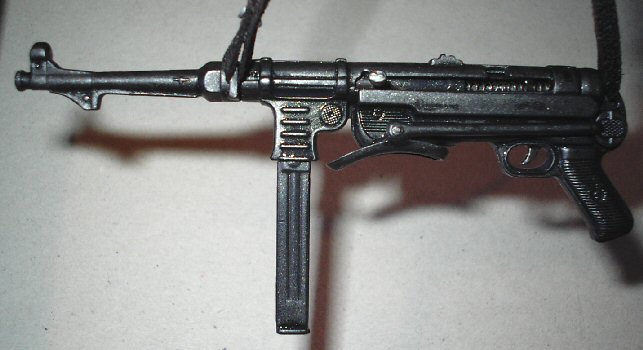
The main weapon for this figure is a metal MP40
machine pistol made by DiD. The pictures below show how I have also altered
this, as I did not like the flat look to the paintwork that it has. The first
picture shows the machine pistol as it comes from the box, in the middle picture
I have given it a wash of thinned Black acrylic
paint, the reason for this is to add some depth and
shadows to the weapon.

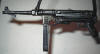
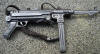
The final picture shows the finished weapon, where
once it was dry I then gave it a very light drybrush dust
over with some Tamiya Gunmetal powder, to add some highlights and then on the
wear points I added a light drybrush of some Silver powder.
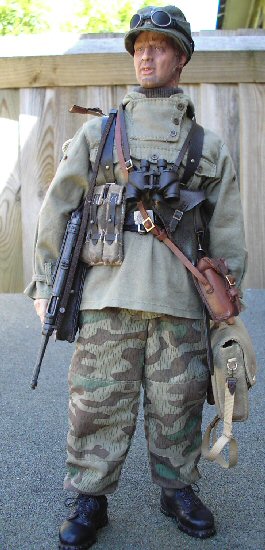
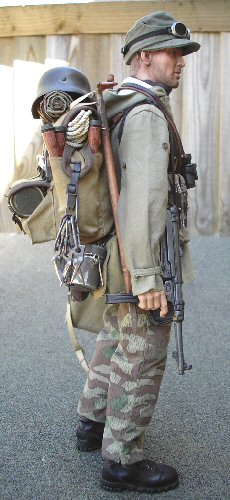
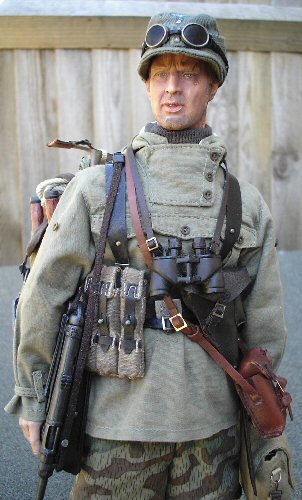
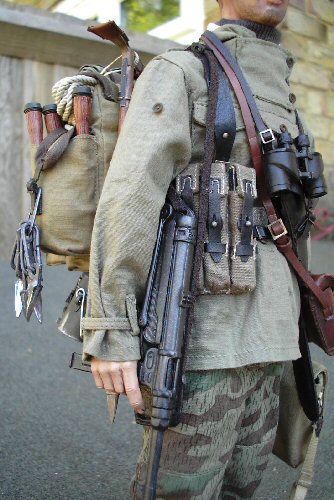
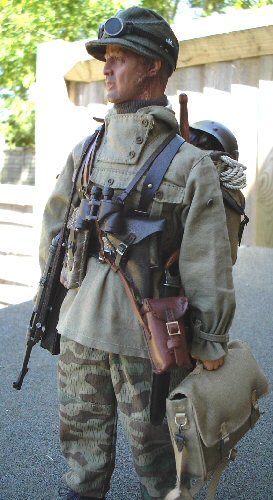
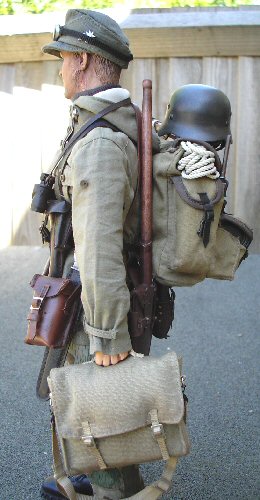
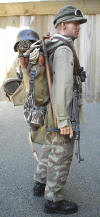
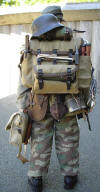
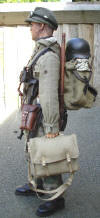
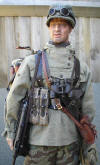
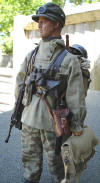
Assembled Figure
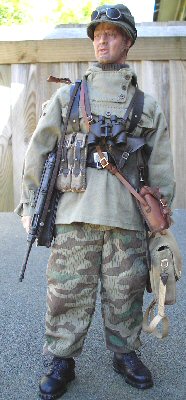
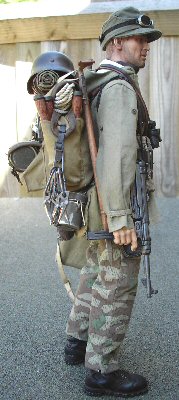
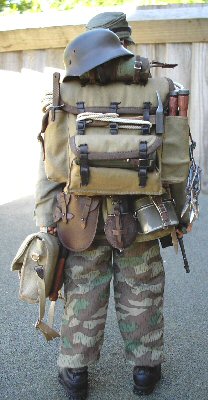
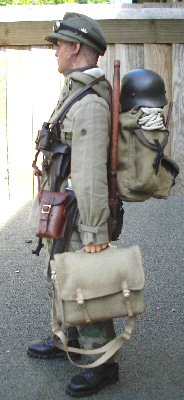
Various pictures of the figure


I would like to say a special thank you to
Heeresbergführer for all of the detailed help with my
Gebirgsjager figure's. |