|
Welcome
To My Pouches Page.
This page is about how I have converted some
pouches to use as other items. The first one is how I altered the DiD thompson 5
cell magazine pouch, the second one is how I cut up a Dragon BAR belt to make
the individual pouches as shown by the pictures from (.308) Paul.
The third one is how I have changed the clips on
the DiD belt equipment, so that it will fit onto the .30 cal ammo belt.
Thompson Magazine Pouch
Browning Automatic Rifle Pouch DiD .30 cal Ammunition Belt
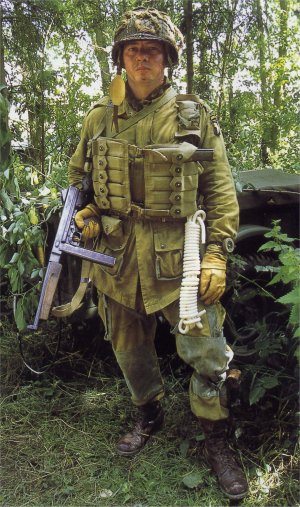
Thompson Magazine Pouch
This page is one that I have meant to do for ages,
since I obtained the book that I got these pictures from. As the twin Thompson
pouches got me wondering if they could be made. And when I looked through my
spares box I found I only had one DML 5 ammo pouch, so I have had to make this
pouch set up with a pair of DiD Ricky Foster one's.
The only problem with using them is, that they are
used for the 30 round magazines. Which I have been told was not used in these
pouches in the
European Theatre during WW2. Those larger magazines were usually carried in
bigger rigger modified pouches, I presume similar to the one the DML Josh
Ackerman figure has. So I had no alternative but to cut them down to the
20 round magazine size. This took a lot of courage on my part, as I have not
tried anything like this before, and I was nervous of completely ruining them.
So with using the picture on the right and the one
below for a reference source, I decided to give it a go and try to make these.

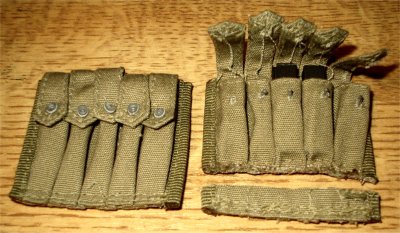
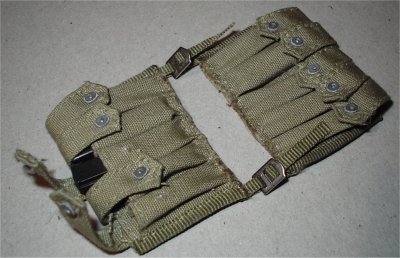
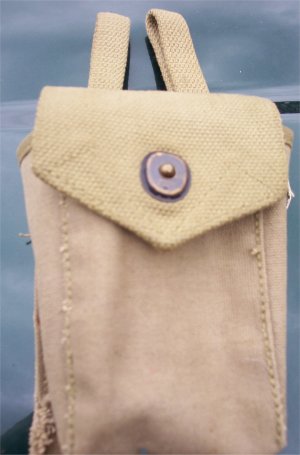
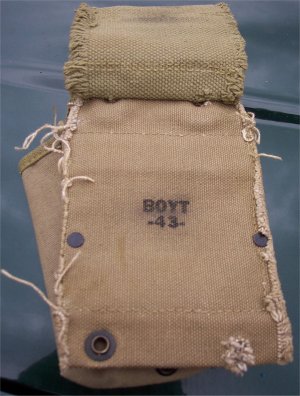
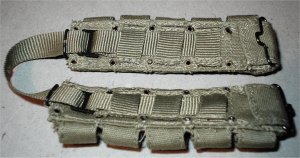
The picture below left shows the magazine pouch as
it comes supplied with the Ricky Foster figure, in the same picture is one of
the pouches that I have cut down to hold the smaller 20 round magazines. To get
the size of the pouch right, and leave a little slack at the bottom, I
placed a 20 round magazine into one of the slots and marked the pouch with a
pencil where it needed to be cut down to the smaller size.
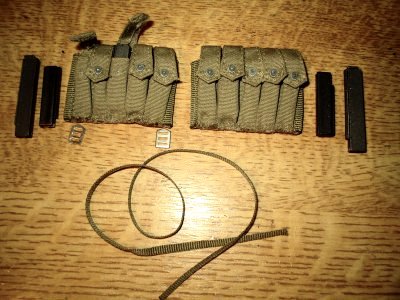
This is where I got a bit nervous about doing
this, but if I wanted the pouches as in the pictures from the book above.
I had no choice but to carry on and cut them up,
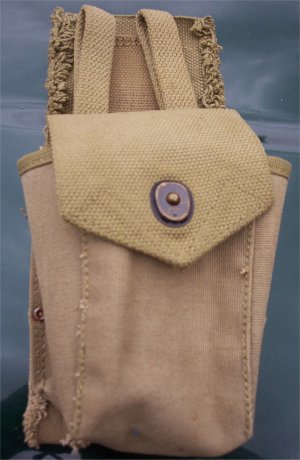
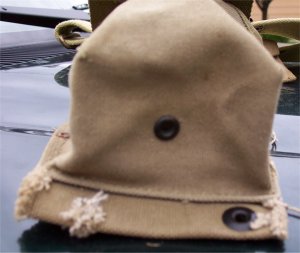
in the picture above right are the pouches that have been cut down to fit the
magazines, the bottoms of them were then sewn together with some thread that is
near to the colour of the pouch. Because they had to be sewn together by hand, I
took my time and used very small stitches to close it up.
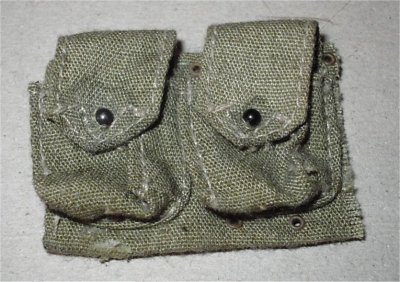
I have also shown in the picture a 20 and 30 round
magazine for comparison, and it shows how much smaller the pouches are now.
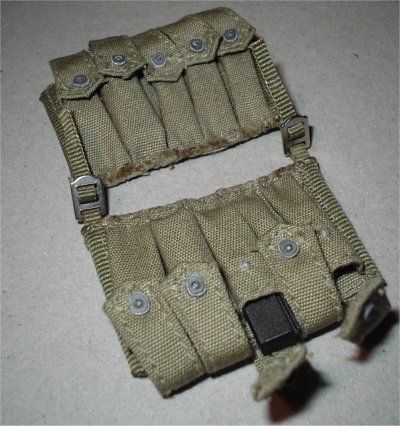
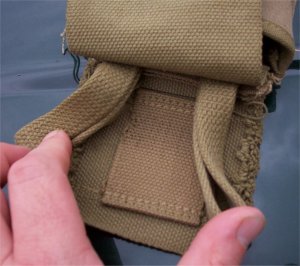
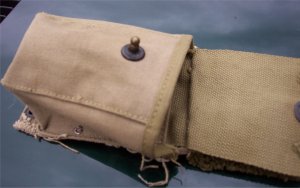
Above are the finished pouches with the straps and
clips sewn into place. I had a bit of luck with the material for the straps,
because I found a piece of webbing in my spares box that is just the right
colour. I think it came from one of the rifle drop bags I have so that you can
tie the bag around a figures leg. One side of the straps had a loop of webbing
threaded through the buckle and then sewn in place on the back of the pouch. For the other side I just cut two pieces of the
webbing, and then sewed them onto the back of the other pouch. Once that was done I just threaded the strap
through the buckle as above and pulled them tight. All I have to do now is make a kitbash to use this
with the figure, remembering that the shoulder webbing on the figure goes
through the loops on the back of the pouches.
One thing I am not very happy with are the edges
of the bottom of the pouches, I may have to find a way of tidying them up
somehow. Because they frayed slightly while I was making this, I did get rid of
some of the loose threads by running my lighter along the edges. But that is not
the best option for this, so I will have to look for an alternative, if I do
anything like this again. Plus, I will have to run a little bit of a light
pastel or grout along the edge to take out the brown colouring.
Browning Automatic Rifle Pouch
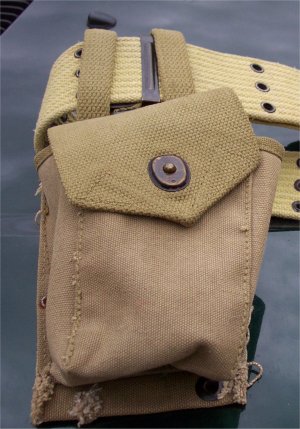
Because I want this figure to look different with
the equipment that he has, I decided to make a separate BAR pouch based on the
pictures that were supplied to me by (.308) Paul. This is how I made this
pouch up and I am very impressed with how it looks on the belt. Apparently this was not a common occurrence to cut
the separate pouches from the BAR belt, but it was done. And I have just got
around to trying it out in 1/6th scale and I am very impressed with the result,
as it does look different.
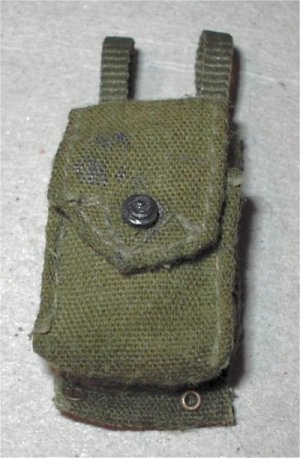
On the left above are the DML pouches with one of them separated, which I did by
laying them down on a cutting mat and using a new sharp blade in my knife, just
cut in between them. Once the pouch was apart I then used my wire cutters to
trim off any loose threads, and I also used them to trim up the sides to match.
I then found some thin green webbing material from a spare broken US shoulder
suspender set, and cut off two lengths of the material to make the loops, making
sure that they can go over the belt as above. Once I had them sewn on to
the back of the pouch, I then made up some watered down dark green acrylic paint
and dipped the pouch into it to make the colour different to the other pouches I
have.
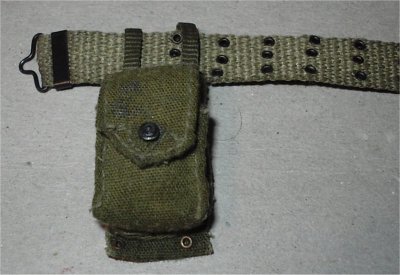
I then pressed the wet pouch down onto some tissue to remove most of the water,
which also helps to let it dry faster as well. I then added a CVI lift dot
repainted with Gunmetal paint and hung the pouch from my figure’s belt as above
right. I do like this idea and it does add a different look to the belt
equipment on my figure.
The pictures below are the one's that were very
kindly sent to me by Paul for reference.
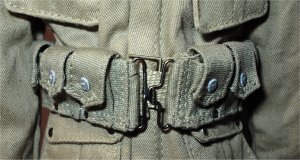
DiD .30 cal Ammunition Belt
I remember reading somewhere on the Sixth Army
Group forum, about how someone changed the belt that came with this cartridge
belt for the other standard waist belt. So I got to wondering if I could do it
as well? Mainly because I am always thinking how I can make my figures equipment
look different.
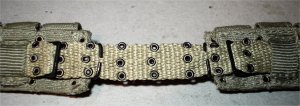
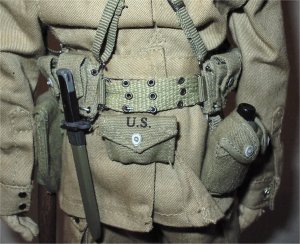
The first thing I did was to take the normal belt
apart as above left, I then took out the strap from the cartridge belt and
swapped them over, it was a bit of a tight fit to get the belt in place with the
grommets but as above right it can be done.
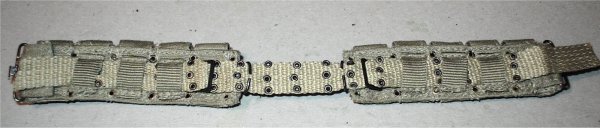
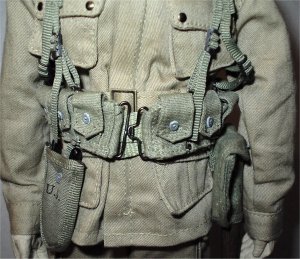
The pictures above show the belt in place which
has the ends overhanging, these will be folded over later back into the first of
the three canvas straps for the cartridge pouches. The final picture above show
the belt in place which I will adjust so that I can hang the first aid pouch in
the middle at the back.
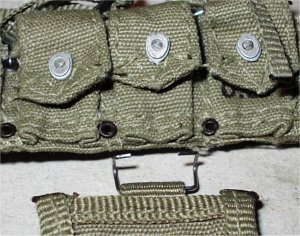
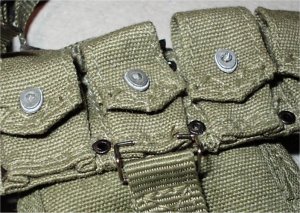
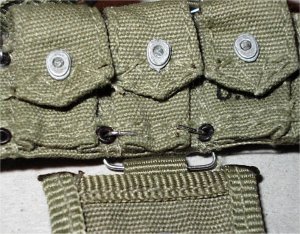
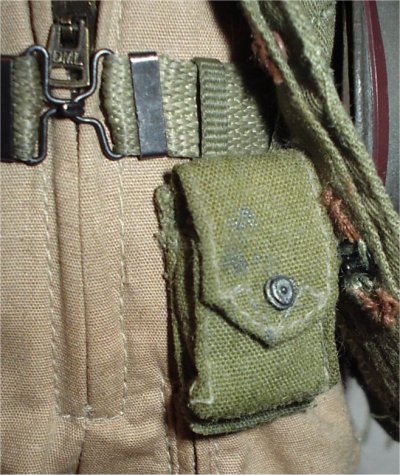
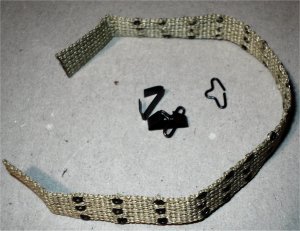
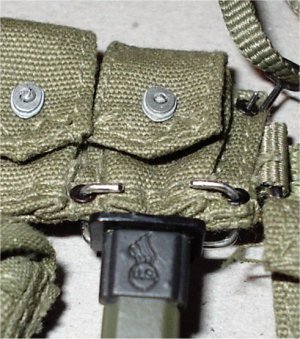
The first two pictures above show how the clips
for the belt equipment are too small to fit onto the .30 cal ammo pouches, the
third picture above shows the wire cutter pouch with a new clip I made from 30
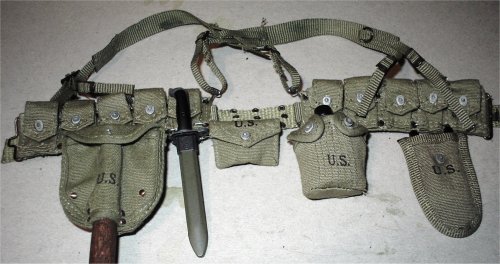
amp fuse wire. The pictures below show the bayonet fitted to the belt, the other
pictures are of all the equipment attached.
| 