|
Welcome
To My Gebirgsjager Radio Operator
Page.
This model is based on my other figure that I
made of a German radio operator, which
unfortunately I do not have anymore. So as a replacement for it have built this
one, one of the differences is that I am using the new DiD metal radio unit
which came with the Wolfram figure.
Radio Unit Review
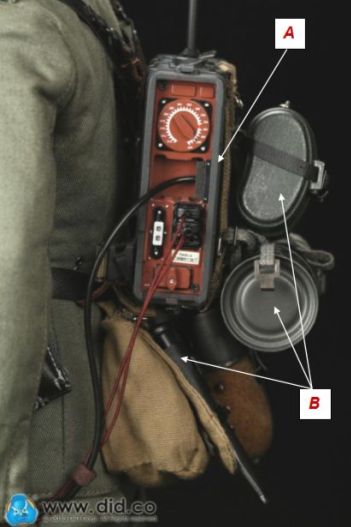
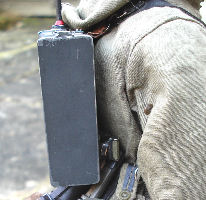
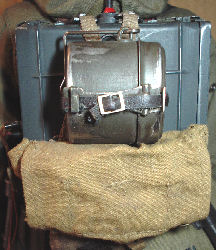
 Overall I am impressed with the radio unit
A as it
is metal and I think die cast, which is a weight of 90 grams on it's own. And in
the picture I have used here, with the metal mess tin, gas mask, bayonet and
water bottle B. In my opinion, I think that the boxed figure may have a problem
standing up, as there is a lot of weight there to pull it backwards. Though I am
willing to be corrected on this, by someone who has assembled the full figure.
The dials do not move. The top clips that hold the side panels in place, are
crisp in their detail, but they may have to be handled very carefully. Overall I am impressed with the radio unit
A as it
is metal and I think die cast, which is a weight of 90 grams on it's own. And in
the picture I have used here, with the metal mess tin, gas mask, bayonet and
water bottle B. In my opinion, I think that the boxed figure may have a problem
standing up, as there is a lot of weight there to pull it backwards. Though I am
willing to be corrected on this, by someone who has assembled the full figure.
The dials do not move. The top clips that hold the side panels in place, are
crisp in their detail, but they may have to be handled very carefully.
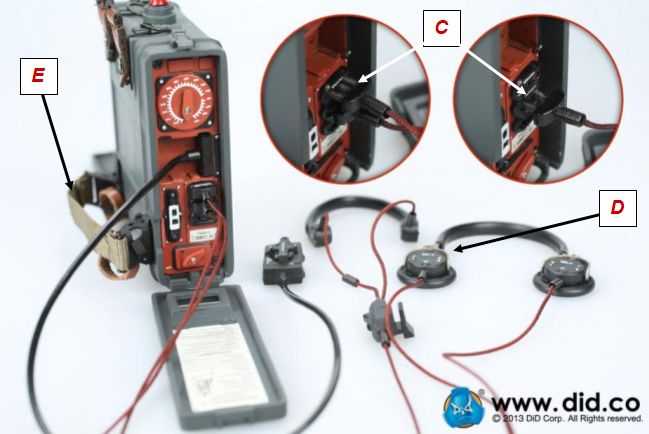
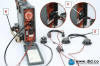
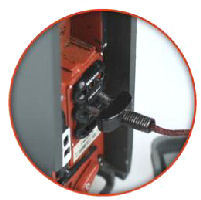
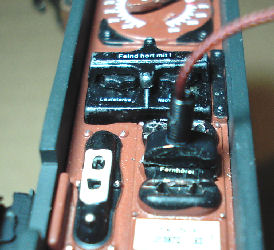
The radio wiring as shown in C are very good pictures, of how far the pins for
the wires can go into the radio. As I have not been able to get them into the
holes any further than this, as they look like plastic and if you force them
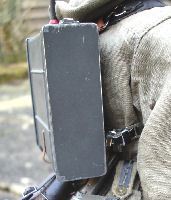
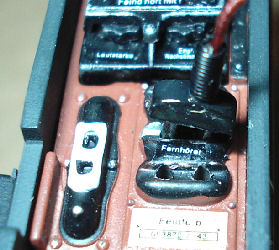
they may break. D are the headphones and they have to be very carefully turned
to get them to fit on a figure's head, as the rivet holding them together is
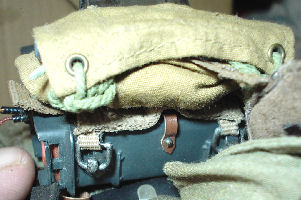
quite tight. The canvas strap E is well made and the clips to hold it in place
are again nicely detailed in metal, although care has to be taken with the
leather straps connected to it. As the belt has to be put through these loops.
 There is no carry handle on the top of the radio as shown in
F, although the
metal parts on the top do have a very small gap in them. So a thin piece of
leather could be pushed through to replicate this.
I got my radio model loose so the clips G were missing, which to me is no real
worry as I can hopefully make these myself. The leather strap at the back and
bottom of the radio H, can be taken off the pip to hold the 'A' frame in place.
But again this has to be done carefully as the rest of it looks like it is glued
in place on the metal radio body. There are also two rings on the top of the
radio to fix the 'A' frame to, as well There is no carry handle on the top of the radio as shown in
F, although the
metal parts on the top do have a very small gap in them. So a thin piece of
leather could be pushed through to replicate this.
I got my radio model loose so the clips G were missing, which to me is no real
worry as I can hopefully make these myself. The leather strap at the back and
bottom of the radio H, can be taken off the pip to hold the 'A' frame in place.
But again this has to be done carefully as the rest of it looks like it is glued
in place on the metal radio body. There are also two rings on the top of the
radio to fix the 'A' frame to, as well
 as two angled metal clips on the base for
the 'Y' strap connectors. I is what looks like a morse code handset again made from metal, which connects
very loosely to the end of the thicker wire. as two angled metal clips on the base for
the 'Y' strap connectors. I is what looks like a morse code handset again made from metal, which connects
very loosely to the end of the thicker wire.
The aerial is fixed into the top of the radio, with the actual aerial made from
what looks like wire. It is easily bent, but putting it between two books should
straighten it out. The rear main leather straps to fix the radio to the 'Y'
strap are nicely made, but the wrong shape when compared to the real radio. But
then again these items could be difficult to mass produce in 1/6th scale, so I
am not really fussed about them.
As I said before I am very impressed with the radio model, as it has a lot of
very good detailing on it, and the decals are very well produced. The only real
concerns I have are the weight of it, and that I may have to drill out or
slightly enlarge the holes for the wiring pins.
Note: Even though the radio is made from metal, I do recommend taking care
when assembling it onto a figure as it is better to be safe than sorry.
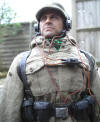
Headsculpt and Body
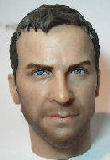
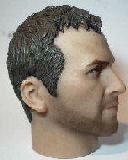
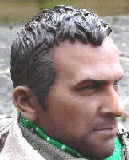
The headsculpt is again one that I got loose, but
I cannot remember who made it. I have had to remove some of the inside of the
neck post, so that I can get it to fit onto a Dragon Neo2 body. I have also given it
the usual pastel wash
treatment to add some darkness to the face, as well a drybrush afterwards of
Flesh pastel chalk.
1.  2. 2.
 3. 3. 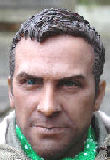 4.
4. 
Pictures
1.
&
2. are of the head as I got it loose,
with pictures 3. &
4. taken outside in daylight to see just how much the pastel chalks
had changed the headsculpt.
Uniform
With the clothing for this figure I have been
experimenting with the pastel washes on it, I have had some good results with
camouflage material.
So I got to wondering if I could get a different
colour with a plain material, so I gave the new Toys City gebirgsjager anorak a
wash with some Brown pastel chalks (not oil pastels).
The same way that I did with my
Heer smocks and the
Heer winter suit.
5.
 6.
6.
 7.
7.
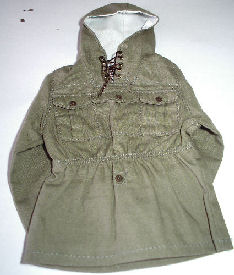
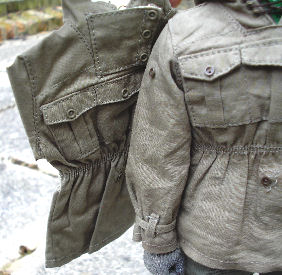 Picture 5. is
the new anorak as I got it loose, before I have given it the Brown pastel chalk
wash in Picture 6. to show the difference
whilst it is still wet. Picture 7. is the
smock on the figure, after I have also given it a drybrush with some Light Sand
weathering powder, the picture taken outside to show the slight colour
change. Picture 5. is
the new anorak as I got it loose, before I have given it the Brown pastel chalk
wash in Picture 6. to show the difference
whilst it is still wet. Picture 7. is the
smock on the figure, after I have also given it a drybrush with some Light Sand
weathering powder, the picture taken outside to show the slight colour
change.
Pastel chalk wash & strange
result
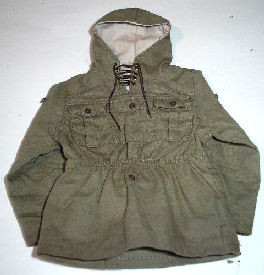
When I took Picture 7.
outside in daylight, something struck me about the colour of the anorak, as it
seemed to be too light in colour and I could not work this out. I have just realised by placing another new Toys
City anorak, behind the one that I gave the pastel wash to, in the picture on
the right. That somehow instead of going a darker shade as I was expecting, the
washed anorak on the top has gone to a lighter shade, when compared to the new anorak
behind it.
I do have a slight Brown tint in places from the
colour of the pastel chalk, but somehow in the process of applying the pastel
chalks. And then using a tissue to mop up the excess water, plus scrunching the
anorak up in my hand, and then laying it flat on my radiator to dry. The
original Green colour has changed to the lighter green colour as shown on the
right. Which has confused me slightly, because I got a
totally different result in Pictures 12. &
14. on my
Pastels page, when I did exactly the same to
the Dragon smock and winter suit.
The other clothing that I have used with this
figure, are a pair of DiD Hanke trousers (again pastel washed lightly), a Dragon
tunic, DiD boots that have been repainted with Black paint. A Dragon M43 cap and
a pair of Twisting Toyz socks over the boots.
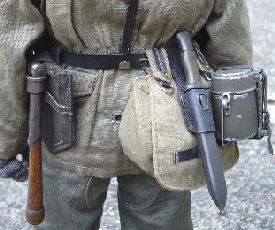
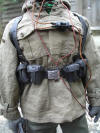
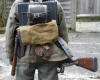
Equipment
8.  9.
9.
 10. 10.
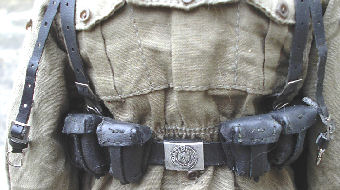
Picture
8.
is of the belt equipment that I have repainted
with Black acrylic paint, so that I have a flat uniform colour with them, plus I
have also lost any glossy effect they had. Pictures 9.
& 10. are the items on the belt after I have
given each of them a drybrush of some Light Sand weathering powders. The buckle
on the Toys City belt,
has been given a wash of black paint which was then wiped off to keep the colour
inside the detail.
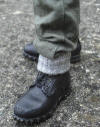
11. 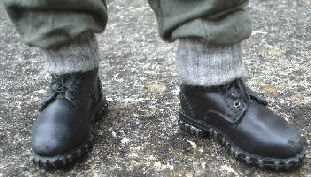 12. 12.
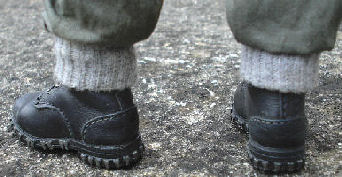
Pictures 11. &
12. are of the DiD boots that I am using
with this figure, they were originally Black but glossy. So I have
repainted them with
some Black acrylic paint to get a flat finish to them. Plus I have
weathered them with the
damaged toe cap. Once dry I then gave them a drybrush of some Light Sand
weathering powders, and as shown it helps to bring out the details of the boots.
Also shown are the socks I used with this figure, which came from the Twisting
Toys Marco figure. Which have been put over the bottom of the trouser legs and
then folded over the boot tops.
Radio
Assembly
With my other
radio figure I made, I had to
make a lot of changes to the plastic radio unit. But this DiD unit is made from
metal, which I have found is a lot stronger. But there are pieces to be careful
with, such as the clips on the top which hold the side panels in place. As well
as the clips to hold the auxiliary 'Y' straps in place, as I found on my radio
the mountings for the waist strap were a little loose.
Note: I have
found as I mentioned it earlier in my review, that the metal unit on the back of
the figure Along with the metal mess tin and water bottle, does make the figure
have a tendency to fall over backwards.
Radio
Assembly &
Carry Handle
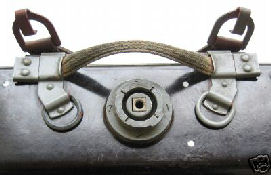
One item missing from this radio unit is the
handle on the top as shown below.
13.
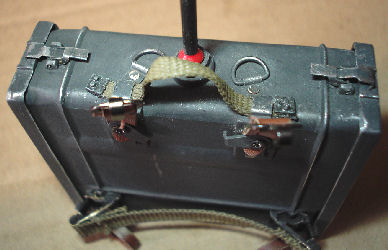
 14.
14. 
Picture
13.
is of a full size radio unit carry strap, and in
Picture 14. I have used a strip of
grossgrain ribbon that I have spare to make the carry strap. Two small squares
of plastic were glued on each end, with four small domes of plastic to replicate
the rivets. Because the ribbon I used is of a different colour, I have repainted
both this and the waist support strap a Khaki colour so that they both look the
same. The plastic ends were painted with some Gunmetal acrylic paint, to get a
near match to the colour of the radio unit. I have also given the whole radio
unit a drybrush
Radio
Assembly & 'Y' Strap
On this figure I have used a pair of DiD 'Y'
straps, which I have also repainted with some Black acrylic paint, because to me
they were too glossy plus they also have white threads.
15.
 16.
16.
 17.
17.
Picture 15.
shows the 'Y' straps that I repainted and gave a drybrush of some Light Sand
weathering powders, with the top hooks for the radio connected to them. Picture
16. shows the side connector on the radio
for the auxiliary straps on the 'Y' straps, with Picture
17. showing the loop from the strap connected. Also shown here is
where I have scraped the edges with my model knife, to replicate the wear and
scratches on the radio edges. Which has given a nice worn effect to the radio,
and as the metal that the radio is made from is a Silver colour, I don't have to
do a drybrush of Gunmetal or Silver to get a worn effect.
Radio Headset Connectors
18.  19. 19.
 20.
20.
One of the problems that I found with the DiD
radio unit, are the connectors for the headset and microphone. As shown in
Pictures 18. & 19.
the connectors cannot be fitted fully into the radio unit. So to get over this I
used my model drill with a fine drill bit, and I drilled out the holes so that
the pins would fit into them. (Note: I first
put the drill end into the holes and then started the drill, as this way I stay
in the hole so that it does not slip and cause damage). So that as shown in
Picture 20. after also carefully sanding the
pins, I can get the connectors pushed in place.
Radio & 'A' Frame
Like my other radio operator figure I have also
put an 'A' frame onto the front of the radio, but because I got the radio unit
loose I did not get the DiD frame. So I have had to use a Dragon 'A' frame
instead that I had in my spares box.
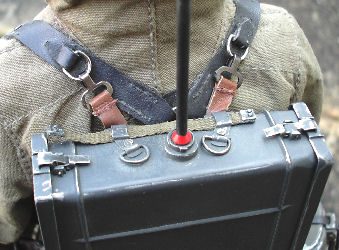
21.  22.
22.  23. 23.
Picture
21.
is of the top connectors that fit quite easily,
but the Dragon 'A' frame connectors on the bottom as shown in Picture
22. are slightly too big to hook fully into
the radio hooks. So I will have to sand the back of the connectors slightly, so
that they clip in place. Picture 23. shows
the 'A' frame in place, with a DiD metal mess tin with a Dragon bag, into which
I have also put the side panel for the radio.
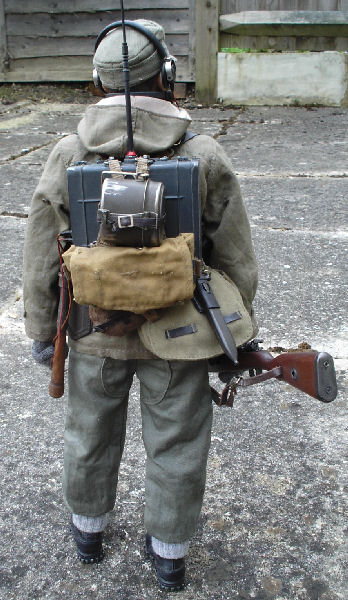
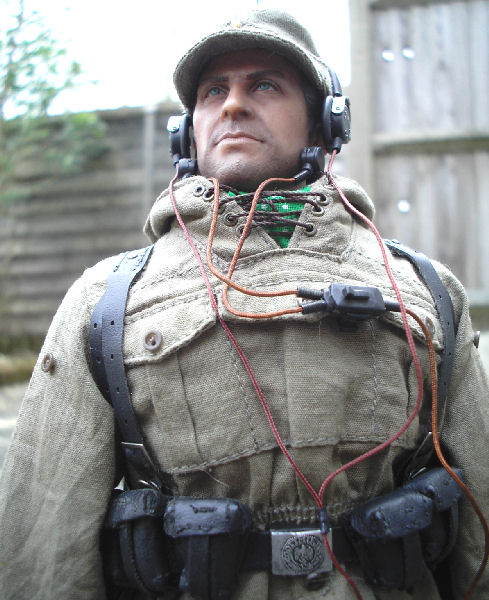
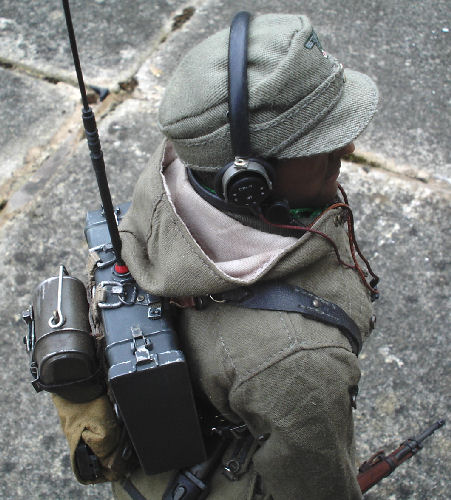
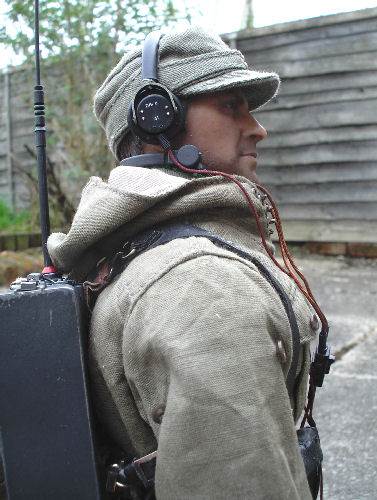
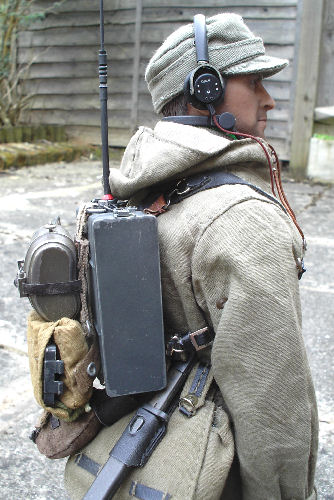
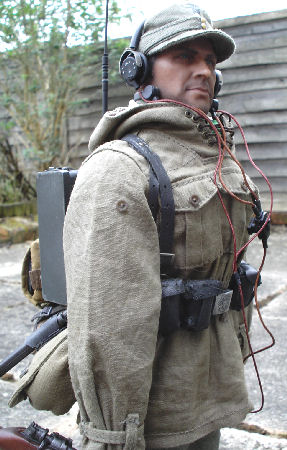
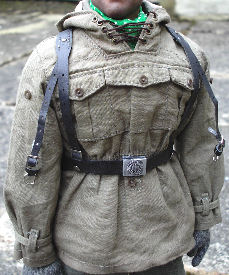
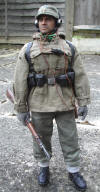
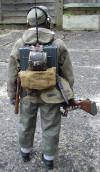
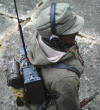
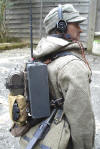
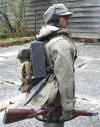
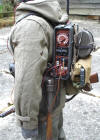
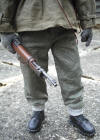
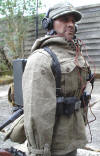
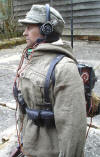
Finished Figure
The pictures below show the
finished figure, with a DiD rifle.

|