|


Welcome
To My Wehrmacht Radio Operator Page.
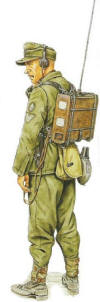
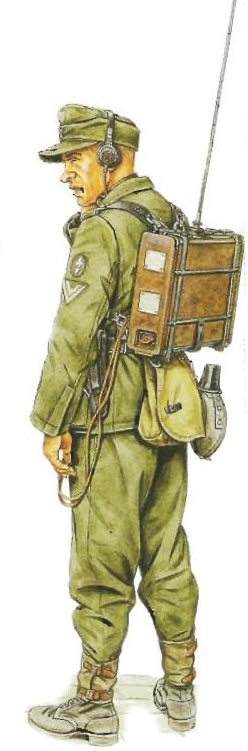
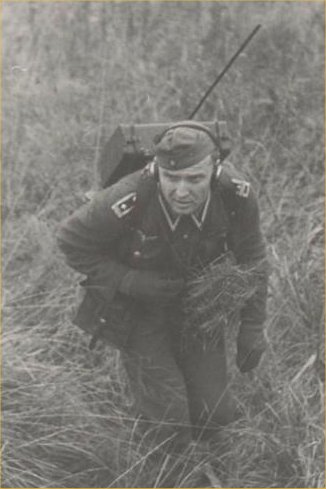
This page is a kitbash I have made based on the
picture on the right, of a Wehrmacht radio operator. The picture comes from the
Osprey book -
The Men at Arms series 336, The German Army 1939 - 1945 (5) The Western Front,
and from that book the picture is in Plate D. Note: I
have asked for
permission from the book
publishers, to be able to use the scanned image here for my kitbash.
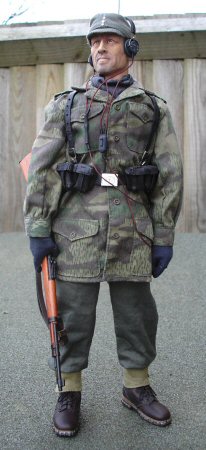
The kitbash itself is based on the Dragon Hermann
Stahlschmidt boxed figure, and the first thing I have done is I have replaced the moulded boots that came
in the set. With a pair from the Toys City Mountain set that I obtained loose, I also have
used a pair of cloth gaiters that I believe came from a German DiD figure. I
have also used a pair of cloth gloves on the hands. Most of the other parts came
from the boxed figure.
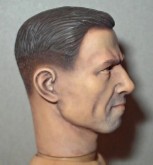
Headsculpt
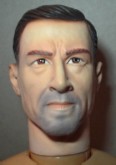
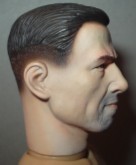
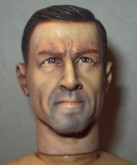
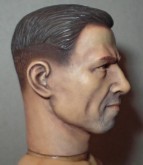
The headsculpt for this figure was again given a
wash over with some Light Brown pastel chalk, to add the shadows and lowlights
to the sculpt. And in the pictures below from the left, the first two pictures
are of the head as it came from the box, the next two pictures are after I have
given it the wash and let it dry. I then gave it a gentle wipe over with a damp
tissue to remove some of the Brown colour from the raised parts of the face. The
final two pictures below show the headsculpt after I have given it a drybrush of
a Flesh coloured pastel chalk, this is to add some highlights to the face.
Note: For this
sculpt alterations I have only used the pastel chalks. and I have not given it a
paint over with the Matt Medium acrylic paint first.

My reason for this is that I have ruined a
headsculpt recently and I could not work out what I was doing wrong. Until I had
a chat with Paul (.308) and he mentioned about contaminated brushes, and
it suddenly dawned on me that this was the problem. Because I was in the habit
of only using maybe two or three particular favourite brushes to do this work,
and if one had some residue from the paint or thinners still on it.
Then when I went to use the pastel chalks, this
could react and cause the problems that I have been having. So now I have
separated my brushes into groups so that some are for the paint and some for the
chalks. And with the result that I have got as shown above, it is proved that
Paul was quite rightly correct in what he said, and I would like to thank
him for the help.
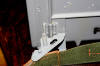
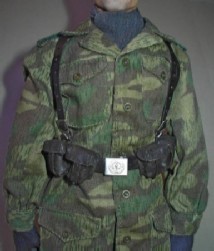
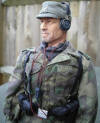
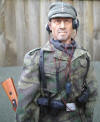
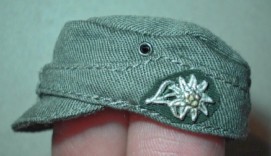 Uniform Uniform
The
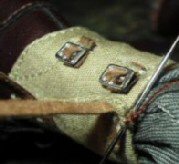
uniform consists of the camouflaged smock, trousers and a loose scarf I had. The cap is one from the Dragon Alfons figure, and for this
figure I also placed the Edelweiss insignia onto some repainted cotton printer
paper as shown right. Note: A better
explanation about how to do this is on my
Gebirgsjager page.
The only other parts that I have used are a pair of cloth gloves.
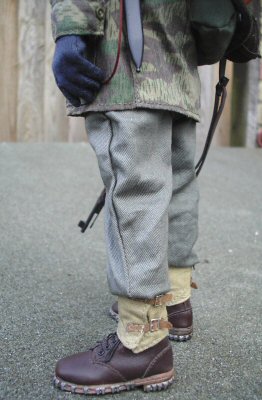
Boots and Gaiters
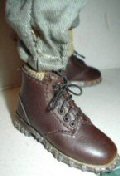

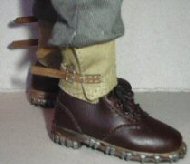
As mentioned before I have replaced the moulded
boots with a pair from the Toys City mountain set, which has had a coat of
Acrylic Matt Medium applied to them to lose the shine. And as shown above left I
have tied the laces as tight as I could. Also I have tied the trouser bottoms as
tight as I can, so that all the slack has been taken up which help when I fit
the gaiters.
The next picture above shows the gaiter placed
around the boot, which is pulled tight on the gaiter material and not by
the straps. Note: Because as I have found
that if you pull the straps too hard they will break. So to make sure that I can
get the gaiters tight, I then pinch them together at the top and sew a couple of
stitches in place, making sure that they cannot be seen from the front. The
point of doing this is that the tightness of the gaiter is held in place by the
thread, and not by the fabric straps.
And as shown by the next picture above, I have
done up the straps by making sure that I press the gaiter together at the top
and bottom when I am doing this, so that there is less chance of the straps
breaking. And in the picture shown above right I have bloused the trousers out
over the top of the gaiters. Note: I always
leave the straps long as shown, just in case I have to remove the gaiters for
any reason and I usually cut these shorter after I have finished the figure.
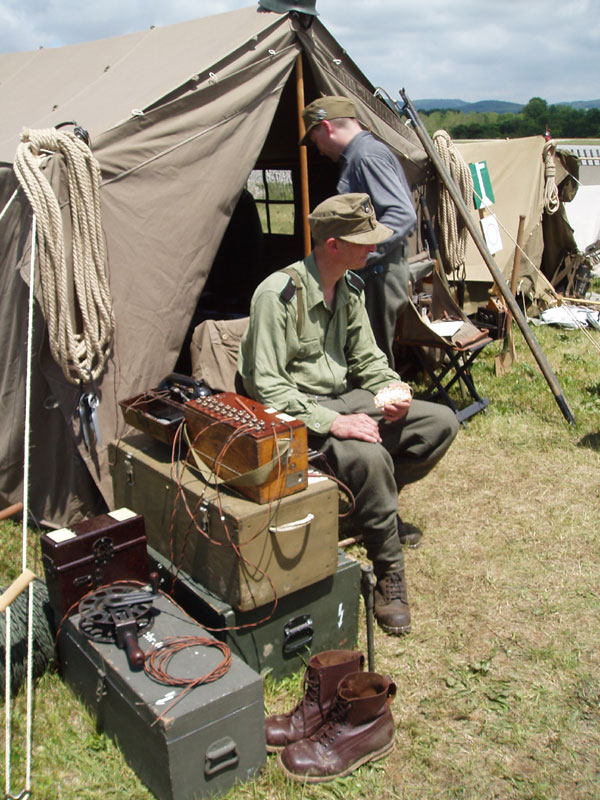
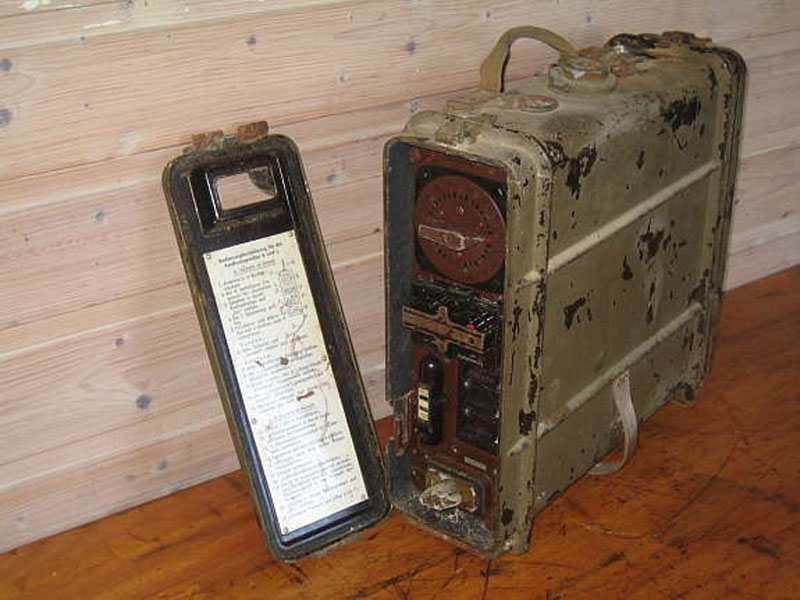
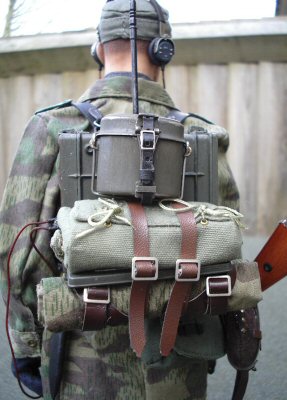
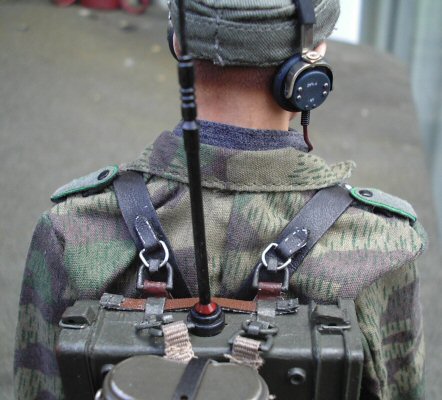
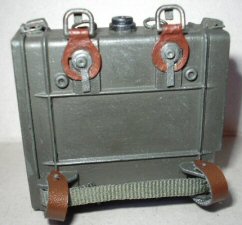
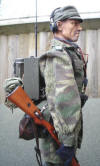
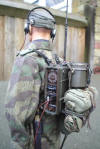
Radio and Equipment

The two pieces of radio equipment that came with
this figure are to be used separately, and not as I mistakenly thought that they
were combined together to make one radio unit. Because after asking
Patrick (Heersbergfuhrer) about this figure, he has been very helpful in explaining to me
about these radio sets.
With my figure here I am using just the backpack
section as this is called a Feldfunksprecher.b radio unit. And two links to show
 what
the unit is are here -
Backpack Radio and also here -
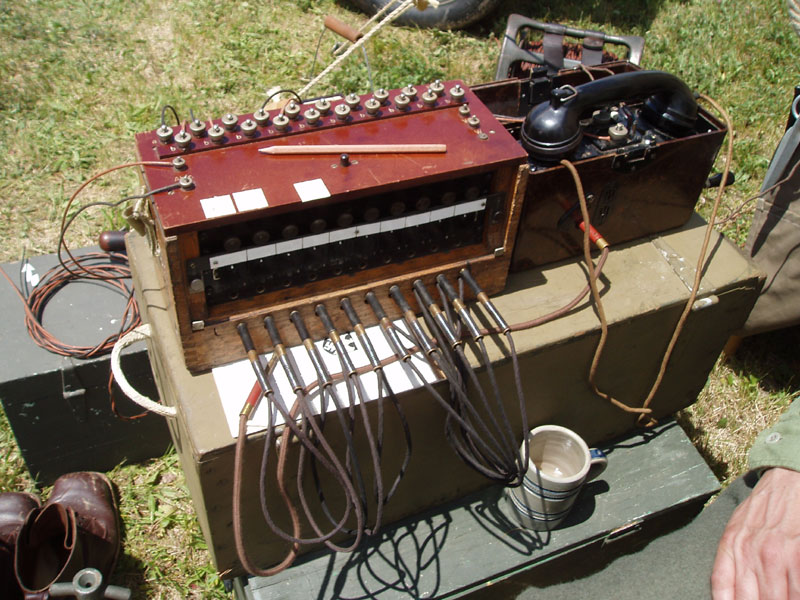
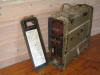
Backpack Radio. The other unit that came
supplied
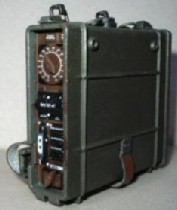
with the figure is a Feldfernsprecher 33 which is a
separate telephone unit which is normally plugged into a larger switchboard unit for
something like headquarters use, which is shown in the pictures on the right.
Links to pictures of this unit are here -
Telephone and also here -
Telephone. what
the unit is are here -
Backpack Radio and also here -
Backpack Radio. The other unit that came
supplied
with the figure is a Feldfernsprecher 33 which is a
separate telephone unit which is normally plugged into a larger switchboard unit for
something like headquarters use, which is shown in the pictures on the right.
Links to pictures of this unit are here -
Telephone and also here -
Telephone.
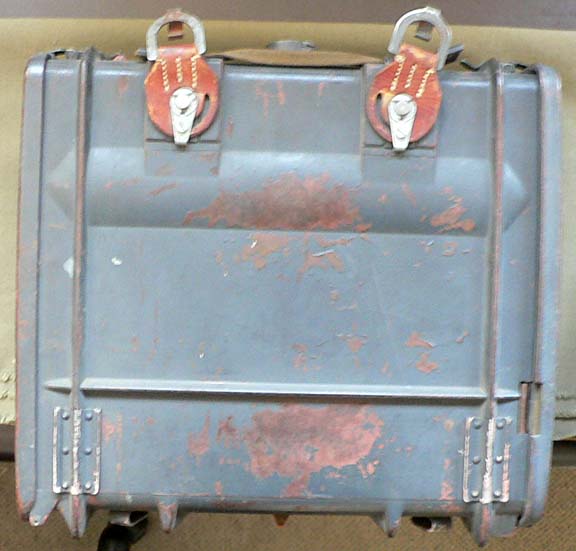
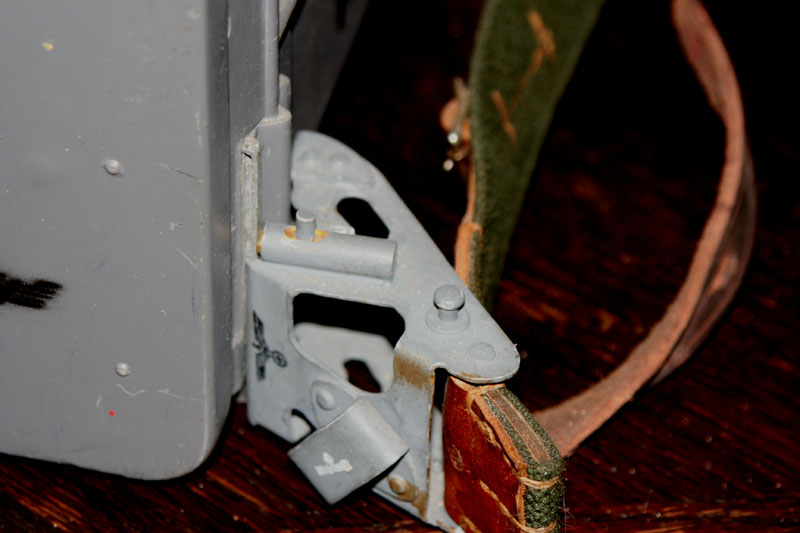
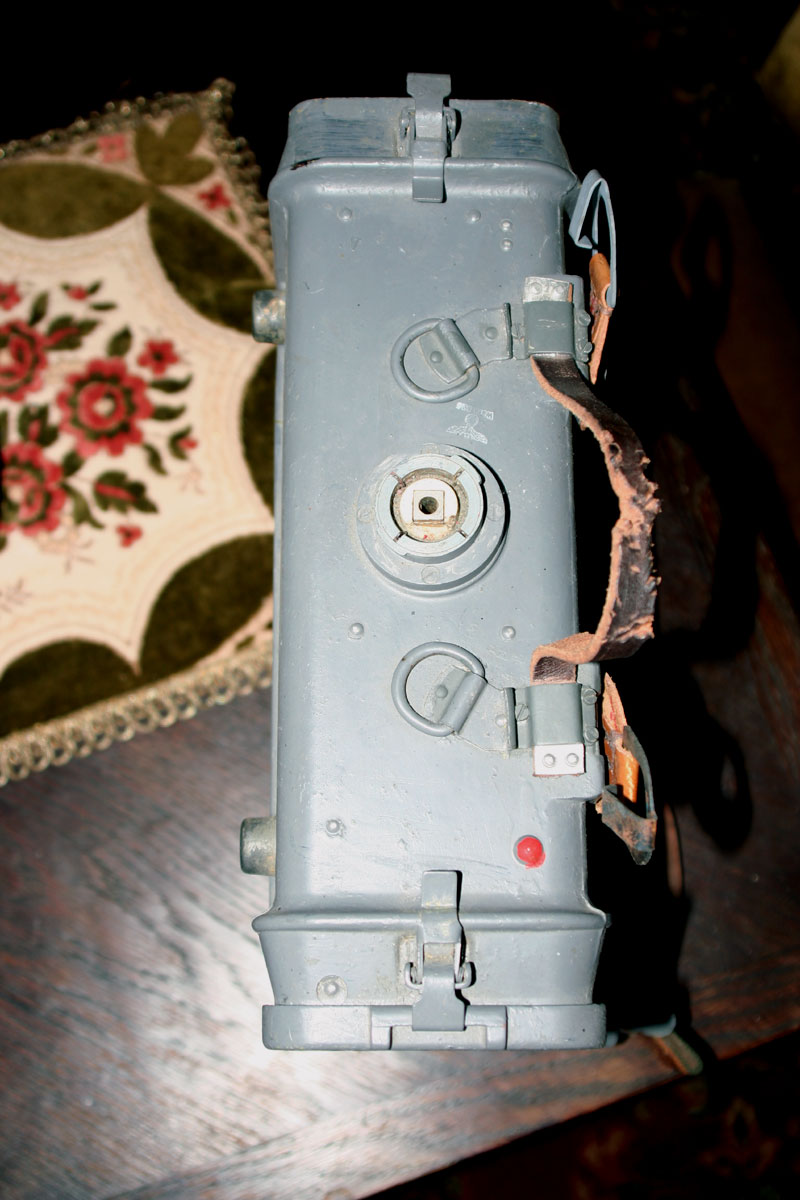
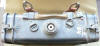
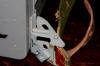
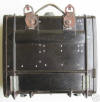
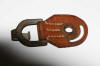
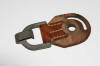
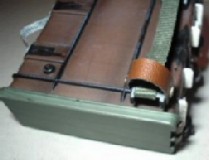
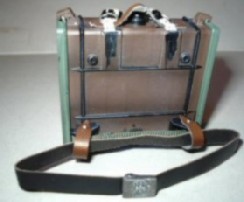
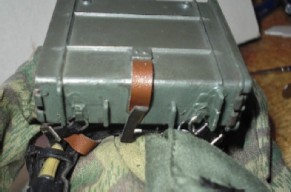
Radio 'D' Rings and Mountings Error
I have just discovered that there are no 'D' ring
fittings on the radio backpack from the box, which are used to fit the radio
onto the 'Y' strap at the top, also nothing is on the bottom of the radio unit
as well, so it cannot be fitted to the auxiliary straps at the bottom. So as
this piece came from the box as shown on the right, I have no choice but to try
to scratchbuild all of the
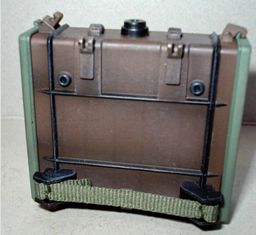 fittings for
this, along with the other 'D' rings I need to be able to fit an 'A' frame to
the front of the radio for the zeltbahn and the carry bag. fittings for
this, along with the other 'D' rings I need to be able to fit an 'A' frame to
the front of the radio for the zeltbahn and the carry bag.
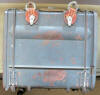
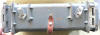
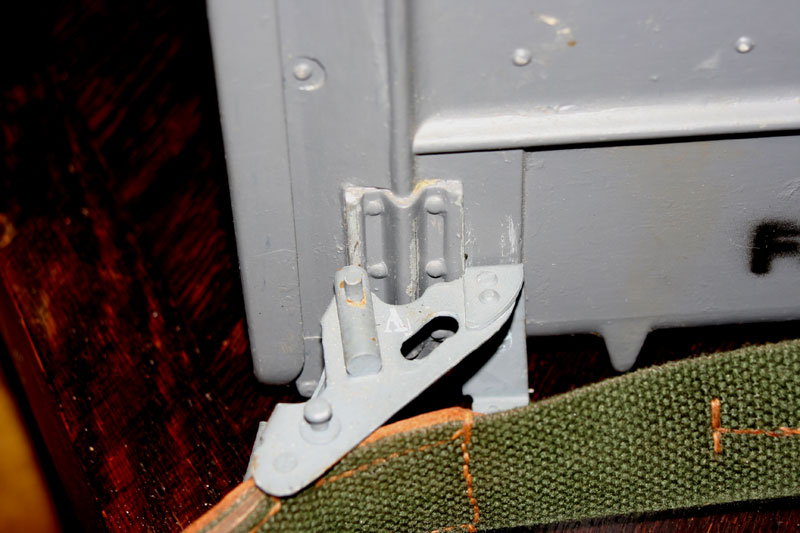
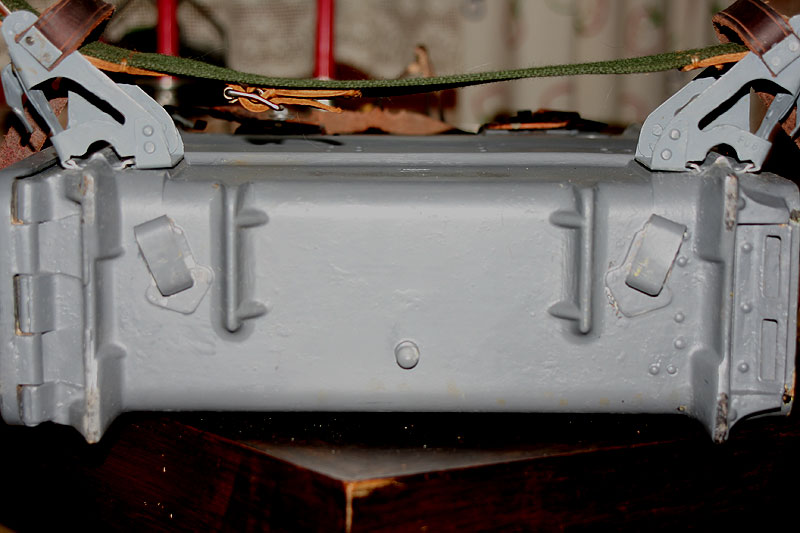
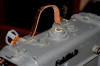
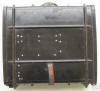
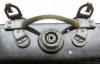
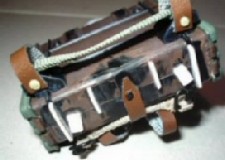
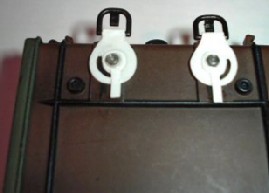
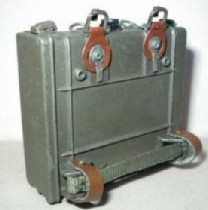
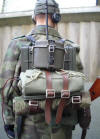
Radio Changes
With the help of Rob from the
Fieldgear.org, and the pictures
above I have been able to make some of the changes that I wanted to do to this
radio unit to make it look a bit more realistic. And from these pictures I now
have a very good idea about what I have to make, both for the top 'D' rings, the
extra leather carry strap and also the bottom leather strap to hold the 'A'
frame in place.
In the first picture above I have removed the
moulded brackets from both the top and the side, and on the top I have used some
plastic strip to make new brackets for the 'D' rings. I also raised the 'D' ring
mountings slightly so that I could fit a leather carry handle. The picture in
the middle above is where I have removed the
moulded strap at the bottom of the radio unit, and I have used some spare
pleather material to make the leather strap that is used to secure an 'A' frame
to the front of the radio. Also underneath I have made a small pip from some
stretched sprue, to make the stud that the leather strap fastens to. The picture
above right shows how I have made two leather straps that go over the waist
belt.


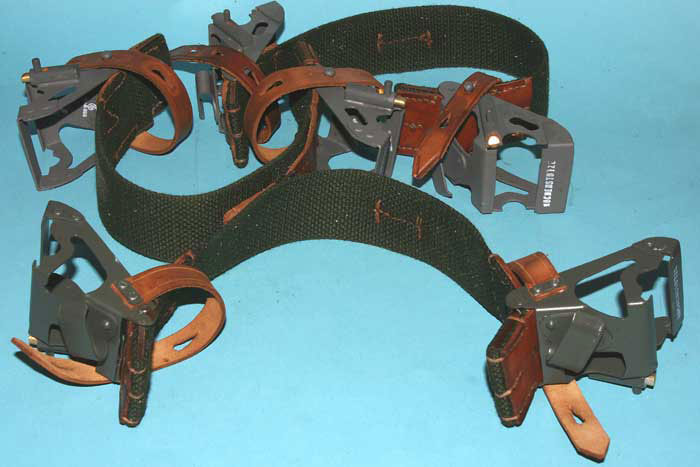
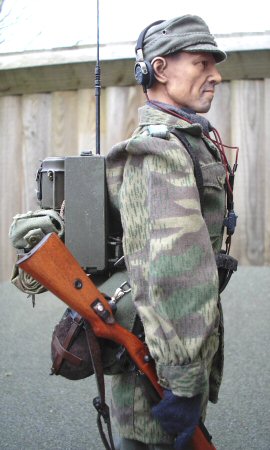
The reference pictures above were very kindly
supplied by Per from his very informative website about
German and Russian radios.
And they have helped immensely with some of the smaller details that I was
after. Especially with the main leather top 'Y' strap connectors as shown above
right, since they are a major part of the whole radio assembly.
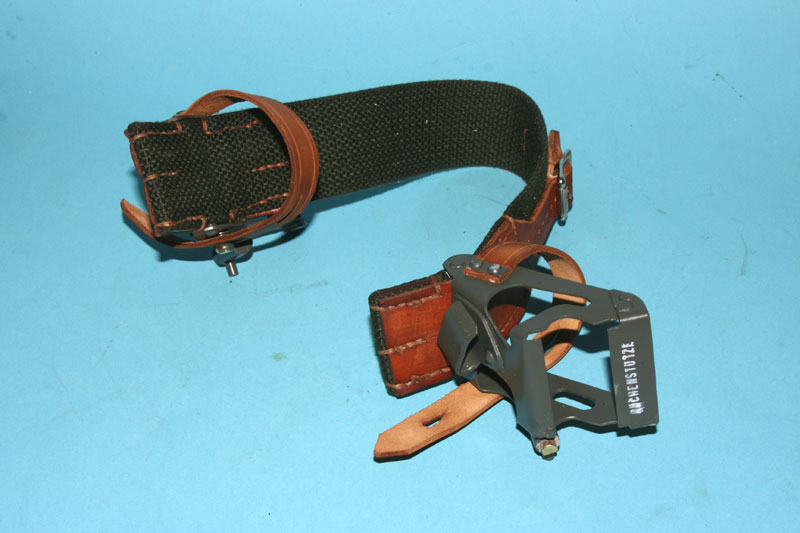
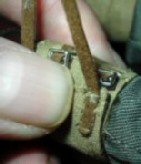
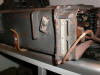
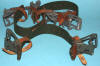
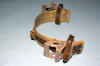
Here I have a close up of one of the waist belt
securing straps, with a pin I have made from some stretched sprue which is
placed through the strap and then through two holes I made in the bracket, this
took about three goes to get right as I wanted a tight fit for the pin, I then
glued the top part in place so it would not come out. The middle picture shows
the stands I made from plastic on the bottom of the radio unit, and also the two
brackets so that the 'Y' strap auxiliary strap rings can connect correctly. In
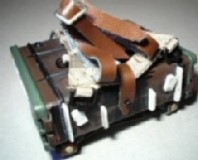
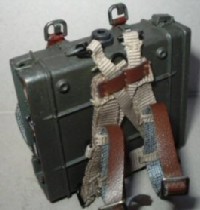
the picture above right I have test fitted an 'A' frame to the front of the
radio, to check that it fits properly on both the top 'D' rings and that the
lower centre leather strap holds it in place.
These pictures show the 'A' frame test fitted onto
the front of the radio, the waist belt test fitted to see that it goes through
the new leather support straps on the radio. And above right I have scratchbuilt
the main top 'Y' strap supports for the radio, I was going to see about making
these from some type of leather material, but I decided to use some thin plastic
instead because I found that this will be stronger, especially with having to
have the clasps fitted to them as well. Plus it would be easier to glue plastic
to plastic, rather than leather to plastic.
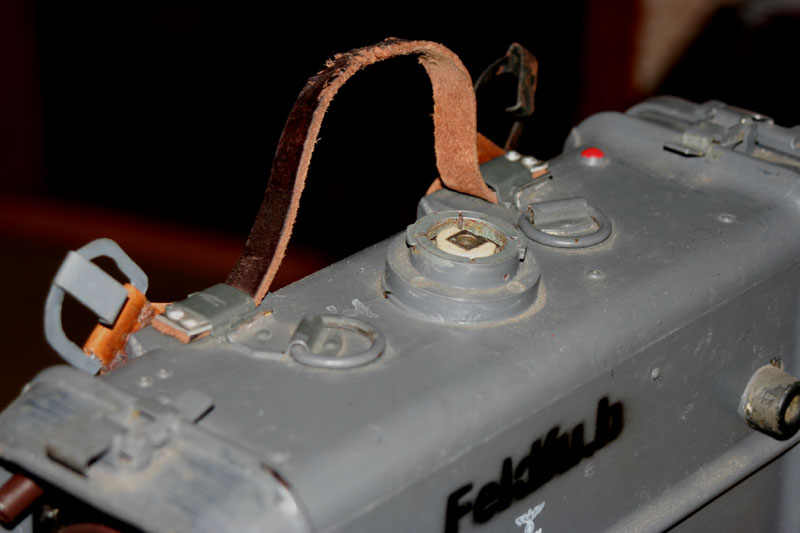
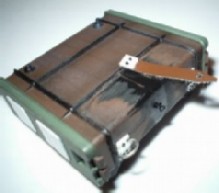
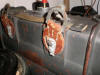
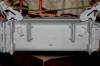
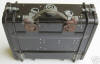
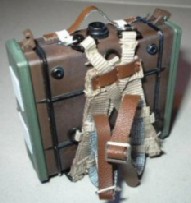
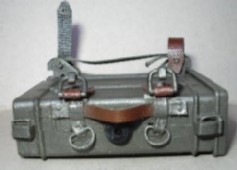
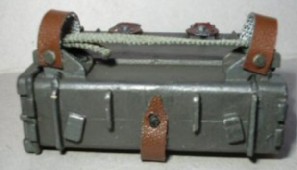
Painting of the Radio
These pictures are of the finished and painted Feldfunksprecher.b
radio unit, and to be honest I am still surprised at how it has turned out,
since I did at times doubt whether I would actually do this or not. Were it not
for the very generous help of both Rob and
Per I would still be scratching my head
about what it is supposed to look like.
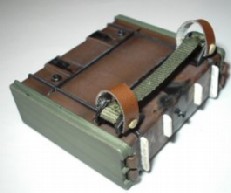
Fitting of the Radio


 With
the test fitting of the radio as shown above, I also ran into another small
problem with the auxiliary 'Y' straps that I wanted to connect to the bottom of
the radio. This was that even when I fully adjusted them, they were still
slightly too short to fit properly, so I adjusted them out all the way. And then
sewed the 'D' ring inside a small loop at the end of each of them, I then
adjusted the buckle down so I could now connect the straps to the bottom of the
radio as shown above right. With
the test fitting of the radio as shown above, I also ran into another small
problem with the auxiliary 'Y' straps that I wanted to connect to the bottom of
the radio. This was that even when I fully adjusted them, they were still
slightly too short to fit properly, so I adjusted them out all the way. And then
sewed the 'D' ring inside a small loop at the end of each of them, I then
adjusted the buckle down so I could now connect the straps to the bottom of the
radio as shown above right.
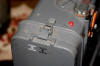
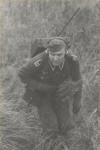
Two very good reference pictures was sent to me by
Rob, and I have shown them here on the right.
And it has answered a lot of my questions I had regarding this figure, and if I
was getting it right or not. As I did have some doubts raised about whether the
leather 'Y' straps were used with this radio, and in these period pictures, it
is clear that the straps were indeed used.
Also I was also concerned about the size of the shoulder
boards on the tunic, and how the 'Y' strap was worn. And for these questions I had some very good
help about this on the Sixth Army Forum as well
here.
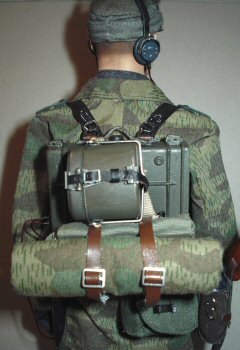
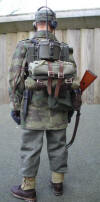
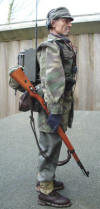
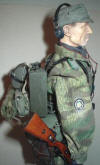
 Finished Figure Finished Figure
With the pictures below I have finally got the
headphones and microphone fitted to the figure, and also connected to the radio
unit. I have also fitted an 'A' frame to the front of the radio, this was mainly
done to add some extra pieces to the figure as I thought otherwise he looks a
bit light on equipment.
I also placed the side panel from the radio in
between the zeltbahn and the carry bag on the 'A' frame, because I thought that
it would have to be carried somewhere. The final part that I have used with this
figure is a wooden Soldier Story Kar 98 rifle, and I am surprised at how well it
is made. The only alteration that I have done to it is I gave the wood a rub
over with some Dark Tan shoe polish, mainly as an experiment to see how the
colour would change.


Finished Figure Changes
I have been corrected on a couple of points with
my figure, which I have shown below. One was the layout of the 'A' frame on the
front of the radio, because I had the carry bag and zeltbahn in the wrong place.
I have changed this now as shown below and on this
page.
The second point was that I had forgotten to put
on the sleeve badge.

Radio Links
Feldfunksprecher.b radio unit -
http://www.fieldgear.org/feldfu.htm
Field Telephone -
http://www.rkk-museum.ru/vitr_all/exhibits/717_e.shtml
Radio Headphones -
http://www.rkk-museum.ru/vitr_all/exhibits/334_e.shtml
One man backpack radio unit -
http://www.rkk-museum.ru/vitr_all/exhibits/309_e.shtml
Two man backpack radio unit -
http://www.rkk-museum.ru/vitr_all/exhibits/308_e.shtml
Field Telephone -
http://www.fieldgear.org/fieldphones.htm
Microphones -
http://www.fieldgear.org/comm_wire.htm
German Army equipment -
http://www.mp44.nl/equipment.htm
'A' frame layout -
http://www.mp44.nl/equipment/a_frame.htm
'A' frame layout -
http://www.sixtharmygroup.com/forums/training-center/12350-frame-assembly.html
Zeltbahn -
http://www.mp44.nl/equipment/zelt.htm
Patrick (Heeresbergführer)
for the pictures and the help with my radio figure.
Paul (.308) for all of the detailed help with my
mistakes when using my paintbrushes.
And a thank you goes to Rob from
Fieldgear.org for his detailed
help and his kind permission to use his images here.
And a thank you to Per from German
military radios for all his help, and his kind permission for the very
detailed pictures
|