|
Welcome
To My Red Ball Express Driver Page.
 This page is about my kitbash I made based on the
Dragon Eddie Strong figure, rather than have him as a normal soldier as he is
from the box. I decided to make something different and this is where this
kitbash came about, because I found some reference material which is at the bottom of the
page. This page is about my kitbash I made based on the
Dragon Eddie Strong figure, rather than have him as a normal soldier as he is
from the box. I decided to make something different and this is where this
kitbash came about, because I found some reference material which is at the bottom of the
page.
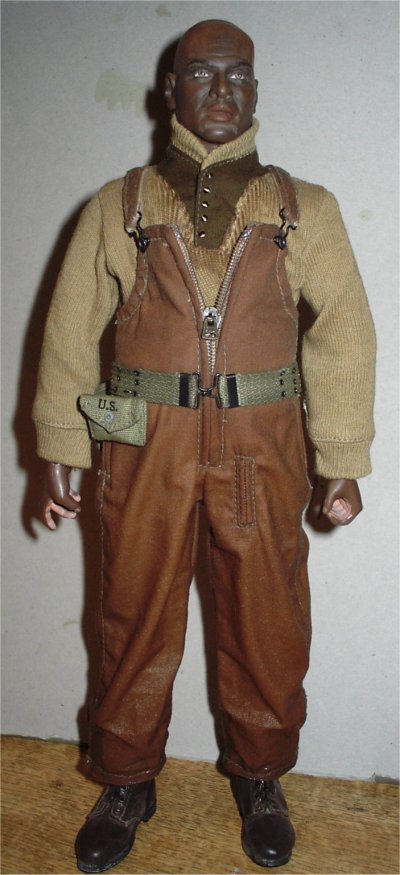
The uniform that the figure has came from a
variety of figures, the jumper is DML but what figure I am unsure, the bib and
brace trousers came from Doc Peterson and the boots, belt, water bottle and
first aid pouch are from DiD. The musette bag came from the bottom of my spares
box, with the bed roll and jacket from the DML Tom Grieger figure.
While assembling this figure I again found out
like my Tank Mechanic figure, that the bib and brace trousers he has on just do
not seem to hang right on him. So I again wrapped some bandage around the waist
of this figure to bulk him out around the stomach area.
The headsculpt for this figure was first given a
coat of Model Color 540 Matt Medium to get rid of the shine that it had, I then
mixed up some acrylic Burnt Umber and Light Flesh colour to add some highlights
to the face. Once that was dry and I was happy with it, I then used two
different brown pastel chalks dusted over the head to add some more faint
highlights. The same was done to the hands on this figure, what I did find with
making this kitbash is that I did not need to add a dark pastel wash to the
headsculpt because of the dark skin colour, all I did need to add was some
highlights instead.
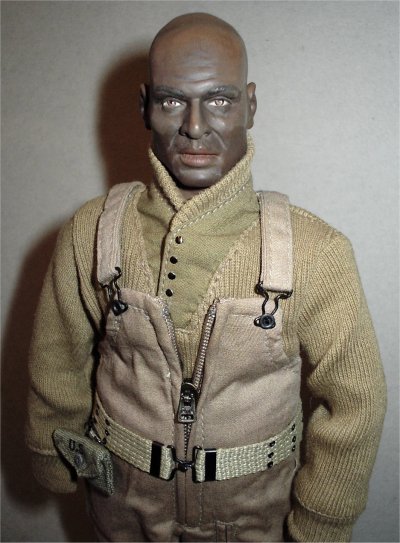
Note: One
thing I have found with my figures and the pastel chalks is that although when
the figure is in front of me, the head looks very flat and has no shine to it.
But in the photo on the right, the head looks like it needs more pastel chalks
to dull it down. This is where now I am taking pictures of the figure as I build
it, to see what the figure looks like in a picture, because it stops me from
going too far with the weathering.
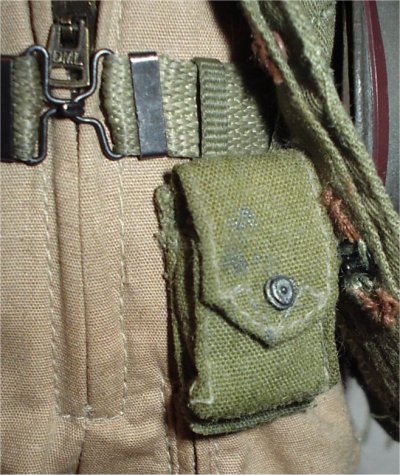
In the picture right I have repainted the belt and
pouches with diluted olive green acrylic paint, mainly due to
me disliking the
plain colour it is out of the box. Plus I have given the bib and brace trousers
a coat of thinned PVA glue to set the folds in the clothes. This to me is the
stage where the figure stops being an out of the box doll and now becomes a
scale model of a soldier, because I can set the pose and the folds in the
material to what I want.
Plus this is the part that I enjoy the most with
making my models, this is because when I was making 1:35th scale figures I could
do nothing about the creases in the uniforms as they were moulded in the
plastic. But now I can move the cloth around to get whatever crease or fold that
I want, plus with the thinned PVA the folds stay where I want them to be. Then
once the uniform is dry it is then easier to use the pastels and grout on the
clothing to make it look dirty, aged and a sort of lived in look.
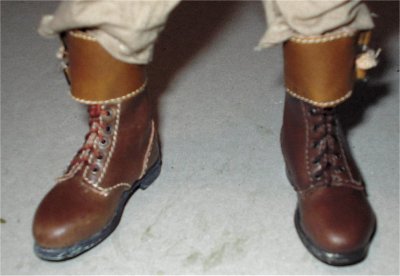
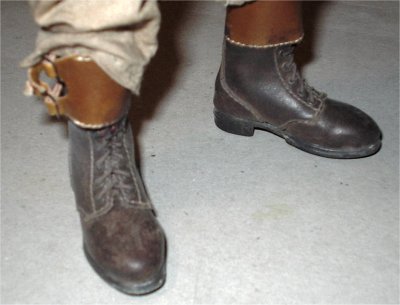
Ricky Foster Boots Repaint
The boots that I used are the DiD US double buckle
one's, but after thinking about it something had to be done about the colour of
them. I do like them although the buckles and straps could do with being tighter
as they just do not seem to look right when they are fastened up. So rather than
cut off the straps and re-sew them back on so the buckles are tighter I decided
to have the trousers hanging down over the boots instead.
Regarding the colour
of the boots I used some brown acrylic paint to re-colour them, this was first
painted on neat to colour the stitching and then with just water and a wet
paintbrush they were scrubbed to rub the colour into the material.
In the picture below left I have re-painted the
right hand boot but not the left one, so that I can show the comparison between
the two. In the next picture below I have re-painted both boots and then gone
over them again with some neat brown paint to further add the colour to them,
and while this was drying off I then used the wet paintbrush again to scrub them
to mix the colour up a bit more. In the final picture below right, I have used
some grout and pastels to add a dusty effect to the boots.
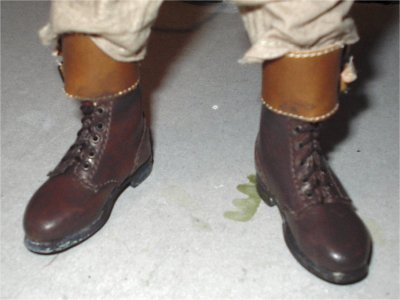
 This to me has improved on the look of the boots, but I do recommend painting
them with some Model Colour No 540 Matt Medium first, because I found that even
after adding the brown paint the grout had a hard job to stick to the smooth
surface of the boots because of the type of material used. This to me has improved on the look of the boots, but I do recommend painting
them with some Model Colour No 540 Matt Medium first, because I found that even
after adding the brown paint the grout had a hard job to stick to the smooth
surface of the boots because of the type of material used.
Separate BAR Belt Pouch
Because I want this figure to look different with
the equipment that he has, I decided to make a separate BAR pouch based on the
pictures that were supplied to me by (.308) Paul. How I made this pouch
up is in my BAR pouch PDF
and I am very impressed with how it looks on the belt. Mainly because I believe
that this was not a common modification to the BAR belt, and I think it would
have mainly only been done in the 'field'.
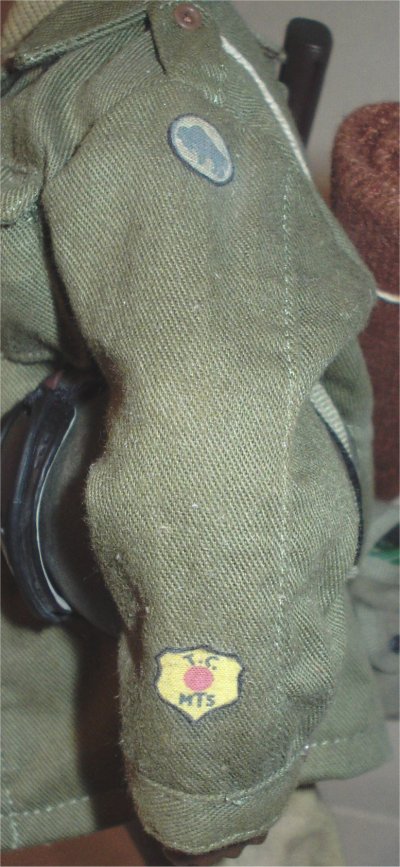
The main problem I had with this kitbash is the
placing of the Red Ball insignia, because I have the 92nd Infantry regiment
patch on the shoulder, so where could the other patch go? It was not until I
found the webpage about the badge, that I found out that it was placed on
the lower sleeve of the right arm. The purpose of this which I read somewhere,
was to allow the MP's to know the truck and driver were a part of the Red Ball
Express, when the driver had his arm resting on the edge of the door window.
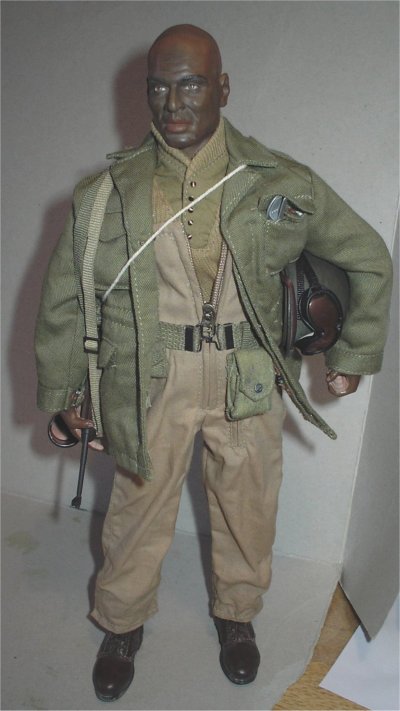
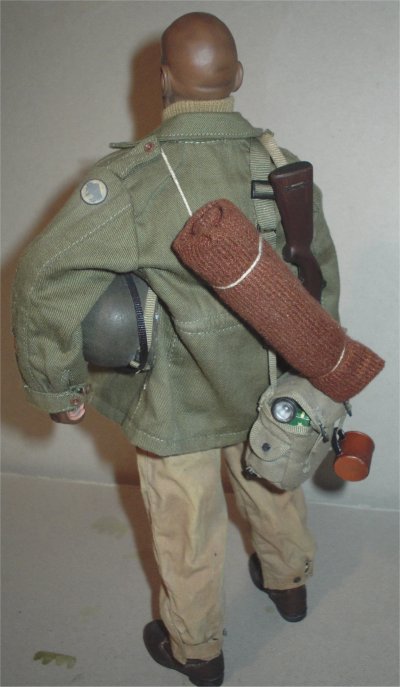
These are the finished pictures of the kitbash
with the pastels and the grout on the uniform to get a dusty look to it. I also
used Tamiya Sand powder on the trousers to highlight the top of the creases.
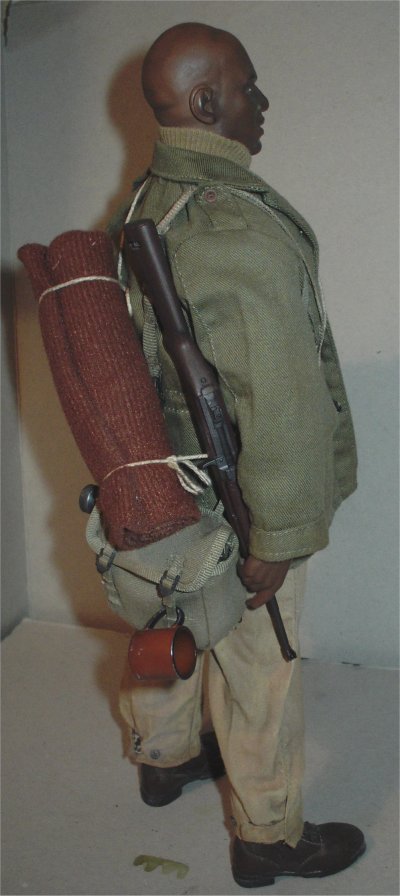
Another thing that I have read out about the Red
Ball drivers, is that they spent many hours on the road moving the freight that
the trucks carried. So they would have had very little time for either sleep or
food until they reached the rest areas. So with my figure I have him carrying
his bed roll and his musette bag is stuffed with as much food as he could carry
also a torch. I have also attached his mug to one of the straps and his cutlery
is in his top jacket pocket.
http://www.skylighters.org/redball/
Insignia of the Red ball express
http://www.angelfire.com/md2/patches/misc.html
| 