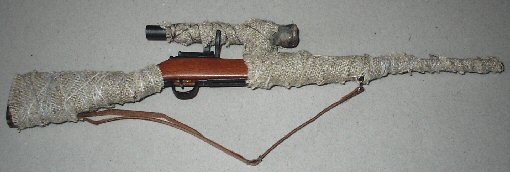
The rifle was made for my Heer Sniper figure is a DiD
Kar 98 sniper's rifle, I bought it as a loose part but I can't remember from
which figure it came. To weather the rifle I went over the wood parts
with some Brown shoe polish, which I then wiped off and then I rubbed in some
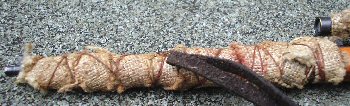
Brown pastel chalks. The rifle wrapping was made from some fine hessian material
which I cut into long strips, and then wrapped around the barrel and scope of
the rifle. I then got some thread and tied a knot around the barrel end, leaving
a long piece of thread hanging free, I then wrapped the thread around the rifle
wrappings to hold it in place. Gradually working up and back down the barrel, so
that when I came to the end, I just tied off the end with the thread I left
hanging earlier and when finished I just cut the thread ends off. The same was
done to the wrappings on the scope.
German Hunting Sniper Rifle
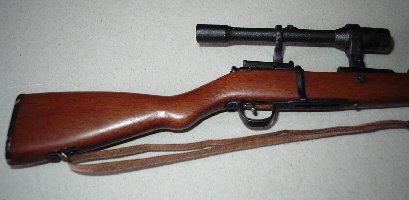
The gun for this figure was made by DiD, and as a
hunting rifle I think it suits a sniper kitbash well. Because to me guns are
designed and made with only one use in mind for them, and as a sniper a figure
is making the best use of this one.
The only real alterations that I have done to it
is with the wooden parts, where I have rubbed some Dark Tan shoe polish onto it,
to darken the wood slightly. I also used some Tamiya Gunmetal and Silver
weathering powders on the metal parts, to get a better colour to these.
German Telescopic Sight Covers
1.
2.
3.
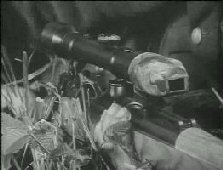
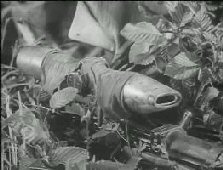
In the pictures above, I have taken some
screenshots of a German WW2
sniper training film
translated into English by the US army to get some reference material for this
figure. Picture
1. shows a telescopic sight with just a piece of material wrapped
around it, but the end of the scope is un-covered. So to conceal this from the
enemy and to stop the glass lens reflecting light, in pictures
2. & 3.
the sniper's have made some different types of slip on lens covers. After seeing these covers I got to wondering if I could make them myself, as I have never seen anything like these in 1/6th scale.
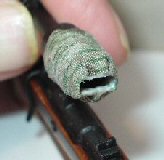
The basic shape for the covers was made from some plastic tube, which I heated and stretched slightly so that would be a tight fit over the telescopic sight.
Note: That I was so carried away making these items, that I have not taken any pictures of the covers as I made them.
4.
5.
6.
7.
In the pictures above I have made a cover similar to picture
2. above,
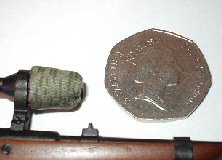
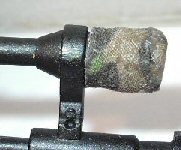
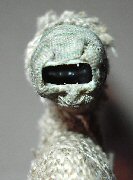
Pictures 4. & 5.
are of the slotted cover with a 50p coin next to it to show the size. Pictures
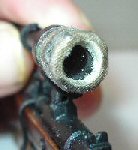
6. & 7.
are of the round cover.
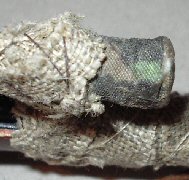
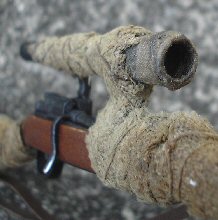
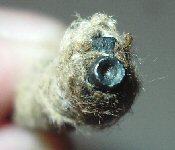
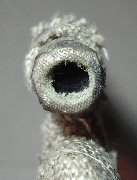
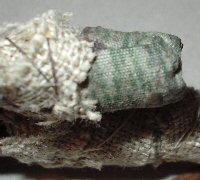
The pictures above show the wrapped rifle and the telescopic sight, Picture
9. is the sight without a slip on cover, Picture
10.
is it with the slotted cover and Picture 11. is the one with the round open end.
Pictures 12. &
13. show the covers from above and how they have just been pushed
onto the end of the telescopic sight.
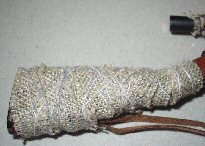
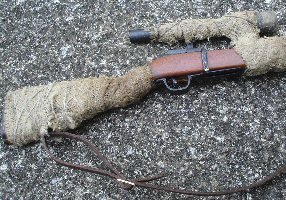
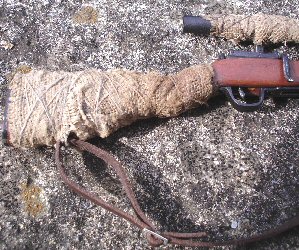
This is the DiD Ralf hunting rifle that I bought loose which like the other
rifle at the top of the page, I have wrapped it in thin strips of hessian
material. Which has been held in place with some thread, which
I wound around the rifle to keep the material in place.
Note: Making sure that I leave the sling
swivels able to move.
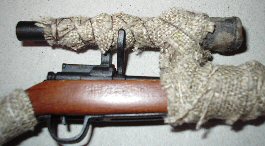
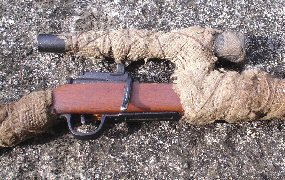
With the thread I first tied a knot around the barrel end, leaving a long piece
of thread hanging free, I then wrapped the thread around the rifle wrappings to
hold it in place. Gradually working up and back down the barrel, so that when I
came to the end, I just tied off the end with the thread I left hanging earlier
and when finished I just cut the thread ends off. This was also done for the
scope and the butt of the rifle as shown above.
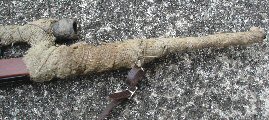
The only thing left to do with the rifle is to dilute some Brown acrylic paint
and then give the material a wash over to darken it. And like the other rifle
above, when it is dry I will give the material a rub over with some pastel
chalks to give it a mottled and dirty look.
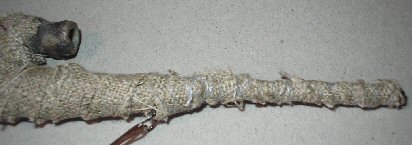
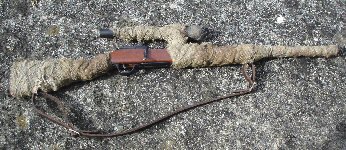
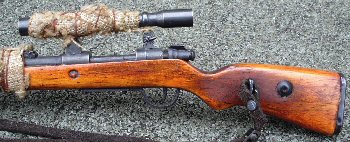
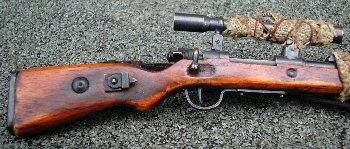
The above pictures were taken outside to get better pictures of the rifle, the
wrappings and the slip on scope cover. I have also replaced the fabric sling
with a strip of leather material and two small metal buckles. The wrappings have
been dirtied up especially around when the rifle is held on the stock and the
trigger. In the final picture at the bottom I used the flame from my cigarette
lighter to burn the material, to represent the flame effect from the gun being
fired.

 German Hunting Sniper Rifle
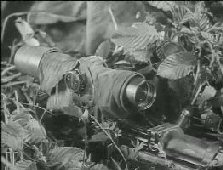 2.
2.
 3.
3.
 5.
5.
 6.
6.
 7.
7.
 10.
10.
 11.
11.
 12.
12.
 13.
13.