|
Welcome
To My Clearing The Ruins
Page.
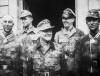
This figure is based on the image that I found on
the internet, and I am using here as a reference
source. As I am constantly trying to find new ideas for my figures, and have
something that challenges the model maker in me. And with the image on the right
I found it for the moment, as again I have to make a rubble base, plus an
attempt at a brick wall that the figure is looking around.
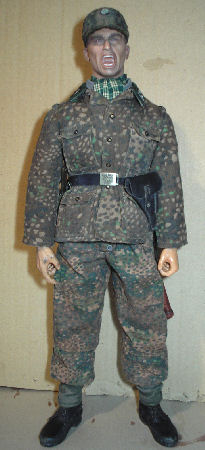
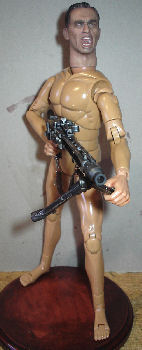
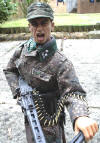
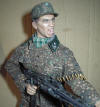
For the figure I wanted a large tall body, so I
used a DiD stock one, plus I have also used my method for bulking out the figure
to make it look like a heavier body. Which helps with the effect I am going for
of a seasoned SS soldier, who seems to have no problem in swinging around an
MG42 machine gun.
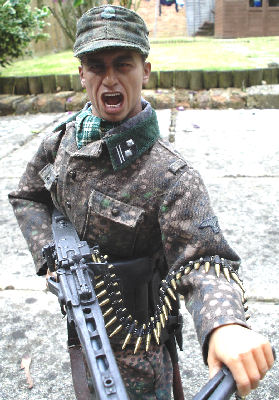
Firing Pose
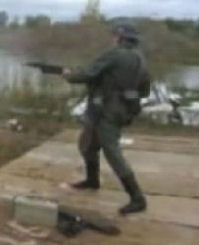
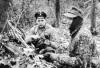
A good source of information for me, came from a video
I found on YouTube
- Gunner. I was also
shocked by the rate of fire that a full size MG42 could lay down in this
video.
Note: Which has given me a greater
admiration of the allied soldiers, that faced this weapon in real life under
wartime conditions. From the first video I have made some screen shots as below,
for me to learn about how a gun like this is handled in real life. So that I can
try to get the pose right for my figure.
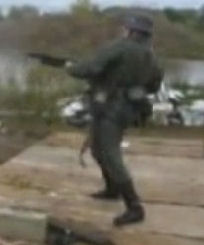
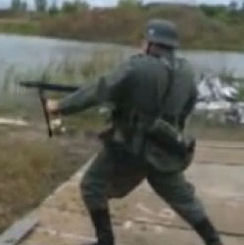
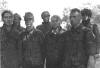
Picture 1. is
where the person in the video is off balance whilst firing the gun, and Picture
2. shows the full recoil which then pushes
him backwards and off target. In Pictures 3.
& 4. the person has taken a better standing
position, as well as a grip on the bipod instead of the barrel. So that the
gunner and the recoil, are now held in place by the body weight on the front leg
as well as the person is also leaning forward during firing. Which as shown in
the second part of the video, now allows the person to keep the gun on target
better.
1.
 2. 2.
 3. 3.
 4. 4.
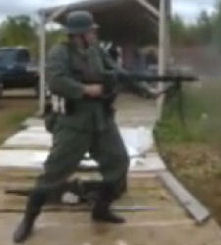
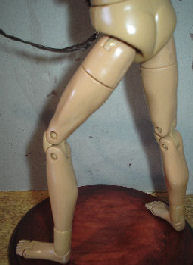
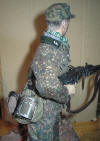
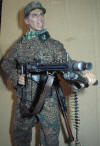
1/6th Firing Pose
To get this pose with my figure, I have had to
find out where the balance point is with the model, because I am using a Toys
City plastic MG42 machine gun. I originally tried this figure with a metal DiD
MG42, but the weight of it caused no end of balance problems for the figure. So
I decided to use the Toys City gun instead, which I have also re-painted here. I am
also using the method used by Gordon for his
running poses. As I have found
out that there is a great deal of difference, between a cast figure as above and
then trying to get a similar pose set with a 1/6th figure.
5.  6.
6.  7.
7.  8.
8.
The following pictures show the figure with the
metal DiD MG42 gun, although the pose is the same.
Note: For my figure, I have used instead the plastic Toys City MG42, as I have found that it causes less weight and balance problems for the
figure. Picture 5.
shows the standard DiD body pose with the trigger of the gun held in the left
hand, with Picture 6. showing the right hand
holding one leg of the bipod. Picture 7.
shows the figure once I had got the balance right, so that the weight of the
MG42 could be held and the figure stands up.
With the basic pose in Picture
8. that I want, I have found that one of the
main weak points are the ankles. As I have the had the figure standing on my
desk, and I have found that the ankles gradually weaken and allow the figure to
fall over. Due to the weight of the MG42, which also weakens the right hand
wrist joint, which allows the gun to fall downwards away from the pose of the
right. Note: Most of these problems were
removed by using the plastic MG42 instead of the metal one.
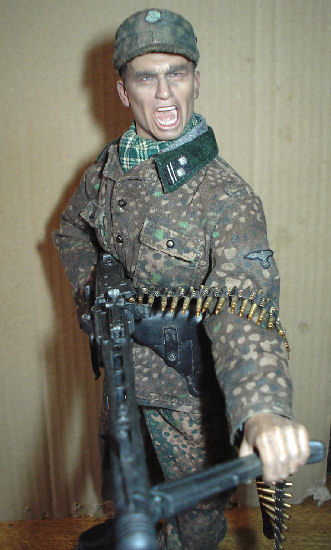
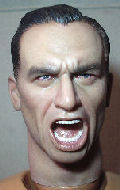
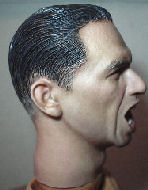
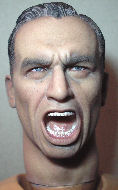
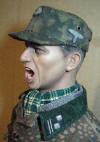
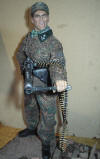
Headsculpt and Body
To add to the effect I am using a newer DiD Meyer
head on an older DiD body, with the DiD Rurik hands and wrist peg on this body. So I can get the grip effect better
with the hands on the MG 42. Pictures 9. &
10. are of
the new headsculpt, with Picture 11. &
12. after a
repaint over the head with some Model Color Matt Medium to dull the shine.
Note: This is similar to the same method
I used for on my Pastel
headsculpt repaint page.
9.  10.
10.  11. 11.
 12. 12. 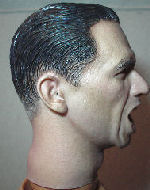 13. 13. 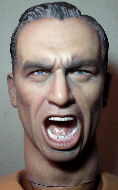 14.
14. 
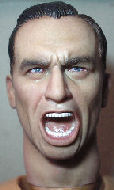
Picture 13. is after I have given the head a pastel wash
of a Brown and White chalks mixed together, Picture 14.
is after I have given the head a light drybrush of some Flesh pastel chalk, to
add slight highlights to the face.
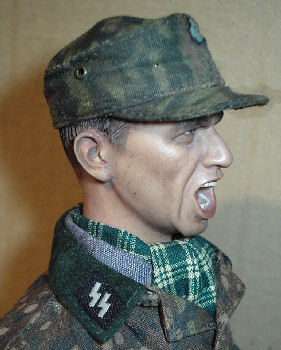
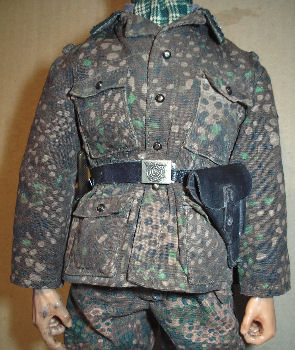
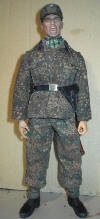
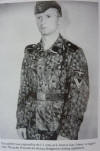
Uniform
The uniform for this figure was made by various
manufacturers, the tunic and cap were made by Toys City, the shirt and trousers I believe came from
Dragon, the gaiters were from an unknown maker, with the boots I believe from
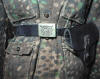
DiD. The SS collar insignia in Pictures 15.
& 16. came from Toys City with an SS
rank of Master Sergeant -
Hauptscharf�hrer. The pictures below show the collar insignia,
with a drybrush of the Light Sand powder to dull down the shiny effect of the
material.
15. 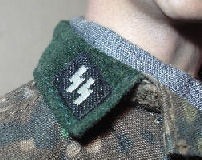 16.
16.  17. 17.
 Picture
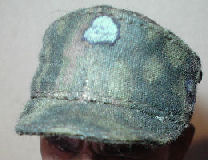
17.
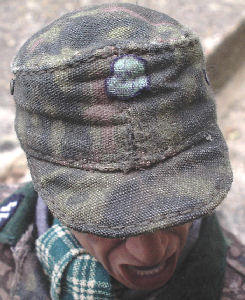
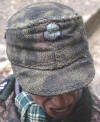
is of the Toys City cap with a home printed SS
skull insignia applied to it, I also have given the cap a drybrush of the Light
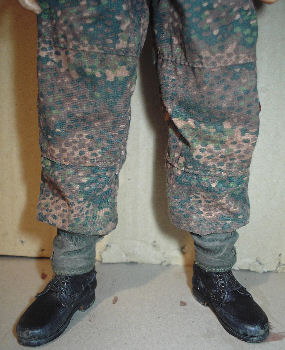
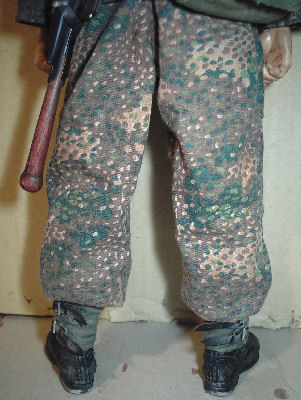
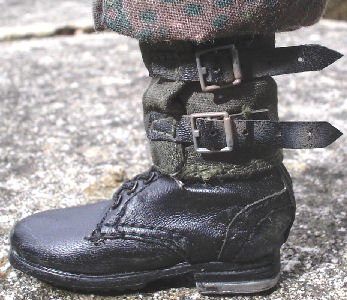
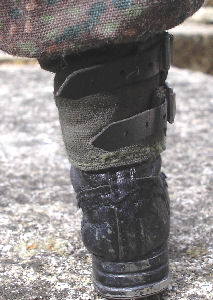
Sand weathering powders. I have also used a pair of the Soldier Story gaiters on
this figure, as I was curious if they were thinner than either the Dragon or DiD
one's. I have found that they are indeed thinner and of a better detail than the
others. I
have also fitted them in a similar way to my other
gaiters on my
Gebirgsjager figure. To get the wrinkled effect on them, I pressed down on the
top of the gaiter which leaves the creases as shown. Picture
17.
is of the Toys City cap with a home printed SS
skull insignia applied to it, I also have given the cap a drybrush of the Light
Sand weathering powders. I have also used a pair of the Soldier Story gaiters on
this figure, as I was curious if they were thinner than either the Dragon or DiD
one's. I have found that they are indeed thinner and of a better detail than the
others. I
have also fitted them in a similar way to my other
gaiters on my
Gebirgsjager figure. To get the wrinkled effect on them, I pressed down on the
top of the gaiter which leaves the creases as shown.
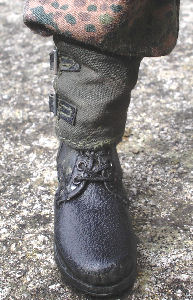
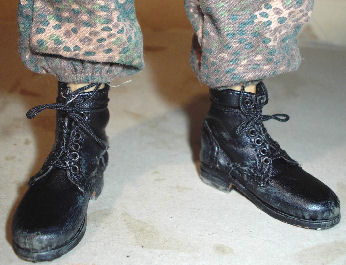
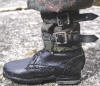
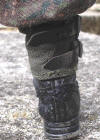
The picture
on the right shows the Soldier Story boots that I
have used with this DiD figure. I have made a separate section about how I have
fitted these boots here. Note: These boots
were not an easy fit onto the DiD figure's foot, as it did take a bit of effort
to get them in place.
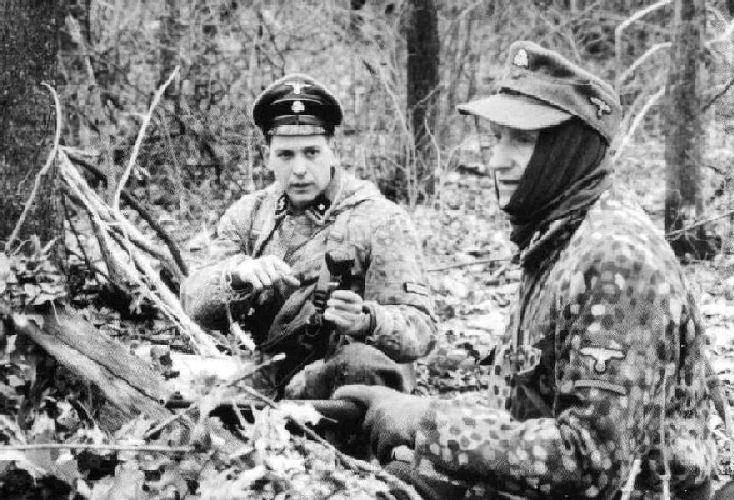
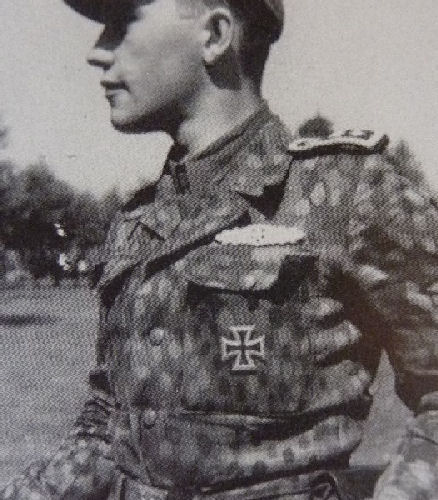
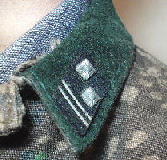
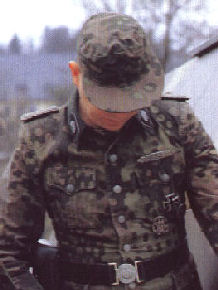
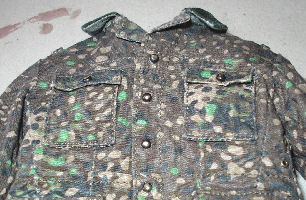
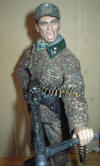
Tunic Alterations
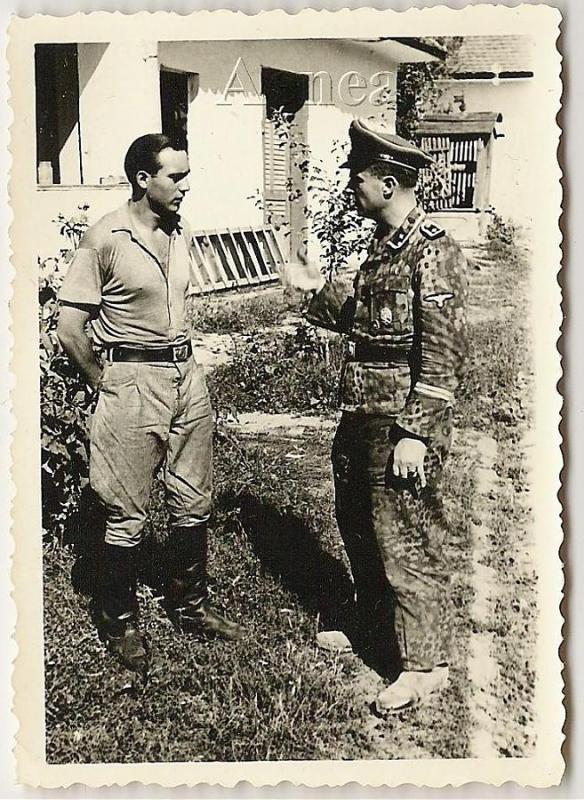
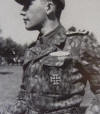
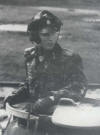
Picture 18. is
one that I found in my reference
books, I believe of a re-enactor. And it shows how an officer has had a pea dot
tunic tailored, with the addition of a green material collar. I liked the look
of this so I have altered the tunic I have with the original collar taken off,
and I have added a green collar from another tunic I have.
18.
 19. 19.
 20. 20.
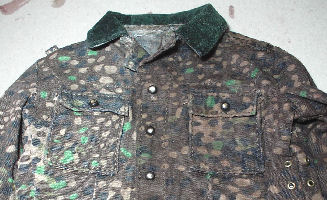
To keep the fold of the collar set on the neck in
Pictures 19. &
20. I have painted some slightly
diluted PVA glue and water on the inside of the collar, so that when it dries it
keeps the fold in place, which also helps to hide my bad sewing skills.
Uniform Pastel Wash
21.  22.
22.  23. 23.
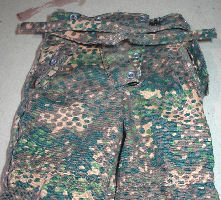 
I have also given the tunic and trousers a wash of
pastel chalks, similar to the winter
suit and Heer smocks that I altered the colour of.
As I am trying to add both weathering and at the same time, trying to get away
from the brand new clean look of the items. Picture 21.
is the new Toys City SS tunic, with Picture 22.
after I have given one side of the tunic a pastel wash.
Note: Making sure that I stayed away from the top green material
on the collar, as I was unsure if it would damage the material or not.
I also did the same with the Dragon SS trousers in
Picture 23. The picture on the right, is
again with one leg of the trousers washed, to show the comparison of the altered
against the new. Although both items are of the same type of pea dot camouflage,
the trousers are of a lighter colour, so that even after the pastel wash. I will
still get the mismatch that I am looking for between both items, rather than one
even overall colour for the uniform. Once I had done the pastel wash I then put
the uniform back onto the figure while it was still wet, so that it could dry
and shape to the body of the figure.
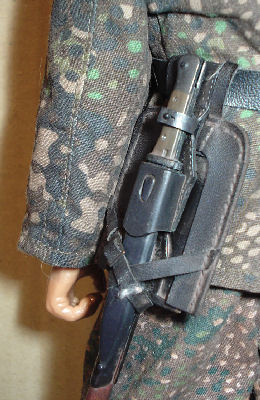
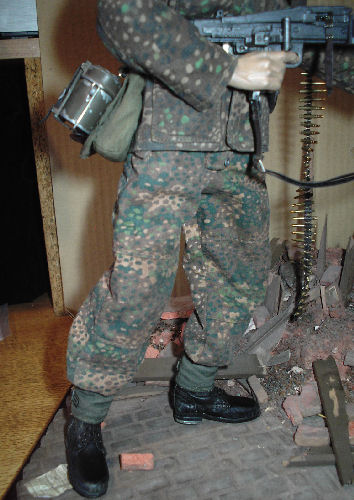
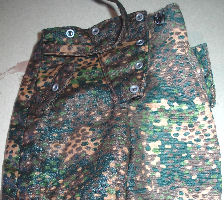
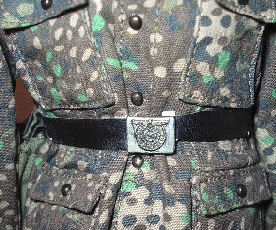
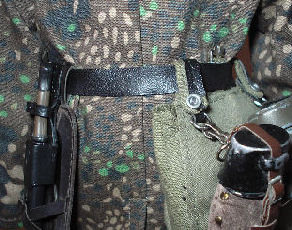
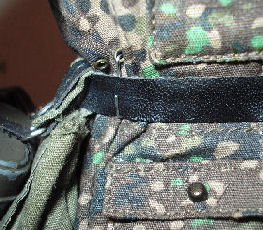
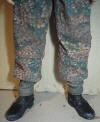
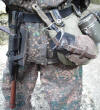
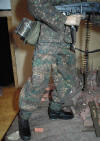
Equipment
The pieces for the figure, are the standard German
belt equipment that I have
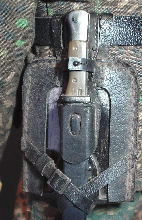
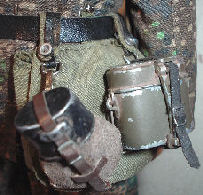
altered as usual, Picture 24. is of the
DiD shovel, Picture 25. is the DiD bread
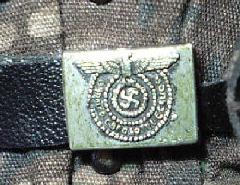
bag, water bottle and mess tin. Picture 26.
is of the Dragon SS belt, again weathered to bring out the
buckle detail with some
Black acrylic paint.
24.  25.
25.  26. 26.
With the older DiD type of body I am using it
gives the tall bulky look that I am after, but it is the waist that has annoyed
me. Because I put the clothing on the figure, and after seeing what the waist
belt and kit look like on it, the waist has narrowed which makes the chest look
even bigger. So like I did with my Bulky figure, I have wrapped some tape and
cotton wool around the waist to try to bring it out, so that the waist and belly
look about the same size.
27.  28.
28.  29. 29.
So that as shown in Pictures
27.
&
28.
I have the belt in place adjusted to be slightly
tight around the waist. I did have another problem develop with the belt in
regards to the metal water bottle and mess tin, as they caused the belt to hang
too low at the back. So in Picture 29. I
have made two belt hangers out of staples, shaped and fitted into the eyelets in
the tunic to help hold the belt up.
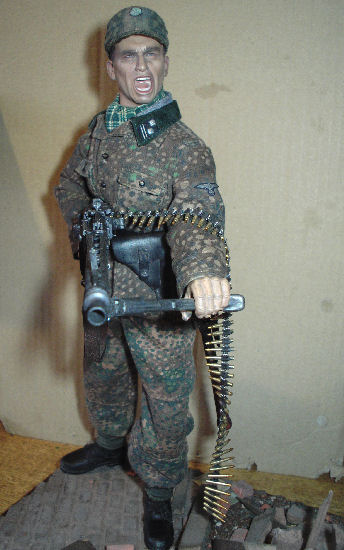
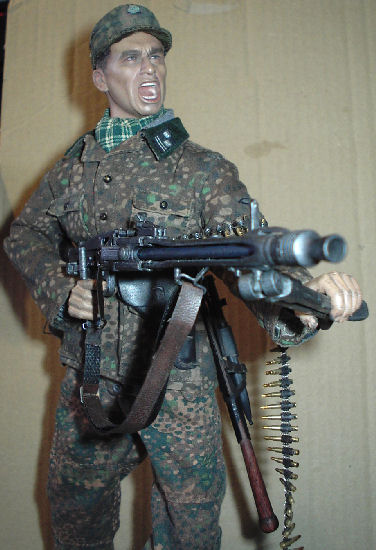
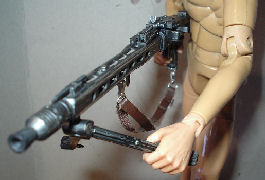
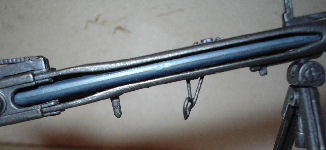
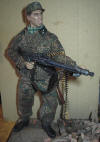
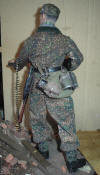
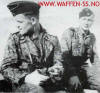
Weapons
With this figure the main weapon will be the Toys
City
MG42 machine gun, along with two belts of DiD metal ammunition. The only problem I
found with using these items is the weight of them, so I have had to do a lot of
research on the pose for the figure, as if he were firing the gun from a standing
pose.
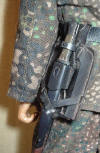
30.
 31.
31.
 32.
32.
Picture 30 shows the
MG42 model, which I re-painted with Humbrol Metalcote Gunmetal paint, a Black
acrylic paint wash and a final drybrush of Tamiya Gunmetal weathering powders. I
also made a new sling mount for the pistol grip, as well as adding a slider for
the sling. Picture
31. shows the separate barrel, that I have
given a drybrush with some Burnt Blue weathering powder, so as to simulate the colour has changed because of the heat from the
gun being fired. Note: The flash from the
camera has made the blue look brighter than it actually is.
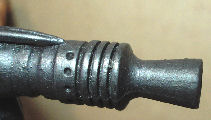
The black butt of the gun was repainted and also given a
drybrush of the Light Sand weathering powder, to get a flat even effect and to lose
the slightly glossy effect that the new gun model had. Picture
32. shows the
muzzle of the gun, which has had some Black acrylic paint drybrushed onto it,
then I also added a drybrush of Black weathering powders.
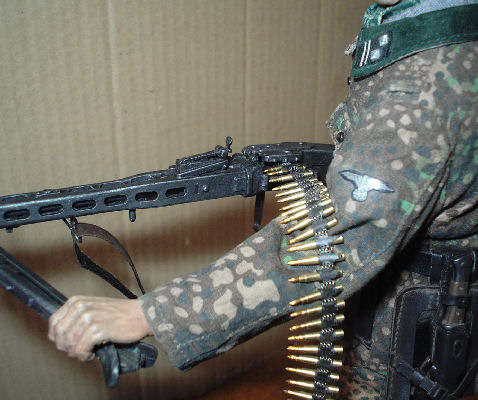
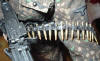
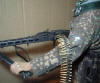
Ammunition belt
After asking about how the gun would be fired in
real life on a forum -
MG42 &
belt feed. I have had a lot of assistance with helping me to understand the
workings of a real gun, and if the pose I want with the figure is possible. A
very good link I have been given regarding WW2 German ammunition is
here. One thing
that was noticed by me and by others is the 1/6th scale ammunition belt, and
that how it does not hang right from the gun and over the arm. Due to the
limitations of the metal parts and the scale, as explained by
The_Dutchman
below in italics.
In Picture 33.
In reality the rounds are closer together so the MG42 ammo belt is less
flexible.
Although your ammo-belt is a good representation, the proportions are off, which
is understandable as not everything can be exactly scaled down.
33.
 34.
34.  35. 35.

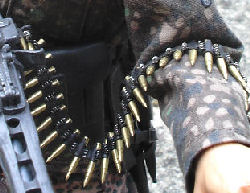
So to solve this problem in Picture
34. I have put the ammunition
belt into the gun and over the arm, and then with the use of my tweezers. I have
positioned each bullet individually so that the belt hangs straight, and I have
placed a tiny drop of
Cyanoacrylate glue with a pin onto
the link between each bullet. So that in Picture 35. the belt now comes straight out of the
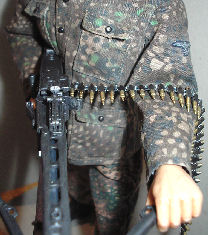
gun, and then gently bends to wrap around the figure's arm as show on the right.
Figure Assembly
36.  37.
37.
 38.
38.
 39. 39.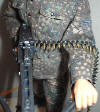 40.
40.


The pictures above show how I have progressed in
putting the figure together, Pictures 36. &
37. show the headsculpt and the Toys City
cap, with Pictures 38. &
39. of the pose with the MG42 and the
original flexible metal
DiD ammo belt. Picture 40. shows the ammo
belt, after I have used some glue on it, to get the correct lay of it over the
arm.
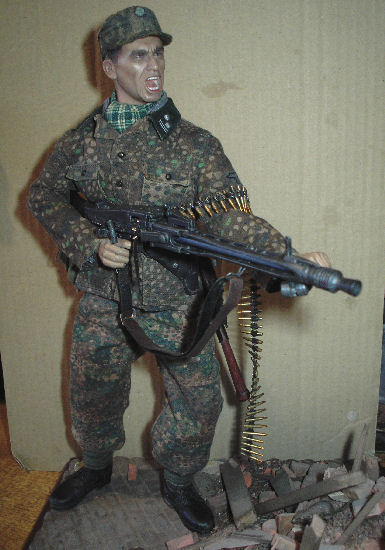
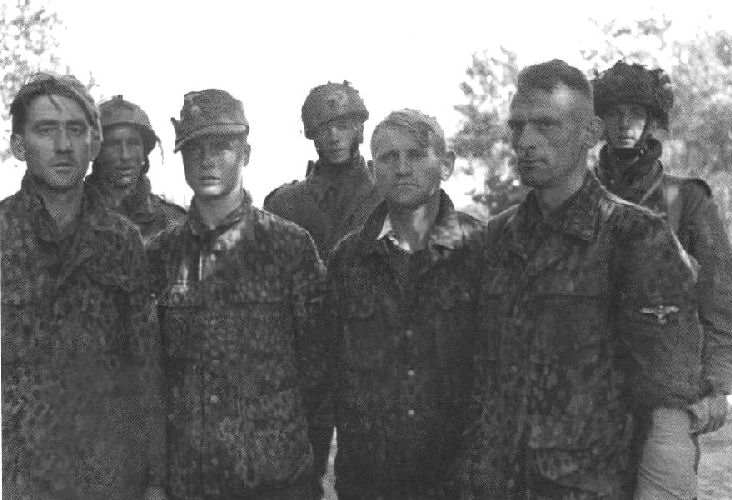
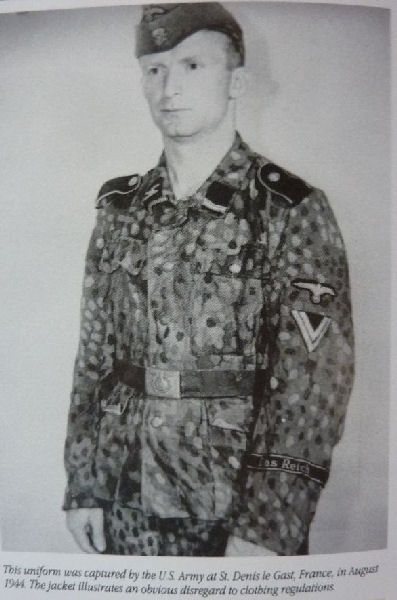
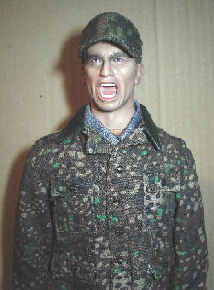
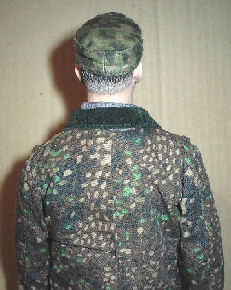
Finished Figure
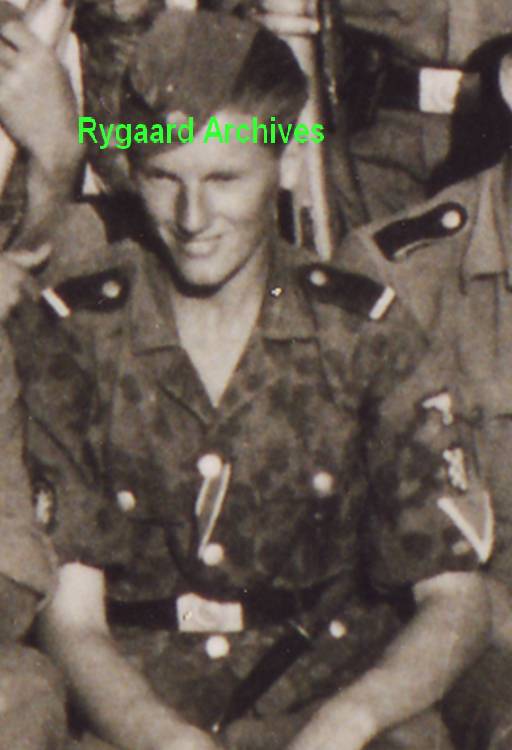
Reference pictures of the pea
dot tunic.
I have had some very good help from my fellow
modellers, in answer to my question about the Green collar on a pea dot tunic.
And I have used the photos below as a reference source for my figure.


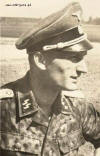
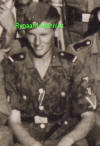

Many thanks to Gran
Sasso, Original
Paintbrush, viaad,
The_Dutchman,
RogueJK for allowing me to use the photos
above.
And to everyone for the excellent information
on these forum posts -
Pea Dot,
Pea Dot 2 &
MG42 &
belt feed.
|