|
Welcome
To My Russian Figure Page.
This kitbash is based on the DiD Rurik Russian
figure virtually as it comes from the box, the only extra parts that I will use
are a Dragon Russian gas mask case and a knife. What I do like about this figure
is the different trousers that are supplied, which does give me a choice of what
to use.
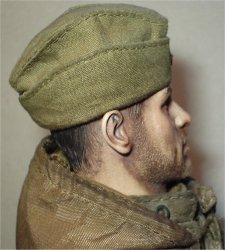
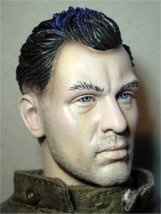
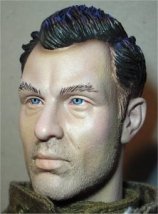
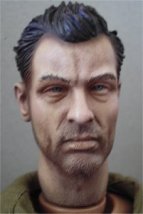
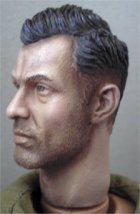
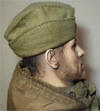
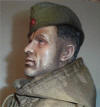
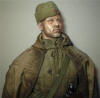
Headsculpt
With this headsculpt I have tried another method
with how I carry out the pastel washes, because after ruining the Hans Pifer
head I found out that the tissue I was using to wipe the heads with may have
been too harsh. Especially with the heads made by Dragon as I think that the
paint used is of a thinner coating, and the rough treatment I gave them with the
pastels and the tissue they may have helped to remove that paint. So for this
DiD headsculpt as an experiment I have used my paintbrushes instead to see if I
can get the same effect as before. And I have found that I can get a softer
pastel coloured look to the headsculpts.
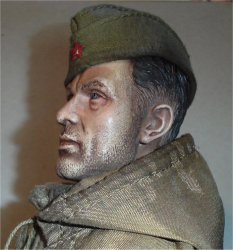
Step One
I painted all over the face and the neck with some
Model Color Matt Medium No 540, this is to get an even flat finish to the
headsculpt, which also helps to get the pastels to work better on the head. This
can just be seen in the pictures below left, the first one is the un-painted
head and the second after the paint has dried fully.
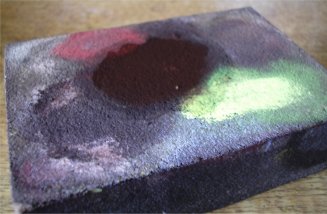
Step Two
I then apply a coating of water (which has a few
drops of Matt Medium added to it) and the brown pastel chalk. To do this the
pastel is wiped onto a sanding block to get the dust (third picture below) and
then I add the water into it to get a kind of thin watery paste. This is then
wiped over the head including the neck as shown below right.
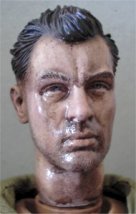
Step Three
This is where I have changed my method of removing
the excess water and chalk mix, because for this kitbash I have used a large
soft fan brush to gently soak up any water. I also found that I had to use some
tissue to clean the brush whilst I was doing this as in the picture below left.
Then with a combination of letting this dry, then using some water over the top
again, I can alter the darkness of the brown pastel chalk on the head. So that
the beard detail can show up, and I can also get a different effect to the skin
tone.
Step Four
It is difficult to explain just how exactly I get
the effect as shown above, but with the water which has the Matt Medium added to
it, I think helps immensely in helping the head to keep the flat look it has.
Plus I think it also helps the pastels to bond to the head better. (Note:
This does not seal the pastels onto the head completely, so I recommend careful
handling of it) For this next step, I turn over my sanding block (as I have
Brown dust on one side and Flesh colour on the other), and again I just rub a
Flesh coloured pastel stick onto it to get a small amount of dust. Which I then
drybrush (using no water) over the face to add the highlights.
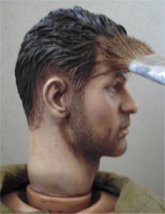
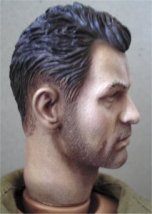
Step Five
It then just use a dry fan brush again to brush
lightly over the head to blend everything in. I also discovered that if I use a
very small paintbrush and wipe the brown colour around the eyes, and then brush
off gently with the fan brush, I can get the pastels to bring out the details
better both above and under the eyes. And when I am finally happy with the
overall effect I leave the figure aside to dry.
Step Six
In this final step I use a fine pointed paintbrush
and some clean water, which I use to remove the pastel chalks from both the eyes
and the lips. This is left to dry to make sure that the eyes in particular are
clean, and then I use some clear gloss varnish to paint them and also in between
the lips. Again the figure is left aside to dry.
I have also made a
PDF of this section.
Note:
For information purposes as pointed out by Paul, the pastel chalks I am
using are from the
Faber-Castell Artists range. The brown is No 280 and the Flesh tone is No
132.
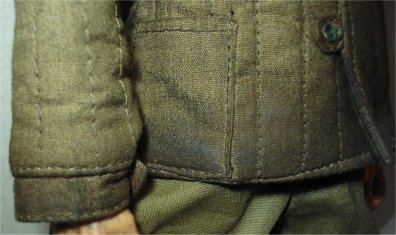
Uniform
With this figure and the uniform I wanted
something different from the usual pastel chalk weathering, so I bought some oil
pastels as I have seen used by other modellers. And as an experiment I have used
a Faber-Castell Brown Oil Pastel number 176, in combination with two chalk
pastels by the same maker numbered Black 199 and Brown 280.
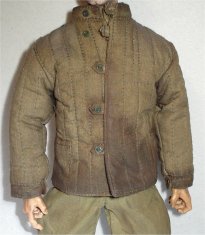
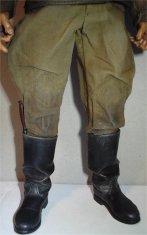
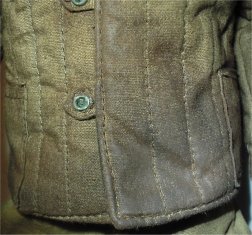
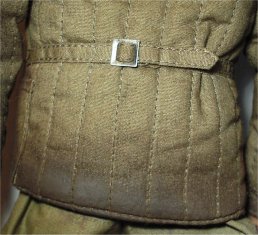
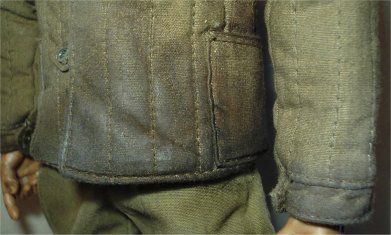

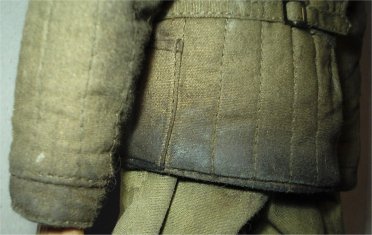
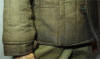
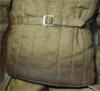
To add the dirt to the uniform I first took the
jacket off the figure as I found it easier to work with, I then rubbed over the
edges with the Brown 280 chalk pastel, I rubbed this in and then gave it a very
light dust over with the Black 199 chalk pastel over the top. I then used the
Brown 176 oil pastel over the top of this, and again I rubbed it in. The with
some more rubbing with my fingers on the edges it brought out the shine as shown
above. This then gave me the in-grained dirt look that I wanted. This was also
added to the collar edges, cuffs, underarms, elbows and the edge of the front of
the jacket.
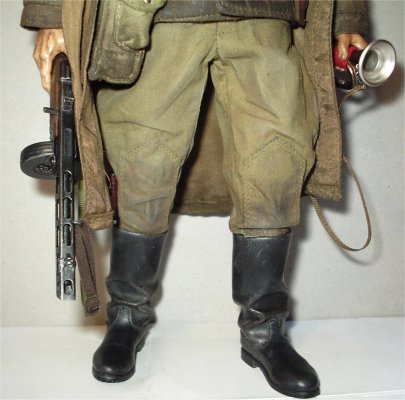
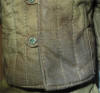
I then used some Light Sand and Mud Tamiya
weathering powders brushed lightly over the rest of the jacket, to add
highlights to the parts that have not been touched by the pastels. I also did
the same to the trousers which have already been treated with some diluted
PVA glue to set the folds.
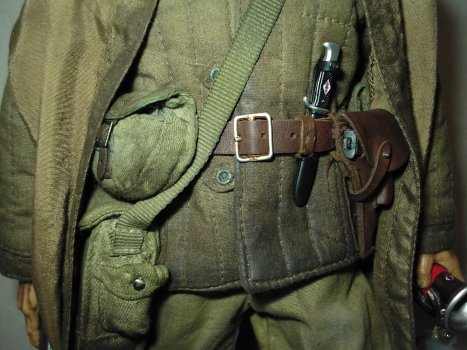
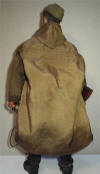
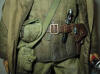
Equipment
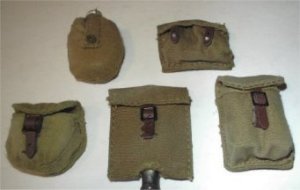
With the pouches as shown below I have repainted
them all with a diluted mix of some Green and Brown artists acrylic paint, which
was mixed together in a saucer of water to get a Dark Green colour. And because
of the material that they are made from, I have got each one as a different
shade of the Green. As I much prefer to have this variation with my figure's
pouches, since in real life this was a common occurrence depending on where the
items were made.
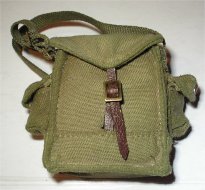
The centre picture is the Dragon gas mask case
which has had the same repainting work done on it, and again because of the
material it is made from this is another variation of the Green colour.
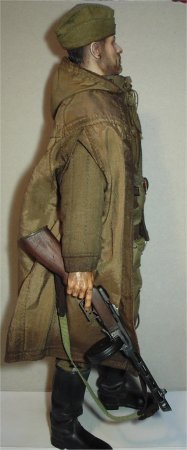
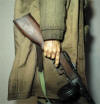
 Russian PPSH 41 Repaint Russian PPSH 41 Repaint
This is about how I have repainted the
DiD PPSH 41 machine pistol this came supplied with the figure.
To be honest this did surprise me with how easy it was to do. Mainly because the
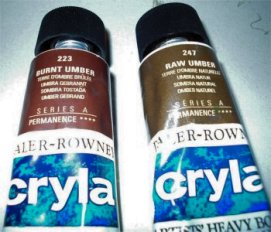
stock itself is made of wood, and it took the artists acrylic paints shown right
a lot better than some plastic rifles.
The colours I used were the Daler-Rowney artists acrylics numbered 223 Burnt
Umber and 247 Raw Umber. The first thing I did with the gun was to remove the
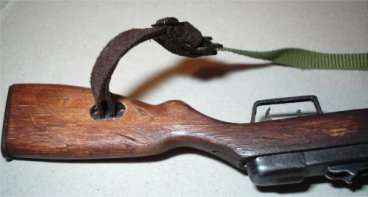
sling from the stock, this was just a case of carefully using my tweezers to
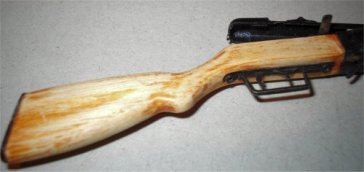
lever out the metal clip as shown below right.
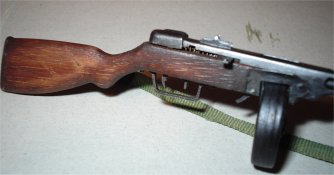
The picture below left is how
it came from the boxed figure, and I have given the whole stock a light sanding
with some fine sandpaper. The picture below right is after I have
started to repaint the stock with alternate coats of the diluted paints.
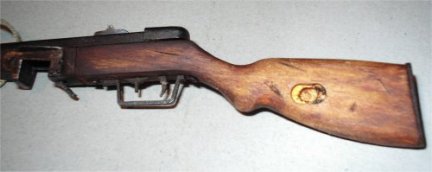
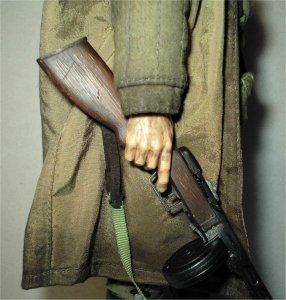
The group of pictures below show how I have firstly added some 'chips' or lines
in the stock with my model knife to represent damage. With the paint I have let
it dry slightly, and then used a wide brush with just water to spread a grain
pattern into the stock. The colour of the wood has come about from using a
mixture of the paints both diluted and a tiny piece of neat paint.
Again always making sure that I went along the 'grain', so that the paint would
spread the colour unevenly so as to represent the grain effect. In all I think I
gave this about four coats of the paint in alternative colours and mixes to get
this effect. Note: The darker colour near
the magazine came about from where I left the darker paint in place to dry, so
it would look like in-grained dirt.

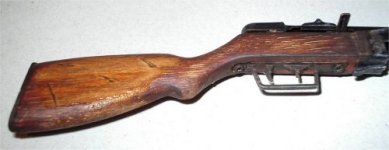
When I was happy with the effect I left the weapon aside to dry completely, and
I then just rubbed the stock between my fingers to press the paint into the
wood, and to get a slight shine to it as well. The canvas part of the sling was
then repainted with some acrylic Olive Green paint, left to dry and the sling
connector was gently pressed back into the stock.
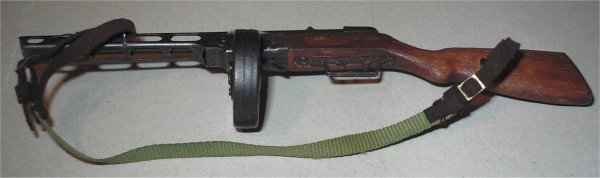
In the picture above I have given all the metal parts of the gun, a light brush
over of the Tamiya Gunmetal weathering powder to finish it.
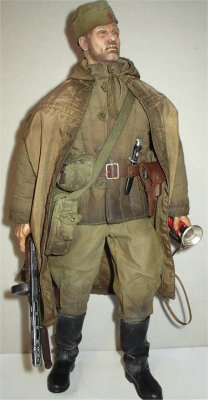
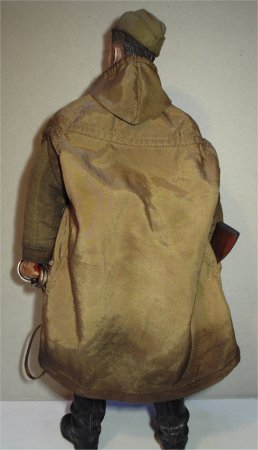
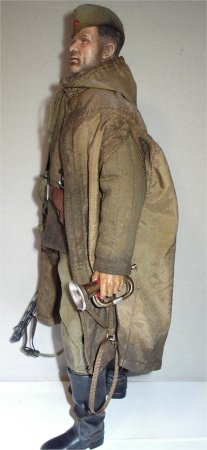
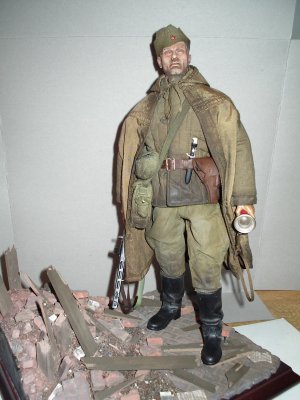
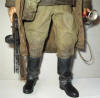
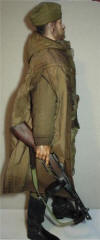
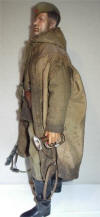
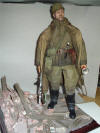
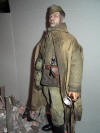
Finished Figure
This is the finished figure with the rain cape on which has also had the oil
pastels used on it to add some in-ground dirt at the bottom, front, collar and
the arm holes, I also added some dirt to the belt kit. And rather than build a new base for this figure,
I have posed it
on the street one that I have made earlier.


|