|

Welcome To My Wehrmacht Ski Jager
Figure Page
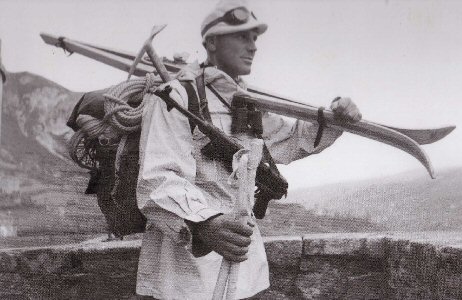
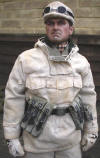
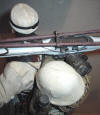
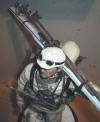
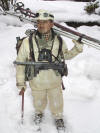
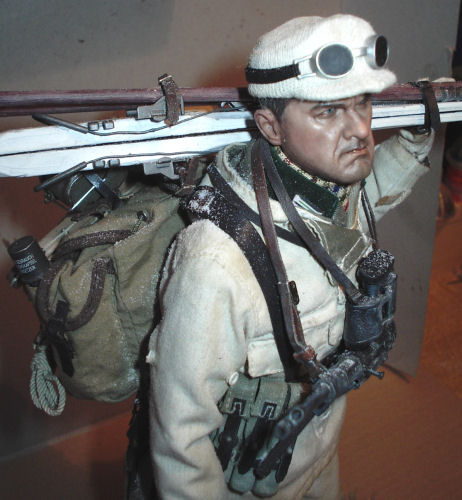
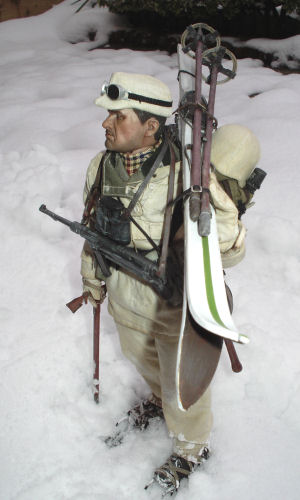
This kitbash is another that I have been wanting to make for quite a while,
based on the picture on the right. I have spent a lot of time gathering the
information together for it, as well as all of the kit for the figure. But it is
finding the time for it, that has always been a problem for me, especially as I
have to make four separate new pages for this kitbash.
The pages are as follows, one page is for the white uniform that I
wanted to look dirty, another page is for the alterations I wanted to make to
the Dragon snow shoes. Two
pages are for the ski's and the poles that I have had to re-model
to look like the one's in the picture on the right. My reference pictures for
this I have assembled from my
Detling visit in
2011, as well as a lot of help I have received from my fellow modeller
Heeresbergführer.
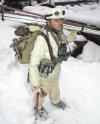
So after finding some spare time I have finally got started with
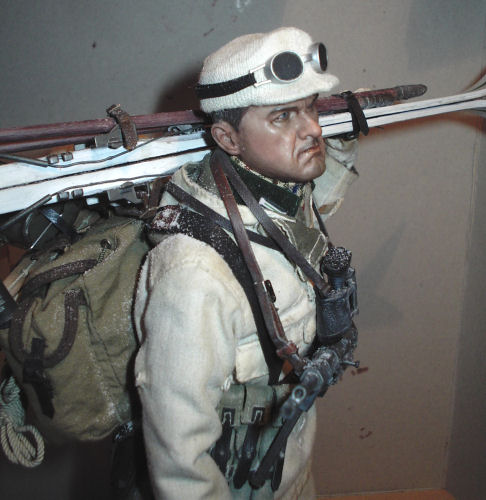
the figure and the diorama base that I wanted to make for it as well. Because of the amount of parts I wanted the figure
to have I have based it on this reference picture, plus it will be loaded up like my other
Gebirgsjager Climber figure.
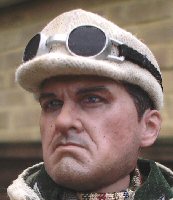
Headsculpt
1.  2.
2.  3. 3. 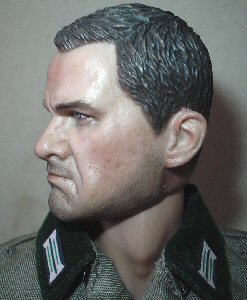 4.
4. 5. 5. 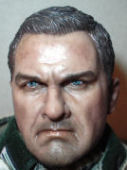 6.
6. 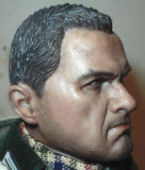
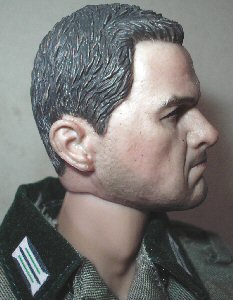
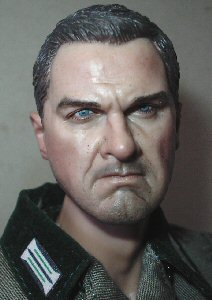
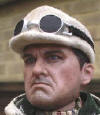
The headsculpt and body I have used for this
kitbash is from the
Soldier Story EODM figure, as I do like the expression on the face. I have
given it a paint with some of the Model Color 540 Matt Medium to lose the slight
shine it had, and then a wash over as usual with some Light Brown pastel chalk.
Picture 1. 2. & 3.
are the new headsculpt as I got it loose, and Pictures
4. 5. & 6. are of the headsculpt
after I have given it a pastel treatment.
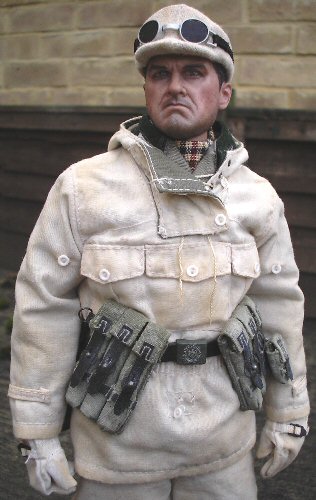
Uniform
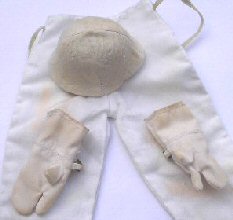
The tunic for the figure as shown below in picture
7. was made by Toys City with the trousers in
picture 8. from Dragon, in Picture
9. I have a Dragon winter helmet cover and a
pair of winter mittens. All of which have been placed on the top of another pair
of white winter trousers to show the weathering I have made to the uniform.
7.
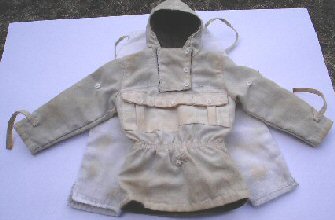 8. 8. 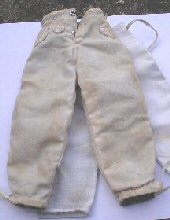 9.
9. 
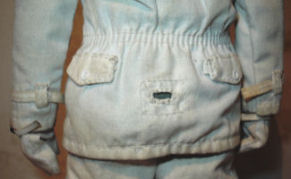
To add a start of a weathering effect I have tried the Coffee
trick above as mentioned by Bob a Job. I have added a section on my German Alterations 4 page, about how I have tried this
effect for myself, and I am impressed with how different the uniform looks now.
As it has added an overall discoloured dirty effect to the uniform, and by rubbing with my fingers on it, I can choose which places to keep the dirty marks. Usually I do not bother to put a uniform under the winter clothing. But for this figure I wanted to bulk out the material, so that the outer white uniform would crease up better.
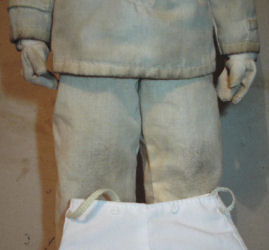
10.  11.
11. 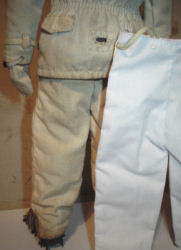 12.
12. 
These pictures show how I have also added some
extra weathering with some Mud powders on top of some Brown pastel chalks, the
chalk was first added and rubbed in between my fingers on the bottom edges. I
then went over the top of this the lighter Mud weathering powder, so that it
highlighted the tops of the creases. Pictures 11.
& 12. show a pair of brand new white trousers
against the weathered uniform as a comparison.
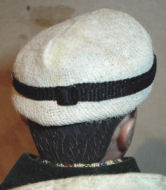
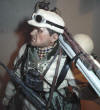
Cap Cover
Another item that I wanted for this figure is the white cap that he is wearing, and as shown in picture
7. with the help of a fellow modeller
Heeresbergführer.
13.
 14.
14.  15.
15. 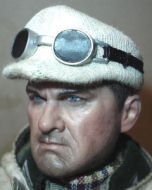
I have been able to use his idea here to make the Bergmütze cover and I have found with the cotton gloves I used, it has a close weave which makes it look knitted in this scale.
Picture 13. &
14.
are of the cap and cover on this figure, the goggles I have used also help to
shape the cover on the cap.
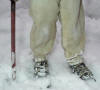
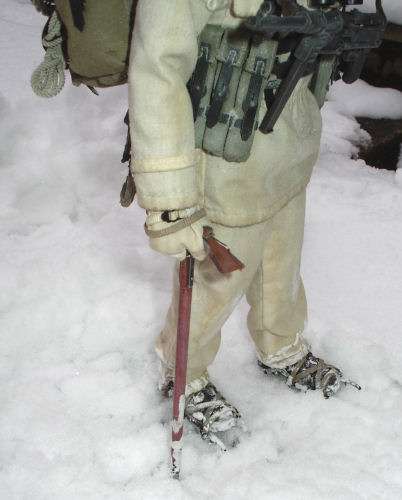
Equipment
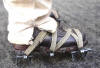
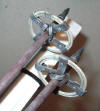
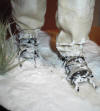
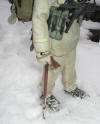
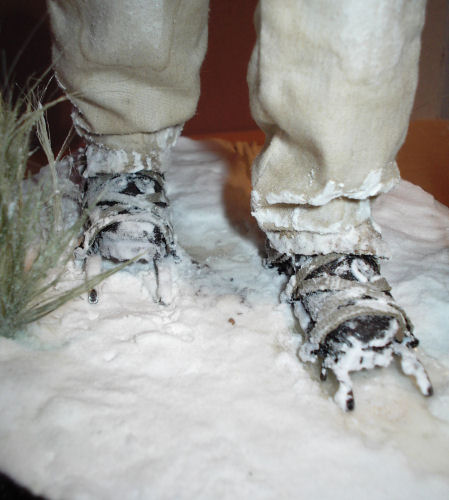
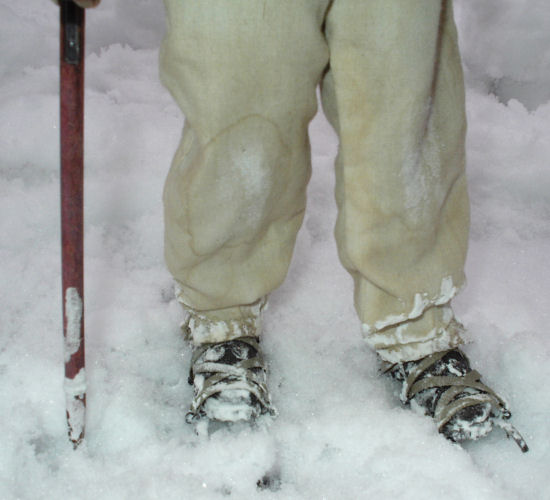
For this figure I wanted to use a pair of crampons on the boots, and I have been helped to do this by a forum post about how to tie them
Crampons. Picture 16. shows how I have
weathered them and re-painted the straps, pictures 17.
& 18. show the crampons fitted to the boots.
16. 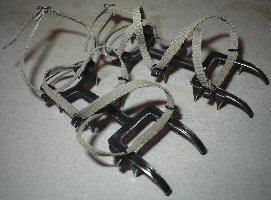 17.
17. 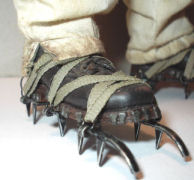 18. 18.
 19. 19. 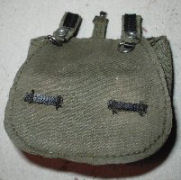
I have made a section about how I have tied the
crampons to the boots here -
Crampons.
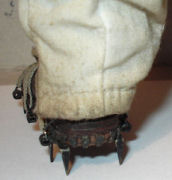
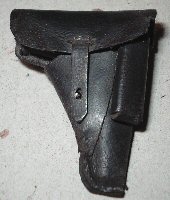
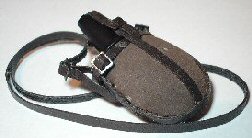
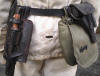
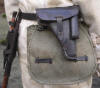
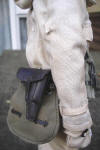
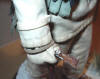
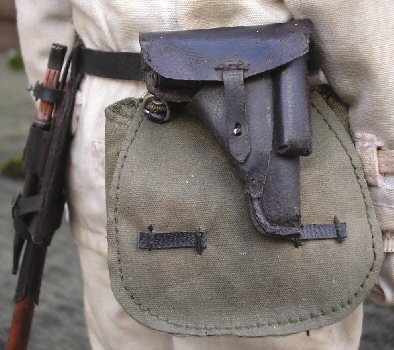
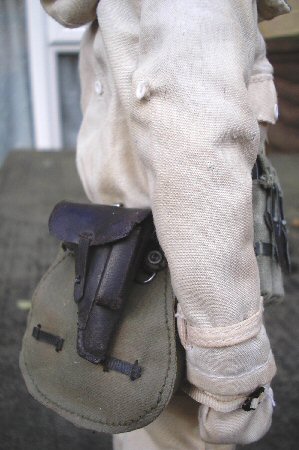
Picture 19. is a Dragon breadbag that I have weathered
here with some pastel chalks, Picture
20. is a Toys City P38 pistol
and holster which I have also weathered here
to make it look old.
20.
 21.
21.
 22.
22.  23.
23.
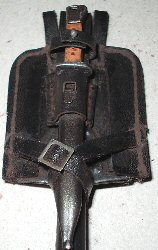
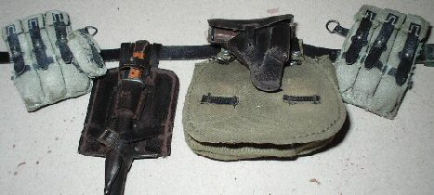 Picture 21. is a DiD shovel and bayonet which has had the covers repainted with Black acrylic paint to cover the threads, both of them were then weathered with pastel chalks as I did
here. Picture 21. is a DiD shovel and bayonet which has had the covers repainted with Black acrylic paint to cover the threads, both of them were then weathered with pastel chalks as I did
here.
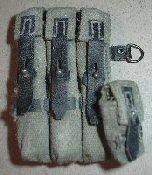
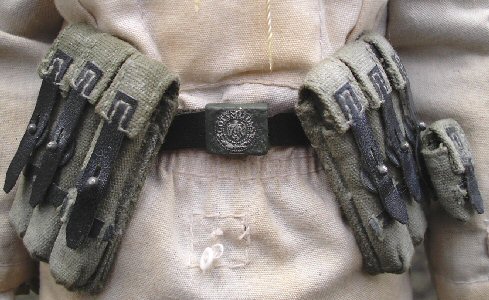
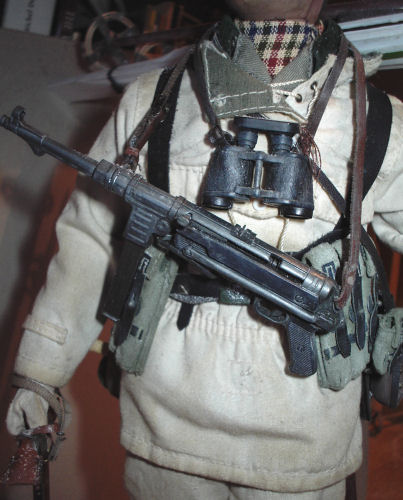
With this figure I wanted a pair of MP40 magazine
pouches, so in Picture 22. I used a pair of DiD Jakob Blau cloth pouches that I have weathered with paint and pastels as shown
here. Picture
23. is a Toys City canteen that I have taken the straps off of, because I wanted something different for this figure. So I
took the straps from a Dragon canteen from the Hinrich Weller figure and placed the Toys City canteen inside it.
Note: Some of the flock material did come off when I removed the straps, but luckily the new straps have covered it up.
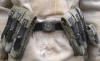
The picture on the right shows
the various pieces fitted to a Toys City belt, to save space on it I have put the pistol over the top of the bread bag.
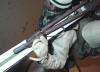
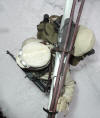
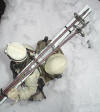
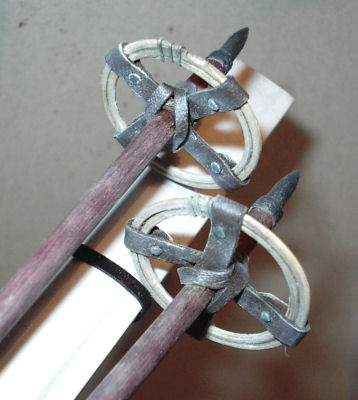
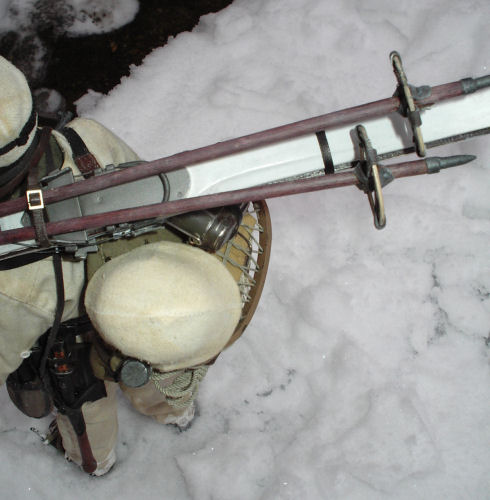
Skis and Poles

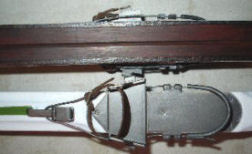
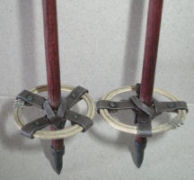
These are pictures of the Dragon skis and poles
that I have altered for this figure, and to explain this better I have had to
make two separate pages about how I did this -
Skis and
Poles.
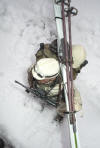
Backpack
24. 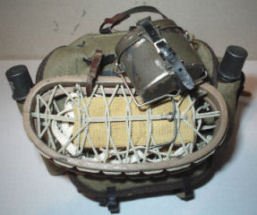 25.
25.
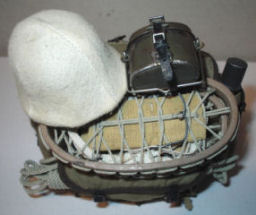 26.
26.
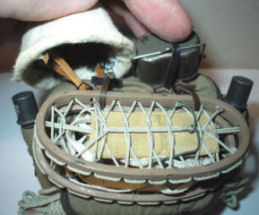
This is the Toys City backpack that I am using
with this figure, which has been altered like the one I have on my
German Alterations 2
page. Then onto this in picture 24. I have
fastened the snow shoes with some leather straps I made, which I put through the
pair of loops on top of the bag. I also altered the DiD mess tin as I did on my
German Alterations 2
page, this was also strapped onto top of the bag. In Picture
25. I then added some ropes under the front
flap, plus the helmet and cover. Picture 26.
shows the underneath of them and how they have had to be secured.
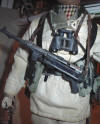
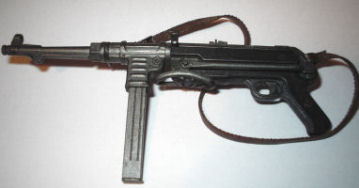 Weapons Weapons
The main weapon for this figure is a plastic MP40
pistol made by Toys City, which I have first painted the bakelite parts with Black
acrylic paint. Once dry I went over the top with a diluted wash of Black acrylic
paint. Then when dry I gave it a drybrush with some Gunmetal weathering powders,
which has added a nice highlighted effect to the weapon.
One thing I did notice with this weapon from my
research, is that the magazine is usually a slightly different colour to the gun
itself as it is made separately -
MP40.
So with my alterations of this weapon I took the
magazine off when I did the repaint, and the result is that it is a lighter
Gunmetal colour to the gun itself.
A very good website for information about this
weapon is here - MP40, especially for the
different colours of the bakelite parts -
Grips.
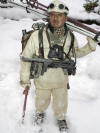
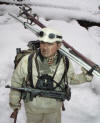
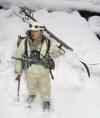
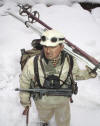
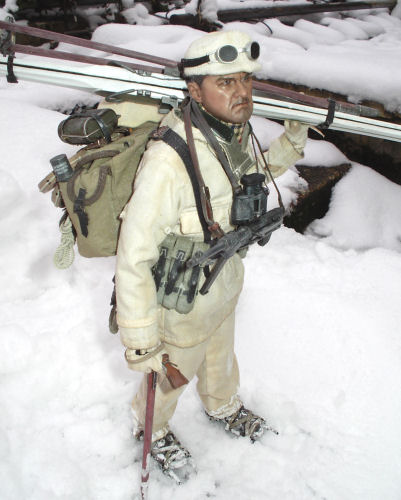
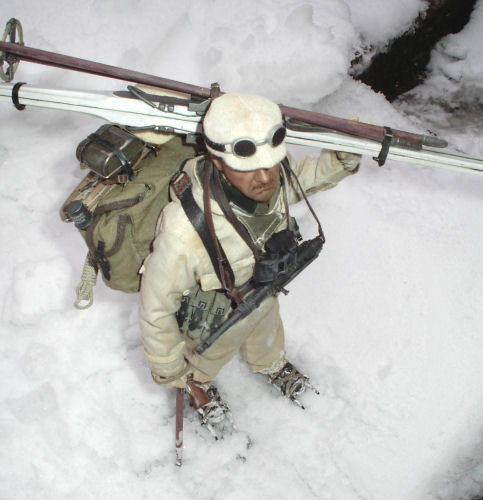
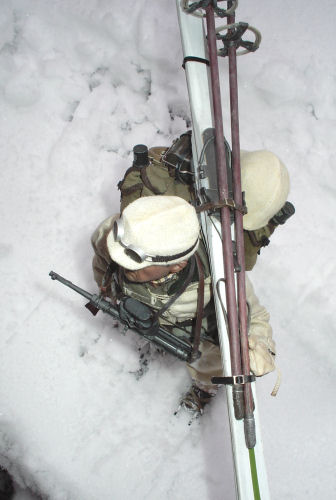
Various pictures of the figure
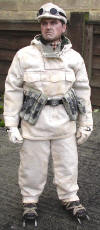
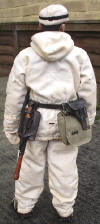
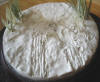
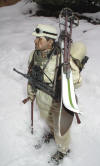
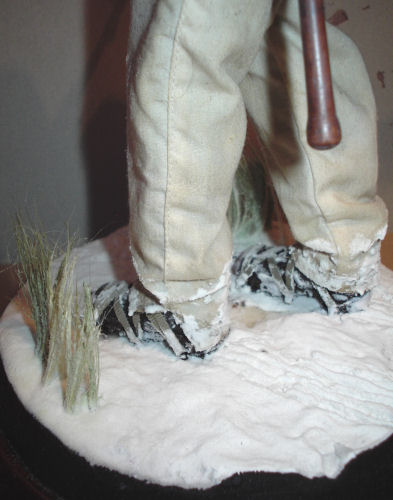
Assembled Figure
This is the finished figure mounted onto the
snow base
I made for it
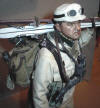

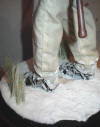
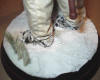
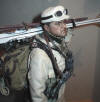
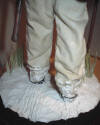
Pictures in the snow


Many thanks to the
85th Gebirgsjager Living History Group
for all of their help.
Thanks to Bob a Job
for his idea about using coffee to change the colour of the snow suit.
And a special thank you to
Heeresbergführer for all of the superb pictures and the
detailed help with my Gebirgsjager figures.
|


