Welcome
to my
Soldat 2
Page.
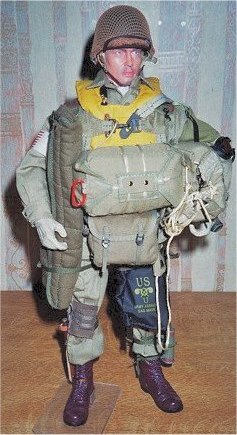
This is how I assembled the 'James' Soldat
2 figure, I presume that this method can be used for any WW2 US Airborne soldier. Although the parachute assembly instructions are for an early war parachute
(D-Day). Not the one that came with the DML Frank Laird figure (Arnhem), for
instructions on this type of parachute, see my Frank Laird page.
Please read
this fully first, this is not a step-by-step setup, it is just the way that I
did it. As I have only been collecting figures for just under a year, so I have
limited knowledge of the entire Dragon etc ranges.
On first
opening the box, I began to worry, because I had thought that putting the Dragon
Jeb figure together was a pain. This one looked like an impossibility with all
of the equipment, but with a little patience, a quiet room and no family to
disturb me, I found it sometimes difficult. But, on the whole an enjoyable
project to put together.
The first
problem I found was that the jacket zip opens, but will not come apart at the
bottom. So this has to be put over his head like the German camo smocks, but
this is a heck of a lot easier that they are. The belt on the jacket was
tightened to look correct, and I filled the pockets with some of the extra parts
that are supplied. The lower pockets were bulked out with the packaging from the
musette bag. I also used some of this for both of the trouser leg pockets. I
then started on the main ammo belt, and fitting the equipment to this. It then
had to be adjusted at the back of the belt so that it will be tight on the
figure's waist.
Note: Be careful with the plastic clips that
lock together both parts of the belt at the front, I had the same type on the
bbi Ranger figure and it broke on me. And I had to end up making another one up
out of wire. (It took three attempts for each side to get it right).
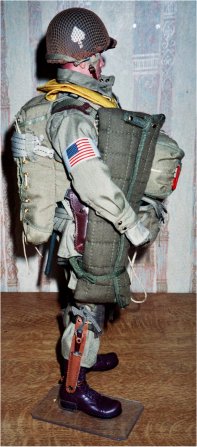
Looking at
it on the figure facing towards you, I put the first aid pouch on the left first
holes, then the .45 holster, the bayonet is one set of holes along. On the other
side I put the shovel and then the water bottle. This found out this was the
best way because, when the parachute is put on the figure the bayonet is pushed
into the figure's back out of the way. And the shovel handle just hangs down
behind his left leg. And both look natural, and they don't foul the straps for
the parachute. The only problem I found by doing it this way, is the little
metal clips the belt equipment have, for it to be connected to the belt. I may
have to have one of the clips for the water bottle and the shovel in the same
hole. It can be done, but it is a case of patience and it will go together.
Note: If the figure is required to be posed
sitting, the shovel handle can be pulled around to the side of the leg.
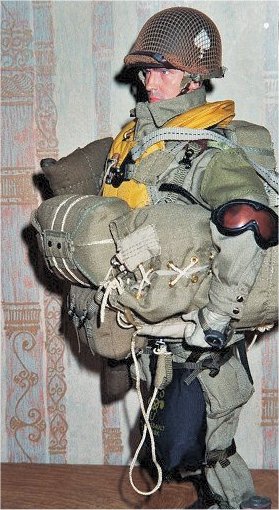
I then put
the ammunition bandoliers over the chest in an 'X' shape, with some ammunition
clips inside to bulk them out. I then put the 'X' shoulders straps on, the small
thin single straps connect to the back of the belt, with the metal clips going
into the last set of holes at the top of the belt at the adjusting points. With
the front two straps on each side, the two main one's ( the top one's of the
pair sown together) go onto the front of the belt into a hole between both of
the ammo pouches, whereas the other two just hang loose for now. And adjust
these straps so that it pulls everything in tight, be careful in doing so
because the front belt clip comes undone, or it may need to be adjusted to look
right. Also, the felt pads that are fitted under these straps can be moved to
look level.
Once that
is done then comes the fitting of the main parachute. For this see the link on
my Jeb Parachute page.
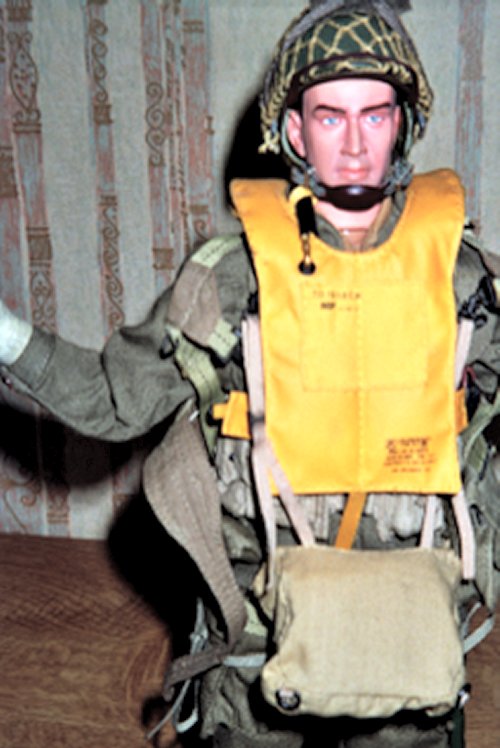
Note: At this point I now fitted the Mae West
to the figure, as it has to go over some of the kit, but under the parachute
straps. I left the parachute hanging loose on the back of the figure, because
the strap that goes down the back of the figure, goes under the parachute at the
back. The rear strap comes down and goes between the legs, and connects to the
front strap adjuster. Do not take the strap out of the front adjuster, just move
it down to meet the free end from the rear strap. Thread it through and then
pull it tight so it sits flat on the figure. Some fiddling here may be needed
here so that the Mae West lays flat, and the adjuster is not between the legs. I
then fitted the parachute, but with this figure I found that I had to adjust the
straps that came though the legs, so that they will connect to the parachute. Because of
the extra equipment on the figure bulking it out.
Note: Do not force anything if it does not
stretch as it will break, check to see what is stopping it from reaching.
Because the clips are plastic and they can snap. Note:
Make sure that the straps on the trousers are kept out of the way,
and some of the equipment in the pockets may need to be moved about to make the
straps sit right. And I found that the uniform and the pockets bulge out nicely
when all this is done. I then fitted the knife to the leg, this is an
improvement on the Jeb one. I Then took off the metal clip at the top of the
scabbard, also I threaded each of the strap ends back through the top of the
scabbard, just for neatness. Once I was happy with it, I cut off the excess
strap end. I then tied off each of the leg straps around the legs, above the
pockets, and on one side I trapped the threads from the holster, to make that
sit right. The musette bag was filled with one of each of the meals, and the
metal canteen tray and the side pocket packed out with spare packaging.
And then I
adjusted and fitted to the main parachute strap across the middle.
Note: This I where I realised that I now had a
problem, as I had to undo the main strap again, because the clips on the spare
'X' straps for the musette bag had to be bent to shape as with the instructions
on the slip of paper in the box. I wondered what that was all about! All I did
was with some pointed pliers, bend the end back on itself, to form a 'U' shape
so that the straight bit points up, and I then cut this straight bit off with
some wire cutters. Then I connected the clips to the bottom of the musette bag
as it says on the slip of paper, put the top straps through the main chute
harness, and pulled it tight. I then connected the spare chute to the clips, but
to me it does not look right.
Note: I found in the box afterwards, the other
clips for this. So I did not have to bend these clips to shape after all.
Note: This I changed because although
everything looked and felt tight, it was too high for me. So I connected the 'X'
straps to the top clips on the musette bag, threaded the main chute strap
through and tightened. Now the musette bag sits lower and is loose at the
bottom, and to me it now looks better. All I have to do now is fit the helmet
netting, armband, rifle without the bag, work out how to use and fit the other
bag. And somehow work out how the gas mask bag fits to the leg.
The ammo
belt front clips could have been made out of metal. Because, Dragon has some of
the other clips elsewhere like the gas mask bag made out of metal. I cannot see
why they could not have done this for the ammo belt? Some kind of instructions
on how the whole kit goes together, such as some pictures of the figure
completed, or pictures of the real thing. Otherwise in my opinion from what I
have modelled, I now have a very detailed US Airborne figure.
p.s. Thanks to Fu Man 83 for the images for me to work with.
Edit:
I finally
worked out how the gas mask pack can be fitted onto the leg. All I did was where
the straps are sown together in a loop for adjustment, I split that with a knife
and it allowed me to tighten the straps around the leg. When I was happy with
this I then used the straps on the trousers, to go around the pack then tied
off. Also as I did not want to cut up the netting on the helmet, I tied the
first aid pack onto the other leg just above the knife. The armband was fitted
to the arm, and the end glued in place with white glue, because the safety pin
to me is vastly overscale.
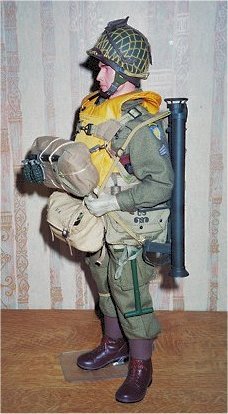
Finally, I
put the large bag under his left arm, with the velcro end again fastened around
the main chute strap. And the last thing I have to do is watch the Band of
Brothers video, to find out how the character 'Bull' told the trooper to wear
the rifle, after he told him to throw away the rifle bag.
Reply from ROYZEE regarding the way the rifle was worn.
Re: M1
rifle, I think he was told to wear it diagonally across his chest behind his
reserve (which he was told to dump, apparently incorrectly), in pretty much the
same way the Griswald bag was often worn. I have seen rifles carried like this
so the butt is up by the right shoulder and the muzzle by the left leg, also
muzzle down over one shoulder, like the rifle is normally carried using the
sling, you could even do a 'Richard Winters' and have it sticking out of the
leg/drop bag (some British para's did this if the Rifle valises or drop tubes
weren't used).
For
Normandy the vast majority of pics. show the use of the Griswald bag.
Both using
the bag and jumping assembled both have their advantages and disadvantages,
neither was probably as practical as the British valise which could be lowered
on a rope during descent so had the advantage of being on your body during exit
but not during landing.
Dragon Soldat 2
US Airborne figure images

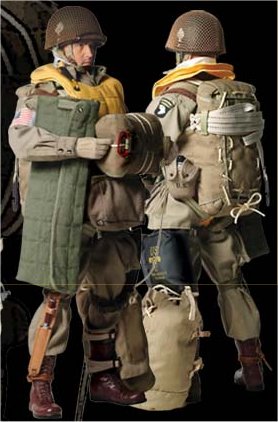
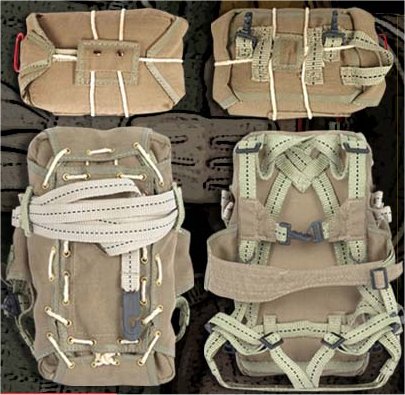
Musette Bag Changes
I
have just found out how to put the
musette bag onto the figure, so that it will hang in correctly in front, so
that it can be flipped over the head to hang on the figure's back. On the one I
have (Jeb), it is connected to the loops on the bottom of the bag, and then the
middle parachute band is threaded through it. But, I have discovered that if I
disconnect the straps from the bottom of the bag, and extend them I can fit them
to the webbing under the parachute harness. So that they can be connected to the
webbing loops on the shoulders, the bag will hang down in front of the figure,
back to front. And then it can also be flipped over the figure's head, so that
it hangs on the figure's back the correct way round.
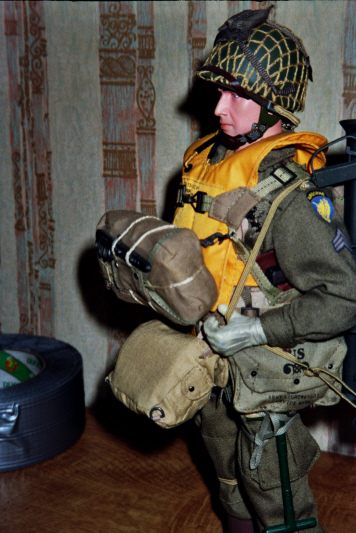
The pictures above show the musette bag before
(1st picture) and after (2nd & 3rd pictures) I changed it
|
