|
Welcome
To My Edward Stiner
Figure Review Page.
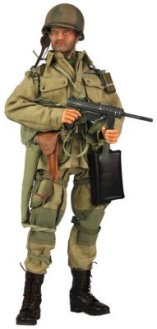
This figure is another US
paratrooper from DiD which to me personally is most welcome, especially with the
M1 carbine scabbard as this has not been available from any of the major
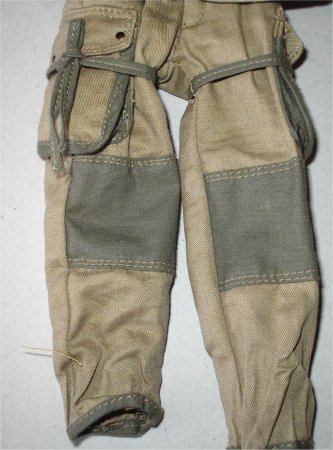
companies before. Plus we now have a 'rigger' modified uniform again with the
patches on the knees, elbows and the re-enforcing on the lower pockets. Which is
a cross mix of the Albert Ross and Corbin Black uniforms.
Figure Review
Body - After getting the figure out of the
box for the first time, I have noticed that the joints on the figure have again
been improved. As they feel a lot tighter to me when I pose the model, plus the
figure holds the pose better.
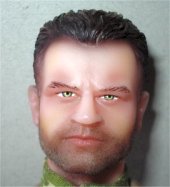
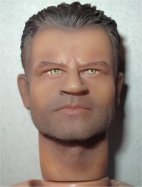
Headsculpt - This again has the flock on the chin area, and it does add
another detail to the headsculpt. I will be experimenting with this, to see if I
can change the colour slightly with some dark brown pastel chalk.
Note: The only problem will be the flocked
head in case the water destroys this, so I will have to turn the head upside
down if I do a pastel wash on it. Note: But what has surprised me the most is the type
of plastic used for this headsculpt, as it looks like it is un-painted and to me
it looks very un-realistic. Especially when compared to the angled head that DiD
made separately.

Update - Headsculpt &
Pastels
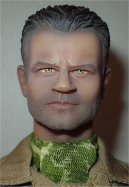
With this headsculpt the way it was made and the
colouring has been on my mind for a few days now, and I got to wondering how it
would take a pastel wash. So seeing as I had some spare time and while I am
waiting for some other parts to arrive, I did a pastel wash and drybrush on the
head. Starting from the left in the pictures above, the head has been given a
wash of a Brown pastel trying to avoid re-colouring the beard as much as
possible.
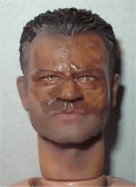
I tried this three times to get the effect I
wanted, and what the result would be if I left it to dry or when it was still
damp. In the end I left it to dry completely as it shown in the first two
pictures, then I got a large dry fan type of brush and then
just brushed across, up and down over the face.
This then removed a lot of loose pastel chalk, leaving a lot of it on the head
as shown in the third picture.
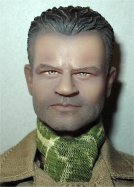
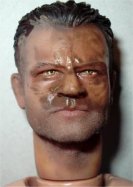
The fourth picture shows the headsculpt after I
used a Cream pastel to add some highlights, but as I added the pastel to the
head it removed the underlying Brown pastel chalk, so the plastic head started
to show through. So I had to give it another light wash of the Brown pastel
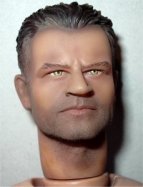
again, but the problem with this is that the head becomes too dark skinned. So
the final picture above right shows the head after the Brown wash has dried,
drybrushed off and then I used a White pastel chalk to add some highlights to
the face to try to lose the plastic look of it.
The final picture right shows the headsculpt after
I have used a smaller dry fan brush, to scrub at the headsculpt to try to blend
all of the colours in. But no matter what I have tried I cannot seem to lose the
translucent look of the head from showing through.
Note: Maybe it is just me, but at the moment I am still trying to
accept the material the head is made from, because without the usual paint work
the head now has a sort of 'spooky' look about it.
Hands - Again a very nice detail to them and it looks like they have been painted
to lose the plastic look to them, also it is true that there is a 'blue'
tint to them to emphasise the veins on the back of them, also a 'pinkish' tint
to the knuckles as well. The other two sets of hands will come in very useful
with me.
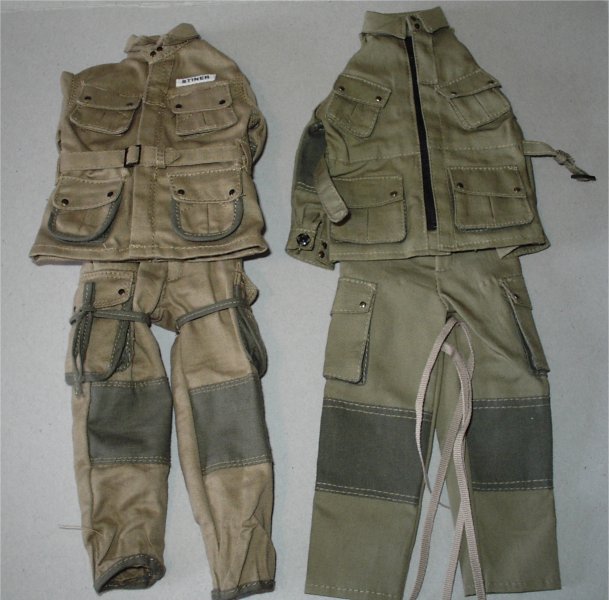
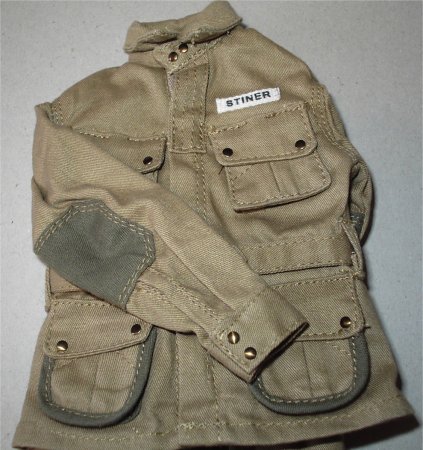
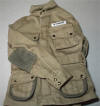
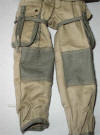
M42 Uniform - It is made from some very nice cloth material which is very similar in feel to
the Albert Ross uniform, which has been adapted to look like the Corbin Black
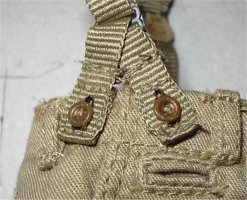
uniform minus the arm pocket. The only problem that I can see with it is the
braces for the trousers, because the buttons I believe are supposed to be on the
inside of the waist band. Again I notice that the belt for the jacket has the
sewing on the pointed end. This will be handy to stop the belt end fraying when
it is put through the metal buckle. Note:
Below are comparisons between the new uniform, the Newline one and a bbi one, and to be
honest there is a lot of difference between them.
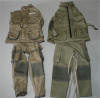
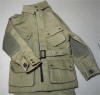

 In the pictures above from the left, the first
picture shows the DiD Stenier uniform alongside a Newline uniform, the second
picture shows the Stenier jacket, the third the Stenier trousers. The fourth
picture the Newline jacket, the fifth the Newline trousers. In the pictures above from the left, the first
picture shows the DiD Stenier uniform alongside a Newline uniform, the second
picture shows the Stenier jacket, the third the Stenier trousers. The fourth
picture the Newline jacket, the fifth the Newline trousers.
Note:
Paul's comment on the trouser braces.
I was trying to take the braces off a pair of trousers, the button didn't
pop off, it actually broke. My strong suggestion would be to cut off the buttons
altogether. Don't even try to attempt anything else. The braces are just too
stiff due to the melted button holes.
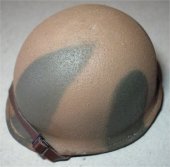
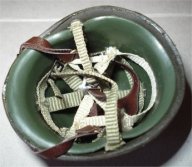
Helmet - Very nice and it is a paratrooper one and again the usual high quality DiD product,
and it is different as it has the camouflaged paint work on it. Although I am
not sure if it would be airbrushed on as here, because I would have thought that
it would have been painted by the soldier by hand. So the edges of the brown
would have been more sharper.
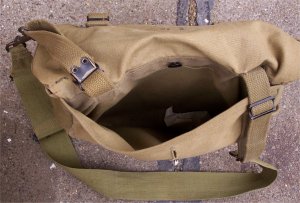
Musette Bag - The musette bag is again the one that has already been used
by DiD for the other US paratrooper figures, it is a nice size, with the lift
dots and metal clips. But I see that DiD still has not corrected the lift dot on
the side pocket, as this will have to be replaced with a metal flat type button
instead as shown below.
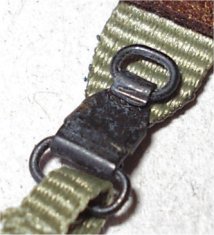 Shoulder Webbing Straps
- I do like these as they come with the felt pads for the shoulder's, this is a
nice touch as it will save me having to cut my own out of some brown felt I
have. Plus somehow DiD have made the buckles on the straps out of metal, this is
a nice touch but I feel you will have to be careful with these, as they do look
fragile. Shoulder Webbing Straps
- I do like these as they come with the felt pads for the shoulder's, this is a
nice touch as it will save me having to cut my own out of some brown felt I
have. Plus somehow DiD have made the buckles on the straps out of metal, this is
a nice touch but I feel you will have to be careful with these, as they do look
fragile.
I asked
Paul for his opinion on the shoulder
webbing straps and it is as follows:
Note:
They are very fine, metal, and I believe to
scale. They are missing the two rivets, but the D rings are movable unlike all
the others on the market. It might require care to move them to the down
position. They are NOT clunky plastic! Nor are the sewn on like the DML. They
appear to be brass PE I would imagine. To me these qualities are a big plus.
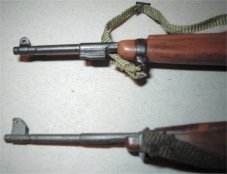
Weapons - M1 Carbine Rifle
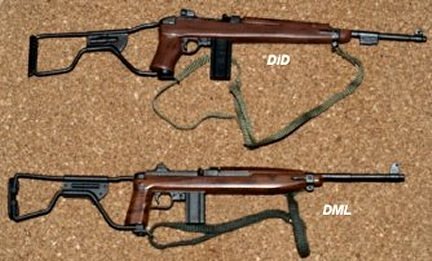
 The
pictures above are a comparison between the DML rifle and the new DiD one kindly
supplied by Paul.
And I have included his comments as below regarding these, which also relate to the link he sent to me -
Rifle The
pictures above are a comparison between the DML rifle and the new DiD one kindly
supplied by Paul.
And I have included his comments as below regarding these, which also relate to the link he sent to me -
Rifle
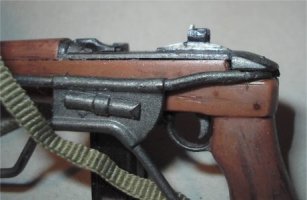
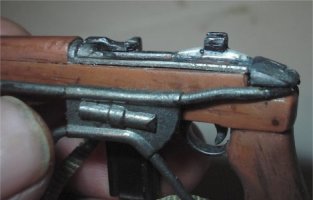
The sight to
the far left is the proper sight for an original Inland
produce M1A1 Para carbine. Inland was the only company to produce the WWII Para
version of this gun used during WWII. All other makers came later, or these
weapons were modified later, Korea or Vietnam. They never
had an adjustable sight for windage. The little knob, will have to be removed.
Please note
the difference between the sights and how they rest on the receiver. The fix
will most likely need some putty work at the base of the sight as you can see a
slight slope at the base, it is a part of the original receiver.
This
is missing or removed (may be just hidden under the new block sights) from the
later sight modifications. That slope would be an important detail to its
 identification. identification.
The next discrepancy would be the pistol grip. The original grip
was square and not concaved. Refer to photo entitled "post 3129".In the photo
the grip to the left is the correct one for the WWII. This shows the difference.
The concaved grip was a later modification made in late 1944, these guns never
saw WWII action. Again, I won't know until it is in my hands. As previously
stated the bayonet lug must go. This modification was done late war and was
never in the field during WWII.
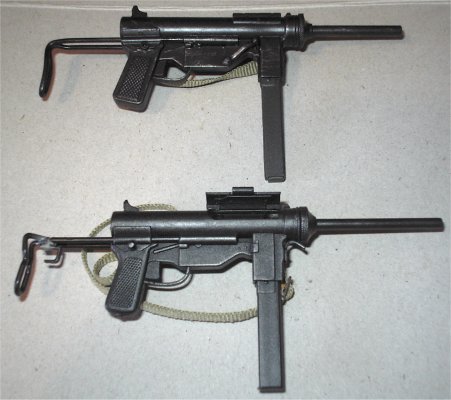
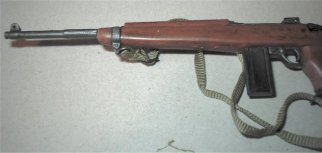
The picture on the right shows the comparison
between a DML M1 'Grease gun' at the bottom, against the same weapon as made by
DiD at the top. With the DiD weapon the magazine is removable, the ejection port
does not open, but the stock is made of metal and it does slide out. This I feel
is better than the DML weapon, because I have had to repair the DML one as the
end of the stock broke off when I placed it in a figure's hands.
M1 Carbine Alterations
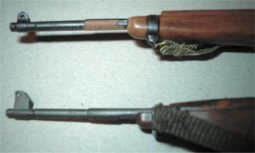
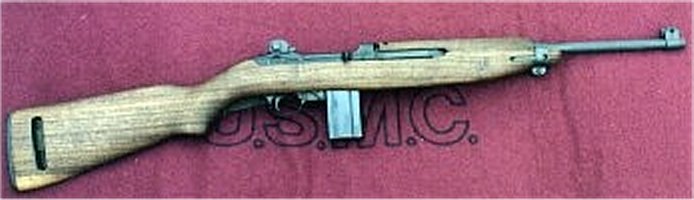
In the picture above is an M1 carbine with the
sights on it as it comes with the Stiner figure, but without the bayonet lug on
it. Using this picture and a bit of Modeller's Licence, I have cut the bayonet
lug off the rifle I have as in the second picture above, also being careful and
with some sanding I can make the barrel like the DML rifle below it. The third
picture above right, shows the rifle re-painted so it now has no bayonet lug on
it.
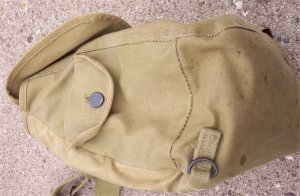
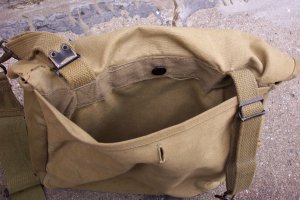
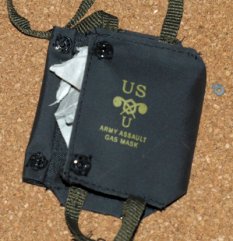
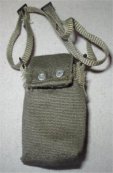
Equipment - This is again to the usual high standard I expect from DiD, and
what has surprised me is the gas mask bag as shown below because this can be
opened. Which I have not seen since the same type of bag was made by Dragon for
the Soldat 2 figure, which came with a separate gas mask to put inside.
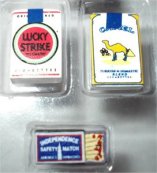
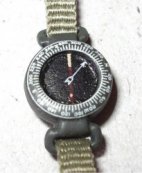
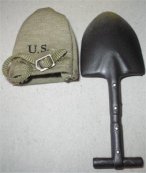
 Other equipment items supplied are two packs of
cigarettes and a box of matches, a wrist compass, a shorter shovel and
cover and a rigger
pouch. Plus a pouch for
the magazines for the M1 'Grease gun', which incidentally are not supplied with
the boxed figure. Other equipment that has been supplied with the figure is the
normal belt kit that has already been issued with the other US figures. Such as
the pistol belt, pistol and holster, first aid pouch and a
plastic water bottle and cover. Other equipment items supplied are two packs of
cigarettes and a box of matches, a wrist compass, a shorter shovel and
cover and a rigger
pouch. Plus a pouch for
the magazines for the M1 'Grease gun', which incidentally are not supplied with
the boxed figure. Other equipment that has been supplied with the figure is the
normal belt kit that has already been issued with the other US figures. Such as
the pistol belt, pistol and holster, first aid pouch and a
plastic water bottle and cover.
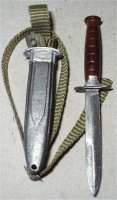
I asked
Paul about the knife that comes with
this figure, because to me it looks like a mix and match affair. Because I think
that it is supposed to be the bayonet for the M1 carbine, but you cannot fit it
to it. Also, it has the metal scabbard for the larger Garand bayonet, which
looks like it has been cut down to fit this knife.
Note:
Paul's comment on the knife.
Many
of the M3's were issued with the leather scabbard, but then they were also
issued with the M8 metal scabbard. Without actual
dimensions from the original I can't tell you if the Did one is exact but it looks
correct to me.
 This picture shows you the M8 scabbard, and there
is also a small detail I have not caught until now. The hand guard is
wrong on the DiD knife. If you look at the blade
of the knife, the edge with the shorter sharpened edge the guard right above the
blade is the opposite direction from the original which is swept forward towards
the point of the blade. This picture shows you the M8 scabbard, and there
is also a small detail I have not caught until now. The hand guard is
wrong on the DiD knife. If you look at the blade
of the knife, the edge with the shorter sharpened edge the guard right above the
blade is the opposite direction from the original which is swept forward towards
the point of the blade.
The other side should be straight. This sweep down
to the guard was for the grip, a place for your thumb. The scabbard may be a bit out of proportion to the
real one.
Many thanks to Paul who has
helped with this page as I have learned a lot from it.
|