|

Welcome To My Replacement Press Stud Page
My Button Snap Covers Shop Bought Button Snap Covers
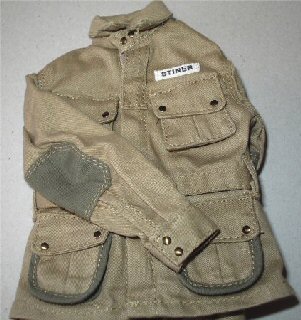 An item that has been
bothering me for a long time are the press stud covers on the US uniform pockets
and cuffs, as I have during the assembly of the US paratrooper uniforms in the past lost a couple. And until now
I could never find a method of replacing them, until I wanted to replace the
buttons on my British tank suits that I have altered. An item that has been
bothering me for a long time are the press stud covers on the US uniform pockets
and cuffs, as I have during the assembly of the US paratrooper uniforms in the past lost a couple. And until now
I could never find a method of replacing them, until I wanted to replace the
buttons on my British tank suits that I have altered.
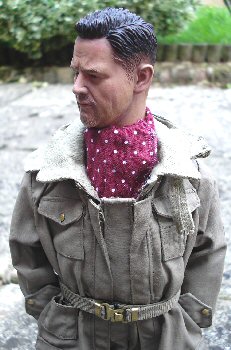
Because on the real item it has button snap covers on the pockets instead of
buttons, and after giving this a lot of thought I have come up with the
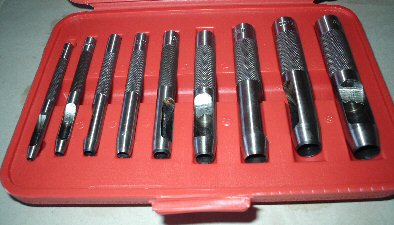
following idea about how to make them. After seeing a set of hollow hole punches
on eBay that can make a variety of holes from 2mm up to 12mm. The sizes I am
most interested in are the 4mm, 5mm, 6mm and the 7mm one's since one of them
should be the same size as the buttons on the Dragon suit.
My Button Snap Covers
I have just received the set I bought as shown on the right below,
and I have found that the buttons on the pixie suit fit exactly into the centre
of the 4mm hollow punch. It is
not the hole the punches can make that I am interested in, it is the material in
the centre that gets removed. As this is what I am going to use as the outer
part of the button snap. And if I can get hold of some thin brass or plastic sheet I can
then stamp out as many of the snap covers as I want.
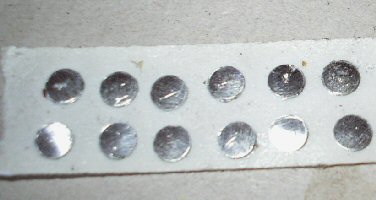
In picture 1.
below I have obtained some thin aluminium sheet with a thickness of 0.50mm, as
that could be easier to stamp the studs out of, but looking at the picture at
the bottom of this section
 of how I have used
the discs on my repainted British tank suit. I think that for any future discs
that I make I will have to look for some thinner brass sheet material, maybe if
possible down to 0.25mm in thickness. of how I have used
the discs on my repainted British tank suit. I think that for any future discs
that I make I will have to look for some thinner brass sheet material, maybe if
possible down to 0.25mm in thickness.
Note: I was
also given a link to a supplier of the tiny round discs in Germany by
Royohboy on the OneSixth UK forum -
Discs. The difference
between them and my discs is that the one's I have made are flat, and the discs
on the webpage look like they are dome shaped.
The aluminium sheet shown in picture 1.
I used below came from a company on eBay called
Forward Metals. Also
shown
is where I have placed the 4mm punch on the sheet and hit the end of it gently
with a hammer, as you can see it has made the hole as well as the disc that I
want which is kept inside the punch. I then just take out the metal discs as shown in
picture 2. and place them onto some double
sided tape, and then repaint them the colour I want.
1.
 2. 2.
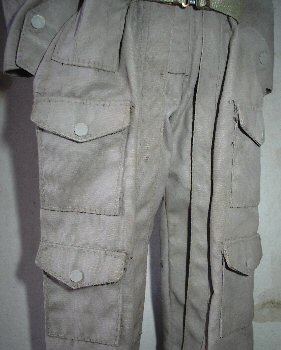
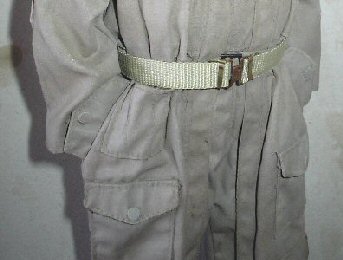
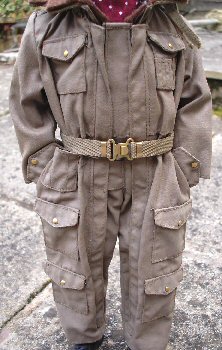
To get them off the tape, I then just cut around them with my model knife,
and placed them onto the British tank suit in place of the other buttons as
shown below. To add a bit of detail to them and the uniform, I have used a wash
of very diluted brown acrylic paint to add dirt around the pockets and the press
studs to add Lowlights. Once that was dry I then gave the cloth and studs a
drybrush of Light Sand weathering powders, to add some Highlights.
Shop Bought Button Snap Covers
It was not until I had made the snap covers above,
did I do some more searching around on the internet just out of interest to see
if I could find the same items as on the DiD US jacket above. Then I
accidentally found a couple of embroidery shops who were selling small
decorative items like rhinestones for full size clothing, and on one of them I
came across something called Nail Heads. And in one UK shop I found that the
items they were selling looked very similar to the discs on the jacket -
Nail Heads. I also found an American shop on eBay that sells the same items
in a Copper colour -
Nail Heads.
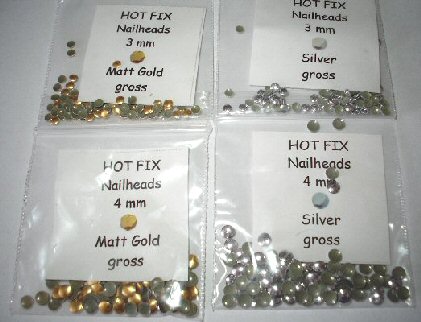
I ended up buying some of the 3mm and 4mm Matt
Gold & Silver coloured one's from the UK shop, along with some of the 3mm Copper
coloured one's from the US eBay shop, to see if they could be used as press stud
covers on my British uniforms. Note: I am
not really bothered with the colour of them, since I could be repainting them
anyway.
3.  4.
4. 
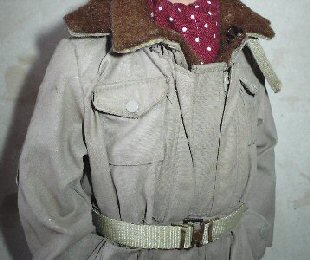
To fix them in place again I put them onto some
double sided tape, (but I realised that they are almost an exact match in colour
to the belt buckle), so that has saved me from having to paint them. Then like
the other discs I made, I used my model knife to cut around them, so that they
have a sticky back to them from the tape. Note:
I am glad that I used the tape instead of glue, because I could have ruined the
uniform trying to take the other discs off.
5.
 6. 6.
 7. 7.
The difference in them is also shown above on the
British tank uniform, as these nail heads are rounded on the edges, compared to
the flat edges from the discs I stamped out of the aluminium sheet.
Note: I may have to put some Matt Medium
acrylic paint on the studs to dull them a bit, as they look a bit too bright for
me.
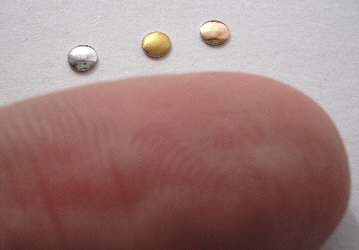 Update Update
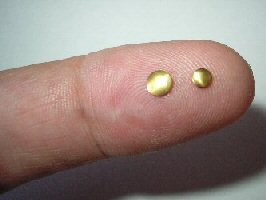
In the picture on the right I have placed an
example of each of the 3mm Nailheads I bought alongside my finger for size. From
the left is the Silver one, the Matt Gold and on the right is the Copper one.
I have found with them I get a very nice result
with them on the uniform, as they are rounded and a great improvement on the
earlier flat discs I made myself. Plus with the use of the Model Color 540 Matt
Medium acrylic paint to dull them off, it keeps the metallic look they have.
They can be repainted to be used on the US paratrooper uniform, but I recommend
using enamel paints, because the acrylic paint flakes off when handled.
Sixth Army forum topic for the nail heads -
Covers
Many thanks to
Royohboy and Old
Git for helping me with my British uniform alterations. |
