|
Welcome
To My Triple Nickel Paratroopers Page.
This page came about after finding out by accident
about the Triple Nickle paratroopers, plus seeing these excellent kitbashes by -
SSG Felder ,
romedome
and
Stall Stuff In the course of making this figure I
have had some amazing help from various sources, and with this page I am hoping
that I can combine it all together for my fellow modellers.
Some history regarding the 'Triple Nickles' or
the 555th parachute regiment and their pioneering techniques can be found from
these links -
Triple Nickles,
here,
here and
also here. Of
all of the figures that I have in my collection, I must admit that these figures
have been the most difficult to find any reference material for. And it is only
through the very generous help of the people mentioned below, have I been able
to assemble this figure.
Note: Below are some answers to my questions about the type
of paratrooper uniform that was worn by the soldiers.
Many thanks to Ms Dennings and Mr Stefanski
from the US Airborne museum at Fort Bragg.
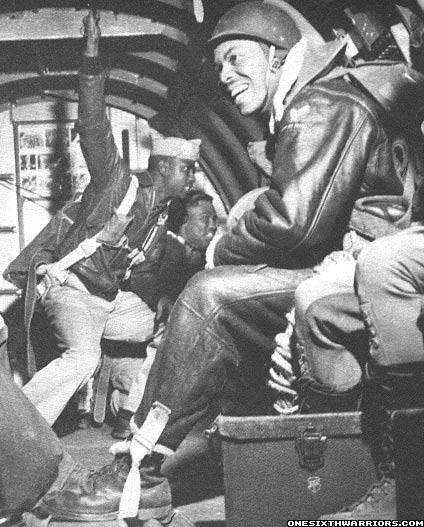
The 555 Parachute Infantry Battalion wore the same clothing as all the
paratroopers wore. 1942 jump uniform with Airborne command patch. The parachute
they jumped was the T-5 parachute. When they jumped out west in to Oregon they
wore bomber cold weather leathers for the protection (extra padding). Boots
were jump boots.
Many thanks to Mr Mark Bando from the
Trigger Time website.
M42 jump uniforms with red Airborne Command patch on left shoulder.
Blue piping on overseas caps
Don't know about gloves other than the standard tan, horsehide ones with
adjusting strap on wrist.


Because of the lack of very clear reference
material that I have been able to obtain regarding the 555th airborne division
and the equipment
for my figure below, I have had to use a little 'Modellers Licence' on some of
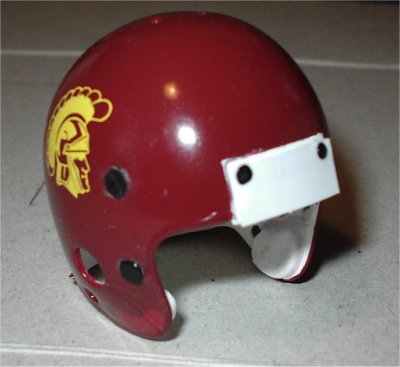
the equipment that was used. One of the main items which was very kindly
supplied to me by Tim (pangaloss)
is the US football helmet, which I feel contributed the most to this figure
because I wanted the pair of figures similar to the one's that were made by
SSG Felder. But somehow I wanted them to be different at the same time, hence
my using the Billy Hicks bomber crewman leather uniform.
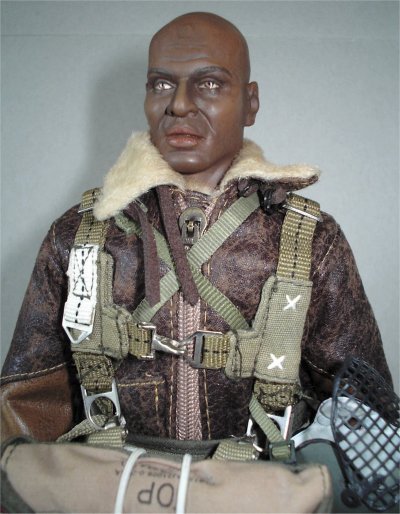
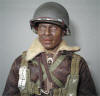
Headsculpt

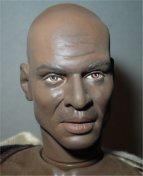
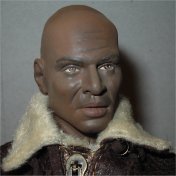
The headsculpt I am using for this kitbash is the
DML Eddie Strong one, this is the same one I used for my Red Ball driver.
To alter the colour on this headsculpt I used two
different brown pastel chalks dry dusted over the head to lose the shine, the
first colour was a dark brown chalk scrubbed dry into the eyes, nose, chin and
around the lips to add a slight depth to it
I then dry scrubbed a lighter brown to add some
more faint highlights, then with a large dry round brush I flicked across the
whole head to blend the two colours together. Once I was happy with that I then
got a damp paintbrush with some water and flicked across the top of the nose,
cheeks, chin and lips to take off some of the chalk from the high points on the
face. While this was still damp I flicked across the head with the large brush
to blend it all in, the final step is with a small wet paintbrush I removed the
chalk from the eyes and the lips. What I did find with
making this kitbash is that I did not need to add a dark pastel wash to the
headsculpt because of the dark skin colour, all I did need to add was some
highlights instead.
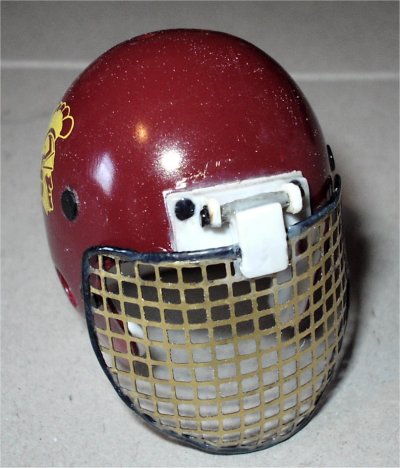
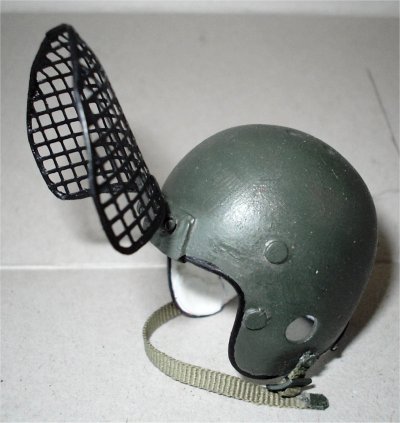
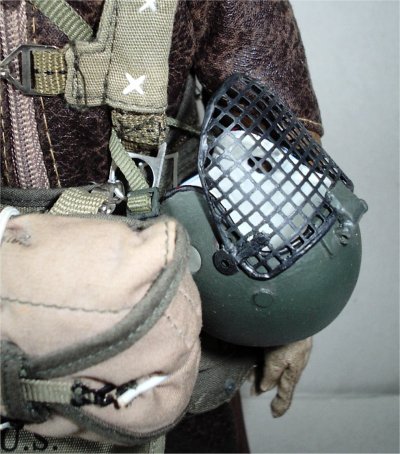
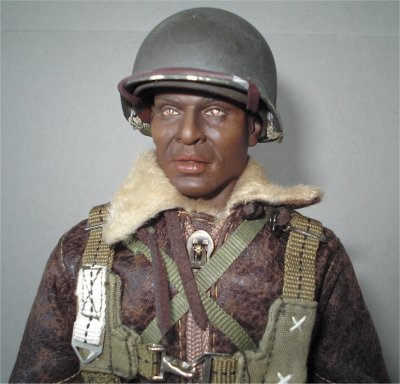
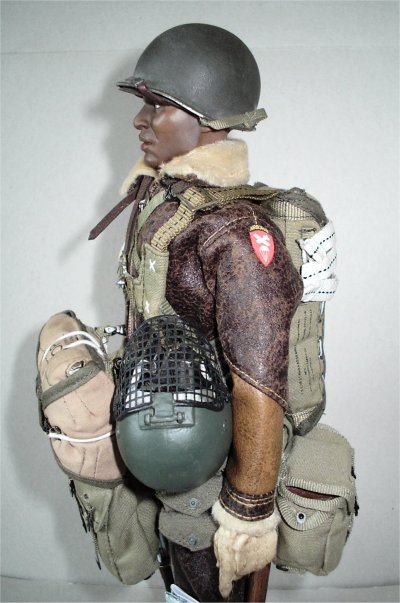
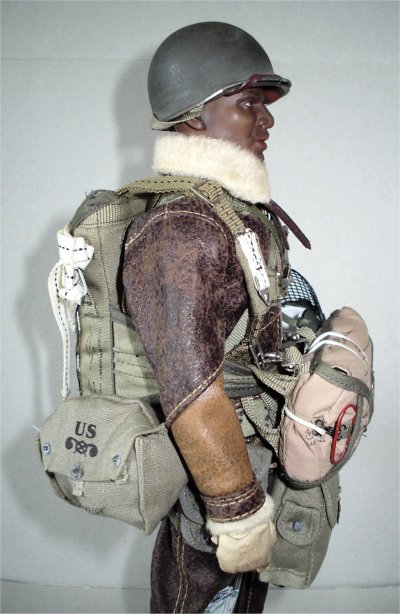
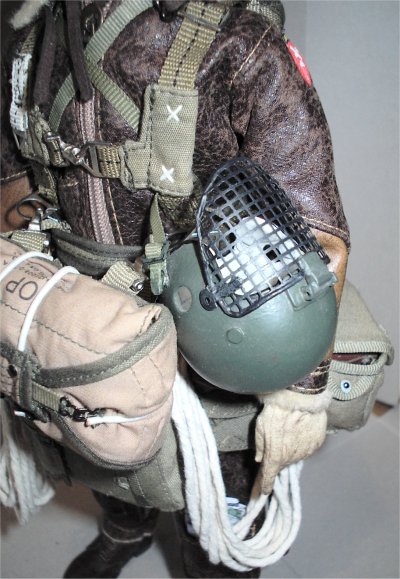
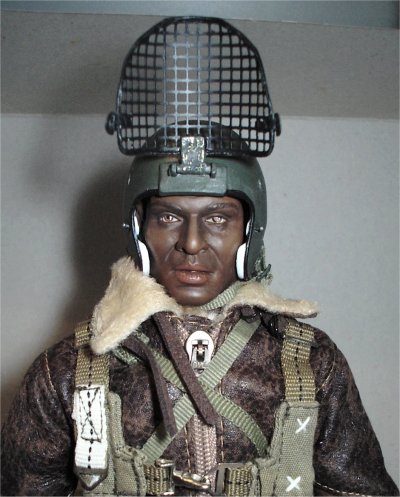
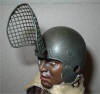
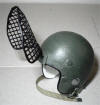
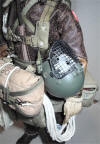
Helmets
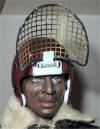
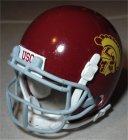 This is the helmet shown right as supplied to me by Tim
of a modern US football helmet, and with some work and research I have changed it to look like the one's
that were used by the 555th soldiers. I have also equipped the soldier with a
normal US army steel helmet, as I believe that these would have been used during
a parachute drop. This is the helmet shown right as supplied to me by Tim
of a modern US football helmet, and with some work and research I have changed it to look like the one's
that were used by the 555th soldiers. I have also equipped the soldier with a
normal US army steel helmet, as I believe that these would have been used during
a parachute drop.
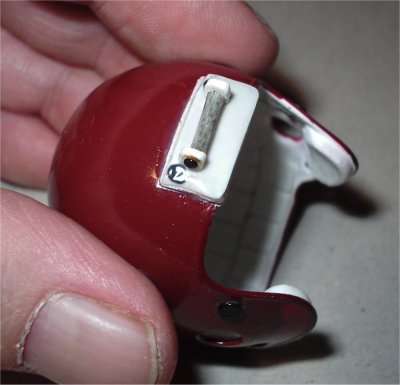
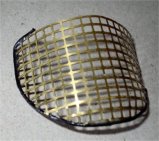
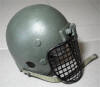
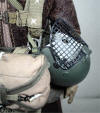
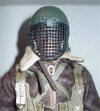
One of the items that I had to make for the fire
fighter's helmet was the mesh face guard, and this turned out to be one of the
hardest parts to make. Because I had to cut out the mesh to shape and then glue
some stretched sprue onto the edge, I originally tried using some super glue to
try to attach the sprue to the brass but all I did was end up sticking my
fingers together. So I then used my Humbrol
Poly glue 'mix' (See
Number 31) which has some melted sprue in it, this was better since it
helped to melt the sprue strip to shape around the brass mesh.


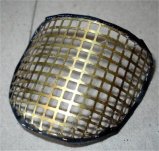
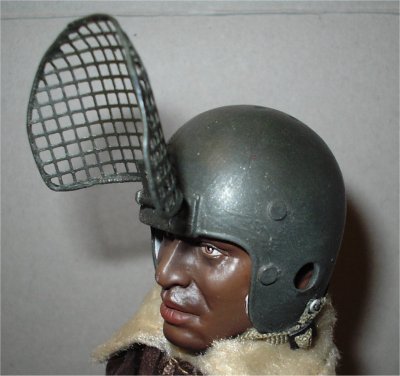
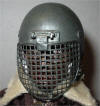
 The next item that
has to be made is the pivot point on the front of the helmet, so that the mesh
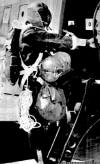
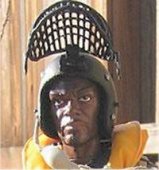
can be able to move up and down. In the picture on the right is the helmet as
used by Romeo on his kitbash of a Triple Nickel soldier, and I would like to
thank him for all of his help with the reference material for my figure. The next item that
has to be made is the pivot point on the front of the helmet, so that the mesh
can be able to move up and down. In the picture on the right is the helmet as
used by Romeo on his kitbash of a Triple Nickel soldier, and I would like to
thank him for all of his help with the reference material for my figure.
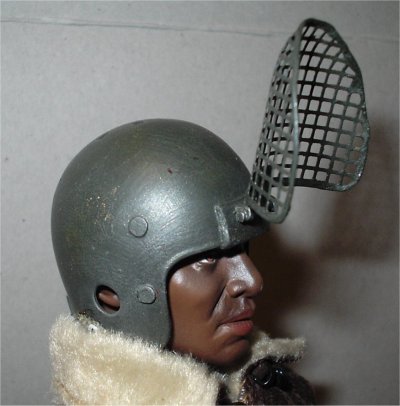
The
pictures below show how I have had to adapt the helmet to what I want, the only
problem that I have with making of the hinge is the material that the helmet is
made from. As it is the flexible type of plastic that does not allow anything to
really stick to it. So I have had to make 6 rivets from some stretched sprue, 4
of them are for blanking plugs for the holes that the original straps went into.
The other two are to help hold the plastic piece I put on the front so I can
mount some brackets for the hinge. Note: To
give the front piece and the rivets more strength I have brushed over them and
the edges with some of the glue 'mix', as this will all become solid plastic
when it dries.


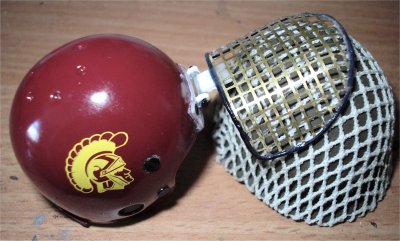
The pictures above from the left show the helmet with the rivets
and front plate in place, the mask lined up to check for size and in the third
picture the hinge I made. Note: The hinge
was made from two pieces of plastic cut and shaped with a hole in each, so that
the pin made from stretched sprue can be passed through them, through the centre
tube and then mushroomed off with my lighter flame. The next picture shows a
piece of shaped plastic glued onto the middle tube to hold the face mask, the
step I have shaped in it is to allow the mask to sit low on the support so when
it is glued in place it does not look out of scale.
The next picture shows the mask attached to the
support, to keep this in place I have used the 'mix' to both glue the pieces
together, plus I have also used it to fill in the gaps in the mesh above the
support to add some added strength to the hinge assembly.
Note: The hardest part of this with making hinge support, was
making sure that when the mask was down it lined up to cover the front of the
helmet. In the final two pictures above right, I have had to add a small strip
of plastic onto the top of the hinge to hold the mesh in place, as the 'mix'
alone was not strong enough to hold it. The final picture shows the helmet on
the figure to check for alignment of the mesh, and to see if the mask opens and
closes as I want. Note: The hinge is not as
tidy as I wanted it to be, but I am hoping that when I paint the whole helmet
Olive Green it may cover up some of the faults.

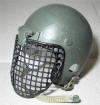
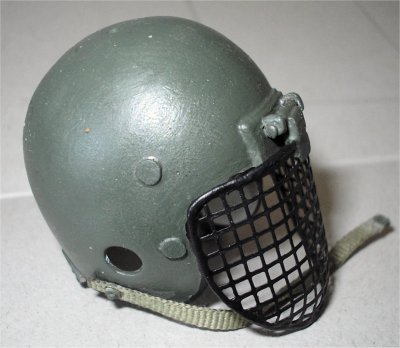
This is the finished helmet with the first three
pictures of it painted an overall Olive Green, but after asking Paul about it he
suggested painting the mask Black which is better. In the last three pictures I
have also added a strap and buckle to the helmet and painted the rubber edges
Black.
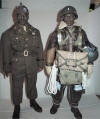
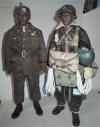
Uniform
This is
the DML Billy Hicks uniform that I managed to obtain separately, although it was
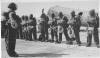
not cheap I just had to have it for this kitbash. Mainly because after seeing
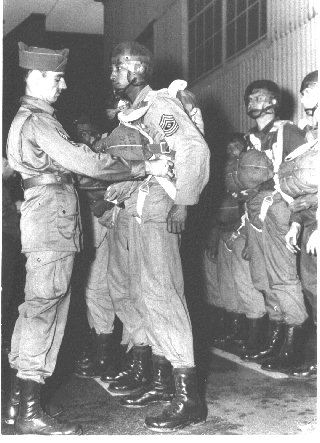
the reference picture of the soldiers on parade by Danny and the kitbash by
Romeo, I just have to have a pair of figures like those in my collection.
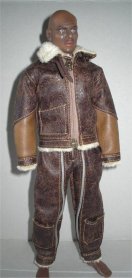
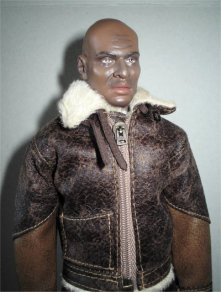
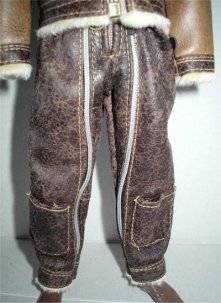
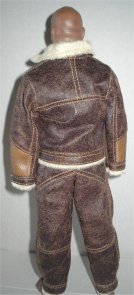
This
bomber crew uniform has to be one of the best items produced by DML over the
last few years, as the material has a very realistic look and feel to it, the
collar material is very much in scale and even feels right, plus the jacket zip
works and is almost in scale as well. Because of the detail that has been made
into the uniform, I am going to leave it as it is as don't think I can do
anything to improve on it.
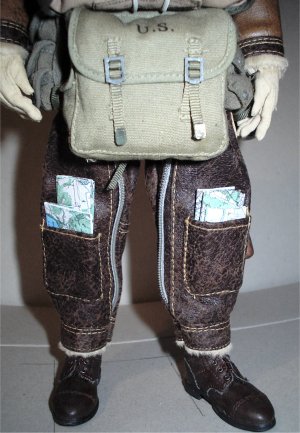
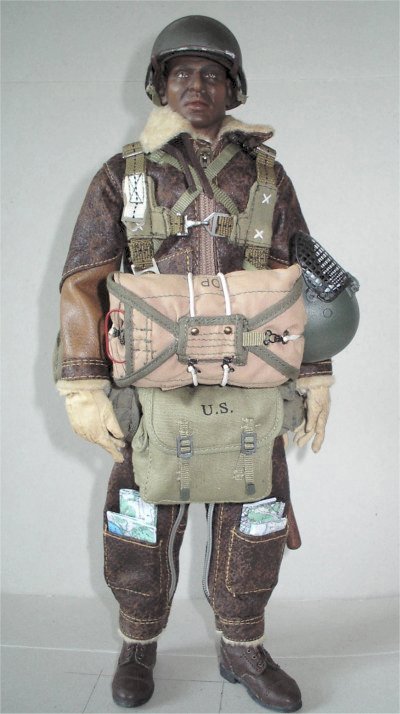
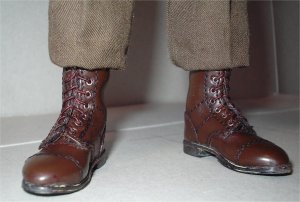
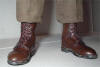
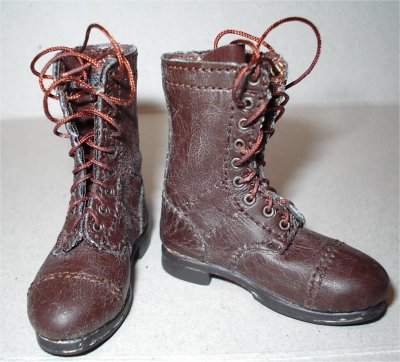 Boots Boots
These are
the one's from the DiD Albert Ross figure, this is where some of the 'modellers
licence' comes into the kitbash. Because although I was told about the soldiers
using jump boots, I could not find any sources for what type of boots they were
so I have used these for my kitbash. After having a little think about these, I
have painted them with the Dullcote again to make them look like they have seen
some use. As they will tie in with the worn look to the uniform as well.
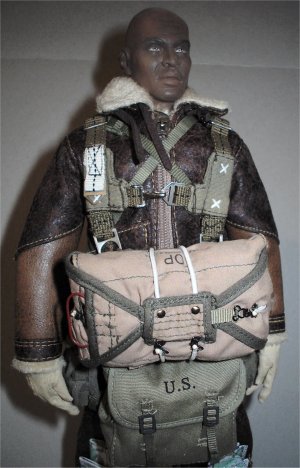
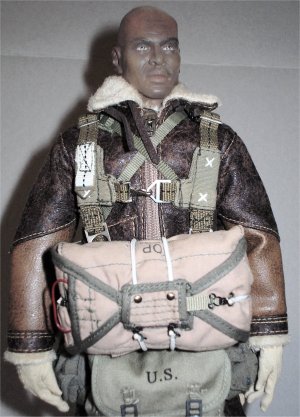
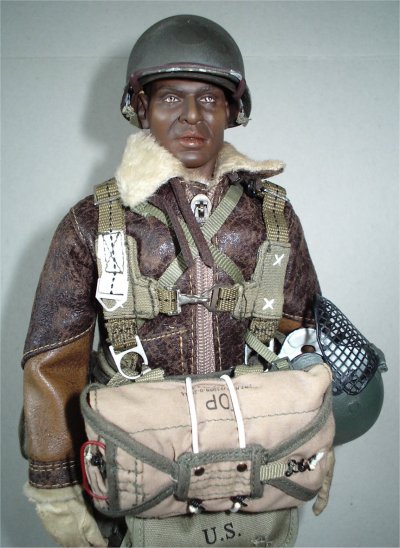
Equipment
From information I have found.
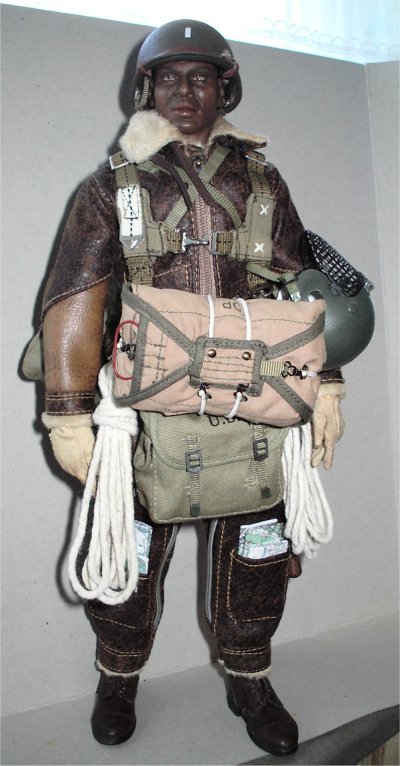
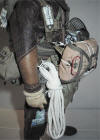
Troopers would jump with full gear, including
fifty feet of nylon rope for use in lowering themselves when they landed in a
tree (later increased to 150 feet after one fatality). Their steel helmets were
replaced with football
 helmets
with wire mesh face protectors. Covering their jumpsuits and/or standard army
fatigues, they wore the air corps fleece-lined flying jacket and trousers.
Gloves were standard equipment but not worn when jumping; bare hands manipulate
shroud lines better. helmets
with wire mesh face protectors. Covering their jumpsuits and/or standard army
fatigues, they wore the air corps fleece-lined flying jacket and trousers.
Gloves were standard equipment but not worn when jumping; bare hands manipulate
shroud lines better.
Regarding the gas mask I believe it was issued
due to this information.
Not mentioned publicly at the time was the
possibility that Japan might equip the balloons with the capability to carry out
some form of chemical-biological warfare. Their experiments with prisoners of
war in the notorious unit 731 were not known until much later - but they began
in 1937 and point to existence of a Japanese program to develop for use deadly
biological agents. Such agents quite possibly could have been delivered in
quantity to the United States mainland by balloons.
Again
here I have used the 'Modellers Licence' for the type of equipment that the
soldiers would have used, coupled with the limited reference material that I was
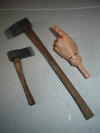
able to obtain. Two items that I wanted for this kitbash I have had to make
myself and these are the axes as shown on the right. The heads were cut and
shaped from some Basswood, then sanded and painted with some Gunmetal and Silver
enamel paint, while the handles were cut from some Balsa wood, shaped and given
a wash of Burnt Umber acrylic paint.
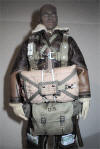
One very important item I did find out about was the type of
parachute that the soldiers used and that was a
T-5 parachute, for this I have
used one from my spares box which I believe is a DiD Corbin Black one. I think
that the reserve parachute also came from the same figure. The gas mask bag is
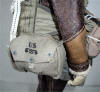
from DML and the musette bag is from the DiD Albert Ross figure.

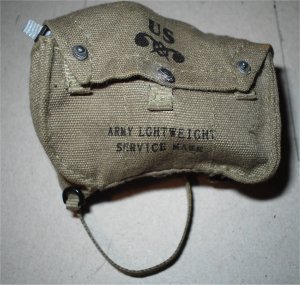
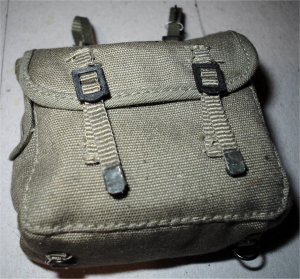
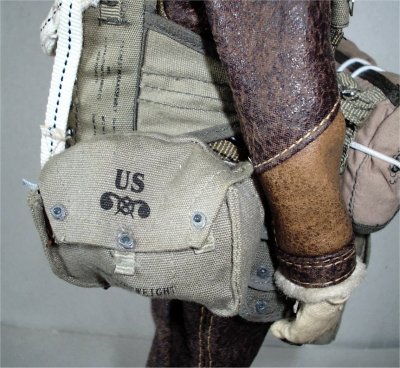
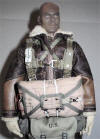
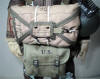
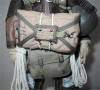
This is the belt kit that I have used for this
figure and I have thought about what might be on it, so I decided to use two of
the 3 pocket pouches as the soldier may have to carry some kind of small
equipment on him. The gas mask bag I have used contains a Soldat 2 mask, with
the bag's lift dots replaced with some DiD one's. The musette bag has had the
small pocket lift dot removed and replaced with plastic rivet, also I have
fitted some end tabs to the straps. The pictures below show the belt kit in
place, which I have dusted over with some weathering powders to break up the
colours.
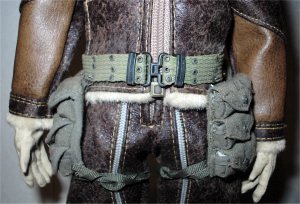

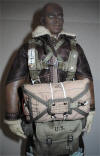


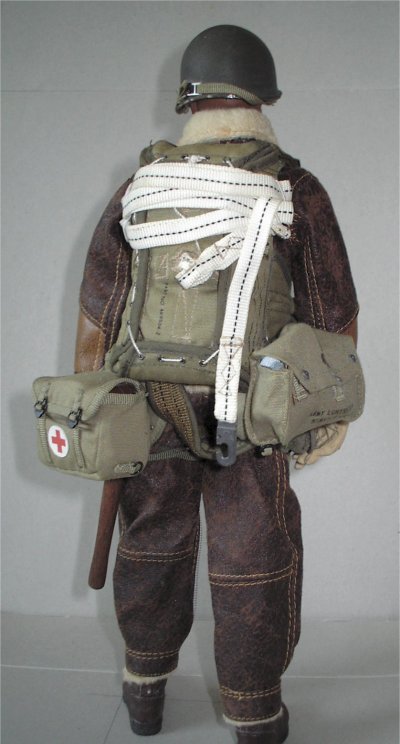
These are work in progress pictures with how I am
working out how to load out the figure, what goes where and what the overall
effect will look like. One thing that I have added is a medical bag as I wanted
to have something extra added over the shoulder, this had a piece of lead
wrapped in tissue put into the bottom of the bag to add weight. On top of that I
have two small blocks of balsa wood to bulk the bag out, on top of that I have a
spare brown medical pack.
Because the pockets on the trouser legs looked
empty I have added some maps of the USA I found on the internet, which I printed
out and folded up to fill these. The fire fighter helmet I may attach to the
parachute straps, because I believe that the soldiers dropped from the planes
wearing either steel helmets or just the liners.
I have just found out about another excellent
kitbash of a
'smoke
jumper' by Stall Stuff on the OSW forum, but while viewing it I realised
that I had forgotten to add the buckles for the face visor, so this is another
small detail that I will have to add to the helmet.
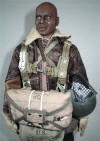


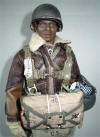

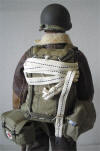


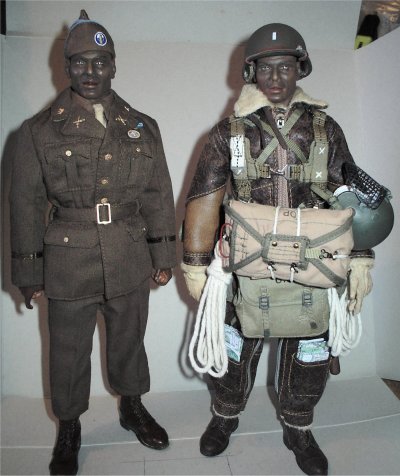
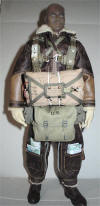
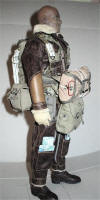
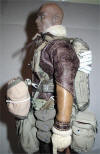
This is the finished figure although the steel
helmet has to be changed as I want to use a DiD helmet on this figure, for the
purposes of the photographs I have used this one. Note:
I am still working on a long bag for the axes for this model.
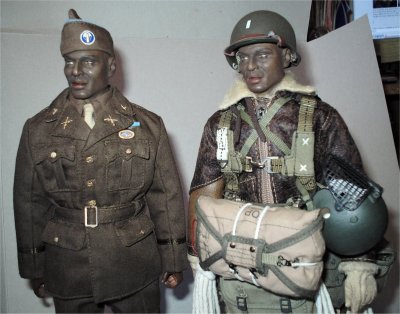
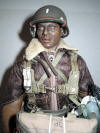
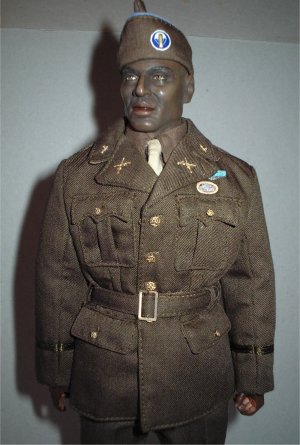
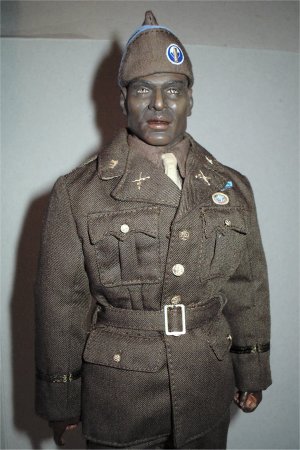
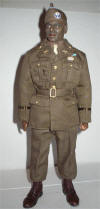
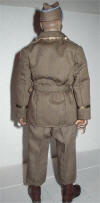
Triple Nickel Class A Uniform
This figure is the other half of my Triple Nickel figures, this
is the same headsculpt as I used in my other model but this one is in a class A
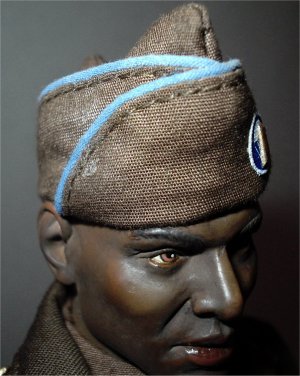
uniform. The uniform is from the Albert Ross set with the piping on the cap
repainted with some Model Color 70943 Grey Blue acrylic paint, which I watered
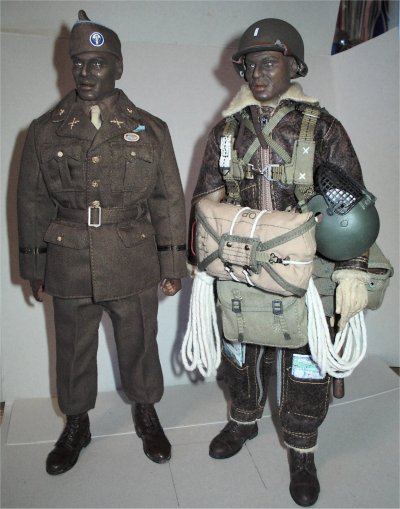
down slightly and put onto the piping with a fine pointed brush.


The assembly was almost the same as my other
Class A uniformed figure,
with the boots again being polished and buffed to the shade shown above right. I
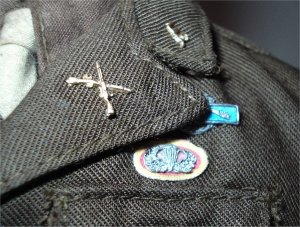
also replaced the jump oval and printed it out onto some cotton paper, which
then had the wings added on top of it. I also have used a badge supplied to me
by Paul which I placed above the oval, also the cap badge has been
replaced with another that I printed out.

Many thanks to justin_g for a link to a You
Tube video about the 555th -
555th video
I would like to thank Tim
(pangaloss)
for the football helmet.
Romeo (romedome)
for the excellent reference help.
Danny
(SSG
Felder)
and
Stall Stuff for
their reference help with this kitbash.
Ms Dennings,
Mr Stefansk and
Mr Mark Bando
for the uniform reference help.
The
Triple Nickels website.
Paul (.308) for all of his
detailed help and for the badge.
Plus all of the other modellers whose ideas I have 'borrowed'. |