|
Welcome
To My Stan Wiley US Military Policeman Page.
This page is about the Dragon
USA Exclusive Stan
Wiley US
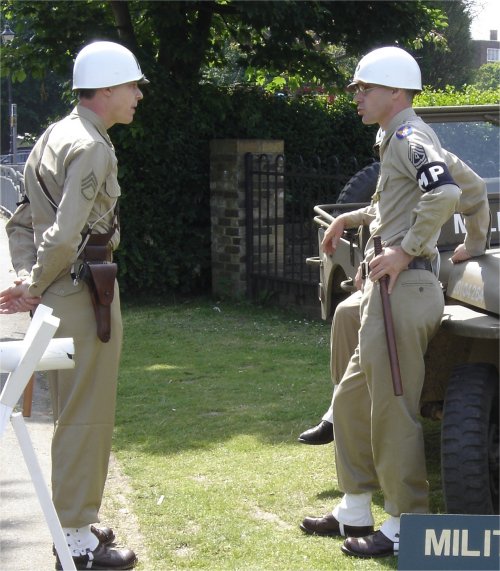
military policeman and how I have put him together. The pictures below we
supplied to me by a very kind gentleman Peter Marshall, and I would like
to say a very big thank you to him for the images. As they are an excellent
reference source to help me with my figure.

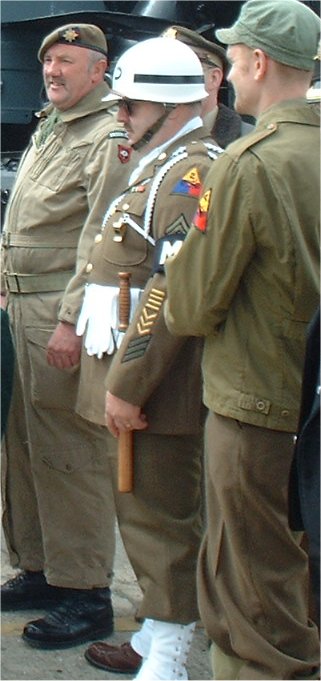
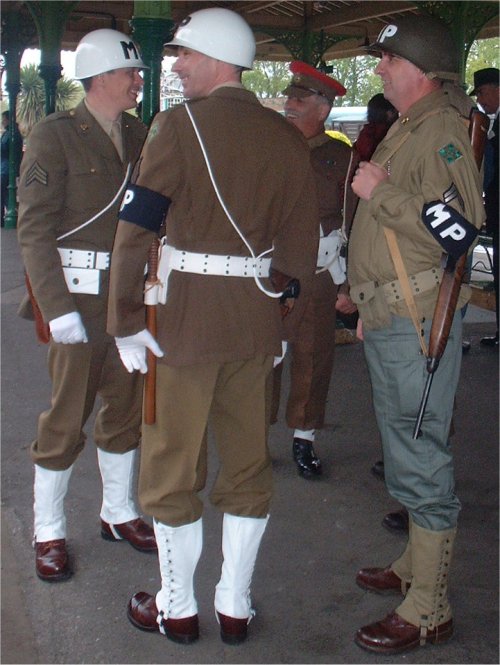
Military Police re-enactors
I have just received some excellent reference
pictures from Thomas of the equipment that was used by the US Military Police
from his collection,
and I have placed them here to share with my fellow modellers.


I would like to say a very big thank you to
Thomas for the images above, and for his kind permission to allow me to use
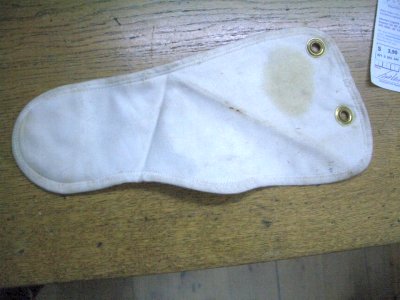
here for reference. Especially the one's of the truncheon holder, as I can see
now that the one I have made from plastic is very near to what this looks like
in real life.
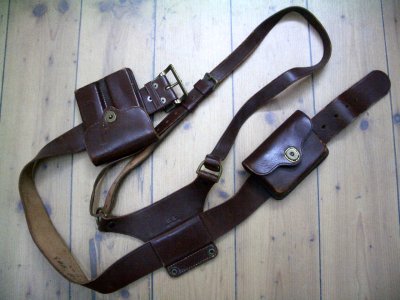
Some information about the above pictures was very
kindly supplied by Thomas:
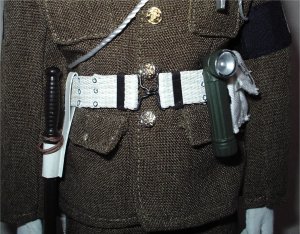
The whole white gear is all post WW2 except the belt - also the belt is not
dated but hardware is identical to other ww2 dated belts in my collection!
Holster has no info on it - might be some parade or honour guard equipment ... -
mag.-pouch is 1950 dated and baton holder is 1972 dated - official issuing date
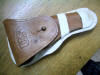
for baton holders was 1946 with the leather gear I also sent a picture ... - but
I'm sure most of the MP's found a way to "field make" such a holder ...
The leather gear is ALL dated 1946 except the Sam Brown belt - most of the brown
gear was painted black in the 50ies 60ies so it is hard to get hands on such a
fully brown set ... The white cover for the holster was also issued towards end
of war but no date on it coz of the lack of white holsters - some MP's even
painted their gear white (had a colt ammo pouch which was altered that way) and
also holsters where converted to MP gear with painting them white (what a shame)
... The guy on the pics was seen in 2004 during Normandy celebrations ...
Headsculpt
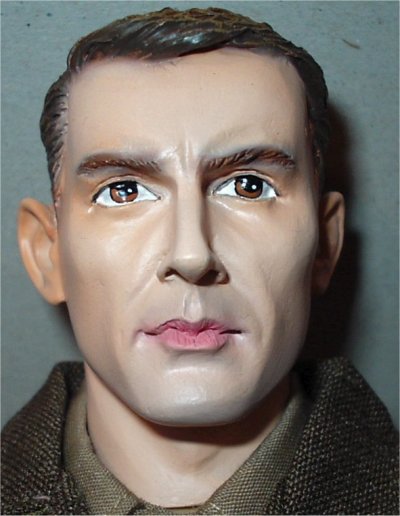
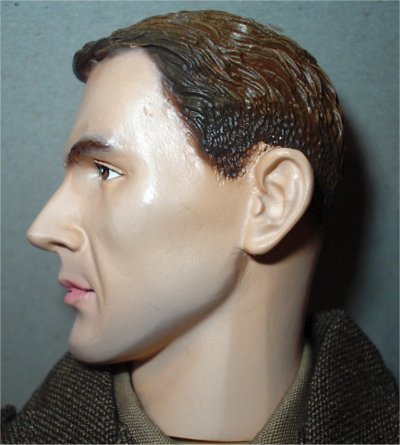
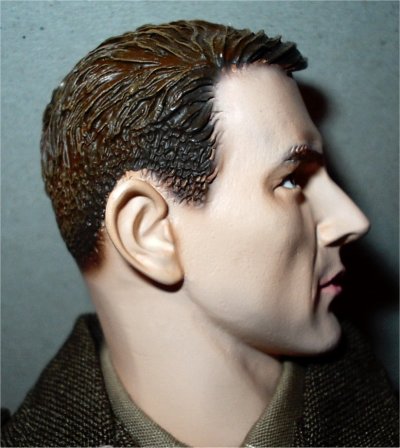
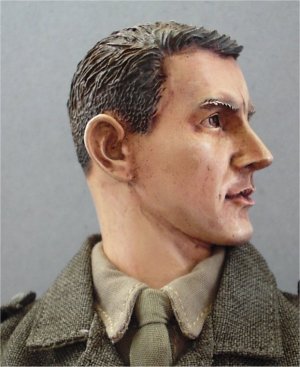
These are the before and after headsculpt pastel
wash pictures, and it took I think 4 attempts at getting it right before I
finally settled on this. To be really honest with myself the pictures above look
better than the actual headsculpt when it is in front of me, and I am forcing
myself to now leave it alone in case I end up ruining the sculpt. One thing that
I have done differently with this head, was that I gave it a very diluted wash
of Model Colour 70934 Transparent Red to add some pink to the facial colouring.
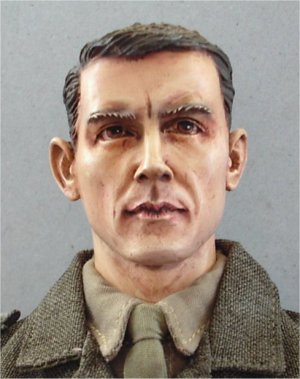
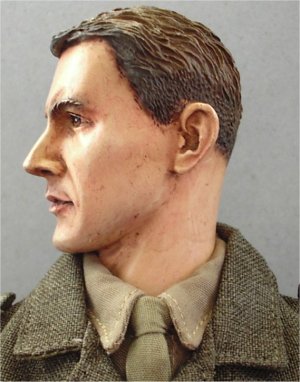
Note: This paint has to be used very
sparingly because even a small drop of it can change the colour very
drastically. On top of that when wiped over and dried off fully, I gave the head
a wash of some brown pastel chalk and a drybrush of some cream pastel chalk.
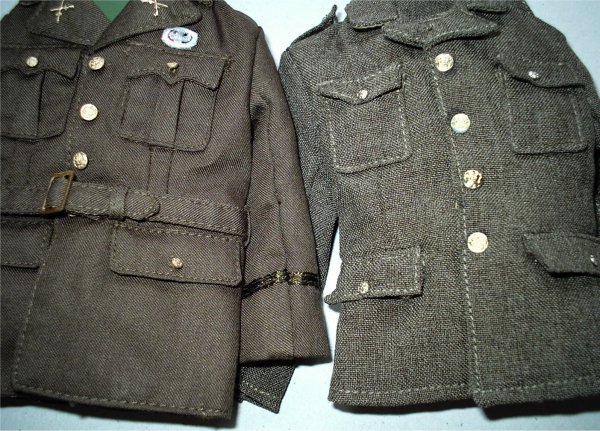
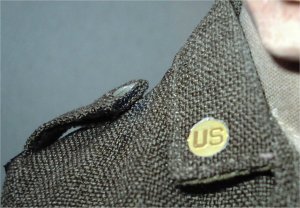
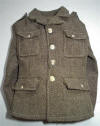
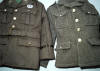
Uniform
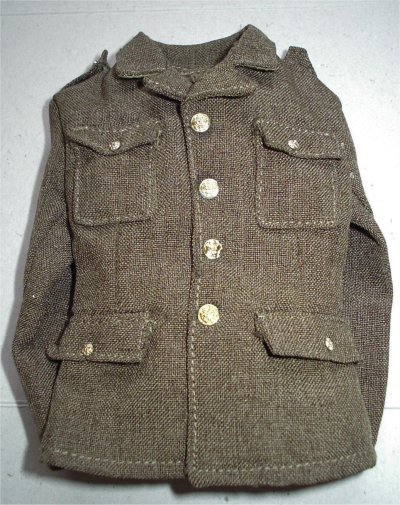
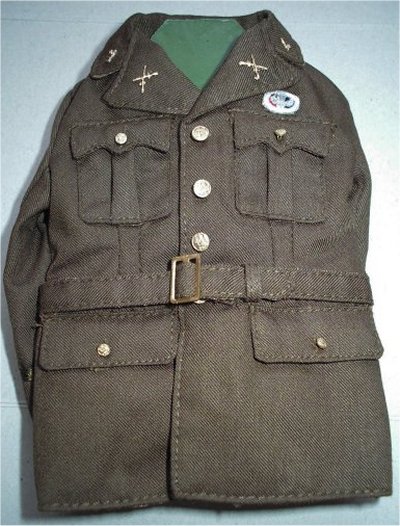
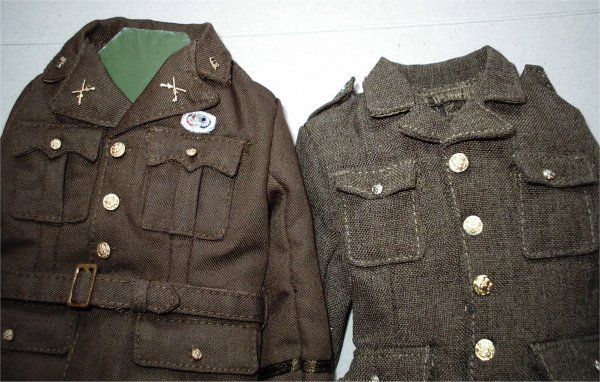
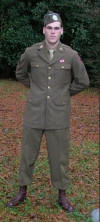
The uniform for this figure I feel is a very nice
copy of the Other Ranks Class A uniform, and in the pictures below I have
laid it alongside the DiD Officers Class A uniform
for comparison. The first picture is of the DML uniform, the second one is the
DiD Class A uniform. The next two pictures are to compare the material used for
the tunics.
 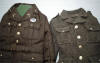

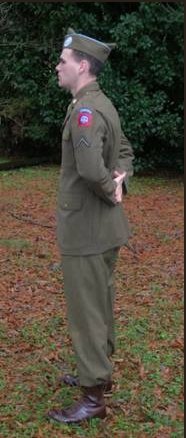
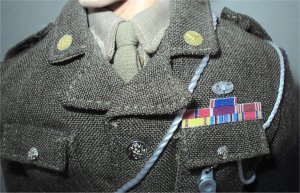
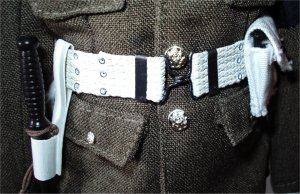
 One thing that
I thought was missing from the DML Stan Wiley
uniform was the centre belt, this I have been corrected on by Paul with
the link he has supplied me with below. Because from that page I have obtained
the two pictures above of an enlisted Class A uniform, which shows that no belt
is supplied with the uniform. One thing that
I thought was missing from the DML Stan Wiley
uniform was the centre belt, this I have been corrected on by Paul with
the link he has supplied me with below. Because from that page I have obtained
the two pictures above of an enlisted Class A uniform, which shows that no belt
is supplied with the uniform.
The belt that does come with the figure is plastic, this I will be
replacing it with a fabric one from my spares box, which I am hoping to be able
to change with
some white shoe dye. Another item I am hoping to be able to make for this
figure, is the truncheon holder as shown on the right. But at the moment I am
looking for a better picture of it and information about what it is made from.
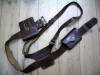
I asked about the belt equipment for the figure on
the SAG forum, and I had a reply back from
siegi
(he219u) about the
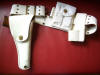
 kit and he supplied me with the picture on the right. I have
also had some excellent help from Shane regarding what the parts are. kit and he supplied me with the picture on the right. I have
also had some excellent help from Shane regarding what the parts are.
I can tell you that #2 is the truncheon holder. #1
and #4, I think are what we call belt keepers. They look as though these are
intended to hold something like a canteen. Usually they would go around the web
belt and the waist belt (of the
jacket or the pants) to keep the web belt from falling lower on the body.
They also look as
though they could be parts to connect a “Suicide Strap” to the web belt (the
strap that would go across the chest). #3 looks like it is something that would
go behind the holster. This would give a more ceremonial look to the
belt.
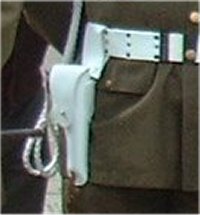
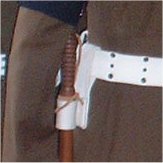
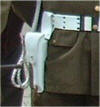
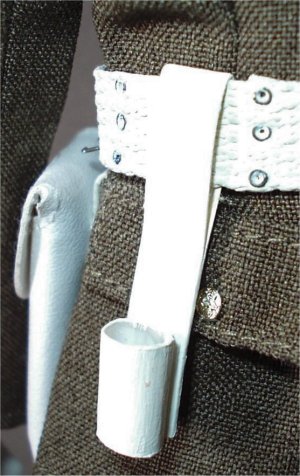
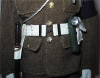
From the picture that was supplied by Peter above
I have taken out a closer picture of the holster, and I can see how it is
supported on the belt by another strap.
Boots
 The boots are another item that I will be
replacing as I dislike the moulded plastic boots from DML, the one's I will be
using a pair from the DiD Albert Ross
figure. The boots are another item that I will be
replacing as I dislike the moulded plastic boots from DML, the one's I will be
using a pair from the DiD Albert Ross
figure.
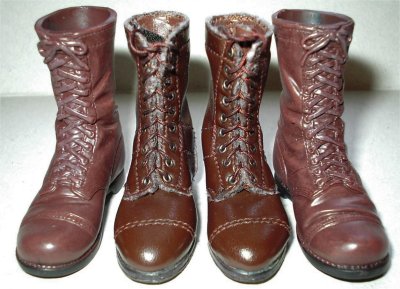
To show a comparison with the boots that came with
the figure and a pair from the Albert Ross figure, I have placed them together
in the picture on the right. The DiD boots in the centre have had a rub over
with some shoe
polish to bring out the shine.
I have found it is not until you actually compare
the boots alongside each other, do you realise the detail that is missing with
the moulded boots.
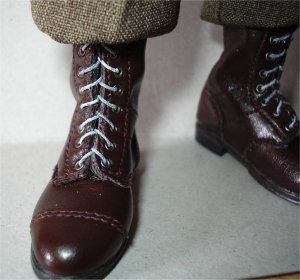
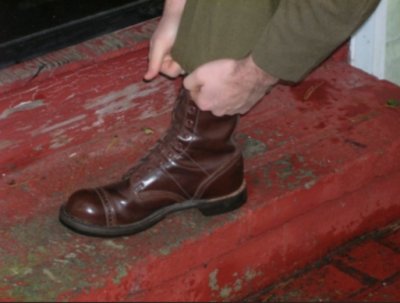
An interesting item regarding the boots that were
worn by the paratrooper MP's, was told to me by Shane about how the laces
for the boots were white.
 If you are going to keep the MP as a 101st MP,
I would keep the high leg corrocan, as the corrocans were a badge of honor worn
by the paratroopers. For this next part there is no historical data to back this
up other then my conversations with other WWII MPs,,, when the MPs were on duty
using this dress uniform often times they would use white shoe laces
(Paratroopers Only). If you are going to keep the MP as a 101st MP,
I would keep the high leg corrocan, as the corrocans were a badge of honor worn
by the paratroopers. For this next part there is no historical data to back this
up other then my conversations with other WWII MPs,,, when the MPs were on duty
using this dress uniform often times they would use white shoe laces
(Paratroopers Only).
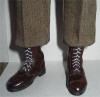
I have used the advice as given by Shane
and I have changed the colour of the laces on the boots as shown on the right.
To do this I used some cotton thread I found and dyed it with the white shoe
dye, removed the supplied laces and re-threaded the boots with the new laces.
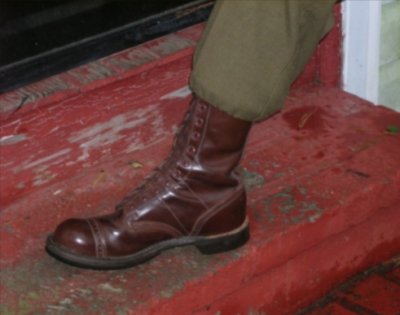
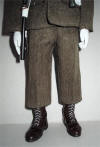
Blousing trousers
Regarding the enlisted ranks Class A uniform, I
have been shown a page by Paul about the correct use of the Class A
uniform for enlisted ranks. Of particular interest I have found is the text
regarding blousing the trousers over the top of a pair of corrocan boots.
Class A uniform
From the page above I have copied this text about
how to blouse the 1:1 trousers over the top of a pair of paratrooper boots, and
my tip here,
here and
here about using the dental
rings for 1/6th scale will I hope allow us modellers to get the same result.
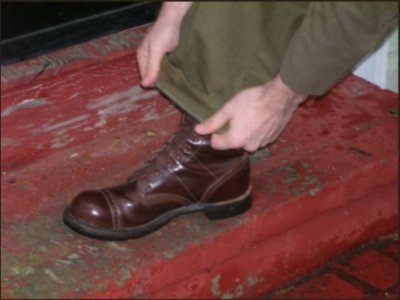
Blousing the wool trousers over the jump boots
must also be done properly to accurately portray a paratrooper. Paratroopers in
WW2 took great pride in blousing their highly shined jump boots as it separated
them from their “straight-leg infantry” US Army counterparts. However, there is
good news, it is extremely easy. First, do not try doing this while sitting down
as it will not give you the proper amount of trouser length that will eventually
end up under the blousing band. There are many documented references to
paratroopers using non-used (make sure they’re non-used) condoms for blousing
bands, however most re-enactors use modern elastic blousing bands. Situate the
blousing band on the jump boot somewhere close to the top of the boot. Then,
with your trouser legs fully extended, neatly fold the ends of the trouser legs,
similar to rolling up your sleeves, until they reach just below the blousing
bands. Then simply and NEATLY tuck the ends of the trouser legs into the
blousing bands, making sure it’s smooth.
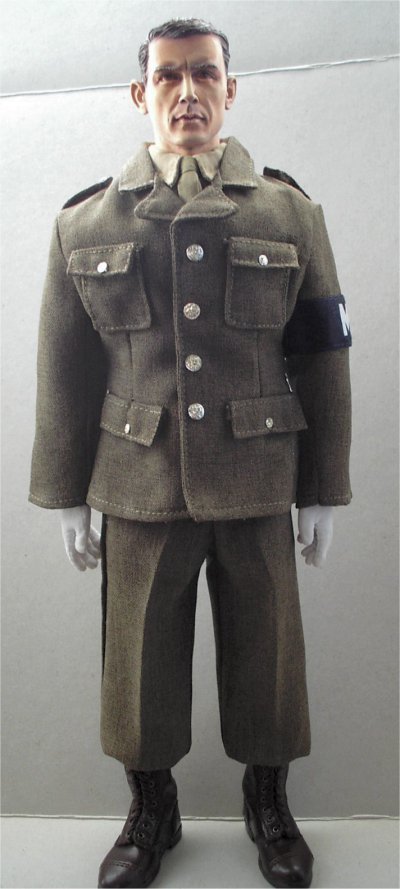
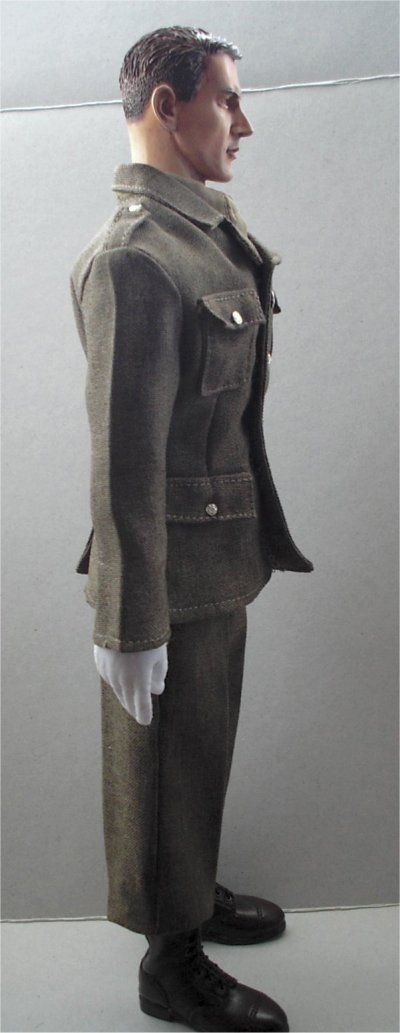
Figure Assembly
This is my first trial to see how the uniform goes
together, the first thing that sprung to mind was the creases in the trousers
have been ironed in wrong so these will have to be re-ironed. I also realised
that the DiD boots really do add a lot of detail to the figure, another item
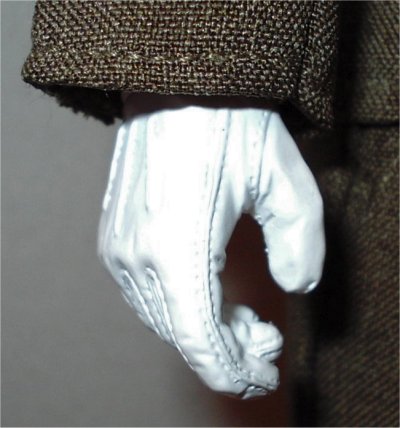
that I have changed are the hands as they are also moulded plastic. These were
traded with Terry (many thanks) for some cotton gloves from the DiD Willi
Baver figure, and I much prefer these gloves to the moulded plastic hands.
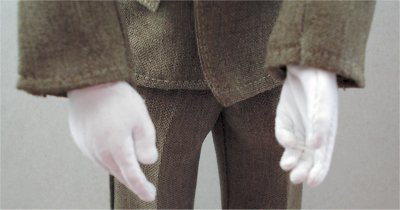
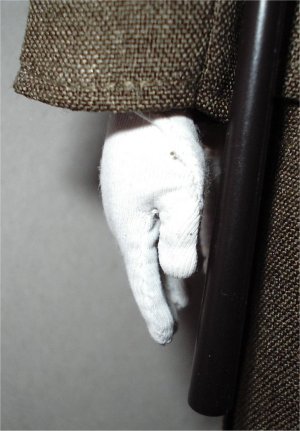
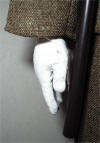
 The new cloth gloved hands are shown above which
were fitted to a pair of DiD bendy hands, these also had to have the
pins replaced for fitting
into the DML arms. The other thing I have done to the uniform so far is shorten
the elastic on the tie, as I did not like the way it hung down which allowed the
neck gap to show. This was just a case of cutting the threads that held the ends
together, sewing it back together about a 1/4 inch shorter and then cutting off
the surplus elastic and fitting the tie to the shirt. The new cloth gloved hands are shown above which
were fitted to a pair of DiD bendy hands, these also had to have the
pins replaced for fitting
into the DML arms. The other thing I have done to the uniform so far is shorten
the elastic on the tie, as I did not like the way it hung down which allowed the
neck gap to show. This was just a case of cutting the threads that held the ends
together, sewing it back together about a 1/4 inch shorter and then cutting off
the surplus elastic and fitting the tie to the shirt.
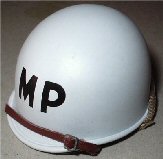
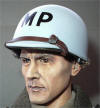
Helmet
I do like this helmet from the set as it made from
metal, but I had to replace the plastic inner part as I wanted the strap and
buckle on the front as shown right. To do this replaced it with a DiD helmet
inner which slotted into the outer shell very nicely. This can also be seen with
the
other picture on the right.
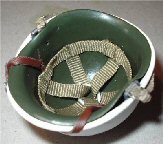 Note: One small
problem I had with the outer helmet shell, was when one of the straps for the
back of the shell came off. This was replaced with some super glue to hold it in
place. Note: One small
problem I had with the outer helmet shell, was when one of the straps for the
back of the shell came off. This was replaced with some super glue to hold it in
place.
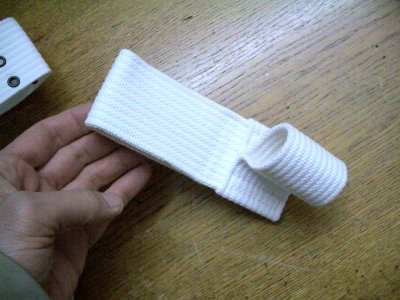
Truncheon Holder And Web Belt
This item I have had to scratchbuild as it does
not come with the figure, and after looking at the pictures at the top of the
page plus having some excellent help from Bob, I made up the holder out of some
thin plastic card.
From Bob and the
4th ID MP Platoon US MP re-enactors
For the past several years, we've been discussing
and researching the truncheon or club scabbard issue within our group and we
agree that the scabbard was not an official US Army issue item during WWII.
Therefore, scabbards that are seen in photos are private purchase or hand-made
as this was commonplace. We have also interviewed WWII MPs who corroborated this
conclusion.
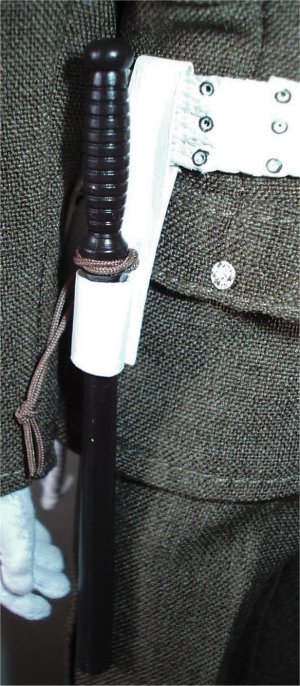
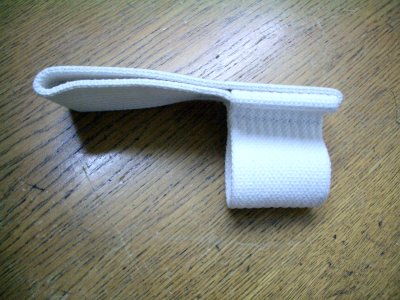
The pictures above show the truncheon holder that
I made from some thin plastic card Note: The
dimensions for it are as follows - Belt hanger - 8mm wide by 38mm long (the
length has to be doubled so it can be folded over and glued in place) leaving
enough room for the web belt to pass through. The holder for the truncheon (12mm
wide) was made by folding the strip of card around the bottom of the truncheon
as this is the widest part, then remove the truncheon and glue the circle ends
together and then glue it to the hanger. When this was all dry I then gave it a
coat of Matt White enamel paint and I made sure that I left some
brushstrokes in the paint, to make surface look a little bit rough.
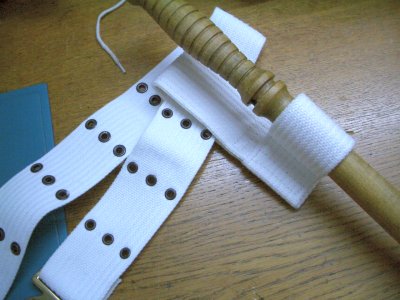
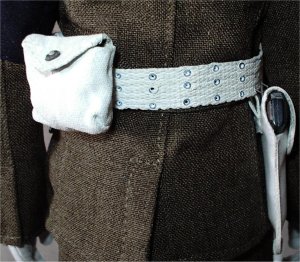
The other pictures are of the canvas belt I had in
my spares box, which I re-coloured with some white shoe dye, this took about 3
goes to make sure it had soaked in enough. The final picture above right is a
DML rigger pouch which again I dyed white, with the fastener replaced with a DiD
lift dot. The .45 ammo pouch that came with the figure also had the fastener
replaced with another lift dot.
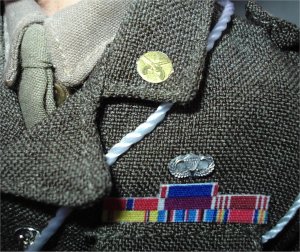
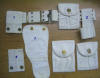
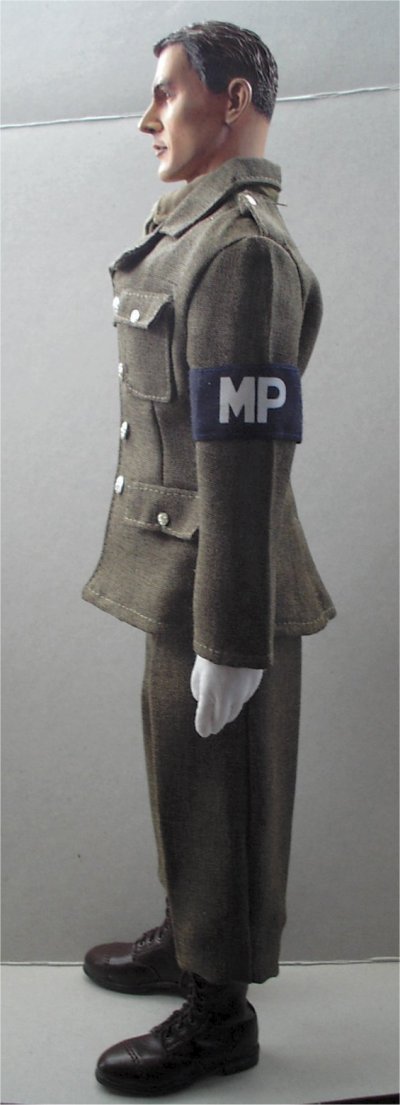
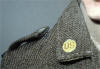
Shoulder Epaulette Error
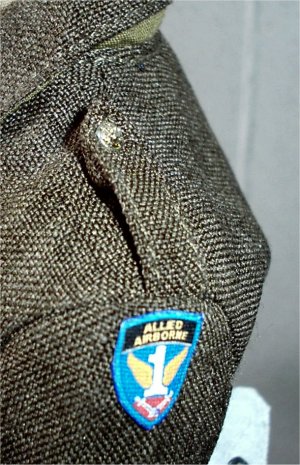
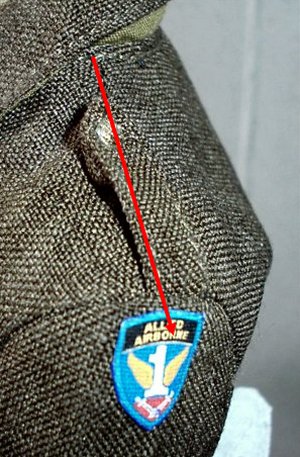
I have just got to the stage of attaching the CVI
shoulder insignia I wanted to use, and I discovered that the shoulder epaulette
on the right hand side of the uniform (figure facing you) is sewn on wrong. The
first picture above left shows the centre of the badge in line with the seam,
the second one shows a line for the seam and how much the epaulette is out of
line. I have now checked my second uniform that I bought loose, and again I find
I have the same problem on the same side, again the red line is the seam on the
last picture above.
I have now been able to use both the text and the
image below, to show how the lanyard is worn by the US MP's. And I would like to
thank both Shane and Brady for allowing me to use the text and
picture here.
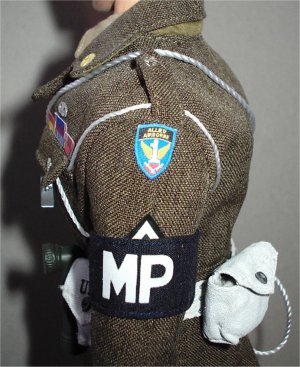
Lanyards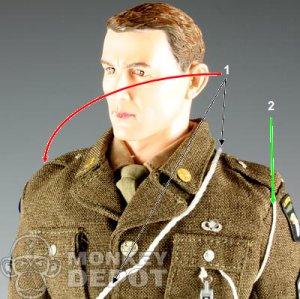
The final part of my figure is the fitting of the
lanyards and because I was a little bit unsure how they were worn, I asked
Shane to explain about them and he has very kindly supplied the following
excellent information.
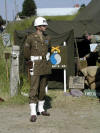
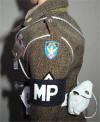
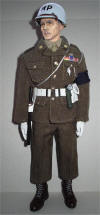
I have attached a pic of the MP from Monkey Depot.
You will notice I have 3 different color lines and #1 and #2.
#1 with the black arrows. The lanyard should be a loop. In this case the loop
would not go under the epaulette, but under the collar and cross the chest and
attach to the lanyard loop on the pistol.
#1 with the red arrow. MPs also wore the lanyard on the same side as the pistol.
In this case the lanyard would go under the epaulette at the same side as the
pistol.
#2 green arrow. Again the lanyard should be a loop. Usually looped under the
epaulette, looping down and back up and hooking under the pocket flap at the
button.
I don’t remember seeing many white whistle lanyards; I mostly remember seeing
chains, like on the pics I sent, and the DML Lou. That’s not to say that the
white lanyards were not used. Each unit had a lot of freedom to play with their
uniform. As of WWII the Military Police corps was a relatively new concept.
Prior to WWII the MPs were usually some guys who were trust worthy and detailed
to MP duty (usually straggler control and deserter apprehension). Even in WWII
they were often from other branches and trained, then released into the MP
Corps. There is little historical data, even in the MP Museum. Much of what I
tell you is a reference from Old Timer MPs I have talked to over the years.
That is probably why I am enjoying this so much,
you are capturing some unwritten history and really honouring those who have
gone before me and made the MP corps the element it is today. Due to the nature
of today’s battle field the broad sword approach (Infantry, Artillery, and Armor)
is not the preferred method. A more precise approach the MPs bring is the
preference, earning today’s MPs the title “The Force of Choice”
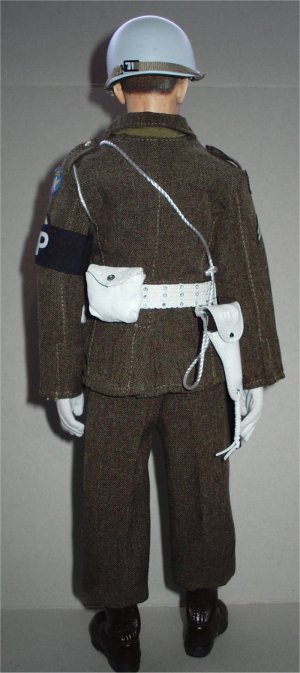
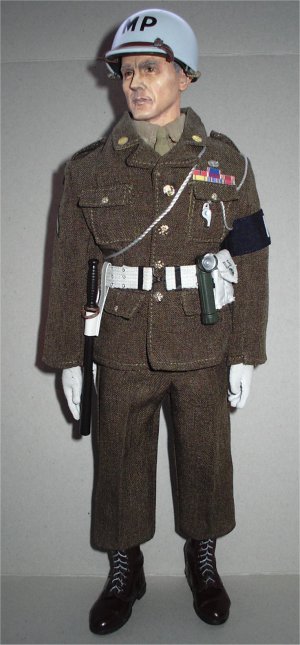
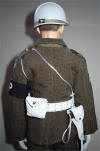
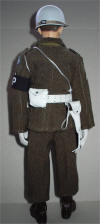
These are some pictures of the finished figure.
The lapel and paratrooper wing badges were put onto some double sided tape, cut
out and then fixed onto the uniform. With the lanyard end I found out it has to be attached to the
pistol, so I made a loop of
stretched sprue, glued
it onto the pistol butt and tied the lanyard to it.


Peter Marshall,
Paul (.308), siegi
(he219u), Terry ('The Bhoy'),
Bob (4th ID MP Platoon).
82nd Div Living History Group
Brady (Monkey Depot)
Shane for his excellent help with the reference details.
|