|
Welcome
To My British Sniper Page.
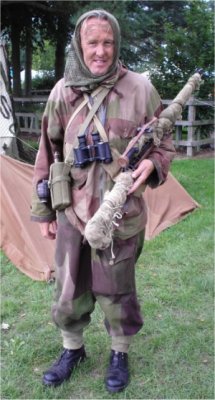
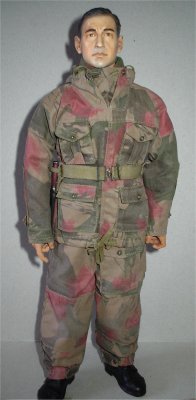
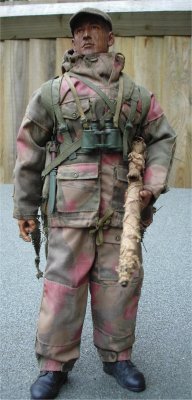
This is a figure that has been on my planning list
for quite a while now, ever since I first saw the re-enactor below at Detling in
2007. And how the pictures I took of him, could be used as a guide for
kitbashing a DML Wes Worthy figure.
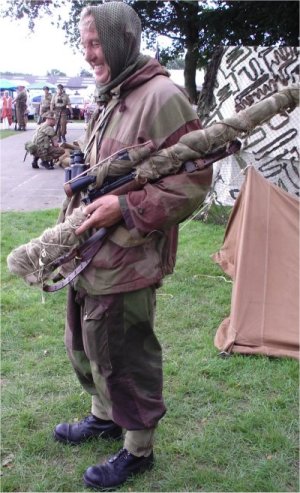
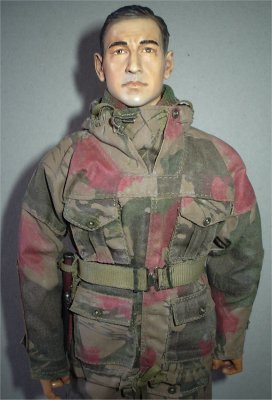
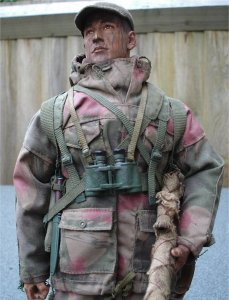
 In the picture above right where the gentleman is
trying not to laugh, this was caused by another re-enactor commenting behind me
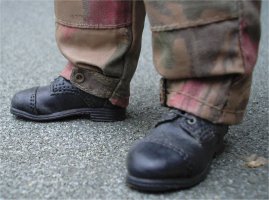
about my previous photograph of his boots. And he said I think something along
the lines of "Be careful as he has a boot fetish..." As I had just photographed
his boots to get the detail. Note:
The things I do for this hobby.... Many thanks goes to the Royal Norfolk Re-Enactment group
for these pictures. In the picture above right where the gentleman is
trying not to laugh, this was caused by another re-enactor commenting behind me
about my previous photograph of his boots. And he said I think something along
the lines of "Be careful as he has a boot fetish..." As I had just photographed
his boots to get the detail. Note:
The things I do for this hobby.... Many thanks goes to the Royal Norfolk Re-Enactment group
for these pictures.
The
main reason that my interest has been rekindled in this figure, is the excellent
uniform re-painting tutorial that has been done by
Tony Barton
and this page on
smocks.
Before he did this lesson, I was always in two minds about kitbashing a
British sniper figure since I had read so much about how the colours on the
windproof suit were wrong, and seeing as how he makes the uniform painting look
so easy, I wondered if I could make a sniper figure like this. Plus in making
this figure like this, it has taken me back to my days of painting 1:35th scale
figures. But the problem I had then was that I could never get the camouflage
uniforms right, so this time I wanted to try it again but on a 1/6th scale
figure instead.
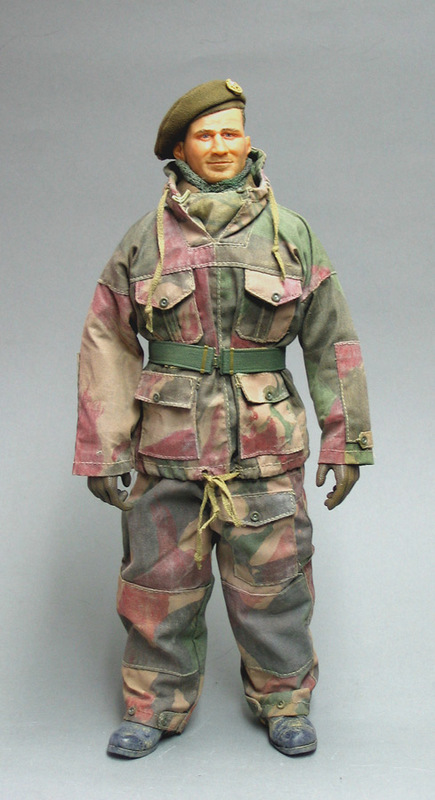
The picture on the right is of the re-painted
uniform by Tony, and I am hoping that by following his painting technique I may
end up with a similar figure. But for mine I want to have the trouser colours
slightly lighter than the jacket, as these may have been washed more than the
coat.
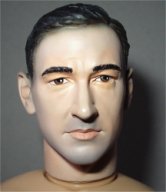
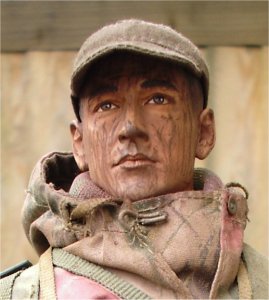
Headsculpt
This is the Wes Worthy headsculpt which has been
given a pastel wash of a lighter brown than I usually give the figures, this has
been done twice to add the shading, once that was dry I then used a red pastel
chalk scrubbed into the face to add the colour to the cheeks. This was then
blended in with a wet paintbrush, left to dry slightly and then wiped off.
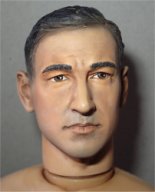
Once this was dry I then gave the head another
light wash of the brown pastel chalk, I again wiped it off and then used a large
bristled brush to blend all the colours together while the head was still
slightly wet. When the head was completely dry I gave it a drybrush of a cream
chalk to add the highlights. I then used a small wet paintbrush to remove the
chalk from the eyes and lips.
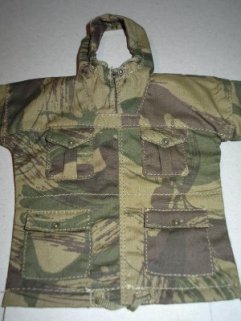
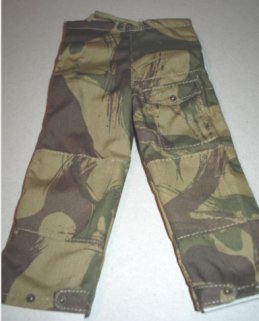
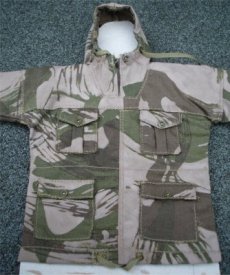
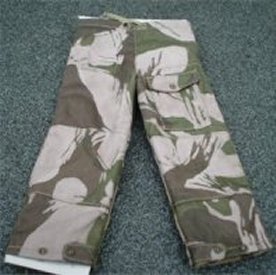
Uniform Painting
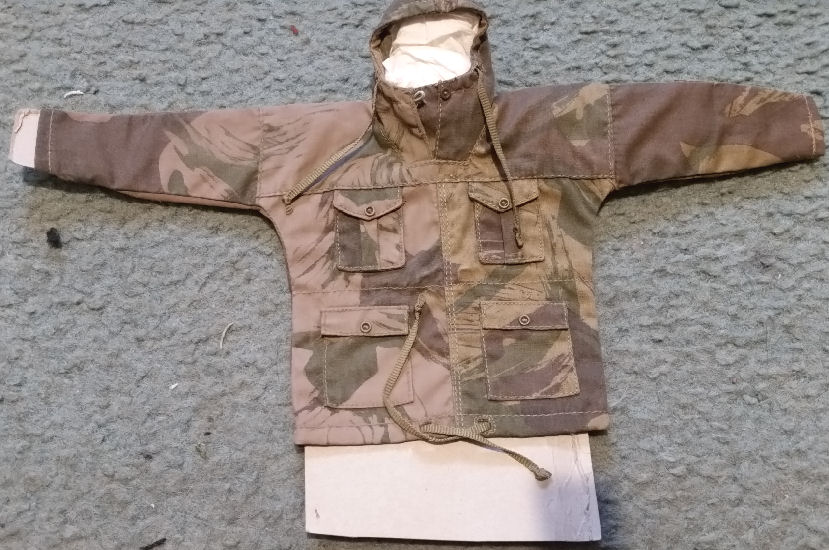
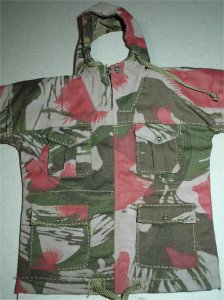
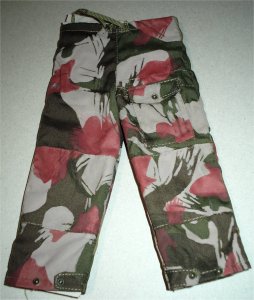
The pictures below are of the uniform from the
boxed figure, which I have laid out with some cardboard inside as instructed by
the tutorial so that the painting of the patterns is easier. One thing I did
find a slight difficulty with is where the Beige colour had to be hand brush painted on,
and after looking at both pictures on Tony's tutorial, I have made up the
picture on the right below.
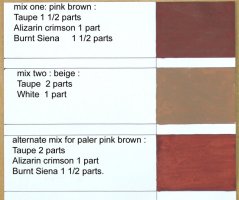
The colours for the uniform re-paint are shown on
Tony's colour chart above right, for the first colour I made up some Beige as
instructed. This will be used to paint over the top of the sandy Khaki colour as
shown on the uniform above.
Update:
Camouflage Mismatch On Sleeves and Panels
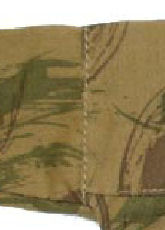
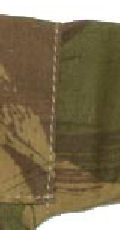
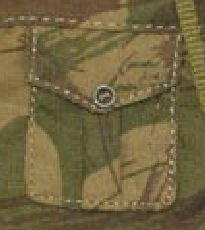
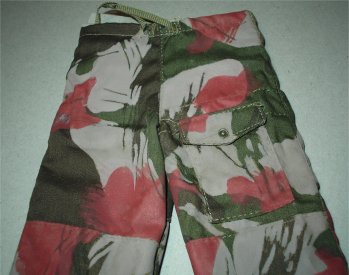
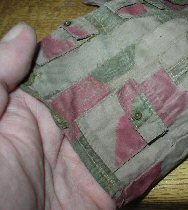
Another thing I forgot to add, if you look at the
original tunic above, is the clear pattern mismatch on the front of the smock
panels and trouser legs. This adds to the whole camouflage effect, and I can now
see why Tony said it is best to hand paint the colour replacements, as you need
to keep this mismatch.
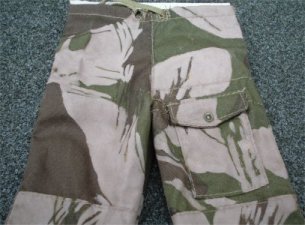
1.
 2. 2.
 3. 3.
 4. 4.
 5. 5.
1.
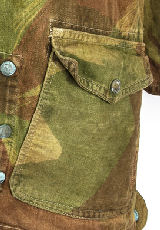
This is a smock left shoulder to sleeve sewn
joint, 2. Is the smock right to sleeve sewn
joint, 3. Is the bottom front sewn panels.
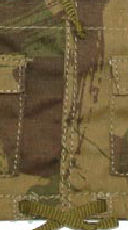
Pictures 4. &
5. show the pattern mismatch on the pockets.
Note: I can admit that it can become
tiresome painting this all by hand, but the effect is worth the effort. Also the
light coloured stitches can be replicated as well, by the use of a drybrush of
some Tamiya Light Sand weathering powder.
Uniform Painting - 1st Colour
Update: I have
forgotten to add the following on to this page. I believe that I was told by
Tony Barton, about how he uses some board to hold the tunic to shape. Which I
have found makes the re-painting of the colours a lot easier, as the camo
pattern has less creases in it.
So I have cut some cardboard, which I fitted
inside the tunic and trousers below, so that the tunic is held in place as
above. Which I have found makes the whole re-painting exercise a lot easier,
plus by having the cardboard stick out the bottom and the sleeve as well, I can
hold the tunic by these ends rather than leave fingerprints on the wet tunic.
Note: I
recommend using only one device like a camera to photograph something like this,
because as shown here. I got a different result indoors using my mobile phone
above and my camera below. Also take the pictures outside in daylight, so that
you will have a constant White Balance setting on the camera.
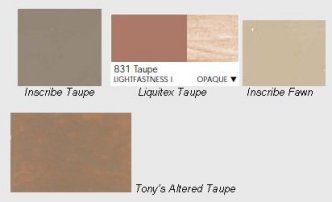 My Uniform Paint Colour Mistake My Uniform Paint Colour Mistake
I have finally found out what I have done wrong
with this figure. I bought the wrong shade of Taupe paint for the base colour
for the uniform, because in the picture on the right I bought the Inscribe Taupe
paint instead of the Liqutex one as I could not find a supplier for the correct
paint.
And when I added the white to it, it then ended up
almost like the colour on the far right Inscribe Fawn. Which is a far cry from
the correct colour as used by Tony, as shown at the bottom of the picture.
So over the last two days I have mixed together
various combinations of paint and have finally made up a colour near to the one
from Tony, and have repainted the uniform again as below.
 The above pictures
show the uniform re-painted by hand with a brush, which has allowed me to follow
the pattern so that I could have the thin lines of the Green showing through. Although
with them the camera has brightened the colours slightly as I have taken them
indoors. But in reality the
paint colour is a lighter version of the original Khaki colour as the uniform
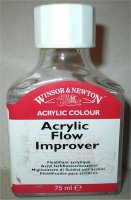
came from the box. Note: One thing I did use
when I was mixing up the paint was use some Acrylic Flow Improver as shown on
the right.
This is another tip told to me by Paul, and it a very good one, as this
is like a thinner for acrylic paint. It has to be diluted in water and then
added to the paint, I found it is a lot better than using just water because it
makes the paint thin enough to use. Plus it does not allow the paint to dry out
too quickly. (Hobbycraft sell this) The above pictures
show the uniform re-painted by hand with a brush, which has allowed me to follow
the pattern so that I could have the thin lines of the Green showing through. Although
with them the camera has brightened the colours slightly as I have taken them
indoors. But in reality the
paint colour is a lighter version of the original Khaki colour as the uniform
came from the box. Note: One thing I did use
when I was mixing up the paint was use some Acrylic Flow Improver as shown on
the right.
This is another tip told to me by Paul, and it a very good one, as this
is like a thinner for acrylic paint. It has to be diluted in water and then
added to the paint, I found it is a lot better than using just water because it
makes the paint thin enough to use. Plus it does not allow the paint to dry out
too quickly. (Hobbycraft sell this)
Uniform Painting - 2nd Colour
The second colour was again made up according to
the colour chart above, and then applied in a random pattern over the top of the
uniform. With this pattern I may have got it wrong, as it is my best guess at
what it would look like, based on some pictures I have seen.
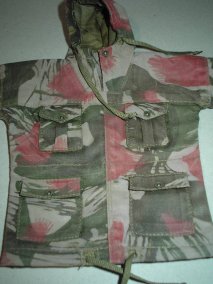 Uniform Painting - Distressing The
Uniform Uniform Painting - Distressing The
Uniform
This is the tunic after I have given it a rub
over with some fine emery paper, as instructed in the tutorial.
Important Note: Make sure that you use very
fine USED emery cloth or sandpaper to do this, because I found that if
you use anything else it will remove too much of the paint and pattern.
Note: Also make sure that you do the sanding
on a small piece at a time, making sure that you hold the material completely
flat. Otherwise you will cause creases and sand too much off the top of it, and
you will end up with a plain line in the pattern. Which may have to be
re-painted again.
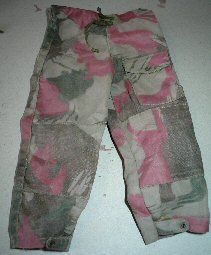
With the trousers, I have sanded the
patches on the knees slightly more that the rest of them. This is to
show more of the wear here, to make it look like the uniform has been in use for
a while where the soldier would have been kneeling down. The same effect has
been used on the seat of the trousers and the elbows of the jacket.
Another
thing I found out regarding distressing the uniform, is to place your finger
inside it and then sand the cuffs, trouser bottom edges, pockets and the patch
edges slightly heavier. As this adds another more distressed wear effect in these areas.
6.  7. 7. 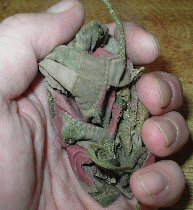 8.
8.  9. 9.
Note: In
picture 6. I put my hands or fingers inside
the uniform whilst doing the sanding so that the material was kept flat, and I
found that on sanding the Beige paint gently it also helped to remove some of the
stiffness of the material. Once I had done this I then gave both the trousers
and tunic a wash over with some diluted Brown acrylic paint, making sure they
were all covered including the parts I had not painted. As they were drying in
picture 7. I scrunched them into a ball in
my hands, so that I could soften up the jacket and trousers so that when they
dried they have a lot of creases in them. So that when the jacket and trousers
have dried fully you can see the difference in them now in pictures
8. & 9. when compared to the
pictures of the new uniform at the top of the page above.
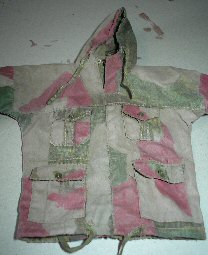
Uniform Re-Painting & Assembly
The pictures above show the re-painted uniform on the figure
after I had scrunched both the jacket and trousers up into a ball in my hands,
to lose some of the stiffness in the material. And I am really surprised at how
different the whole thing looks now, as the sanding has really added a worn look
to it. Plus it has subdued the red colouring very well, as this really had me
worried when I started to paint it on, as it looked far too bright for a
camouflage pattern. And it even crossed my mind at one point that I had ruined
the whole uniform.
With the bottom of the trouser legs I was going to
leave them as they were, but after thinking about it and whether or not to use
the gaiters on this figure. I decided to cut off the button at the bottom, and
then sew them tighter using the second button position as supplied. As this gave
me a nice gathered effect at the bottom of the trousers, without having to use
the gaiters. The boots I have replaced with a pair of the DiD Michael Taylor
one's as I prefer the laced boots to the plastic one's. I also replaced the
hands with a spare pair of DiD one's, as the detail is better plus they can grip
the rifle easier.
 Another point that has just sprung to mind is with
the folds in the uniform, where the shadows and highlights show up with the
pattern. Because this was one of the main problems I had with 1:35th model
figures, in that I could never get those right. Another point that has just sprung to mind is with
the folds in the uniform, where the shadows and highlights show up with the
pattern. Because this was one of the main problems I had with 1:35th model
figures, in that I could never get those right.
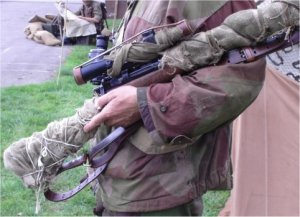
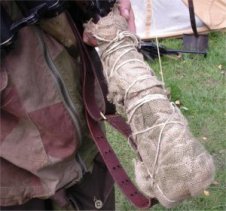
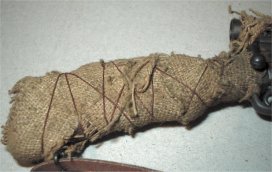
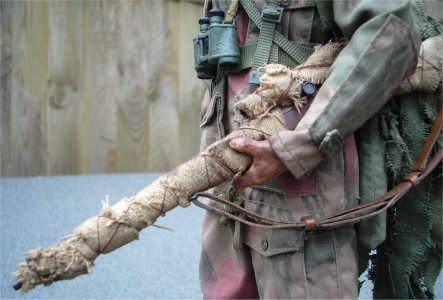
Rifle
The picture here shows the rifle that the
re-enactor had with him, and I am hoping that I will be able to replicate this
with some fine hessian material, similar to the rifle that I used with my
Falklands figure.
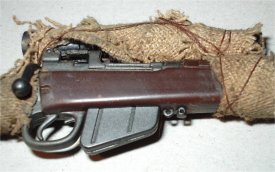
In the pictures below I have cut out some thin
ragged strips of hessian material, looking at how other modellers have done this
I realised that the material has to be a close weave, so as to keep it in scale.
This is then wound around the rifle to break up the outline, making sure that
the trigger, magazine, sling swivels and telescopic sights are still accessible.
Once I had the wrap around the rifle I then tied it in place with some brown
thread.
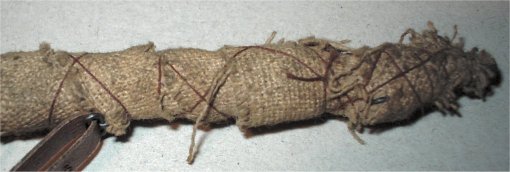
Making sure that when I make the knot at the start
of the thread winding's I leave a long end on it, this is so that when I come
back to the knot again I have something to tie the thread off to. I then tie the
ends together and cut them off just above the second knot.
Note: Remember this is meant to be tight around the rifle, but the
more untidy you can make it the better, as it helps to remove the rifle's
silhouette. The pictures below show the hessian with some diluted acrylic brown
paint and a drybrushing of some Mud weathering powders.
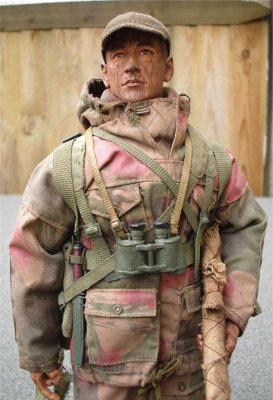
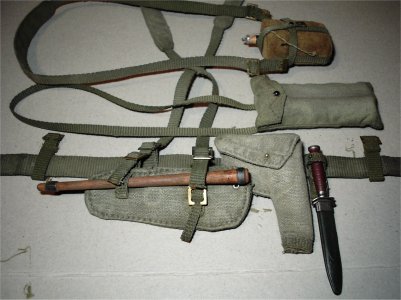 Webbing Webbing
With this figure and the equipment he would have
had it has been assembled with a little bit of Modeller's Licence, since I can
find very little information on the subject. So with this figure he has a
webbing set to carry the pouches, and I have used a pair of the cross straps over
his shoulders held in front with a pair of brace extenders.
As I think he would not have
used the front ammunition pouches as it would have got in the way when he was
lying down. Also he must have had to have a shovel of some kind, plus some
weapons for self defence as well.
The equipment and webbing shown right has come
from various sources, and it all has had a repaint with some Green acrylic
paint. Then to add some variety and different colours to it all, it has been
rubbed over with some of the Tamiya Light Sand Weathering powders to indicate
wear and age. All the brass buckles were painted green with some acrylic paint.
Figure Assembly
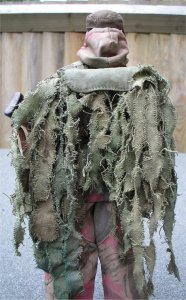
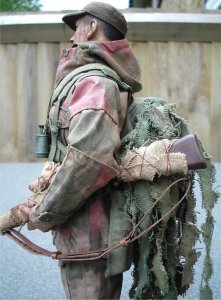
This is the finished figure with a sort of ghillie
suit stuffed into his backpack, this was made from some roughly cut fine hessian
material and painted with various colours of acrylic paint. The strips were then
laid over the camouflage cloth that came with the figure, rolled up tight and
tied with some string and put under the backpack flap.
Note: The wrapping on the rifle butt was removed and then re-wrapped
with less material, as it was pointed out to me that as I had it before was
wrong.
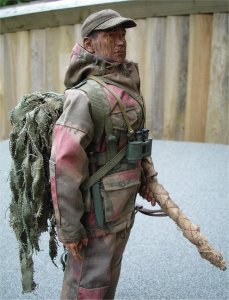
As was pointed out to me, I forgot to add the dirt
to the face and to get a better picture I took these outside. Because I was
getting too much shine on the face when I took it indoors.
Many thanks to
Tony Barton
for his tutorial about repainting the windproofs. | 