|
Welcome
To My Gebirgsjager Cable Layer Page.
This kitbash is a combination of many different
parts from different manufacturers which I have used to make a German
Gebirgsjager signal cable layer. And as usual with me I am now buying less and
less boxed figures, instead I now prefer to buy the individual loose parts
instead. Mainly because when I work out how much a boxed figure is now, and how
many of the items in the box I will actually use. I find that in the long run it
is actually cheaper for me to get just the pieces that I want.
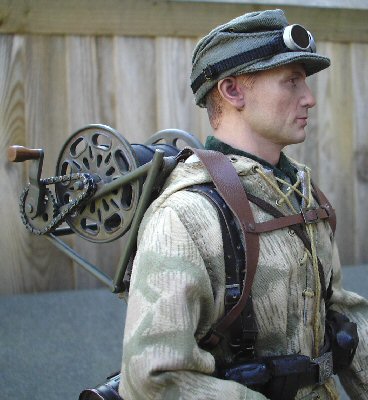
Headsculpt
As with a lot of the kitbashes I have made
recently, the headsculpts that I prefer to use a lot of the time are the DiD
one's, combined with a thinner Dragon Neo 2 type of body. But the problem in
doing this is that I have to convert the DiD head to fit the Dragon body frame.
Note: To remove a head from a body, I have
found that if I put the moulded head into a cup of hot water for about a minute,
it helps to get the head off the neck mounting. Also, once it is off leave it
aside for a coupe of minutes to cool down, that way there should be no
distortion or damage to the head.
Important Note:
Do NOT use the hot water with the DiD hairy heads, as I have found that the
water causes the hair to fall out, because it removes the glue. Instead try
using a hairdryer, to warm these heads up at the neck joint to loosen them
enough to remove them.
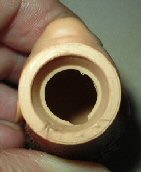
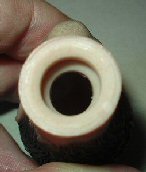
 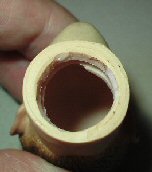
In the pictures above I have shown how to convert
the DiD head. The first picture above left is the inside of a standard Dragon
head, the next picture is of the inside of a standard DiD head. The next two
pictures show a Dragon neck mounting along with a DiD neck mounting, and as you
can see the DiD head will not fit onto the Dragon neck mount. So to combine the
two, I have had to use my model knife to carefully cut away the inside of the
DiD head, so that it will fit tightly onto the Dragon neck mounting.
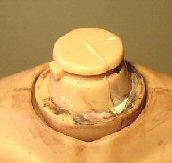
Note: This has
to be done very carefully and slowly, removing a little at a time to widen the
hole in the neck, making sure that you check that the head will gradually fit
onto the Dragon neck post. In the last picture above right, I have the DiD head
mounted onto the Dragon body, which if done right will be a tight fit as the
head and neck joint closes up when you push the head into place.
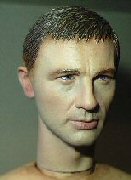 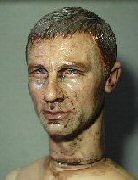
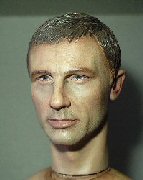 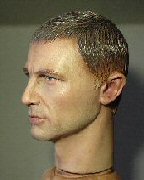
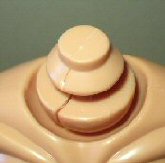
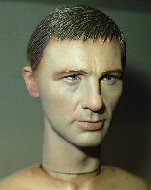
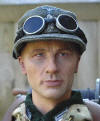
The headsculpt has had a slight wash over with the
Brown pastel chalks, the first picture is the standard head, the second picture
with the pastel wash. The third and last picture show the head after the wash
has been removed, and I have done a light drybrush with a Flesh coloured pastel.
I still have to add some Gloss Varnish to the eyes and the line of the lips to
get them to look shiny again
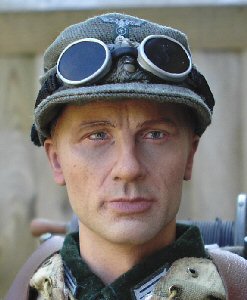
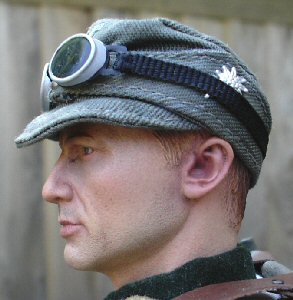
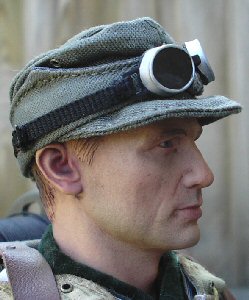
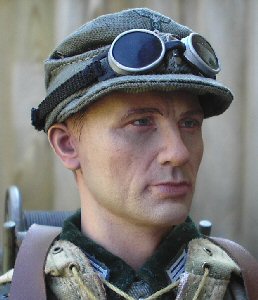
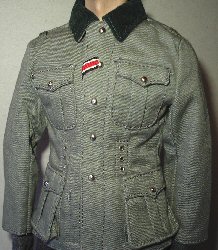
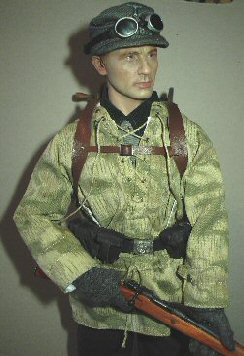
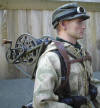
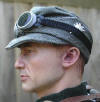
Uniform
The main parts of the
uniform are again a mixture of different companies, the tunic and Gebirgsjager
trousers are from Toys City, the woollen gloves are from Dragon. Along with the
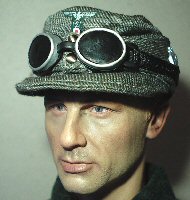
better M43 cap which is also from Dragon, I prefer this cap because it is made
of a thinner material and it just sits better on the head, the snow goggles are
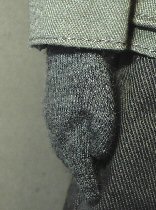
I believe made by Toys City. With this figure I wanted something different from
either puttees or gaiters around the boots, and I found a reference picture of a
Gebirgsjager soldier using socks as shown below right. And after a long search I
finally managed to buy two pairs of the Twisting Toys Italian socks loose.
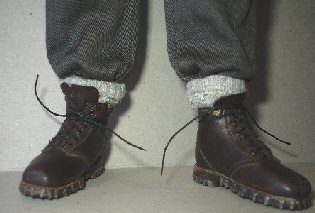
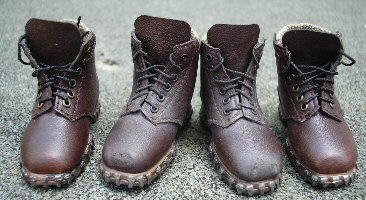
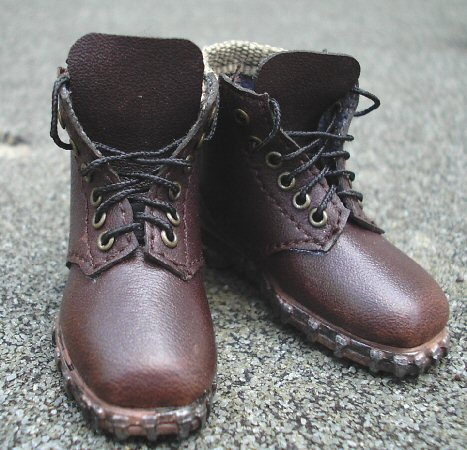
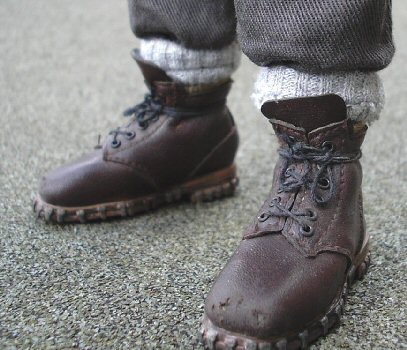
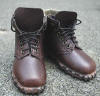
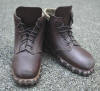
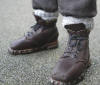
With the footwear that I wanted to use with this
figure, I prefer to use the Toys City Gebirgsjager boots as shown on the right
as they are softer than the DiD boots and they take the pastel chalks well. I
have included in the picture a pair of new boots on the outside, with the pair I
have altered on the inside. With this figure I not only wanted the boots to look
old and used, I also decided to have some scuff marks on the toes as well. I did this by
folding a small piece of sandpaper in half so that it caused the cuts in the
leather, and I sanded gently to cause the marks. I also sanded the toe slightly to add the scuff and wear marks.
I repainted the metal parts on the soles of the
boots with some enamel Gunmetal paint, and then used a Light Brown pastel chalk
powder to add a dust effect to the boots. I made up a mix of White and Light
Brown pastel chalk mix, which was then drybrushed over the top to bring out the
edges and add some highlights.
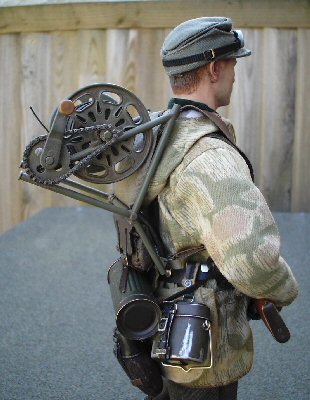
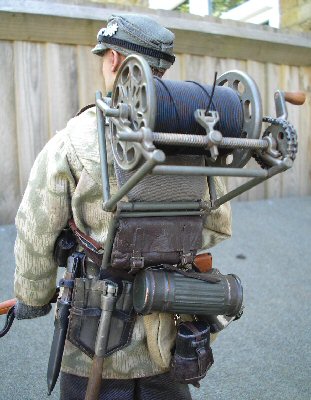
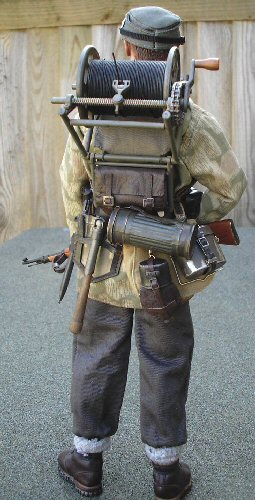
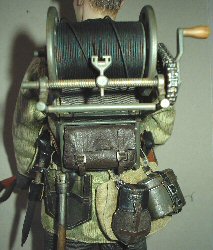
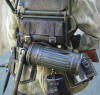
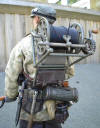
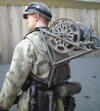
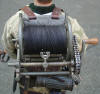
 Equipment Equipment
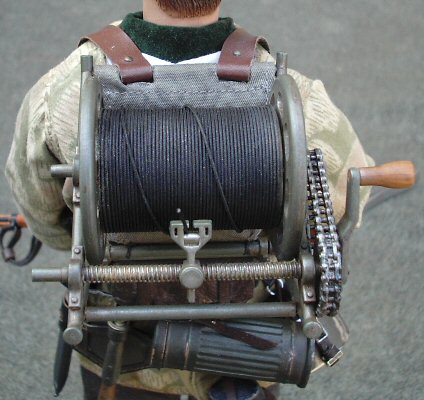
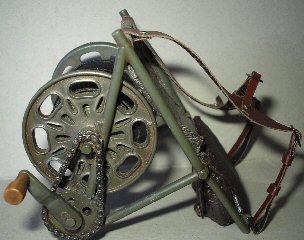
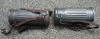
The main piece that brought the idea to mind of
this kitbash was the Dragon Willi Kahler cable reel backpack, of which I have made my own
leather tool pouch for it, to replace the moulded plastic one that it came with.
The picture on the right shows the finished cable reel after I have made the
leather tool pouch and the support pad for it.
To detail this item I started with the centre screw
thread, I used some Rust powder to fill in the thread detail, and on top of that
I have then used a combination of the Silver and the Gunmetal powder to add some
highlights to this area. I
have used a combination of some of the same Burnt Umber paint that I used on the
leather parts, but this time I diluted it down heavily with some water and used
it as a wash on the reel, frame and the chain detail. This was then carefully
wiped off to leave the darker colour inside the details.
Once that was dry, I then used some of the Mud
colour to help to dull down the plastic look of the frame, I then gave the edges
of the reel, chain, frame and the handle edges a light wipe over with the
Gunmetal powder to bring out the details. After that I then used some of the
Silver powder very lightly to get a slightly shiny worn edge to the reel, it's
mounting points and the top parts of the chain. I also added this to the toothed
parts of the cogs.
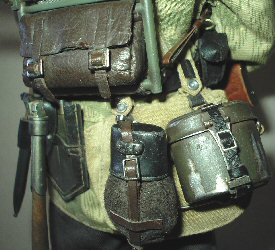
With the parts that I am using for the belt kit I
have altered them as shown above and right, by the use of either the Tamiya
Weathering Powders, Matt Medium acrylic paint or some pastel chalks. My main
reason for doing this is that I don't like the new look to the items, so I try
to get them to look aged or used.
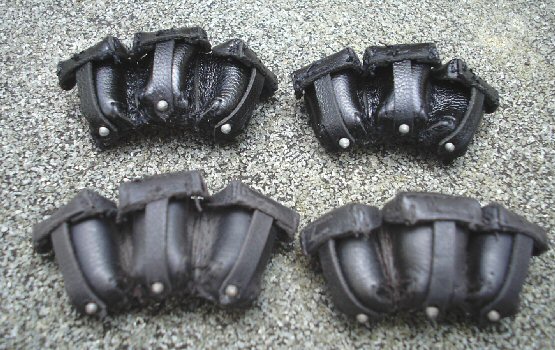
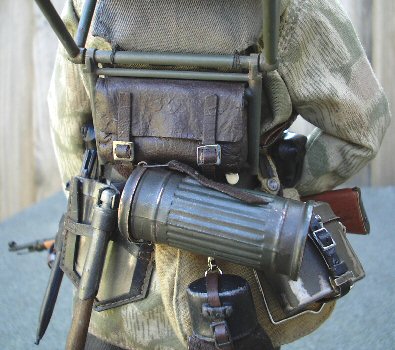
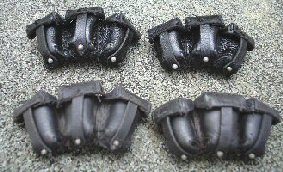
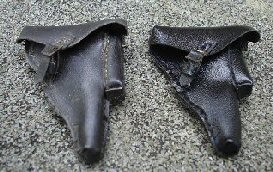
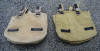
The 'leather' ammunition pouches which I filled
with some tissue to bulk them out and the holster above are I believe made by
DiD, and I have placed some new items next to the altered pieces, to show a
comparison about how much they have been changed. I first painted them with some
Model Color 540 Matt Medium to remove the glossy look to them, I then used a
Brown pastel chalk which I ground up to a powder, and brushed it into the edges
and gaps. I then used a White and Light Brown pastel chalk mix which was
drybrushed over the top to bring out the edges and add some highlights. The DiD
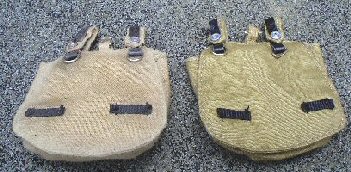
cloth breadbag above right, had some Light Sand Tamiya Weathering Powder rubbed
into the edges to lighten them, also to make the whole bag look a bit more worn.
Again a new bag is alongside as a comparison.
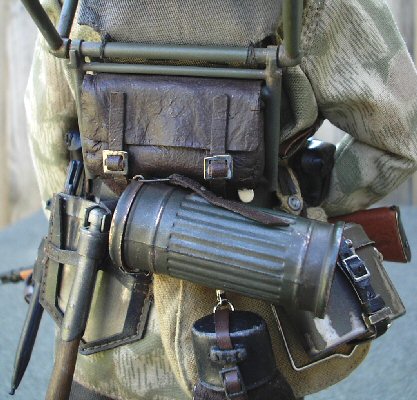
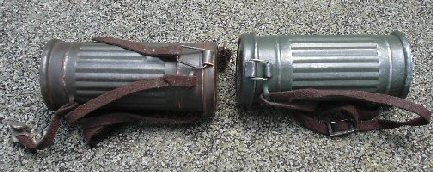
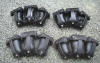
The DiD metal gas mask case has also been altered,
firstly I used my model knife to remove some of the paint from the ends, this
was then rubbed over with some Gunmetal Weathering Powder rubbed onto the edges
and the raised lines, and then I went over the top of this with some Silver
Weathering Powder added lightly to simulate wear. I then ground up the Brown
pastel chalk to a powder, and I brushed it into the edges to add a layer of
dirt. I then carefully wiped it off with a tissue, leaving the dust inside the
edges and recesses.
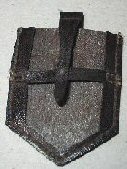 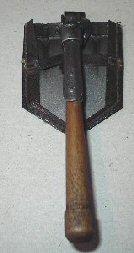
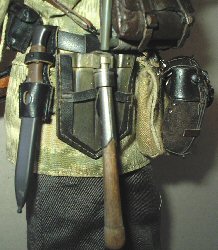
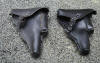
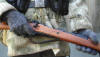
With the DiD shovel above I have done the same as
I did for the ammunition pouches, with a new cover next to the altered one. The
middle picture is of the shovel in place, with the handle was rubbed between my
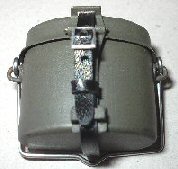
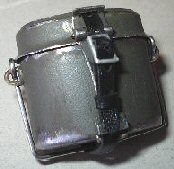
fingers which had been dipped in the Brown pastels. The DiD metal mess tin was
just rubbed over gently on the edges with some sandpaper, to get some wear
detail on it.
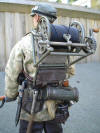
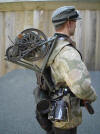
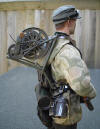
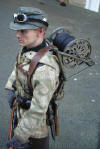
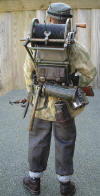
The pictures above show how I have trial fitted
the uniform and equipment to the figure, as I wanted to see how the cable
backpack fits onto the figure with the pieces on the belt. Also I wanted a
camouflaged jacket for the kitbash rather than the Gebirgsjager type, so I used
one from the Ludwig Braus figure instead.
Weapons
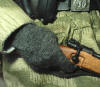
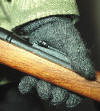
 The rifle that I have used with this figure is the
wood and metal Soldier Story Kar98 weapon. But because I could not get the pose
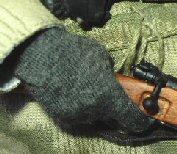
I wanted with the DiD bendy hands, I have had to change them for a pair of
Dragon gripping one's instead. The only problem in doing that is, that I had to
put the woollen gloves onto the hands. To do this it is similar to the method on
my Gebirgsjager
page, but I first had to separate each of the finger's with my model knife. And
then it is a matter of some patience and effort to get the glove onto the gripping
hand. The rifle that I have used with this figure is the
wood and metal Soldier Story Kar98 weapon. But because I could not get the pose
I wanted with the DiD bendy hands, I have had to change them for a pair of
Dragon gripping one's instead. The only problem in doing that is, that I had to
put the woollen gloves onto the hands. To do this it is similar to the method on
my Gebirgsjager
page, but I first had to separate each of the finger's with my model knife. And
then it is a matter of some patience and effort to get the glove onto the gripping
hand.
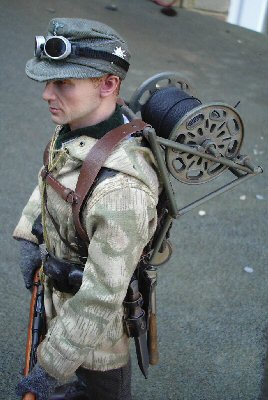
Assembled Figure
The pictures below are of the completed figure and
it has come out better than I though it would, and the belt equipment on the
back of the figure had to be only slightly adjusted to get the cable backpack
into position. In fact the hardest part if I remember right, was getting the gas
mask canister positioned correctly. The last thing I had to do before I
assembled the figure was to change the laces. Because the thread supplied with
the boots was to short to tie them around the boot tops twice, and then tie a
bow in them.
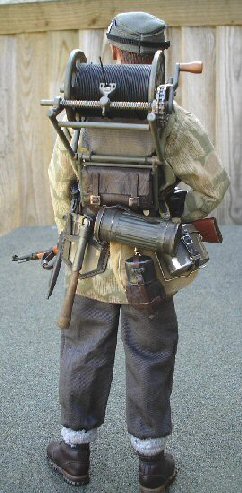
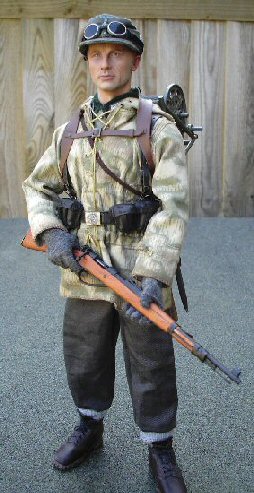
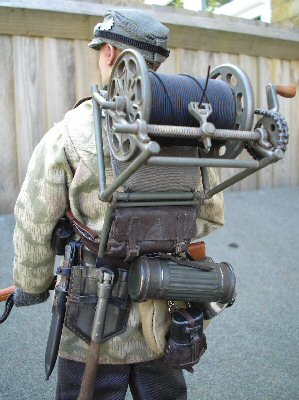
Various pictures of the figure.


I would like to thank
matiascg for sharing
his idea with me about adding the dust to the equipment.
I would like to thank
RogueJK for his excellent help with my future German figures.
And a special thank you to
Heeresbergführer for all of the superb pictures and the
detailed help with my mountain figure. |