|

Welcome
To My Albert Ross A2 Uniform Page.
This page is about how I have assembled my Albert
Ross figure in the M1 jacket & uniform, this is another very nice addition to
my US paratrooper collection. The figure here is basically as it comes from the
box, apart from the changes I have made to the jacket colour, polishing the
boots and changing the patches that came with the figure.
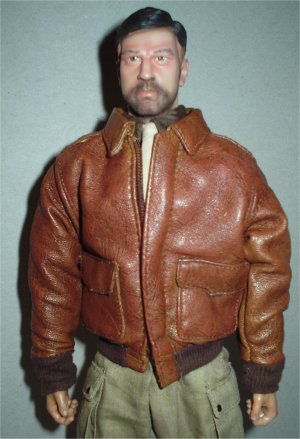
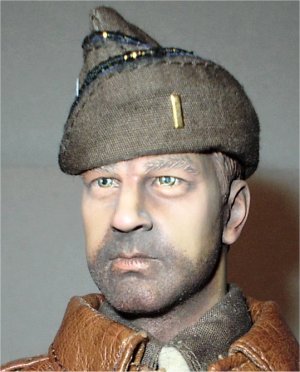
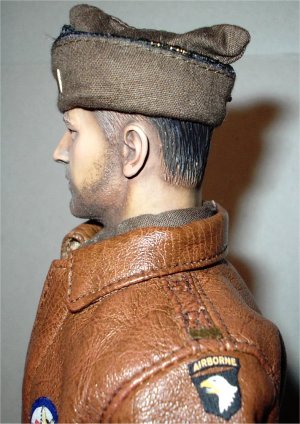
Headsculpt
This head is another excellent product from DiD
due to the flocked beard it has, which makes me think that there are some
very skilled workers in the DiD factory. This head was again given a pastel wash
to bring out the detail, similar to the head I did on my Class A figure. The
only difference here is that I had to be a lot more careful with this head, as I
did not want to ruin the beard. Note: I
suspect that the flocked beard may be 'painted' on the head the same way that
DiD have done with the 'real hair' heads, so if you have to refit a head I
advise you not to use hot water to soften up the neck, as this might make the
flock fall off as the water weakens the glue.
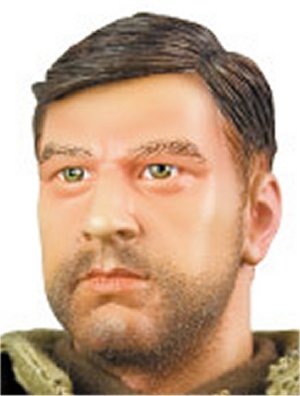 
One new thing I have just tried with
this head is using dry pastels to add the highlights, because I was told by
Paul (.308) that this is how he does his heads. And I have found it a lot
easier to use like this as all I did was draw a light line of the pale cream
pastel on the bridge of the nose, nostrils, above the eyebrows and the tops of
the cheeks. This was then brushed over lightly with a dry paintbrush to blend it
in, and I have found that I get a nice even effect this way as it also allows
the factory paint to show through as well. Although the camera has made the
headsculpt look too light in the picture above.
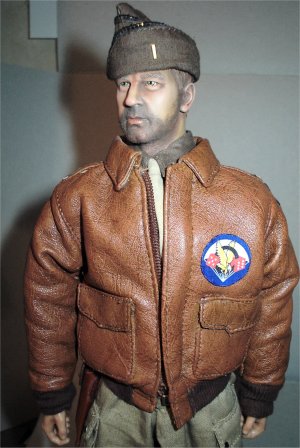
Leather Jacket
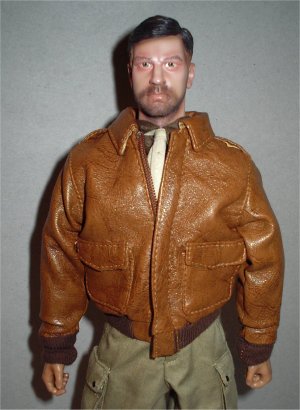
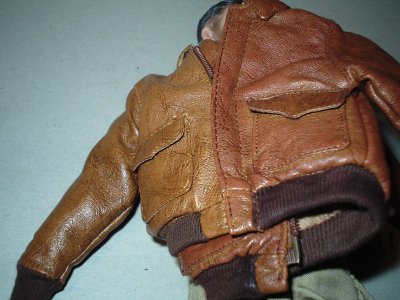
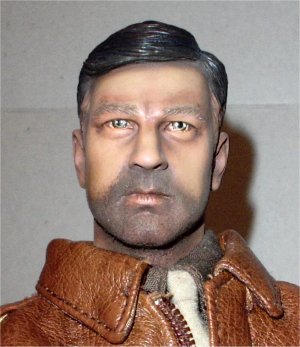
After
seeing the different coloured jackets in the link
here I got to
wondering how I can alter the shade of the material somehow. And while I was out
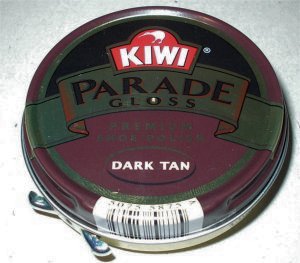
shopping today I found the shoe polish as shown above left. And in a big
experiment by me I rubbed some of it into the jacket and the colour differences
are shown above. The jacket on the left is the one from the box, while the other
one has had the polish treatment done to it. Note:
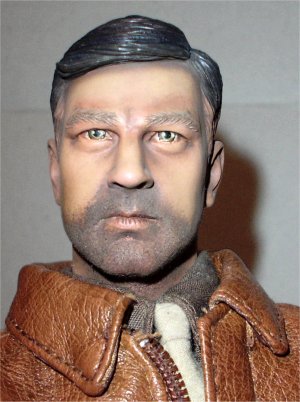
A better picture is above right, as this shows two separate jackets zipped
together, the one on the left is the original DiD jacket, with the polished one
on the right.
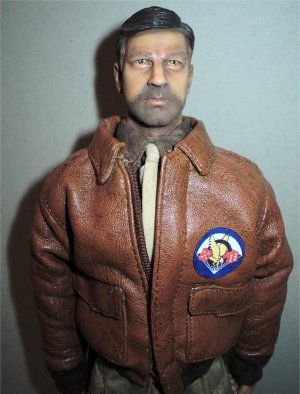
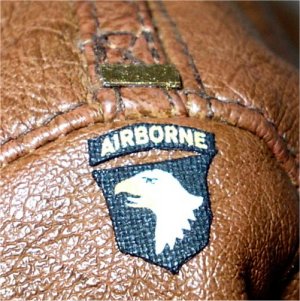
The insignia on the front of the jacket is from
CVI and is a lot more in scale than the badge supplied by DiD, this was cut from
the sheet and the white edge was touched up with some blue acrylic paint to
match the background of the patch. I then laid the patch onto some double sided
tape, cut it out, removed the backing and placed it on the jacket.
Note: This may need a dusting over of some grout to
lose the brand new look to the patch, because at the moment it seems to me that
it stands out to well.
The same was
also done for the airborne shoulder patch. Note:
Be careful using the double sided tape on this jacket, because I had fitted the
large patch and later I realised it was slightly out of line. So I went to take
it off again and it took a small piece of the brown vinyl away with it, but this
was not a problem as the patch covered the split.
One other thing I have done to this jacket is add
some rank insignia to the shoulder epaulets, as I thought that the jacket looked
to bare without them. These were made from some thin plastic card which I shaped
to size, painted gold, placed on some double sided tape, cut out and placed on
the jacket.
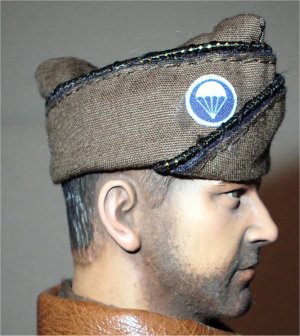
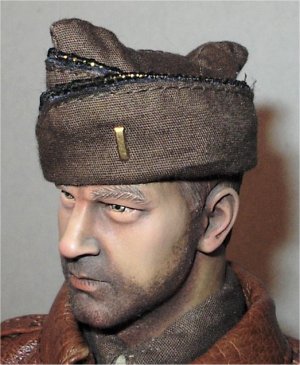
Uniform Cap
The cap piping was again changed from the white
one it comes with, to the gold and black piping for an officer. To do this I
used the cord that I bought and replaced it as I did with my Class A figure.
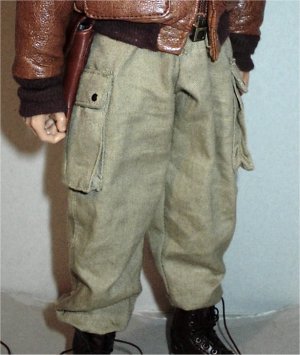
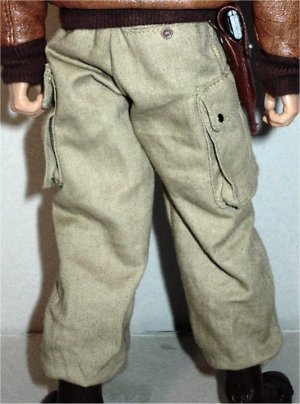
Trousers
The trousers were also bloused the
same way that I did with my other Albert Ross figure, but with this figure I
wanted a really baggy look to the trousers with lots of creases. So with the
rings that I used to hold the turn up on the legs, I moved them so they are
right against the inside sewn seam at the bottom of the trouser legs, I then put
the boots on and rested the turn up against the top of them. I then pulled each
trouser leg upwards which gave me the baggy look I wanted, and it was just a
case of re-arranging the trouser legs to get the creases.
Boots
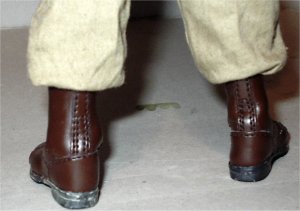
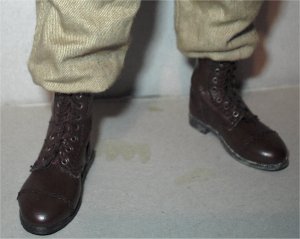
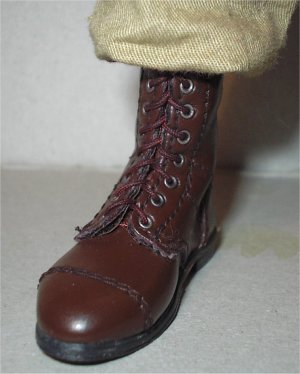
The boots on this figure did not look the part to
me so I tried to see what they would look like if I used some dark brown shoe
polish on them. This has added a flat even overall colour to the boots covering
both the stitching and the laces, the boots were then polished to get a shine
with my Dremel drill with a polishing cloth attachment.
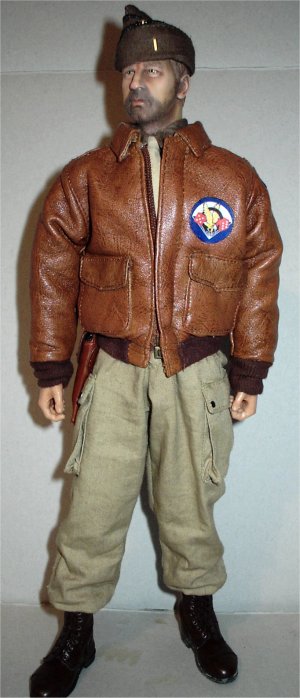
This is the finished figure, in the middle picture
above I have made some insignia for the shoulders. This was cut out from a piece
of plastic card, stuck onto some double sided tape, painted gold and placed on
the shoulder.
Note: Be
careful using this type of tape on this jacket, because if you position it wrong
it will tear the coat if you try to take it back off again.
| 