|
|
|
Welcome
to my
Mr Canoehead's Dragon - Jeb Special
Version Review Page.
This is a tutorial from
MrCanoehead about how to fit the DML Jeb parachute, I used this to fit the
parachute onto my Soldat 2 figure, and as I found this so helpful. I have asked permission
for it to be used here. I have also found that came in very handy when I
fitted my Corbin Black parachutes. Note: The
Italic text below is from Mr Canoehead.
Note:
This tutorial can be
also applied to the Corbin Black figure, as it helped me with my models.
And
this
is not my work, I have just included it along with the updates on my pages to
help my fellow modellers.
How to hook up Jeb's parachute
These steps were made by my observation of the rig from an Osprey military
book and with close inspection of the chute itself, I have not verified if this
is totally correct, but don't think its far off.
Please note:
The additions below
regarding fitting the reserve parachute and the Mae West Vest.
Parachute
Update
I have been informed of an error in this tutorial. In
Step 5 it shows the reserve chute attached to
the parachute straps by the hooks. But what it fails to show, is that the belly
band goes through the loops on the back of the reserve chute to hold it in
place. This is something that I have often wondered about with my figures,
because to me the reserve seemed to 'flap about' with only the hooks connected.
But after receiving some excellent advice from
USMCPrice on the Sixth Army Forum, this
question has finally been answered.


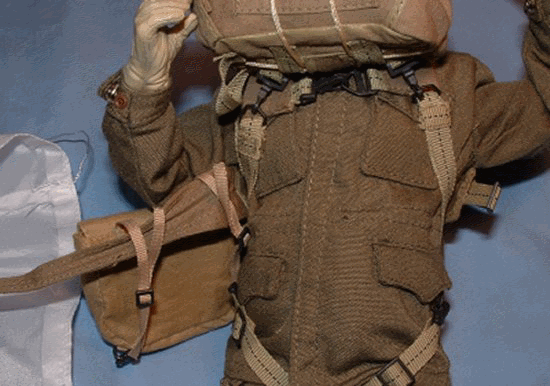
The pictures above show the belly band going through the spare
parachute loops and what it looks like finished.
He also explained in detail
about why the reserve chute is connected to the belly band.
I've never jumped a T5 but I have jumped a
T7, T10 and MC1-1 and they are all rigged with the belly band through loops on
the back of the reserve. I am sure the T5 would have had to be rigged this way
also because the two hooks connecting the reserve to the main parachute harness
would not be sufficiently strong to support the weight of the jumper and his
equipment. When the reserve is deployed it suspends the jumper from his abdomen,
belly up with his body parallel to the deck, without the belly band that's a lot
of weight and force placed upon two small hooks.
Parachute Usage and Fitting Update
I have
just received the following information by e-mail from Joshua about the WW2 US
T-5 and T-7 parachute and harness, and because I feel that it is so informative.
I have posted it here on this page to hopefully help my fellow modellers. Plus,
I would like to thank Joshua for taking the time to share this detailed
information with me.
I have studied the T-5/T-7 parachute for years and just thought I would give
you a little information. The belly band isn't there to support weight. It's
purpose was for keeping the reserve from flapping around, and also worked great
to secure equipment. Its attaching seams will not hold very much weight-its sewn
with the regular parachute pack thread, about 8 lb. tensile strength. The two
reserve hooks/d-rings are plenty strong. They were rated at 5000 pounds. (the
original ones were the reg. harness hooks, rated at 2500, but by D-day just
about all were the 5000 type).
The hooks will go 8420 pounds to the maximum bend. That's when the hooks would
bend far enough for them to come off the ring. The rings have a much high
bending strength. That means it can safely take an opening shock of 10,000 lbs,
or approx 40 opening g's (at about 40 g's your probably dead). Even in the worst
conditions - the reserve opening at 250 feet, 300 lb weight, 1.5 second
inflation time, and at terminal velocity the opening shock would only be about
2400 lbs. Normal opening shock would be in the vicinity of 1300 lbs for the
reserve, and that's probably a slightly high number. Some troopers on combat
jumps cut off the belly band to be able to shed the harness faster.
Also, when the reserve opens, it doesn't suspend the jumper at that much of an
angle. Though he isn't suspended vertically like when the main is open, he is
still close to vertical, though it isn't very comfortable. This is especially
true when there is a heavy load of combat equipment; it pulls the jumper
slightly more vertical with all the weight at the bottom. Hope this helps.
Note: Realize though that the opening
shock forces have so many variables, so the numbers are not extremely accurate.
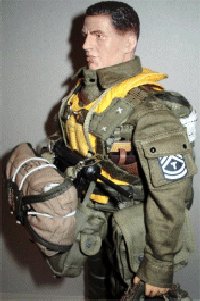 Figure assembly update Figure assembly update
Note: If you are using a Mae
West vest with the paratrooper figure, this goes on before the parachute and the
parachute harness straps go over the top of the Mae West vest.
I apologise for not adding this section before, but I was
informed incorrectly that the vest went over the parachute. And after it was
explained to me how the equipment was worn, I have had to change my figure
around. So that the Mae West vest is now under the parachute harness.
Plus I have also learnt from fellow modellers, that the straps
did indeed go over the vest. Because thinking of it after it had been explained
to me, you would want to ditch the rapidly waterlogging parachute as fast as you
can before it dragged you under. And at the same time try to inflate the vest as
well to try to keep you afloat, plus try to ditch all the heavy equipment that
you were carrying.
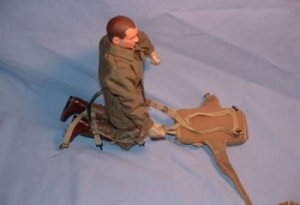
Parachute Assembly Instructions
Step 1:
Lay the back part of the chute down (the side that the chute would come
out of), and lay out the harness.
Stick Jeb through the biggest loop so that the green
felt side would go up against his butt and the two straps would fall
between his legs.
|
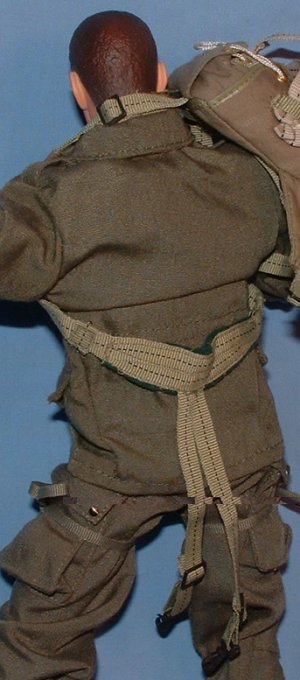
Step 2:
Now just like Jeb is doing, take the pack and flip it over his shoulders.
|
Step 2 continued: Let the back drop down his back, and make sure that the a-shaped
part of the strap is behind his head.
|
|
Part 2 finished:
Here's what it should look like after you've pulled it over his head.
 |
Part 3:
Connect the snap at Jeb's
chest level.
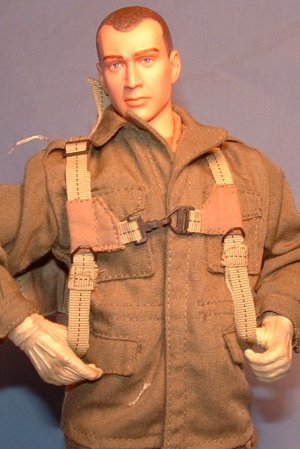
|
Step 4 prep:
Ok now see those two straps dangling down from the green felt area? We're
going to bring those to the front and give Jeb a wedgey.
|
|
Step 4:
Take the strap from one side, and bring it to the front. Connect this strap
with the loop on the backpack as shown.
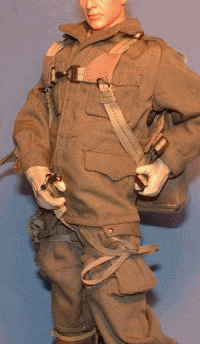 |
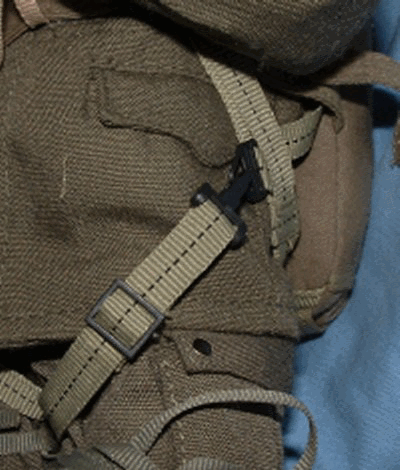
Part 4 close-up:
Notice that the loop which the strap attaches to actually passes through
the strap which is going over his shoulders. Open up the two shoulder straps
that lead to the shoulder and thread that loop through, then connect the leg
strap to it. If Osprey's "US Paratrooper 1941-45" book is illustrated
properly, then this is correct. The leg strap can be lengthened if you're
having some trouble reaching the loop.
 |
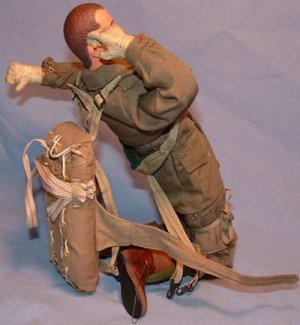
Step 5:
After doing up the both leg straps, you can attach the musette bag. Now I
don't know if its supposed to go onto the belly band as shown, but I don't
see any other place to put it on, and it seems to hang at the right height
there.
|
Figure assembly update
(many thanks to Sean for the help)
Note: I have since found out that the
musette bag connects to the webbing straps on the shoulders, because on landing
the paratrooper dumps the chute. Then flips the musette bag over the shoulders,
so that the straps are facing outwards, behind him. So on the figure, i have the
musette bag hanging in front with the straps facing in towards the body.
These steps are for attaching Special Jeb's parachute. Regular Jeb is
complete by Step 5.
|
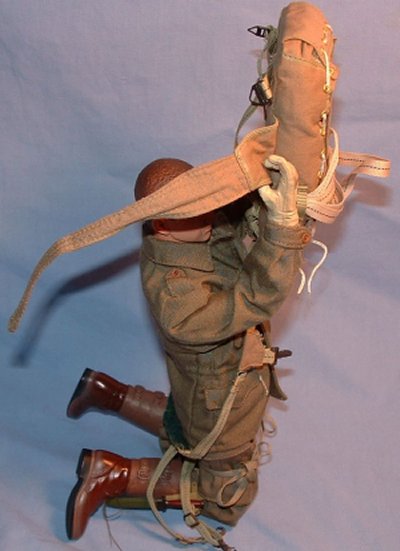
Step 6: Jeb's
chute is going to be threaded through the loops on the upper part of his
shoulder straps. Seen here is the loop to thread through, and the parachute
that will go through it.
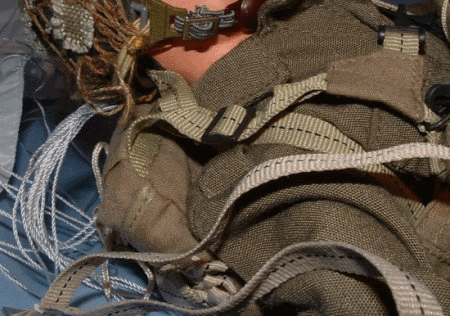 |
Step 6a:
There are two parachute straps on each side of the chute, so decide which
ones you want to be on the bottom, and thread that one through the shoulder
loop first.
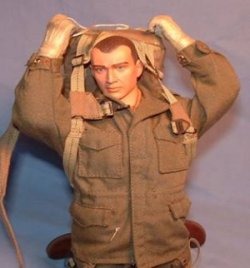
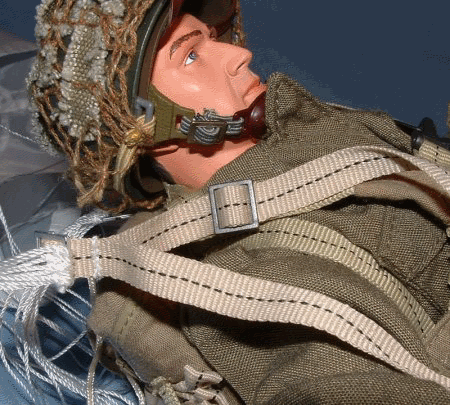 |
Step 7: Finally, pull on the
chute to make sure you have an acceptable amount of leftover material going
through the shoulder loops and you're done!
 |
|
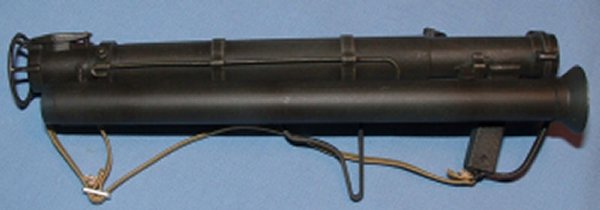
Jeb's Bazooka
The
big surprise here is that the bazooka joins together just like the real one!
Right now I have it lined up to where they come together.
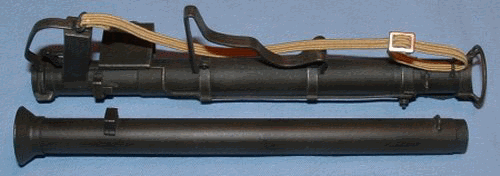 |
On the grip side you can see the kind of protruding piece...this piece goes
into the loop in the barrel side.
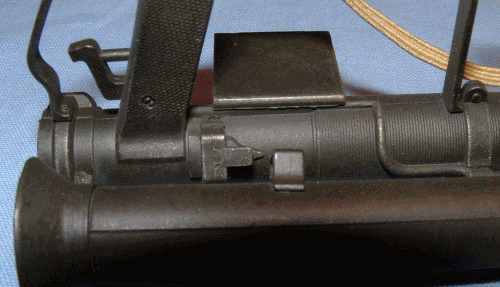
|
|
Here is the barrel loop part slipped over the hook in the trigger section
(trigger section on bottom now).
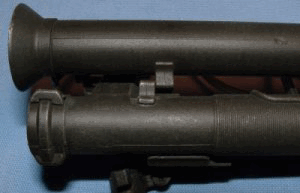
|
Be Careful when fitting the bazooka together,
as I found out that the pip on the other end can break off!
At
the other end you can just force one end over the other and the two pieces
come together snugly.
 |
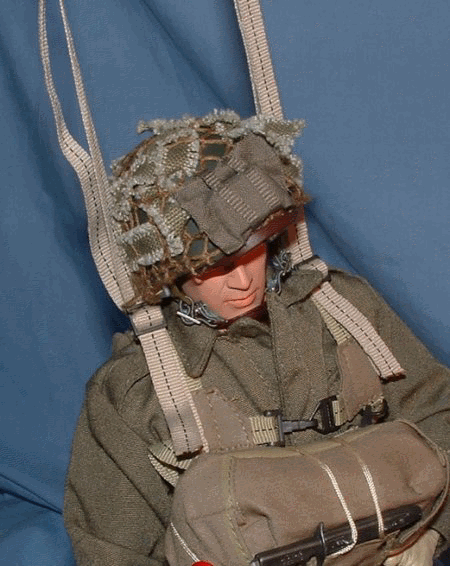
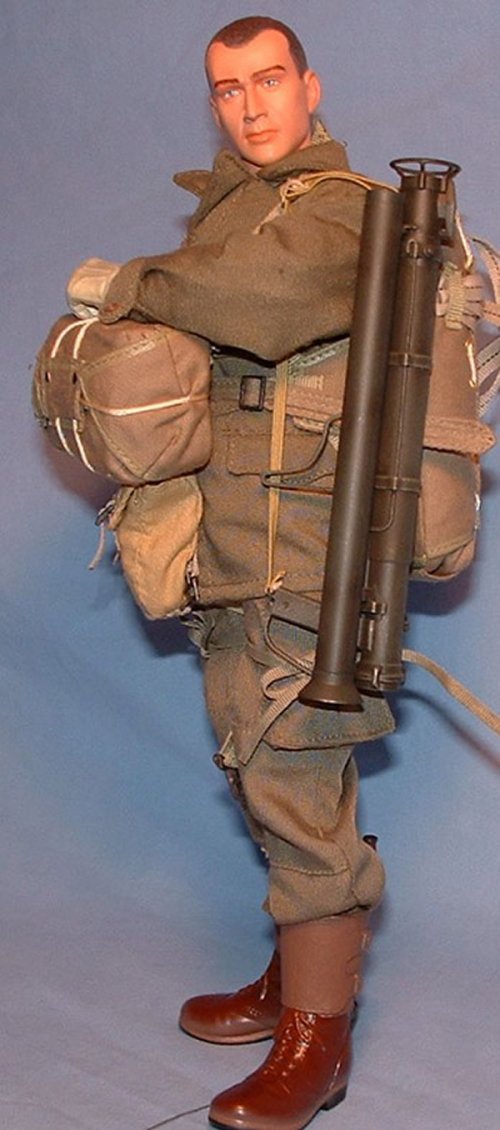
This is the DML Jeb figure completed, and as I said before I have used this
excellent tutorial with my Soldat 2 figure. Because as usual with Dragon they
have provided a figure, but no instructions on how to assemble it.
Finding this tutorial has saved me hours of work searching the internet, or
buying books to try to find out how the parachute is fitted.
|
Many thanks to Mr Canoehead for this work.
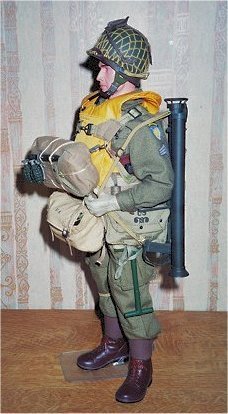
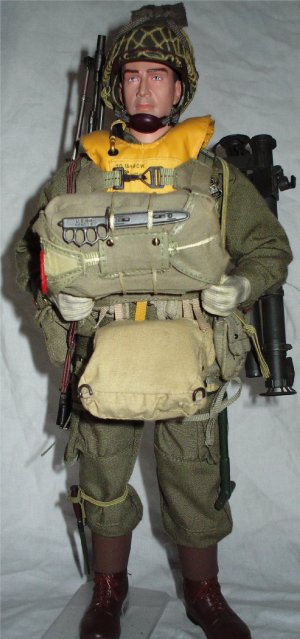
Below
are 2 pictures of how I equipped my DML Jeb figure through using this
tutorial, and through trial and error.
Since
these pictures were taken, I have changed the musette bag so it hangs from
the shoulder clips. Also so that it can be flipped onto the figure's back.
These pictures show before and after.
|
The packed up bazooka fits well on Jeb but I don't think he would have
jumped with it.
|
|
|