|
Welcome
To My US Tank Mechanic Page.
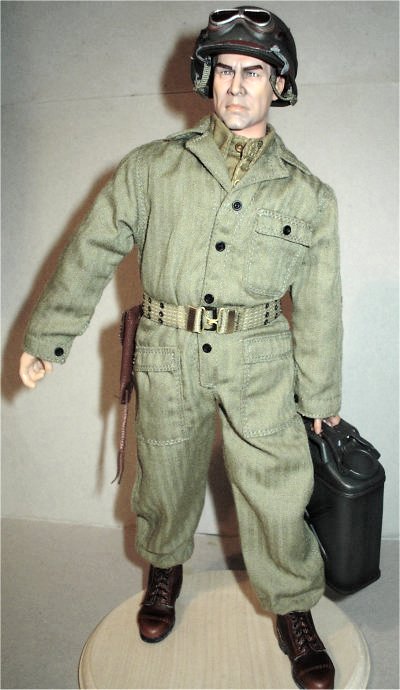
This is my figure of a US tank mechanic, and the
idea for the kitbash came about after I found a
company that was
selling a 1/6th scale mechanics apron. And I got to
wondering if I could use the vest in a kitbash, so after a little research I
ordered one. Plus seeing as I was on the page I also ordered two of the spanner
sets as well, these are to be used to fill the pockets on the figure. The main reason for kitbashing this figure was
that I was beginning to get bored with the same type of armed soldiers, so I
started to have a look around to see what images I could find, that could be
used for a different type of kitbash. So after finding the mechanics apron the
idea for the tank mechanic came about.
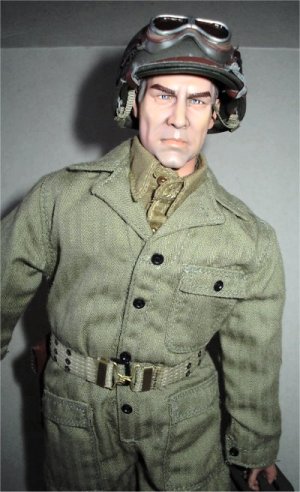
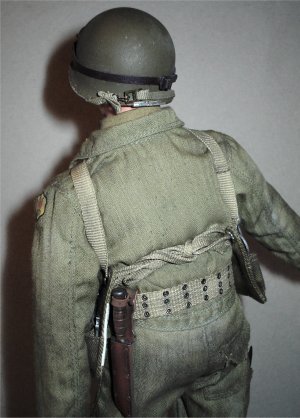
The uniform for this figure I believe is the one
from the DML Josh Ackerman figure along with the goggles, the shirt was from my
spares box, the boots are the short one's from the DiD George Puller figure as
is the metal helmet as well.
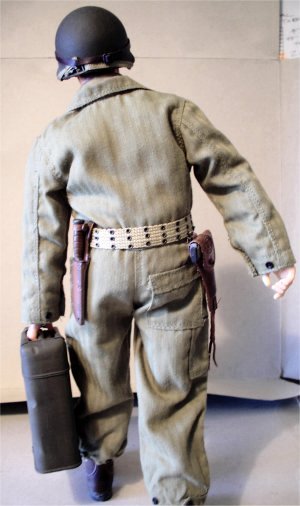
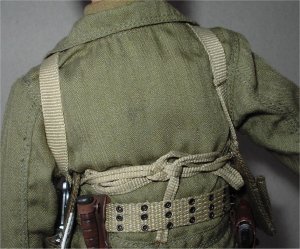
During the assembly of this figure I just could
not get the overall to hang right on the figure, as no matter what I tried it
still looked like it was about two sizes too big. So I got some bandage that I
had hanging around and wrapped the waist area of the figure with it, then done
up the uniform over the top of that and it gave the figure enough bulk around
the waist so it now fitted a lot better. And with the angled pose I wanted for
the figure, the bandage helps the uniform folds look more realistic.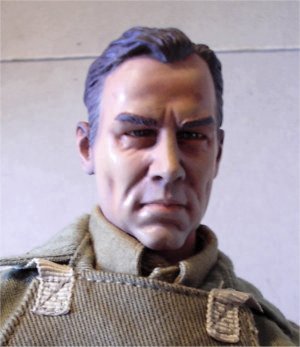
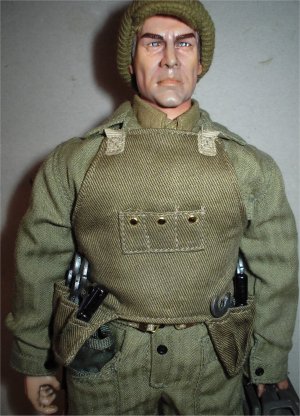
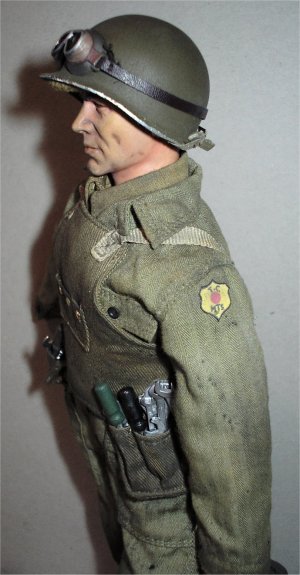
The headsculpt for this figure is the DML Doc
Peterson figure (No 348) and as with all my figures the head was painted with some Model
Color 540 Matt Medium to lose the glossy look to it. Making sure that I use the
neat paint for the cheeks, nose forehead and chin. Because these parts always
seem to catch the light more and seem to stay glossy to me.
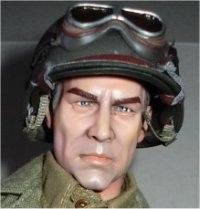
The picture on the right shows the headsculpt
after a pastel wash to add some depth to the face, and a brush over the top with
some light coloured pastel to bring out the highlights.
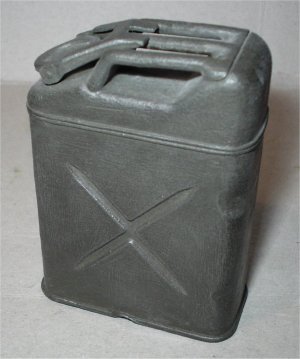

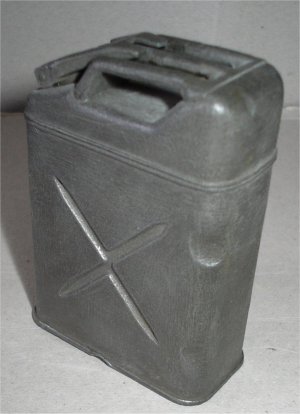
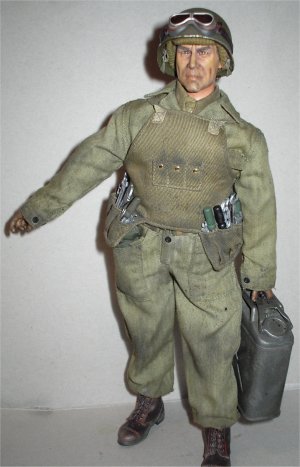
The jerrycan was repainted with some paint from
the Revell enamel paint range number 39 matt Dark Green, as this was the nearest
that I could find at the time for WW2 US military paint colours. And it was only
after I had repainted it, did I realise that the can still looked too new. So I
used the flame from my lighter to melt the sides and the bottom slightly, then I
just pressed the lighter into the side of the can to create the dents.
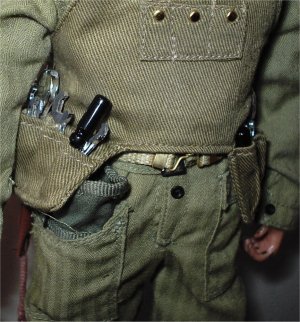
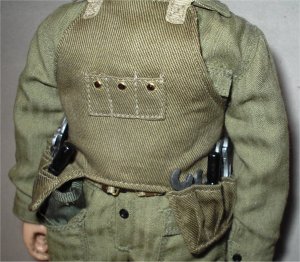
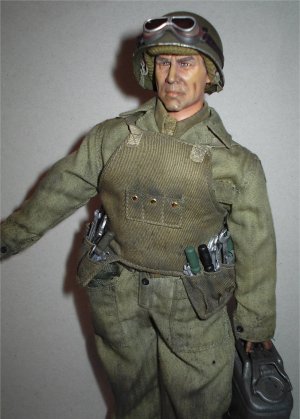
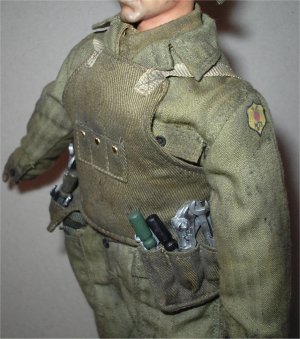
Mechanics Apron
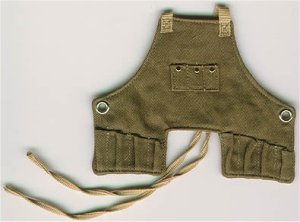
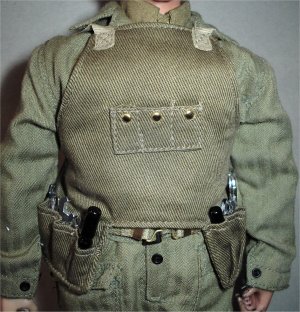
This is the apron that I bought fitted onto the
figure with some of the tools placed into the pockets, this is a very nice piece
of equipment for my kitbash, and helps to make the figure look different
especially with the cluttered look. As I have never seen anything like this made
by any of the main figure companies, so I just had to have one for my
collection.
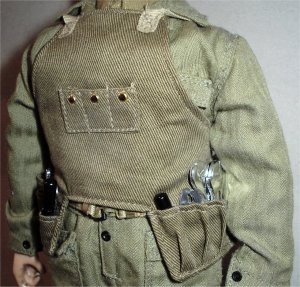
Spanners

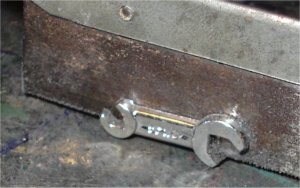
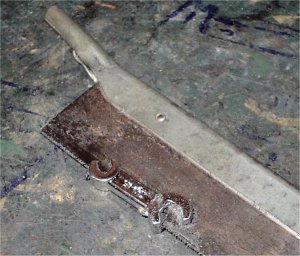
This is one of the pair of toolsets that I also
ordered and what surprised me when they arrived was the thickness of each of the
spanners. Even though they are very nicely made but to me they looked overscale,
so I got to wondering how I could use them. This is when I had the idea of
cutting them in half, as shown in the picture above right the benefit of doing
this is that I instantly doubled the amount of spanners I had,
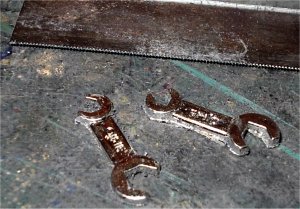
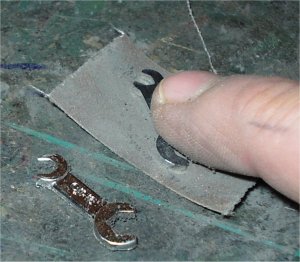
The pictures above show how I used my razor saw to
cut the spanner in half, now that I have the two halves I then smoothed out the
back part of each spanner on some sandpaper to get them flat. Because once they
are in the apron pockets the flat side won't be seen so that don't matter to me.
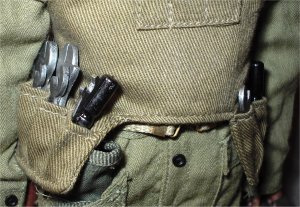
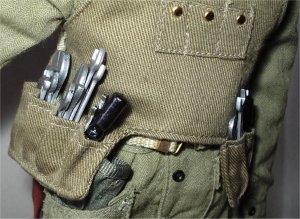
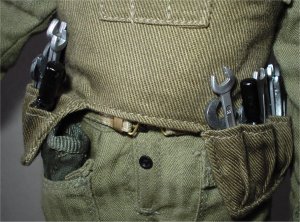
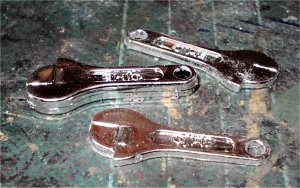
The pictures above show the cut down spanners
after being repainted with some enamel Gunmetal paint to take away the chrome
shine that they had. I also gave them a brush over with some Tamiya Gunmetal
powder as well. I also put a DML spanner roll into the front pocket to bulk that
out, I also used the other spanners to fill out the pockets. The above right picture
shows how the tapes are tied to hold the apron in place on the figure.
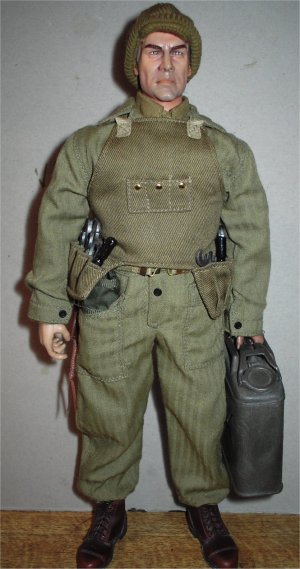
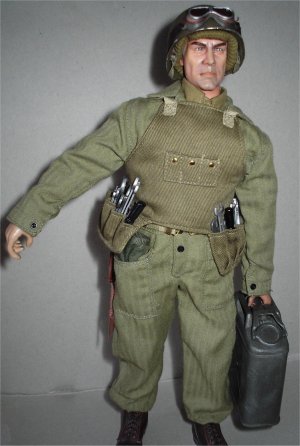
This is the finished figure apart from dirtying
him up a bit I may get around to basing this figure, but at the moment I can't make my
mind up which pose to use for him as it may be either the picture left or the
picture on the right above.
The pictures below are of the figure after I have
added some dirt and grease stains to the uniform, this was done with the Tamiya
Oil Stain weathering powder. Although it can just be seen I also added some oil
spots onto the arm and front of the uniform, this was done with diluted Black
acrylic paint which I filled the brush up with and gently tapped it above the
uniform to get the splatter effect.
| 