|
Welcome
To My Cork Bark Mountains Page.
This page and kitbash is another that I have been
meaning to make for quite a while, but finding the time for it has always been a
problem for me. So after finding a slot in my schedule I have finally got
started with the figure and the diorama base that I wanted to make as well. As I
have always liked the other mountain dioramas that I have seen made by my fellow
modellers, so I had a go at making mine.
Important Note:
Make sure that the base is sealed with varnish before making a diorama on it, as
this stops the base from warping. Also I put some strong tape around the edges,
so that when I am finished and it is removed I have straight lines all the way
around the landscape.
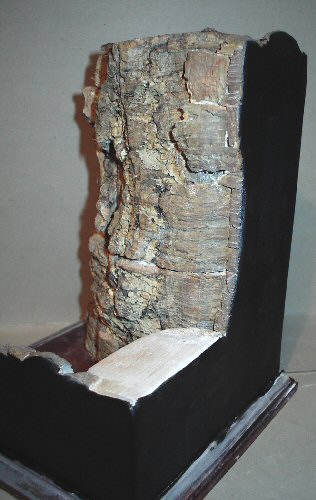
Diorama Base Assembly


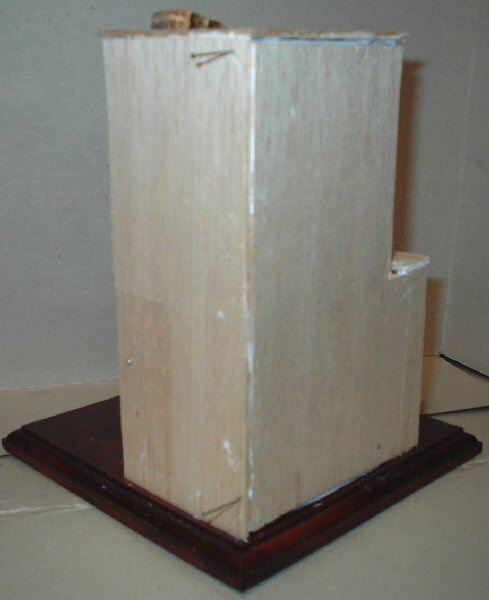
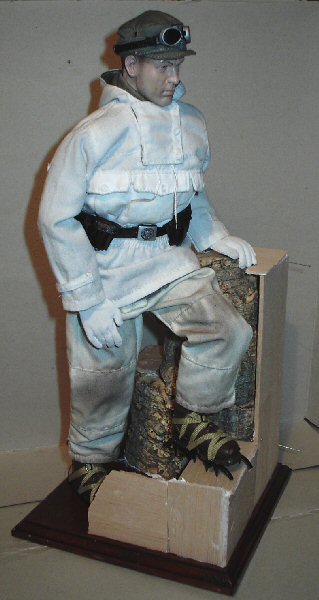
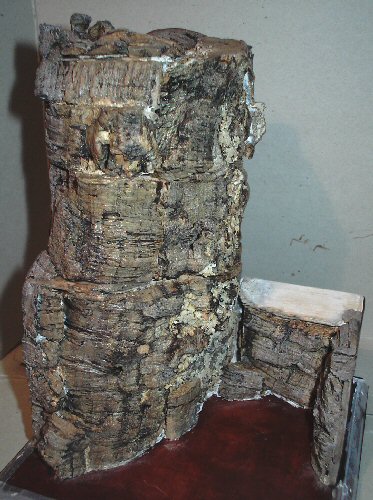
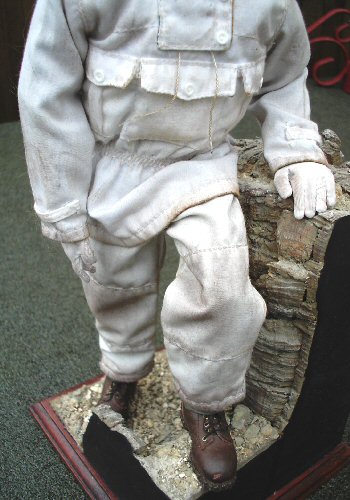
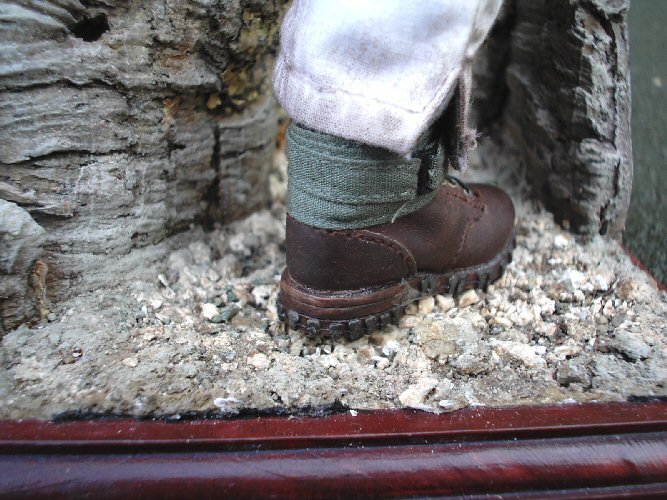
With this base I wanted the figure to look like he
is climbing, but with the limited space I have for storage of my figure's I had
to keep the overall height of the combined base and figure to a reasonable
level. So that is where I came up with the idea for the figure, where he is
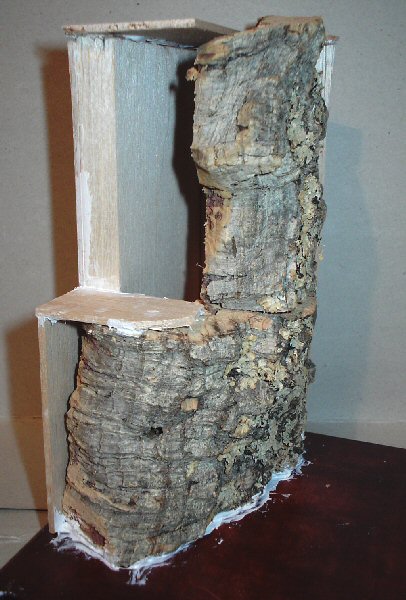
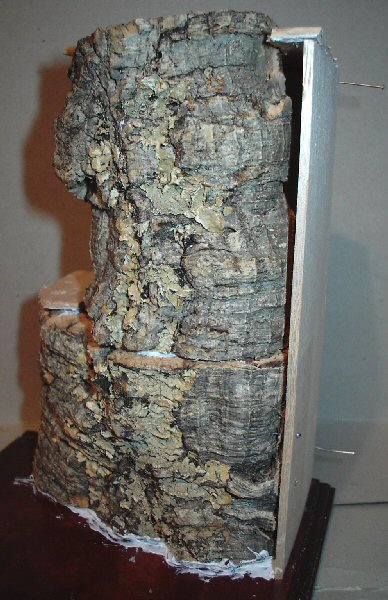
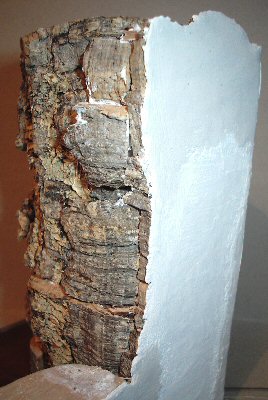
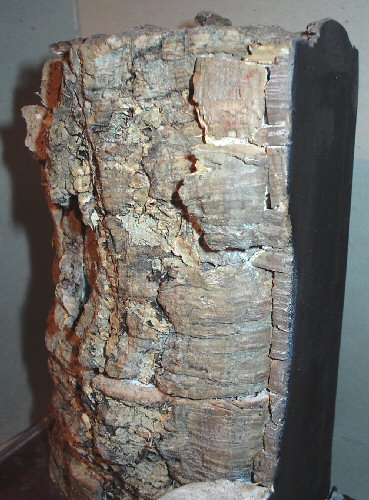
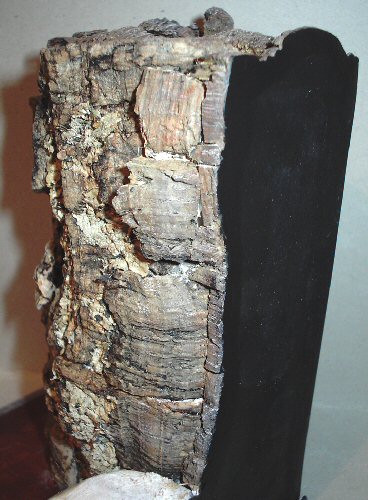
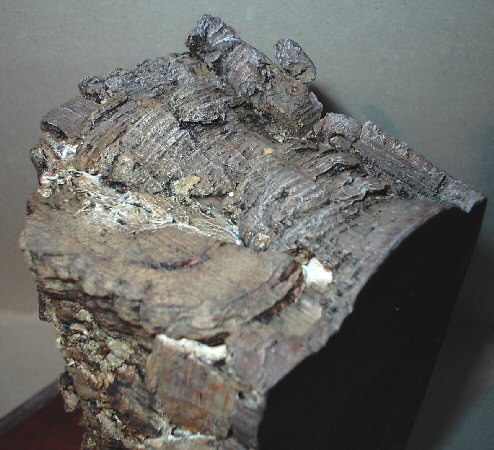
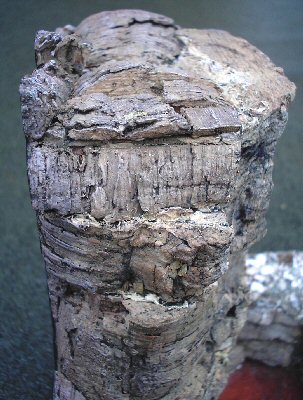
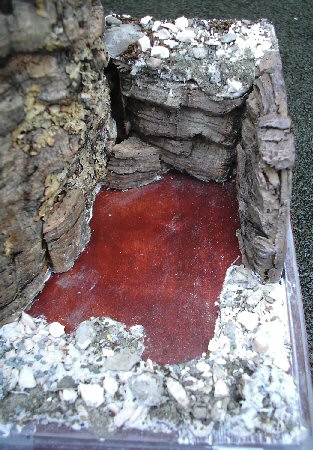
stepping up onto another rocky ledge. And in the pictures above they show how I
have made the diorama, the first one from the left shows how I have used a large
piece of curved cork bark to make part of the mountainside.
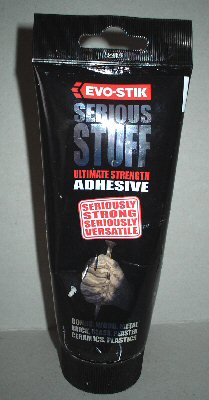
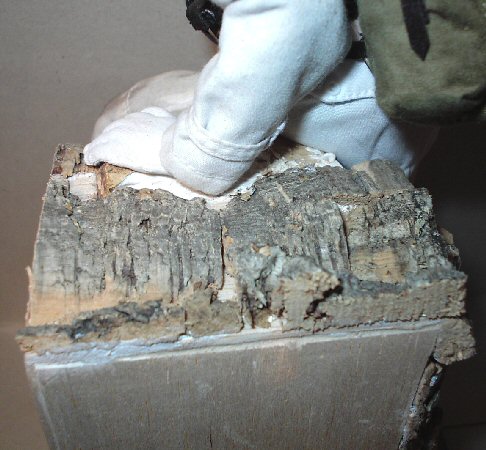
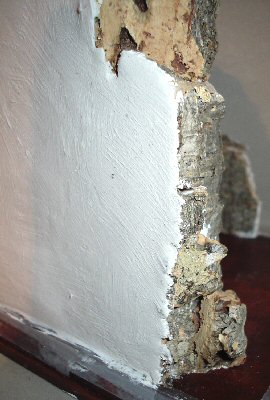
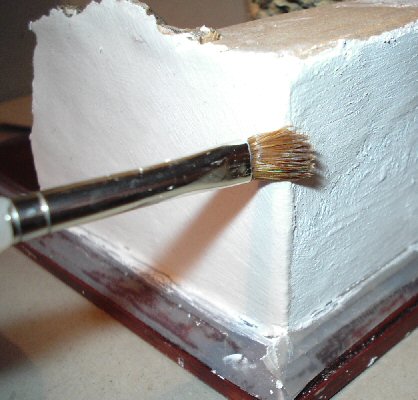
Note: The hardest part was working out how I
was going to fix the bark to the base, in the end I used the product as shown in
the second picture above.
This material is like a glue for wood so it can be
stuck to walls, and it was an experiment by me to see if it would work for what
I wanted, rather than by using screws to fix the cork to the base. I found that
the best way to use it, is to put some on the bottom of the cork, then place it
on the base, take it back off and then put it back on again. As this helps to
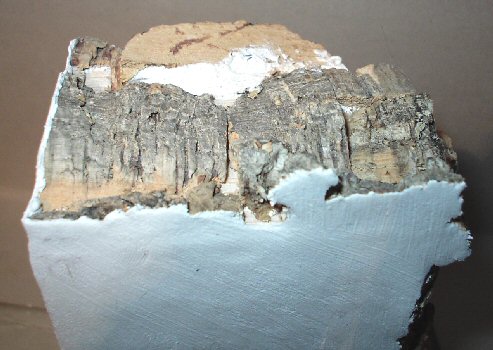
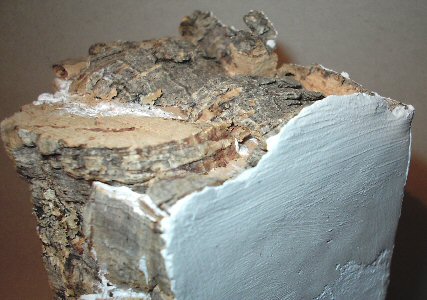
make the glue material stick better. The other pictures as shown above are of
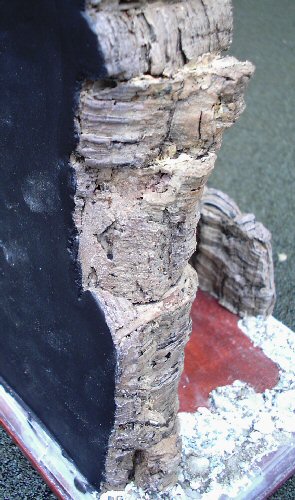
how I have made a balsa wood backing for the rock face, slightly inside the base
edges. All of which is designed around the pose that I wanted for the figure, in
particular with the way that his hand is resting on the top.
Note: Once I had got to this stage I left it
to dry for 24 hours, to make sure that everything had set.
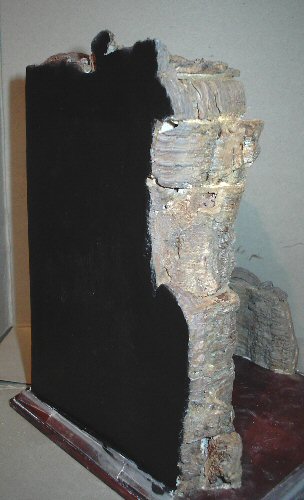
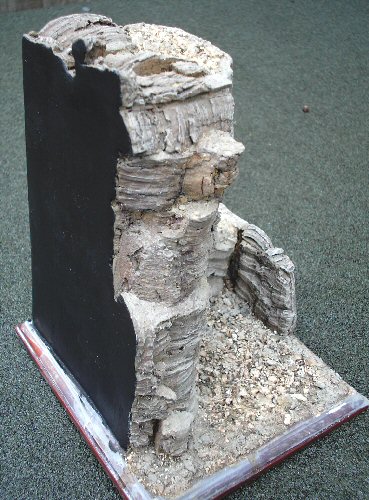
Diorama Base Sides Assembly
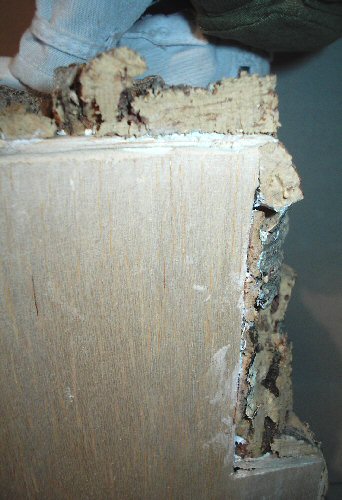
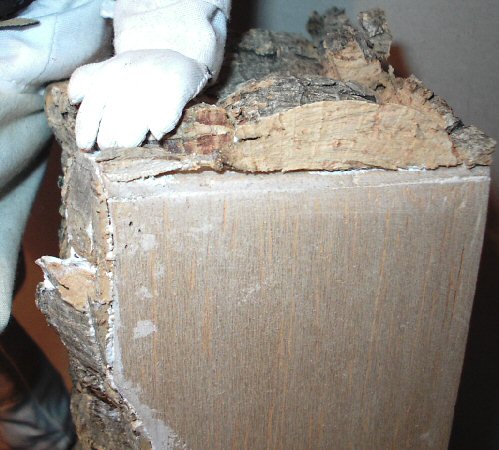
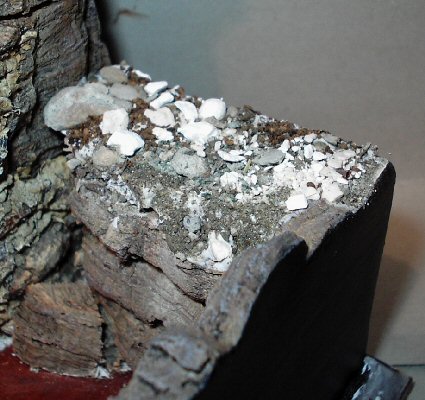
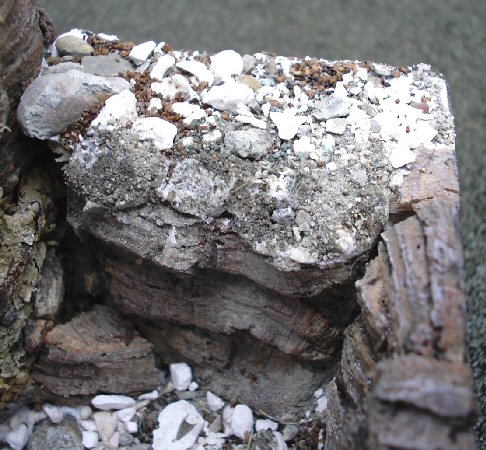
 In the pictures on the right, I have cut up some
small pieces of the cork bark, and glued them along all of the edges of the
balsa wood. The purpose of this is to both fill in the holes along the edges,
and that I want to show the rock face right along the edges. I then paint all
areas of the balsa wood and the edges that are remaining black, to clarify
visually that these are not part of the diorama, which also helps to bring out
the lighter colour of the cork bark rock face, which is part of the diorama. I
have also shown on the right how I have added the cork bark pieces to the balsa
wood edges, which unfortunately has some gaps. This is not a problem as I will
cover these with some plaster filler and sand them flat, so that the cork bark
now blends into the balsa wood sides. In the pictures on the right, I have cut up some
small pieces of the cork bark, and glued them along all of the edges of the
balsa wood. The purpose of this is to both fill in the holes along the edges,
and that I want to show the rock face right along the edges. I then paint all
areas of the balsa wood and the edges that are remaining black, to clarify
visually that these are not part of the diorama, which also helps to bring out
the lighter colour of the cork bark rock face, which is part of the diorama. I
have also shown on the right how I have added the cork bark pieces to the balsa
wood edges, which unfortunately has some gaps. This is not a problem as I will
cover these with some plaster filler and sand them flat, so that the cork bark
now blends into the balsa wood sides.
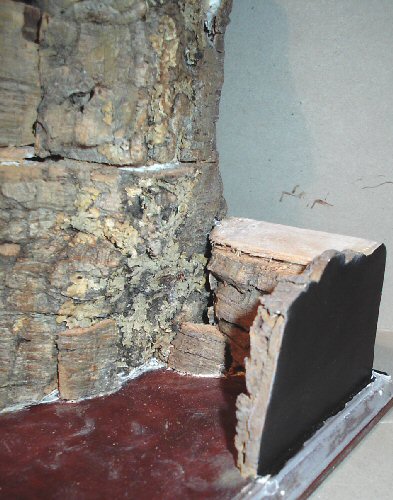
Diorama Base Sides & Gap
Filling


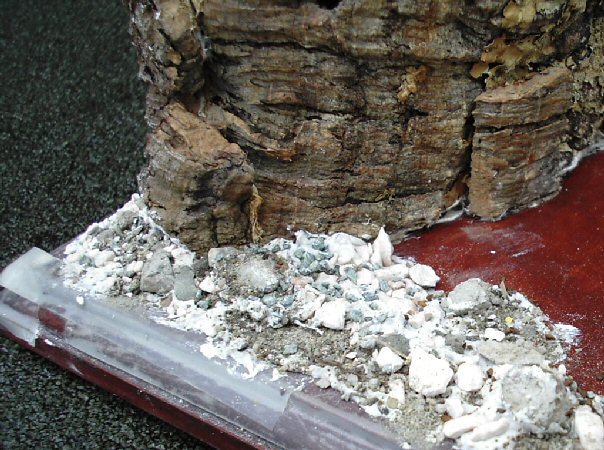
The pictures above show how I have filled the gaps
in the sides with some small pieces of cork bark, and how I have blended the
sides into the rock face as well. This was done with some plaster mixed with a
little PVA glue in a saucer of water, this was then painted onto the sides with
a large fan brush. And as shown I have filled the gaps between the cork bark and
the balsa wood, and in the last two pictures above right I am using some clean
water to smooth the edges and the sides. I am not being to fussy with this at
the moment, because once this has been left overnight to dry fully I will be
using a small piece of sandpaper wrapped around my finger, to get the sides
smoother. Note: I recommend either wearing a
face mask because of the dust, or doing the sanding outside to save making a
mess.
The last two pictures above right show how I have
sanded the sides smooth, and with any holes or low points have had some more
plaster applied to make it all level. This will again be lightly sanded when
dry, rubbed over with a tissue to remove all of the dust, and then it should be
ready for painting.
Diorama Base Side Painting


These pictures are of the base with the sides
painted with some artists Black acrylic paint, one of the benefits of using this
thicker water based paint is that it can help to fill in any small faults in the
sides of the base. Because even though I have sanded the sides as smooth as I
can, I would be adding and sanding the plaster for hours, just to get the sides
all perfectly smooth if I just used the plaster. In the first five pictures
above from the left, they show how the Black paint shows off the lighter
coloured cork rock face better. Plus how I have used drybrushed a mixture of
various Tan, Khaki, Green Ochre Model Color acrylic paints to add depth and
highlights to the cork, I also used some Burnt Umber and Burnt Sienna to add
some Brown colour as well.
It was then that I realised that all I had done
with the paint was to add various highlight colours to the rock face, and it
just seemed to me to be too light and what was missing was some depth to the
rock. So in the next three pictures I have given the cork bark a wash of some
very diluted Black acrylic paint to add the depth. A better example is in the
last picture above right, whereas A is the
drybrushed cork rock face, and B is the same
cork bark after I have given it a wash of the diluted paint.
Important Note:
Due to the amount of time (some years) since I last made a diorama like this, I
recommend only painting the sides Black once you have finished everything else
with the base. Because I found that where I did this too early, I had to end up
repainting the sides again since I ended up with too many fingerprints and marks
on them from handling the base.
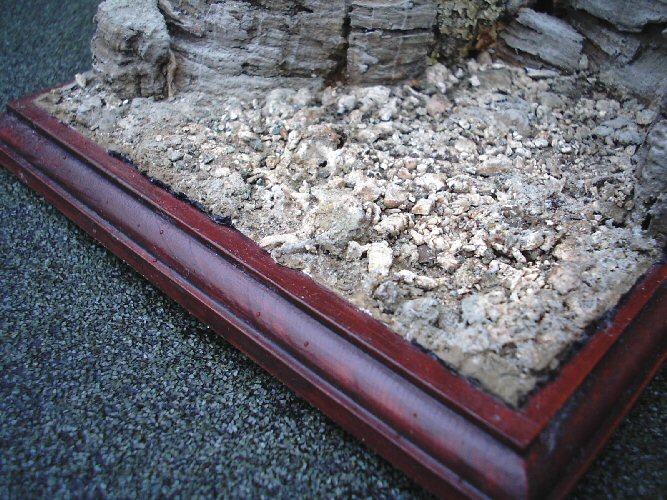
Diorama Base Landscaping


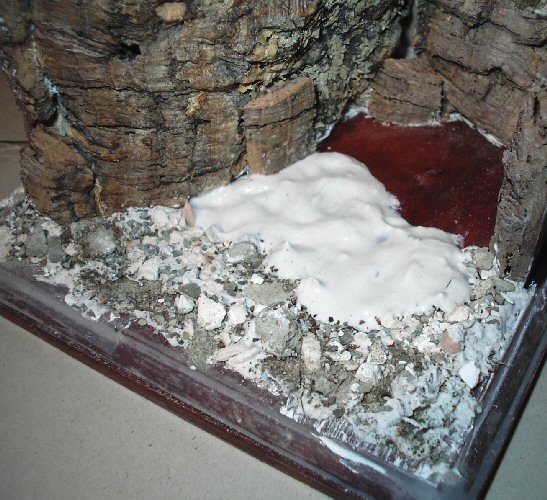
To make the landscape for the base I use some more
of the plaster mixed with some PVA glue, and as shown on the right I just spread
it onto the base and I then put the scatter/landscape materials onto the top of
it. To make sure that it starts to stick to the plaster mix, I gently press down
on it with my finger. Note: I personally
prefer to work in small areas like this, as it makes the plaster easier for me
to work with, as it does not have time to dry out. And to add the next section
onto the base, I just add some more plaster which overlaps the other one on the
edges.
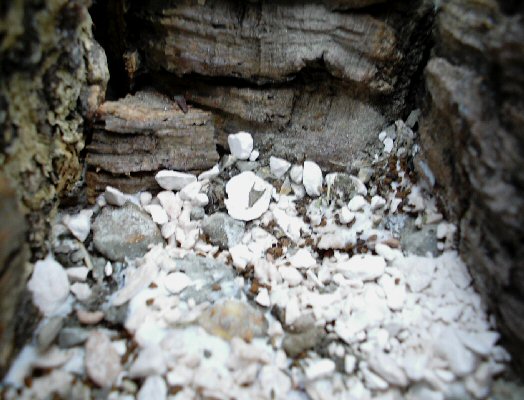
As shown above I have the base in various stages
where I am adding the landscape material, which consists of various materials
like different types of railway scatter materials, ground up cat litter, small
stones, dust. And even some of the white grit material that we use at work to
soak up oil spills. This is then left aside to dry off for a few hours to make
sure that the plaster has set, I then make up some washes of acrylic paint such
as Brown and Green to help colour the landscape material. I then do a drybrush
of neat Grey, Brown and Black to add a variety of colours to the base.
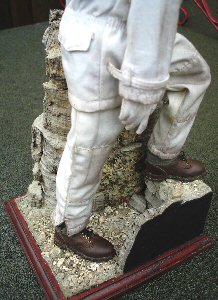
Finished Diorama Base


This is the finished base above left with the tape
still around the edges, and in the last three pictures above I have removed it
to create the demarcation lines between the landscape and the base. The last
things I had to do, was to touch up the edges of the landscape with some Brown
paint to cover up where the plaster was showing through, and touch up the bottom
of the sides with some Black paint. In some places I also painted the edges of
the landscape Black, as these were higher than in other places. And finally I
went along the edges of the base with my model knife very carefully, to remove
any excess paint and plaster to keep the straight edges.
One final note worth mentioning, is that I have
found the cork bark is for sale as either curved pieces like I used, as flat
sheet or as chunks.
And now looking at it again as a 1/6th scale modeller,
it has opened up a lot of new possibilities for me with making rocks, cliffs and
mountains.
And by pinning pieces together from behind,
various shapes and heights can be made. All of which can be hidden from view by
the sides as made above.
Cork Bark Examples
Cork Bark Flats -
http://www.bigappleherp.com/Zoo-Med-Natural-Cork-Bark
Curved Cork Bark -
http://www.thatpetplace.com/pet/group/4298/product.web
I would like to take the chance to say thank you
to all modellers of all scales, who over the years have taught me so much. |