|
Welcome
To My Shooting Pose Page.
This page has come about because of an idea I had
with a pair of US paratroopers, carrying out an evaluation on the German G43
sniper rifle compared to the US Springfield sniper rifle.
The hardest part of getting the pose right is
getting the rifle stock against the shoulder, plus having the figure's eye the
correct distance from the end of the telescopic sight. And this is where I have
relied very heavily on the experience of Paul (.308), as he has a better
knowledge than me of handling telescopic sighted rifles.

 Getting
The Pose Right Getting
The Pose Right
With the excellent pictures and guidance from
Paul below, I have been able to get my Dragon figure adapted as near as
possible to the correct pose for firing a rifle.
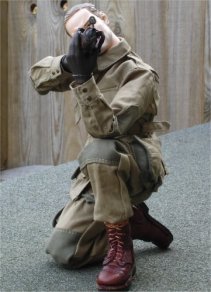
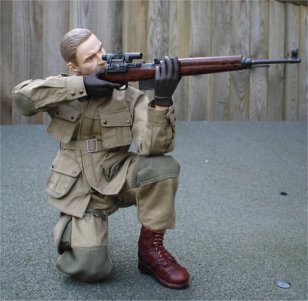
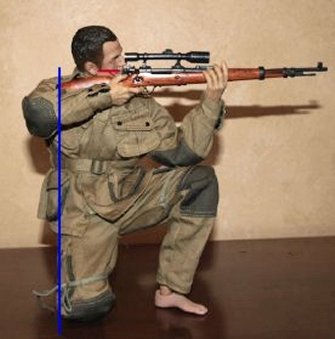
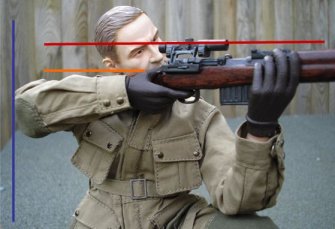
General Kneeling position.
The most important things to note are:
Eye Relief
The distance from the scope to the eye, this is
the correct eye distance. Reality vs 1:6th figure pose: I feel the scope is
mounted too high on the rifle.
The thumb, and rifle stock should be just under
the cheek bone as my red line indicates. This is a problem with the way the
rifle was modelled. The Blue line indicates how the correct position forms
nearly a perfect vertical line.
Head Tilt
Should not exceed what is shown here. I have
seen many modelled figures where the head is set too far over the top of the
rifle nearly resting on the shoulder. The rifle should be perpendicular to the
ground.
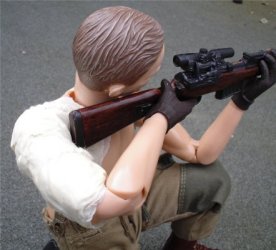
Rifle Stock and the Shoulder
The butt of the rifle should be solid against
the shoulder. The Soldier Story figure's shoulders actually has a little
movement to them, so this wasn't too hard to accomplish. The orange line
demonstrates placement of the rifle butt. The butt should not rise above the
shoulder more than shown.
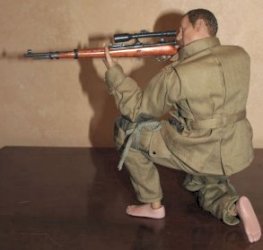
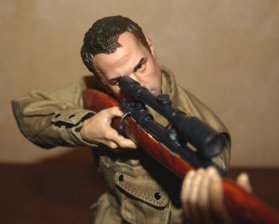
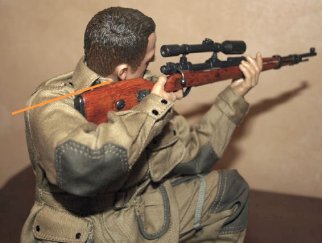
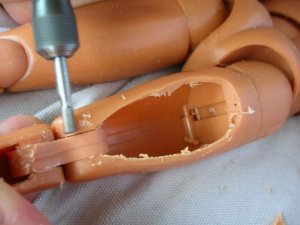
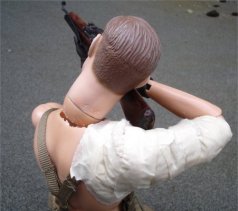
Figure Alterations
To finally get the pose as near as I can, I have
had to use my model drill to remove some of the back of the knees as shown
below. This is so that the legs can be closed up tighter, as shown in the middle
picture below. Because with a combination of this and movement in the waist, the
height of the rifle barrel can be adjusted to make sure that it is in the
shoulder, the eye is lined up with the sight and the elbow can be positioned on
the raised knee properly.
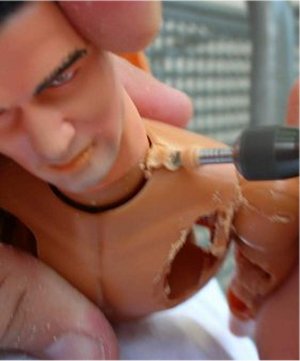
To get the head to also line up correctly I have
removed some of the upper chest as shown below right, to allow a slightly better
movement of the head downwards. Note: I only
removed a small part of this area, as I only needed a very small extra bit of
movement here.
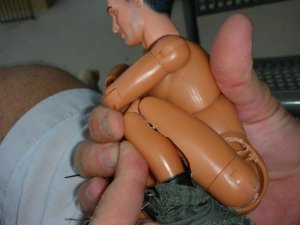
Also to make sure that the rifle stock is close
into the shoulder, I have had to cheat here slightly. In that I have padded out
the upper arm that will hold the trigger area. Mainly because of the gap that I
had between the end of the rifle stock and the shoulder.
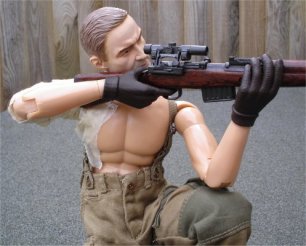
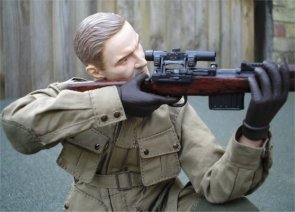
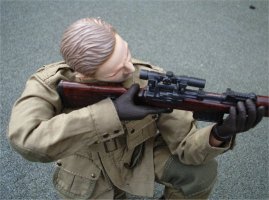
 But as shown in the first pictures at the top of
this page, the jacket has helped to hide this, so it looks like the stock is held
firmly into the shoulder. So that in the final picture on the right here, I
can apply all of the points made by Paul to my figure. But as shown in the first pictures at the top of
this page, the jacket has helped to hide this, so it looks like the stock is held
firmly into the shoulder. So that in the final picture on the right here, I
can apply all of the points made by Paul to my figure.
The Red line indicates
that the scope is level with the eye, with the rifle barrel height governed by
the arm supported on the Knee. (Slide the hand forward to lower, and back to
raise it)
The Orange line indicates the stock held against
the cheek, plus also into the shoulder.
And the Blue line the near vertical pose
of the figure so that it all looks as natural as possible.
Many thanks to Paul
(.308)
for the detailed help with the firing pose.
And to Ed
(1stLooey)
for the
help with the
Body
Modifications. | 