|

Welcome
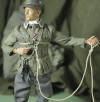
To My Gebirgsjager Ropes & Knots Page Two
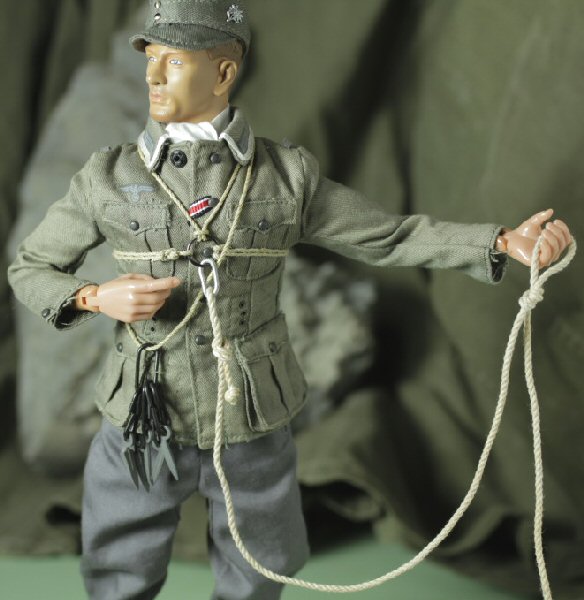
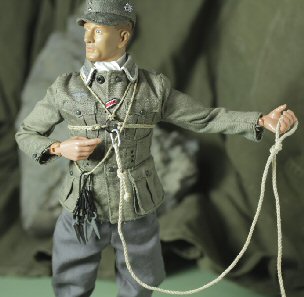
Chest Harness Ropes
Chest Harness Rope & Ring Assembly
Chest Harness Rope & Ring Tutorial
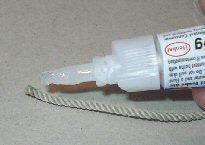
Please note:
That I found the 1.5mm scale
polyester rope from
Takelgarn Modellbau is the best size for the chest harness, and the 2.0mm
scale rope is best for the larger main climbing ropes with my figures. Also the
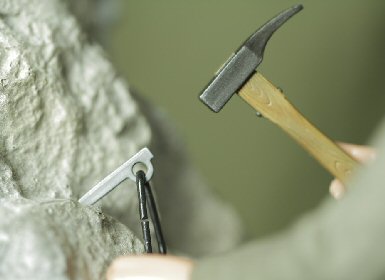
0.4mm scale rope I used to thread through the hammer end.
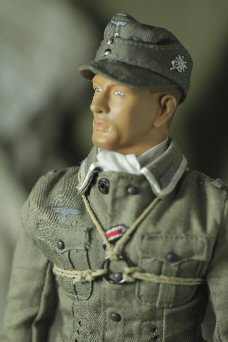
Chest Harness
Ropes
1.
 2. 2.
 3.
3.  4. 4.
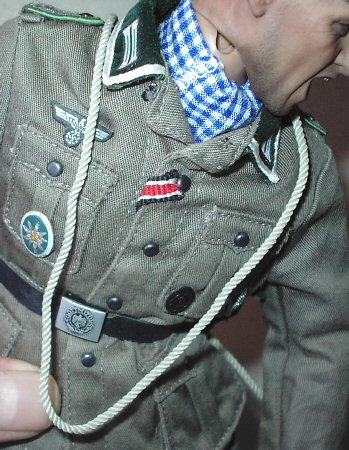
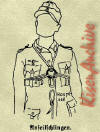
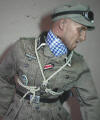
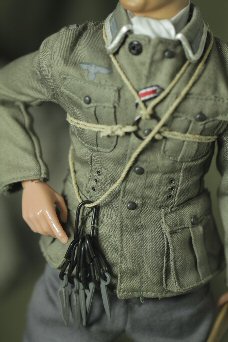
The details below are about the rope and knots I
used to make a chest harness, I am using the reference
pictures shown above in the pictures numbered 1.
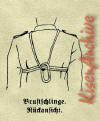
& 2. Picture 3.
shows the metal ring I have made out of solder, to seal the ends I held it in my
tweezers and put my lighter flame onto the joint to melt it slightly.
Note: Be careful as the ring will get very
hot. Once it had cooled down I cleaned up the joint, and painted the ring with some Gunmetal enamel paint.
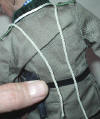
4. Is the 1.5mm scale Beige rope I am using for this next step of making the chest harness.
Note: Before the rope is cut to size it has
to be sealed with some super glue to stop it fraying, once I have done that I
also put another drop of glue on the end to seal it.
5.
 6.
6.
 7.
7.
 8.
8.
 9.
9.
 10.
10.

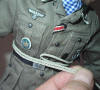
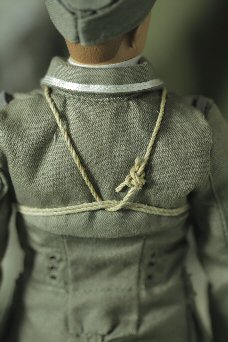
The pictures above show how I have firstly
measured out the length of the ropes for the chest harness,
5. is the centre rope with a slight overlap
in the length to enable me to loop it onto the ring. 6.
& 7. Shows the rope for the
back of the figure, again measured slightly longer than I needed.
8. 9. & 10.
show the completed chest harness in place. Note:
That with the measurement for the centre rope, I had to change this later
as I could not get the knot in the right place. So I had to undo it again and make the upper rope
of the pair longer, so that I could move the knot across slightly as it is
shown in picture 1.
Chest
Harness Rope & Ring Assembly
11.
 12. 12.
 13. 13.
 14. 14. 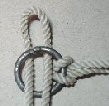 15. 15.
 16.
16.
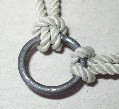
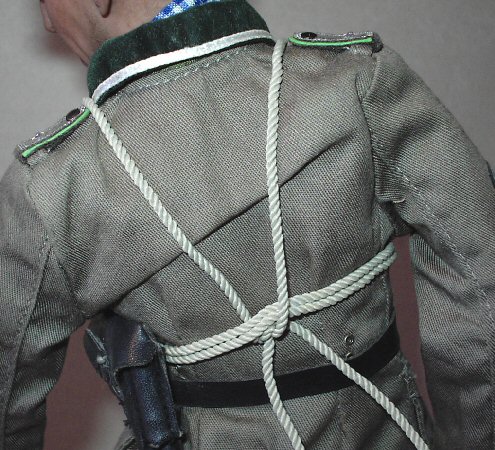
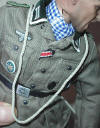
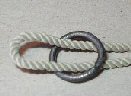
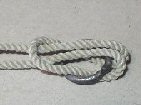
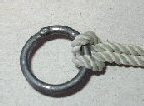
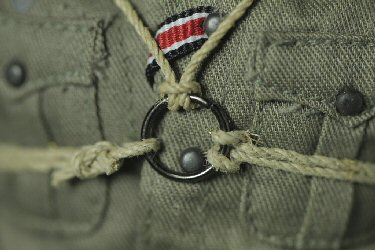
 With the pictures above I have assembled the ropes
to the centre ring on the chest harness, picture 11.
shows the centre rope looped through the ring. Picture
12. shows the ends brought back through the loop, picture
13. shows the rope pulled tight.
Note: I turned the ring over here, as I
realised that I had the loop on the wrong side. (See reference picture
1.) With the pictures above I have assembled the ropes
to the centre ring on the chest harness, picture 11.
shows the centre rope looped through the ring. Picture
12. shows the ends brought back through the loop, picture
13. shows the rope pulled tight.
Note: I turned the ring over here, as I
realised that I had the loop on the wrong side. (See reference picture
1.)
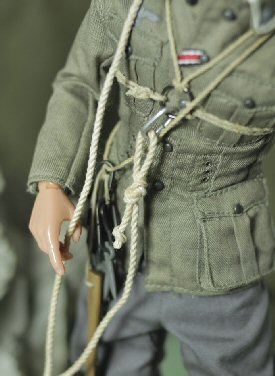
Picture 14. shows the loop for the neck
and back rope, 15. the ends have been put
through the loop and with picture 16. this
shows both ropes in place and pulled tight, plus also covering the joint in the
ring.
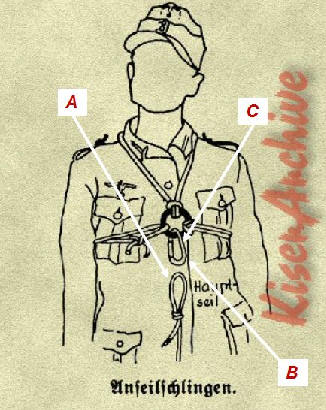
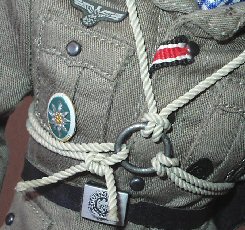
Another note from
Heeresbergführer, in reply to some more of my
questions.
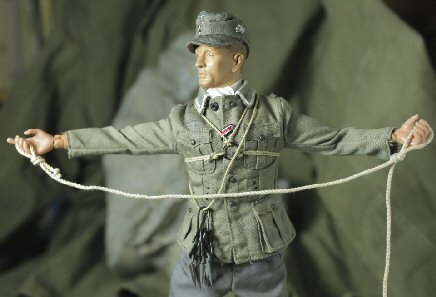
1. And am I right in assuming that the lower
rope loop (A) on the front, would connect to the metal ring (B)?
Yes, the lower rope loop (A) is the "Hauptseil" (main climbing rope) and
connects to the metal ring (B)...more commonly known as a "carabiner" or "snap link" in mountaineering
terms.
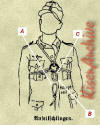
2. And the other end of the rope loop (A) would connect to the piton in the rock face?
The other end of the rope loop (A) is attached to the other climber coming up the rock face. Your figure is the "Belayer" and is taking up the rope as the
climber ascends the rock face. The Belayer would take a portion of the rope...about 3 feet or so...from loop (A) and make another loop which would
connect to a piton in the rock face behind the belayer...this is protection for the belayer if the climber falls he won't go with him.
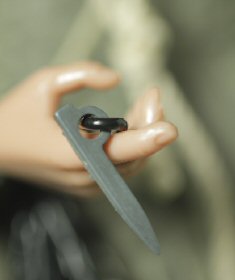
3. Is the metal ring (C) like the modern one's, where the centre part unscrews to allow the rope to connect?
Yes, the carabiners are similar to modern ones but made of steel with a spring
gate...with or without a screw lock.
The black 'O' ring in the middle of this type of chest harness is a solid forged metal ring without any openings...the ropes and carabiner are attached to it.
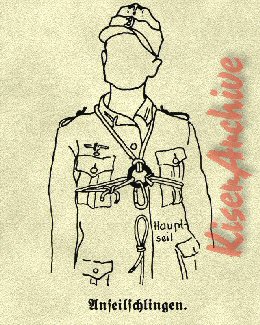
Chest Harness Rope & Ring Tutorial
Note: This is
another tutorial which was put together by (Patrick)
Heeresbergführer, and he
has very kindly allowed me to use it here on my webpage. This will also help to
explain better the replies I got to my questions above.
1.
 2. 2.
 3. 3.
1. The
ring-harness was usually used for rappelling, but could also be used for
climbing. It is made with a steel ring and climbing rope, or what the Germans
call "Reepschnur" (smaller cord or rope...6 to 8mm in diameter). Reepschnur is
also used to make slings and other safety lines.
2. First,
attach two lengths of Reepschnur to the metal ring...I found some nice
'chain-mail' rings in various sizes at Michaels Craft Store in the "Beads"
section. 3. The top cord goes around the
neck and the side cord goes around the chest.
4.
 5.
5.
 6. 6.
4. Make
sure to thread the side cord through the top loop in the back of the figure.
5. The 'Reepschnur' is also handy for
making slings like this one to hang pitons and carabiners off of.
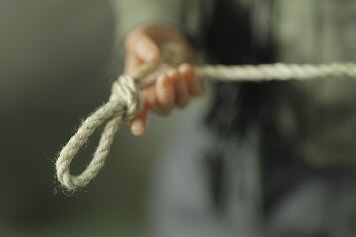
6. To set up a 'Belay' position with this
harness, take the end of the 'Hauptseil,' or main climbing rope, and tie a loop.
7.
 8. 8.
 9. 9.
7. Then
draw out an arm span of rope and tie another loop.
8. & 9. Now take the first
loop, clip a carabiner to it, and then clip the carabiner to the metal ring of
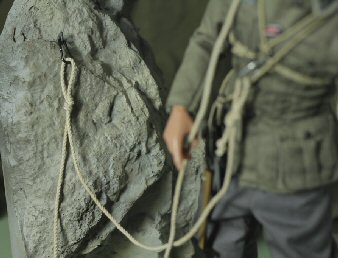
the harness. 10, 11 & 12.
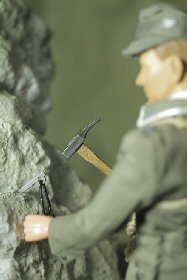
To set up your anchor with a piton and
carabiner, hammer the piton into a suitable crack in the rock, then clip the
second loop into the carabiner.
10.
 11. 11.
 12. 12.
13.
 14.
14.
 15.
15.
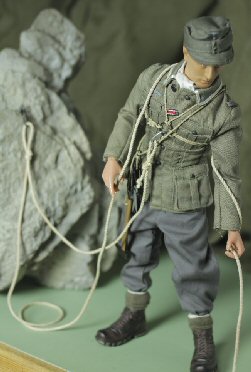
13, 14 & 15.
The lead climber now ready to belay the second climber.
Belay Tutorial
Scale model rope suppliers
Takelgarn Modellbau - For the 1.5mm and 2.0mm polyester scale rope (best
scale rope)
Cornwall Model Boats - For the Hemp rigging thread similar to the type used
by Patrick
This page has been made with the very generous
help of Heeresbergführer (Patrick
Kiser)
And I would like to say thank
you for all of the
original ideas, and for allowing me to use his pictures here.
|