|
Welcome to my
M42 Uniform + 7 Page
This is my fourth figure that I have made up from
the Albert Ross sets I bought, and is based on what I think a paratrooper might
have looked like on D-Day + 7. This figure has made a change for me after my
last two Class A kitbashes, as I can get back to dirtying a uniform up again.
Plus I can do some experimenting with adding some fabric wear on the elbows,
knees, collar and the tunic edges.
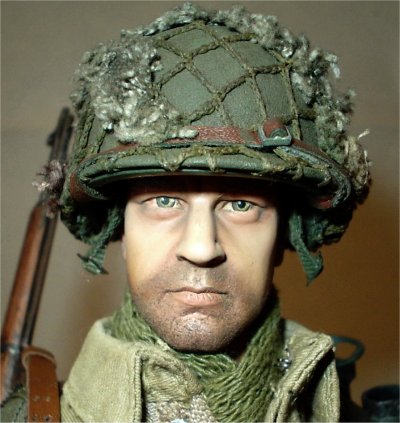
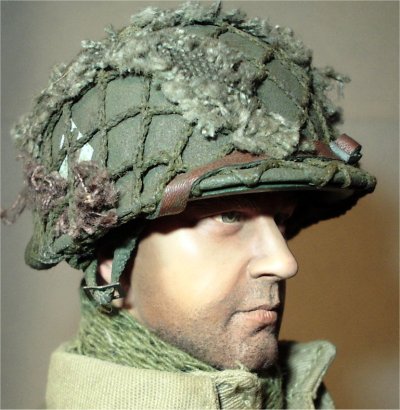
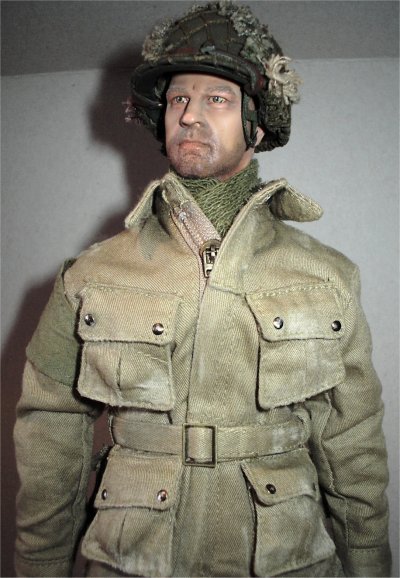
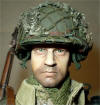
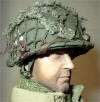
Headsculpt
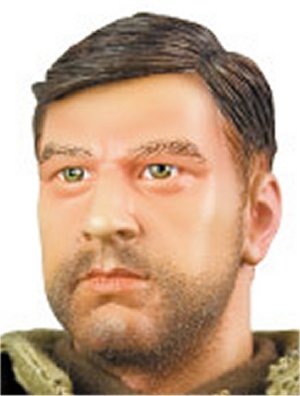
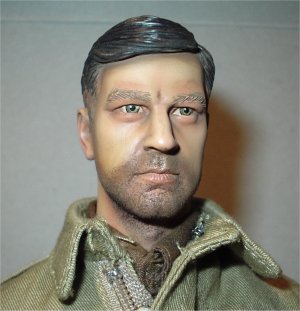
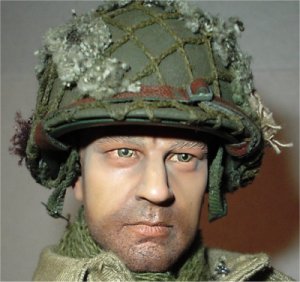
The headsculpt for this figure is again the
bearded Albert Ross one, as that fits in just right for my impression of a
soldier that has been in France for about 7 days. With the Ross head this time I
gave it a slight wash of a brown pastel, which I dripped onto the head and
spread around the face as I wanted to keep the beard colour the same. This was
allowed to dry and I wiped it off towards the forehead away from the beard. I
then tried the technique mentioned by Paul about using dry
pastels. Firstly I used a dark brown pastel which was scrubbed into the cheeks, upper and lower
nose area and around the eyes, I then used a large dry fan type of brush to take
off the top layer, by brushing lightly across the face leaving the darker pastel in the face recesses. I then did the
same again with a cream pastel to add the highlights to the top of the nose,
cheeks and the bags under the eyes.
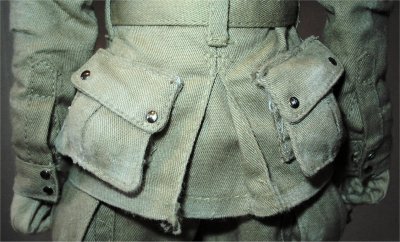
M42 Uniform
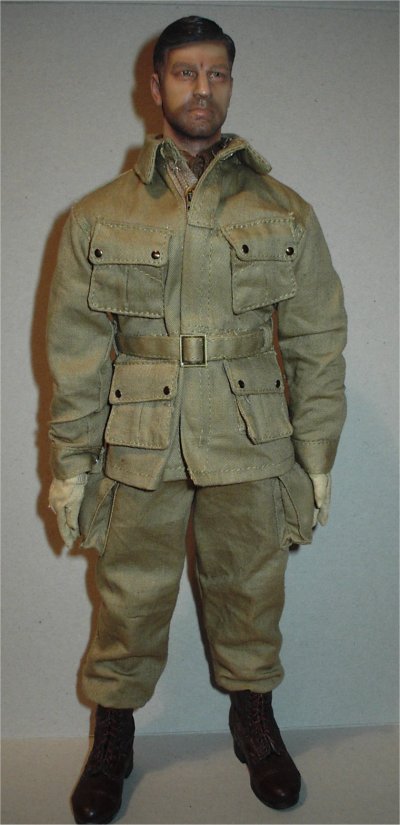
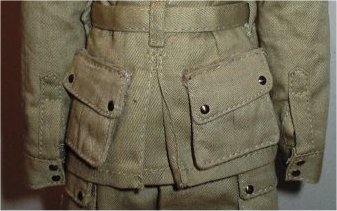
With this figure I wanted the uniform to be
slightly different from the other M42 that I used on my other figure, so after
much thought I decided to cut up a spare jacket for the pockets I added on the
rear of the coat. How I did this is on my
Worn Uniforms page.
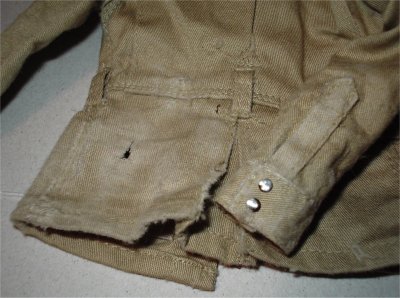
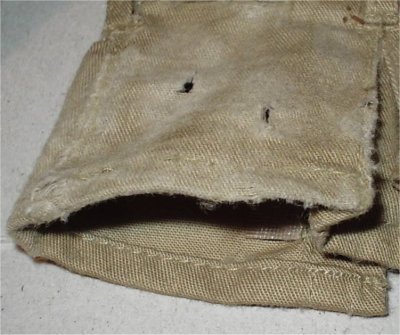
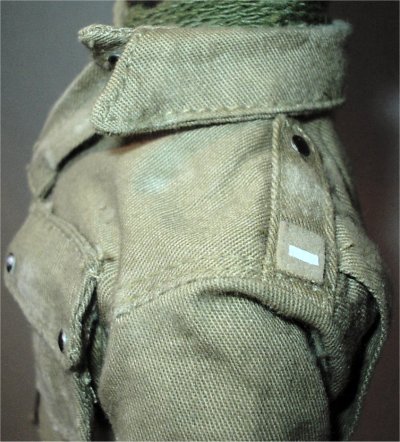
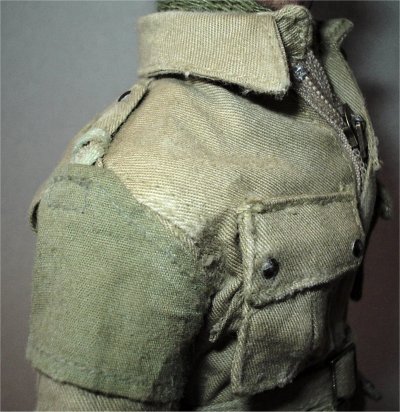
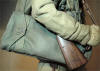
M42 Uniform Wear Example
Some experiments I have done with simulating wear
on the 1/6th scale uniforms is shown below, this was done with some fine
sandpaper to rough up the edges of the tunic. The holes were made by cutting a
small hole with my model knife, then I used the sandpaper over the top to make
the wear that caused the holes. Note:
Because the jacket is the one I cut the pockets from, I wanted to see what
result I would get if I continued to use the sandpaper on it past the slight
wear effect I wanted. So the pictures below show what happens when I get carried
away with the sandpaper.
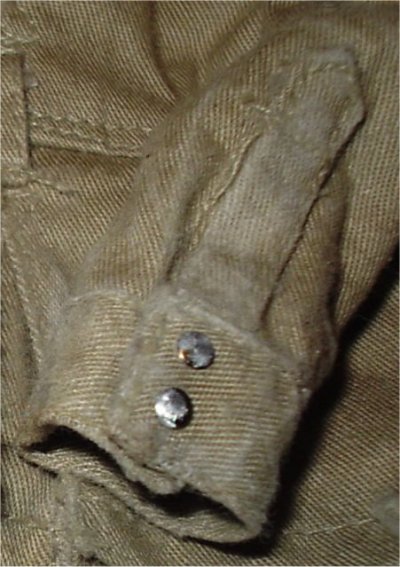
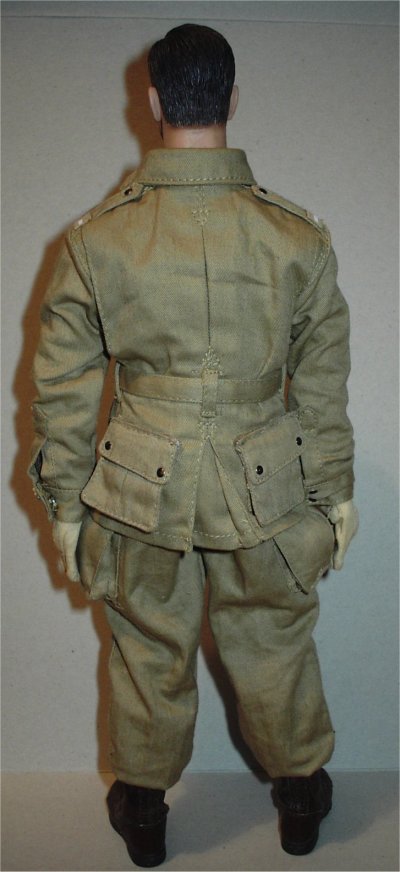
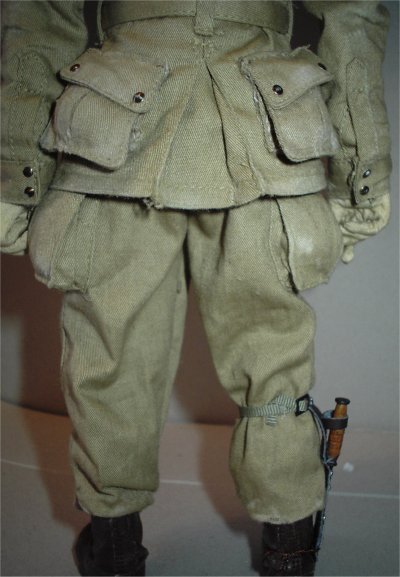
M42 Worn Uniform
After doing my experiments with the spare jacket
above, I now had an idea of what wear and damage I wanted on the uniform that I
have on my figure. In the pictures both above and below I have added some wear
to the knees, elbows, collar, epaulettes and the pockets.
Note: The flash from the camera has highlighted the sanded areas
more than they actually show on the figure, even though they are lighter than
the rest of the uniform it just seems that in the pictures it looks like I have
a mad half hour with my model drill...
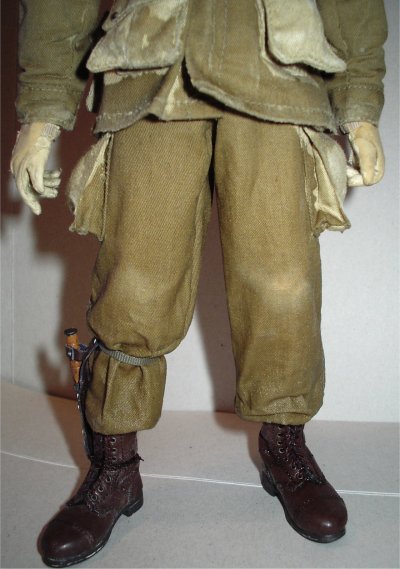 In
the picture on the right I have given the whole uniform a brush over with some
diluted PVA glue and water,
I always feel that this is the point with me that it stops becoming a boxed
figure and it is now is a 1/6th scale model. Plus this is one of the stages that
I seem to like the most with my figures, because I can set the clothing as I
want it with the folds and the jacket and pocket edges. Something I was never
able to do with 1:35th scale figures, although this can be a problem since I can
spend up to an hour or more just on the trousers alone in getting the creases
just right. In
the picture on the right I have given the whole uniform a brush over with some
diluted PVA glue and water,
I always feel that this is the point with me that it stops becoming a boxed
figure and it is now is a 1/6th scale model. Plus this is one of the stages that
I seem to like the most with my figures, because I can set the clothing as I
want it with the folds and the jacket and pocket edges. Something I was never
able to do with 1:35th scale figures, although this can be a problem since I can
spend up to an hour or more just on the trousers alone in getting the creases
just right.
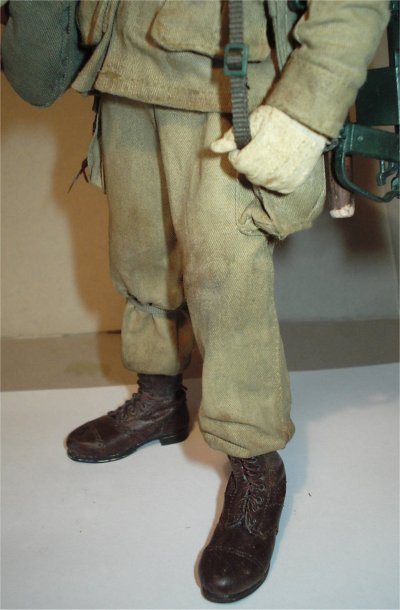
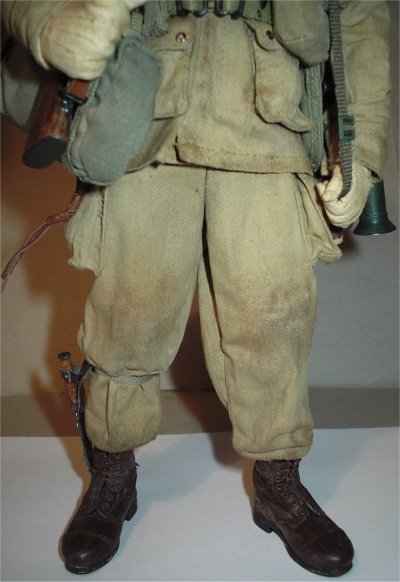
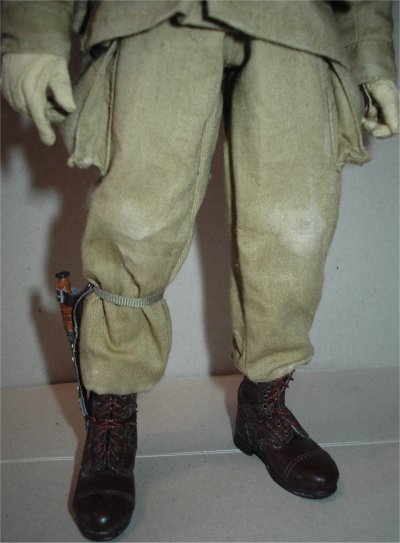
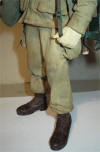
Especially with my paratrooper figures as I just
have to have the baggy trousers on each of them with the bloused legs over the
boots, as well as a sort of blousing above the leg knife strap as well. Since
this was a sort of trademark for the real soldiers, so I am trying my best at
replicating that.
The other benefit of the PVA mix is that I can add
highlights to the top of the folds, with either grout of the weathering powders,
which can also add to the look of the wear on the uniform, plus as it is a
rougher surface so the materials take to it better as the folds stay in place
unlike the un-treated uniform.
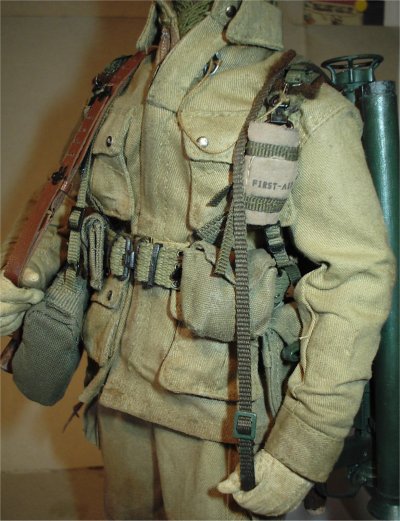
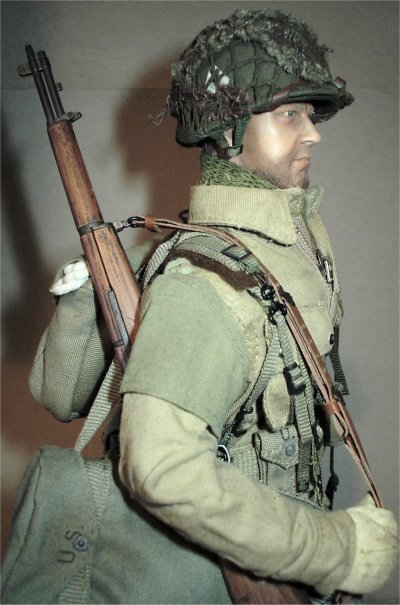
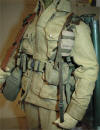
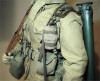
.30 cal ammo pouches and
suspenders
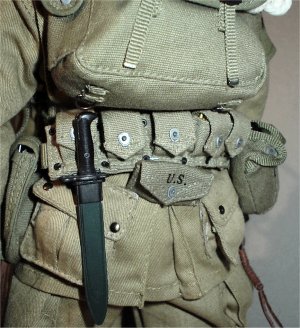

To make the .30 cal pouches as they are being
worn in the picture above, I took apart an Albert Ross belt also cutting off the
metal buckles so that I only had the cloth parts left. I then put one of the .30
cal pouches onto a normal belt so it sits at the back, the purpose of this was
so I had the ammunition pouches on the belt and I could free up the holes on the
belt for the other kit. I then cut up some felt for the shoulder pads and
threaded the suspenders through them to check that the pads were the right size.
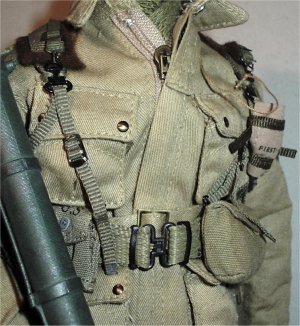
With the normal belt and the suspenders I wanted
them to be different shades of green, so I made up some diluted acrylic green
paint and water in my saucer and I placed the items in it to soak. After about
two minutes I took them out and placed them onto a cloth, pressed down on them
to remove the excess water and hung them on a radiator to dry.

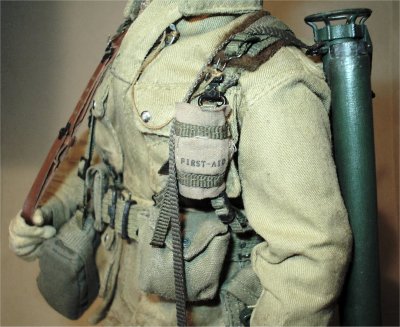
I also did this for the riggers pouch on the front
of the belt. Another thing I have done to the straps on this figure was to bend
the middle buckles, as shown in this tutorial by Ist Looey -
Suspender Tutorial Also I am making up some buckles ends for the straps,
they can just be seen in the picture above right.
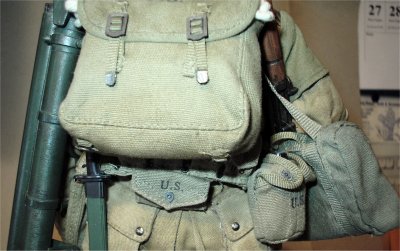
Another problem I had with this figure was trying
to get all of the belt kit on, because once the pouches were on the back of the
belt those holes could not be used anymore. This is when I found out the metal
hangers for the first aid pouch and the bayonet, will not fit into the holes in
the .30 cal pouch as the eyelet spacing is too wide. This is when I came up with
the idea of using a staple instead, so I took off the supplied metal hanger and
threaded the staple through both items, then pushed the ends through the eyelets
and with my pliers I then bent the ends flat against the pouch. In the picture above right I have shown the staple
and the standard hanger lined up below the .30 cal pouch, to show the
differences with the hangers and the eyelet holes.
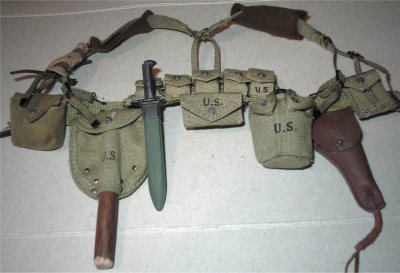

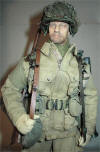
These pictures are of the finished webbing kit for
the figure, I have shortened and sanded to shape the shovel handle, repainted
the bayonet scabbard, added end tabs to the suspenders straps, painted Dullcote
onto the holster to dull it down, added a lift dot to the riggers pouch and also
repainted all of the clips, buckles and lift dots with some enamel Gunmetal
paint.
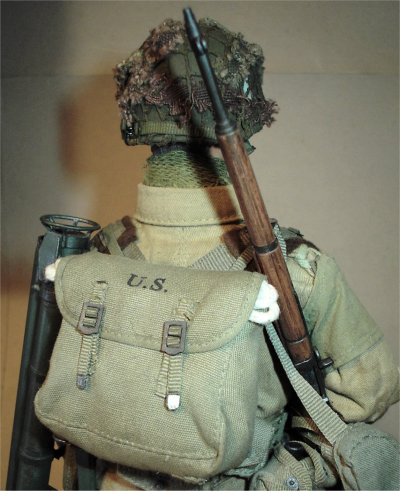
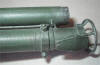
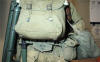
Musette and Bazooka Bags
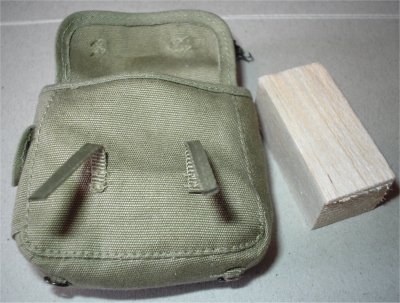
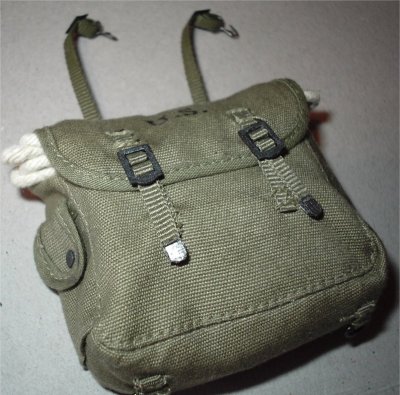
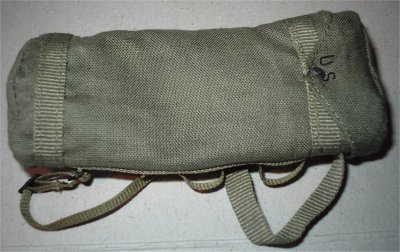
The pictures above are of the bag's and the
changes I have done to them, in the first picture above I have already wrapped
some lead weight in tissue (Many thanks Paul for the idea) and placed it
at the bottom of the musette bag to add weight, next I cut a piece of balsa wood
to place on top to make the bag look like it is full. The middle picture shows
the bag done up and some end tabs added to the straps, I also replaced the small
pocket lift dot with a rivet made from some stretched sprue. The bazooka bag had
again some lead weight wrapped in tissue, placed inside for weight and I
replaced the lift dot with a DiD one. Finally I again repainted all of the
clips, buckles and lift dots with some enamel Gunmetal paint.
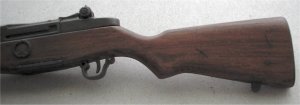
.30 cal Garand Rifle
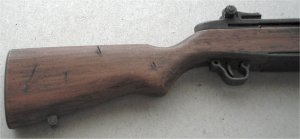
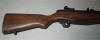
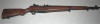
Because the DiD Garand rifle I wanted to use for
this figure looked a bit too shiny to me, I decided to use the tutorial by
Sylvain Ranchu about how he has had added a
Wood Grain effect to his rifles. Note:
The difference I have found with the DiD rifle is that I did not have to sand it
down before applying the paint. Because it comes with a very nice wood grain
effect straight from the box, and all it needs is a wash over of some slightly
watered down artists acrylic paint. The reason why I am using the artists paint
is because it is thicker than the normal acrylic paint, and when sanded off it
does leave a nice grain effect.
To start I used my razor saw to add some nicks to
the butt, which were lightly sanded to remove any high edges, I then gave the
wooden parts of the rifle a wash over of slightly damp Daler Rowney No 247 Raw
Umber paint, this was then spread along the rifle with just a wet fairly large
paintbrush to add the streaks. The rifle was then left to dry and then I used
the sandpaper to lightly rub along the body of the rifle to get the lighter
colour to show through. I repeated this again to add some more darker colour, to
add some depth to the nicks I used some 036 Mars Black artists acrylic paint
which was almost neat onto the rifle butt. While still wet I wiped it off with a
tissue making sure that I only wiped horizontally to add to the grain effect.
Once this was dry I then scrubbed lightly along the rifle with just some water
and a wet paintbrush, this is to blend everything in.
The final step I did with this rifle was to use
some Tamiya weathering
powders on the metal parts, I firstly gave them a brush over of Gunmetal and
then a light brush over of Silver along the edges. Then with the sponge pad I
rubbed some Silver onto the end sight, muzzle, sling mounts, butt edges,
trigger, loading handle and the top slot for the bullets. The purpose of this is
to add some highlights to the high wear areas.
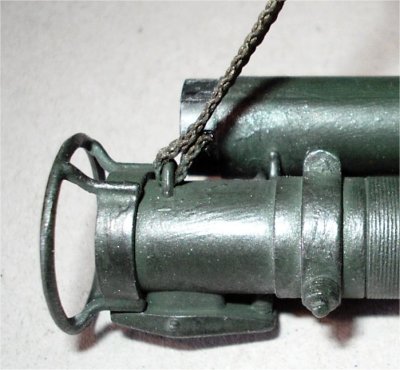
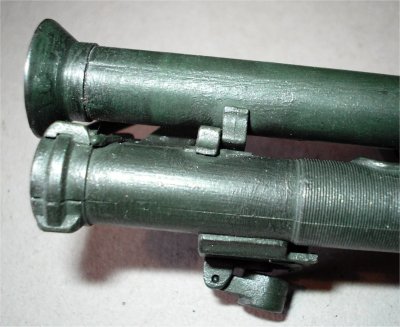
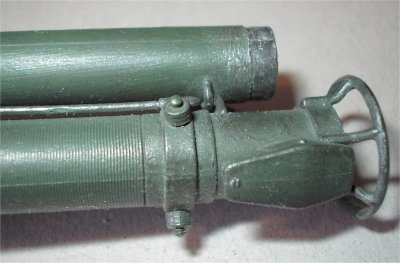
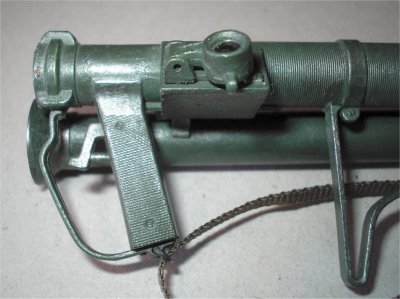
Bazooka
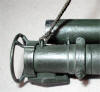
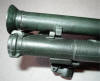
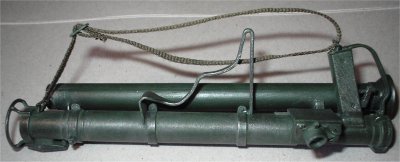
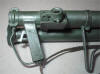
With the bazooka I first sanded off the mould
lines as had to re-paint it with some enamel paint because it just looked too
plain to me as it was, also the elastic strap just had to go, so I replaced it
with some spare canvas webbing material I have. The problem was now that it
looked too flat, so I just experimented with weathering powders to see what
effects I could get Basically I used the Tamiya powders again with the
Oily Steel and the brush which I smeared it all over the bazooka, smudging it in
places with my finger. I then used the Gunmetal powder on the edges and recesses
to add depth, then over that I put a light brushing of the Silver powder onto
the raised parts.

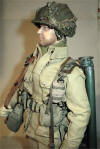

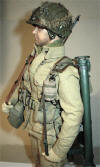
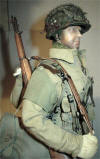
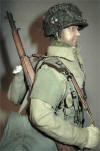

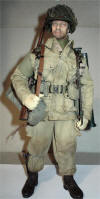
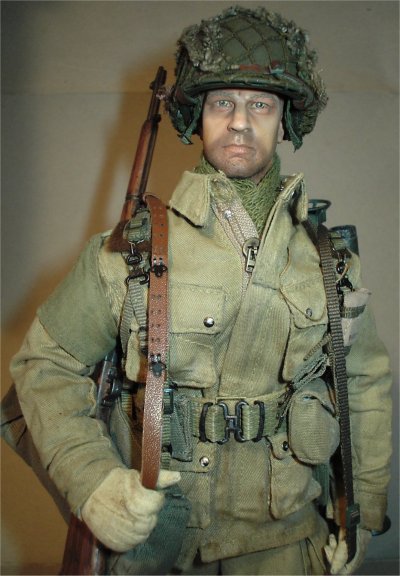
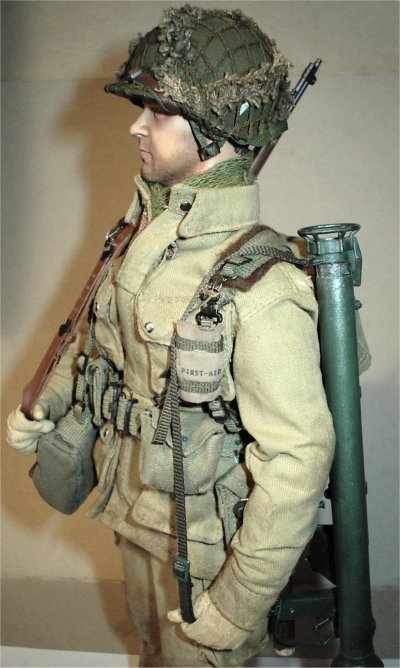
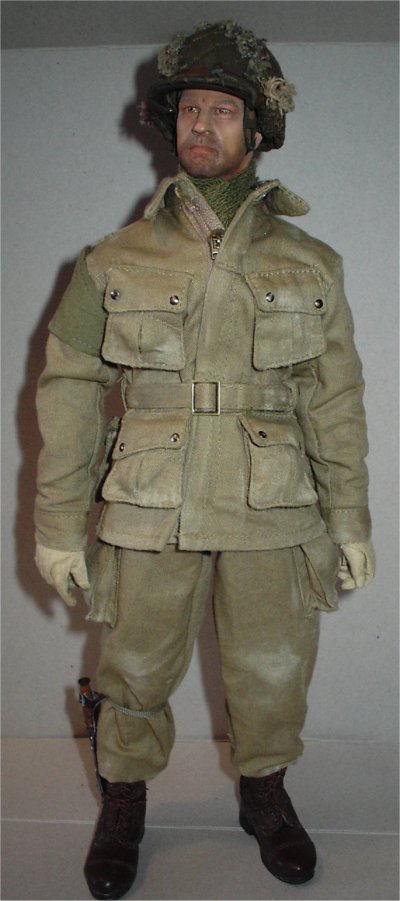
This is the finished figure after I have used some
grout and weathering powders on the uniform to age it, plus I also added some
dirt to the knees, elbows, cuffs and pockets. This figure has surprised me with
how well it went together, as everything just seemed to slot into place. I am
also very happy with the way the scratches turned out on the rifle butt, as well
as the grain effect as well.
The only thing I am not happy with is the right
hand boot as it faces me, as there is a crease in the side of it that I just
can't seem to get rid of. I think if I use the DiD boots again, I may have to
wrap the ankle joint in some tape to bulk it out to stop the creases occurring.
Links I found for pictures of 'in
the field' US paratrooper re-enactors
http://enfernormand.free.fr/tailly.htm
http://enfernormand.free.fr/normandie_2007.htm
http://enfernormand.free.fr/enfer_normand_p_le_jeune.htm
http://enfernormand.free.fr/st_martin.htm
http://enfernormand.free.fr/musee_airborne.htm
http://enfernormand.free.fr/deploiement2007.htm
http://enfernormand.free.fr/bracquetuit.htm
http://enfernormand.free.fr/bastogne2007.htm
http://enfernormand.free.fr/duclair.htm
http://enfernormand.free.fr/reportage_normandie_2007.htm
http://enfernormand.free.fr/souchez_2007.htm
http://pagesperso-orange.fr/enfer.normand/carentan_2006.htm
http://pagesperso-orange.fr/enfer.normand/sarthe_2006.htm
I would like to thank Paul
(.308) for all
of his help, Ed (1st Looey)
for the suspenders tip and
Sylvain Ranchu for the tip about the
rifle.
Plus all of the other modellers whose ideas I have
'borrowed'.
Top of Page |