|
Welcome
To My US SCR-300 Radio Repainting Page.
This is my page on how I did a simple repaint of
the radio that came with the bbi Sparky Parsons figure, this is a very nice
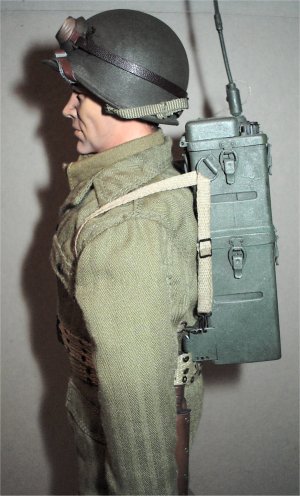
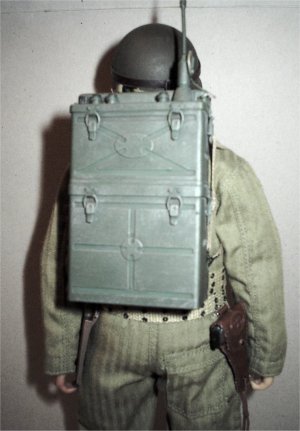
piece of kit and I have found out that it is very sought after now as well. The pictures below show the radio as I have used
on my Radio Operator figure, but when I made this kitbash I made the figure up
without the radio being repainted or touched in any way apart from a wipe over
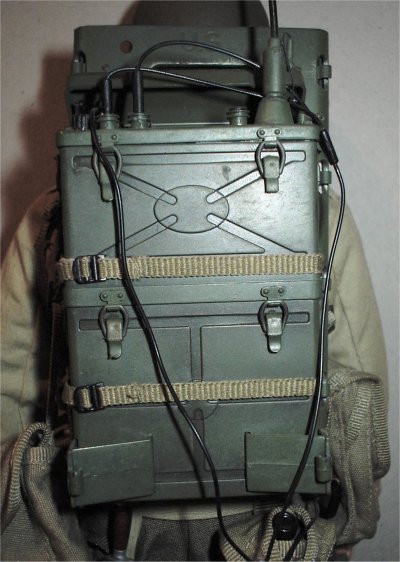
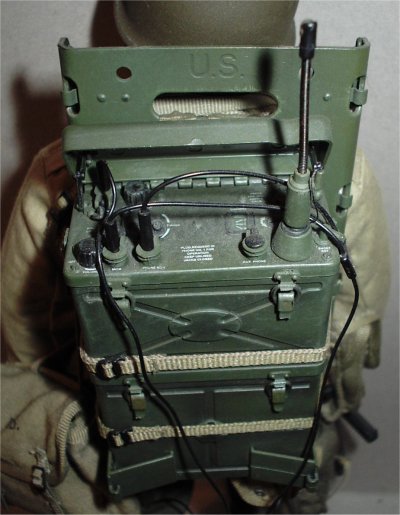
with grout. A full size photo of the actual radio is
here,
here and
here.
Radio Information - US SCR-300 Radio Technical
Manual Pages -
http://www.scr300.org/index-tifs.html From this site the pages I found
useful are Sections 15 to 18, 55 & 61 to 65.
Loading a Packboard -
http://www.hardscrabblefarm.com/ww2/packboard.htm
So with my other radio that I have I wanted to see
what it would look like after a repaint and a drybrush, because at the moment to
me it looks to much like a glossy plastic. Plus it reminds me of a 1/35th scale
tank model, all nicely made up but unpainted.
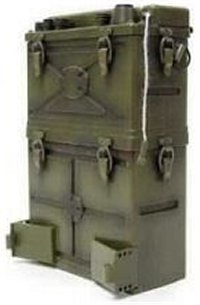
This is the basic radio after a base coat of
Revell enamel paint number 39 matt Dark Green making sure that the neat paint
got into all the recesses, because after a drybrush of the lighter paint
hopefully these will appear darker.
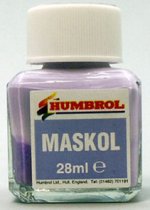
Note: One problem I have found with this
radio unit, is the excellent transfers that bbi have used for the wording on the
top. So to make sure that I did not accidentally over paint these, I covered
them with some Humbrol Maskol. This is a rubber solution that modellers use to
paint over the top of items to keep the original colour. I have found this very
handy over the years with my models, and in this case I painted this over the
top of the words also trying to keep the Maskol to a minimum, because of the
difference in colours of the new paint and the original plastic.
Radio Wearing Confusion
 The main reason for this alteration to the wearing
of the radio, is the Osprey book that came with the bbi Sparky Parsons figure
which was very kindly sent to me by
Toy Soldier Brigade.
Which although it is very a very good book it has some conflicting
images. Because the pictures in it are of the radio being used without the
packboard, and this has me confused because with the figure you get the radio
unit and the packboard together. Which to me makes sense in that the radio is
worn separately, then the operator can remove the radio without removing his
belt kit. The main reason for this alteration to the wearing
of the radio, is the Osprey book that came with the bbi Sparky Parsons figure
which was very kindly sent to me by
Toy Soldier Brigade.
Which although it is very a very good book it has some conflicting
images. Because the pictures in it are of the radio being used without the
packboard, and this has me confused because with the figure you get the radio
unit and the packboard together. Which to me makes sense in that the radio is
worn separately, then the operator can remove the radio without removing his
belt kit.
But if I was to make a model of a figure as per
the Osprey book images, then the belt kit of bayonet, first aid pouch etc would
be worn with the radio fitted to it as well. So if the operator wanted to remove
the radio unit, he would have to remove his complete belt kit as well. Unless as
I have done in the pictures above, made the radio and belt separate so the
figure now wears two belts.
Fitting The Radio Onto The Belt
So with this radio set I decided I wanted it
fitted onto a model as in the book pictures, in that it is hooked around the
soldier's belt to keep it secure and in place, with the shoulder straps being
used as normal.
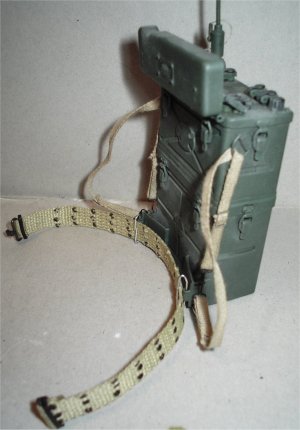
So to make this arrangement I have had to make two
metal loops that allow the belt through, and hook onto the bottom of the radio
unit. These were made from a paper clip which was straightened out, cut into two
equal lengths and then bent to shape with any extra cut off with snips. They
will have to be painted in the green colour to match the radio unit, plus the
belt has to have some kind of Olive colour added to it, as I believe that at the
moment it is the wrong colour.
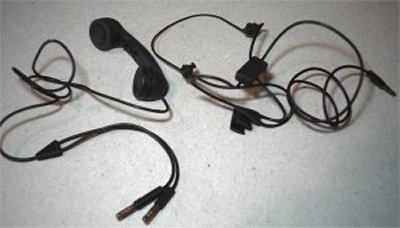 The other parts of this radio set are the headset,
wiring and the handset, I gave the wiring a coat of matt black acrylic paint to lose the
gloss finish to the cabling. The handset and headset were drybrushed with a lighter
mixture of the matt black and white colour. This was brushed lightly onto the
handset, cable connections and plugs to highlight them slightly and bring out
the detail and edges. The other parts of this radio set are the headset,
wiring and the handset, I gave the wiring a coat of matt black acrylic paint to lose the
gloss finish to the cabling. The handset and headset were drybrushed with a lighter
mixture of the matt black and white colour. This was brushed lightly onto the
handset, cable connections and plugs to highlight them slightly and bring out
the detail and edges.
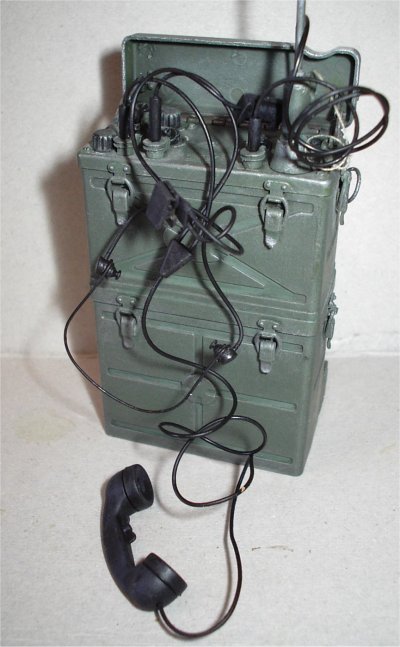
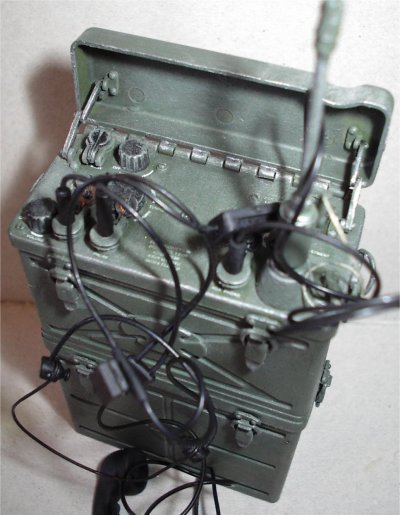
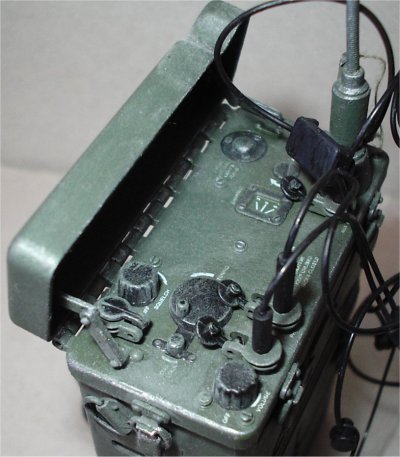
Below are pictures of the repainted cables fitted
to the radio unit, although they do look slightly shiny still this was just a
reflection from the flash of the camera. Also in these pictures you can see how
I have used some Gunmetal and silver paint on the edges of the radio to bring
out the edges to indicate wear.
This was put on with a fine pointed brush which
was run along the edges of the indentations to highlight them, the secret of
this is to add the minimum of paint to add highlights. I also smeared the paint
on the sides of the radio as can be seen in the picture below right with the top
part of the unit. In doing this with a very small bit of paint and the smearing
with a finger, you pickup the raised parts better. This is shown where the flash
from the camera has picked up on the lid edges and the fastening clips on the
sides.
| 