|

Welcome
To My German Ski Alterations Page Two.
This page is another one that I have wanted to make ever
since I started making Gebirgsjager figures, and is a continuation of the ski
page I
made about how I altered the Dragon German ski's, and with the help of
Patrick (Heeresbergführer) I
have had a go at trying to see if I could follow his excellent tutorial about
improving the Dragon ski poles as well.
 A very good tutorial to help me with these
changes to the
ski poles was made by
Patrick is on the Sixth Army Group forum, that has helped me so
much with how to replace the basket at the bottom of the pole. A very good tutorial to help me with these
changes to the
ski poles was made by
Patrick is on the Sixth Army Group forum, that has helped me so
much with how to replace the basket at the bottom of the pole.
Note: I found
out afterwards that for the wooden poles it would be better made from Basswood,
since it is stronger than balsa wood.
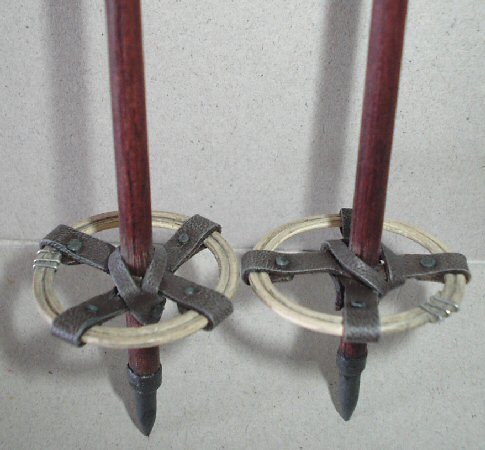
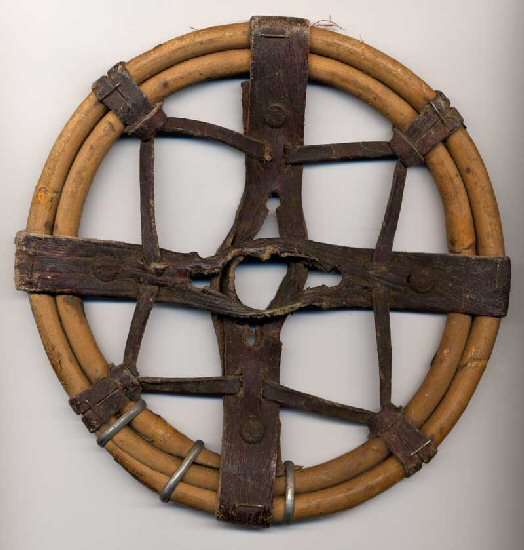
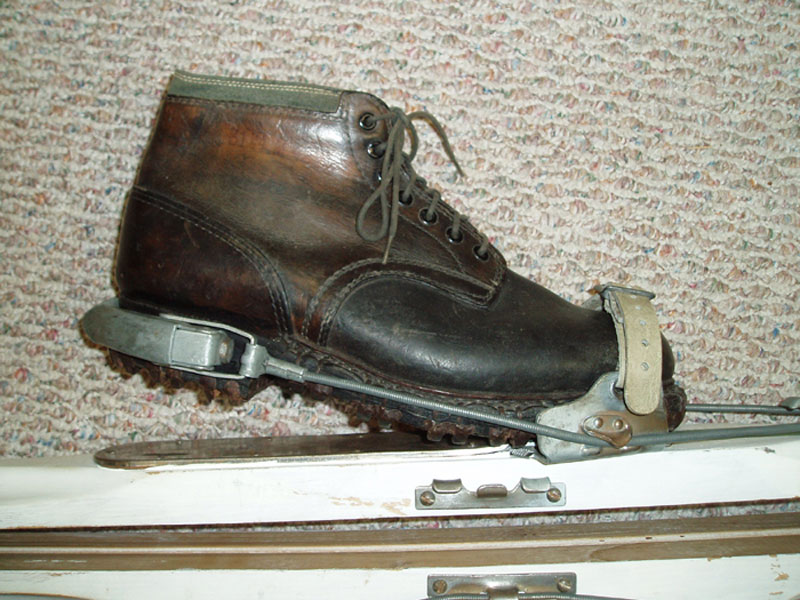
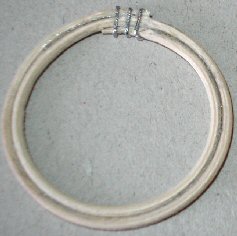
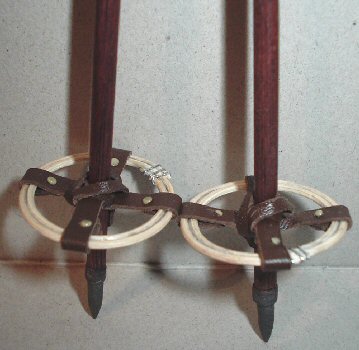
Pole alterations
For the poles I want to use with my figure I am
basing them on the reference pictures above, with the method by
Heeresbergführer
about how to improve the baskets at the base of the poles. The hardest part I
found with making the changes, was finding a supplier of the cane for the basket
itself. I did find a couple of suppliers in the UK, but they would only supply
the 1.5mm round cane in bulk, but I did find a company in Dorset, UK that would
supply the cane in 8 foot lengths instead of by the kilo in weight -
Centre Cane/Reed
Glue for the baskets
30
- Humbrol Liquid Poly Glue - This is the main glue I use for any plastic repairs
on my figures and weapons, although I do also use Superglue at times. But I
prefer to use this type on any plastic parts as it 'melts' the parts together
making a stronger bond.
31 - 'Poly Glue Mix' - This pot is a mix of the poly glue and scraps of plastic such as sprue
added to it, the purpose of this is that the glue melts down the plastic over
time to make a liquid plastic. I found out about this many years ago and it
has helped me enormously with my 1/35th and 1/48th scale models, because when it
is brushed onto a joint seam and smoothed down with the normal poly glue. Once
it hardens it becomes part of the model
itself, and I have found that with 1/6th scale weapons if I have broken them in
some way this glue can repair them far better than Superglue ever could.
32 - This
is the new packaging for the Humbrol glue, whereas the other smaller bottles are one's
that I have had around for years.
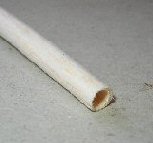
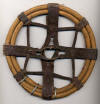
Making the baskets
1.  2.
2.  3. 3. 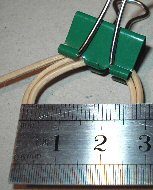 4. 4. 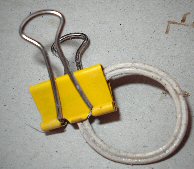 5. 5.
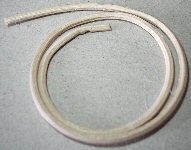
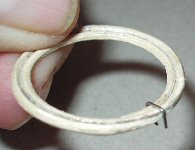
The pictures above show the steps I have used to
make the cane rings for the basket, the first thing I did was to soak the small
strips of cane I cut off in hot water so that it can be bent without snapping.
Then in picture 1. I curled a strip up into
a ring similar to the way Patrick did it, and I then held the ends together and
measured across the ring to make sure it was 30mm in size. I then used some
small bulldog clips to hold the ends together and left it all to dry. Once it
had been left aside for about an hour in picture 2.
I have removed the clip and the cane has kept part of the ring shape.
I have tried to use the method of glueing the cane
together in a ring with wood glue, but when I tried it I could not get it to
hold the ring together. So I have in picture 3.
I have used my 'Poly Mix' glue instead, which I painted on with the brush from
the bottle onto the edge of the cane inside the ring. I then wound the ring back
tight again making sure that it is 30mm across, and I then put the bulldog clips
back in place to hold the ring together. Picture 4.
shows the ring after it has been left to dry overnight to make sure the glue has
set. When I checked the ring it has become very stiff and the cane has glued
together well. Note: To make sure that glue
has set I then used some of the regular poly liquid glue to fill in between the
cane ring, which has again helped to set the poly glue mix. Picture 5. is where I have
sanded each of the ends down to fit onto the ring, and I have used some thin fuse
wire to make the three metal clips.
6.
 7. 7. 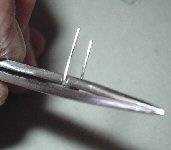 8. 8.
 9. 9. 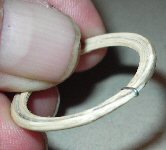
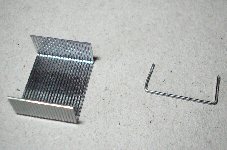
To make the clips for the cane rings I started in
picture 6. with a staple, which I then
straightened out with my pliers. In picture 7.
I have placed the staple in my tweezers and I then bent each end around the
sides of the tweezers, while I had the staple held in the tweezers I used my
side cutter pliers to cut each of the legs down to a smaller size. to make
thinner staple that fits around the sides of the cane ring as shown in picture
8.
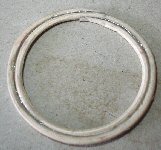
In
picture 9.
I have carefully crimped both of the ends around
the cane ring to complete it and make it look like it is holding the cane ends
in place rather than the glue that I used. I then repeated this for the other
two metal rings, so that it now looks like the reference picture.
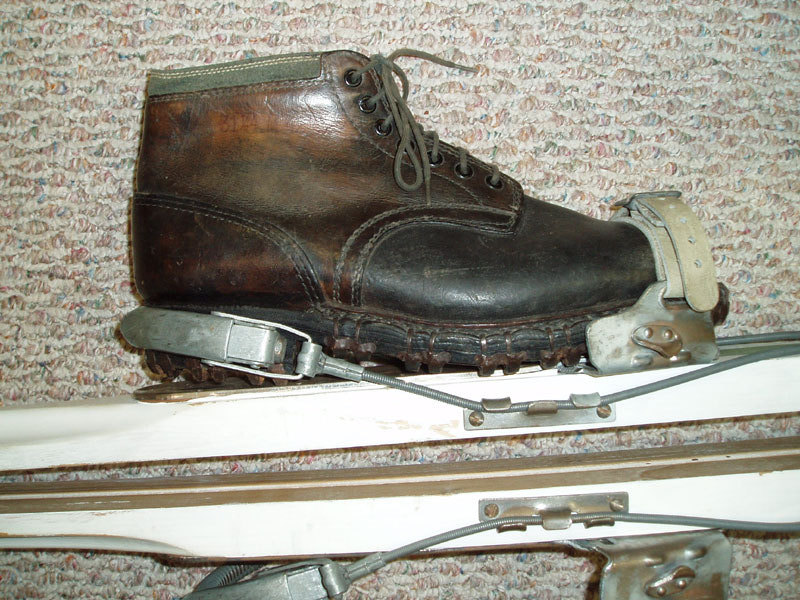
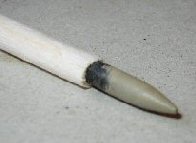
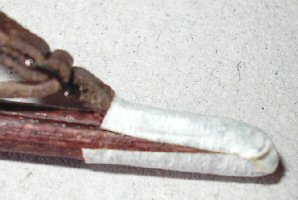
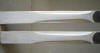
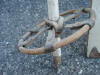
Making the pole spikes
I was going to use the Dragon plastic poles with
the baskets removed, but after looking at my reference pictures again I saw that
the pole is straight so I have made some new poles out of balsa wood. With the base I have cut the spikes
off of the bottom of the Dragon poles, and I have made a hole in the bottom of
the balsa wood in picture 10. so the spike
can be fitted into it as in picture 11.
10.  11.
11.  12. 12.
 13.
13. 
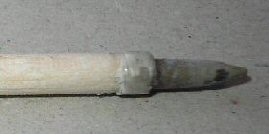
I then cut a thin strip of masking tape and put it around
the base of the wood, I then 'painted' over the top of with the 'Poly Mix' glue
in picture 12. so that when sanded it becomes smooth like
metal. Picture 13. shows the completed spike
after I have used some Brown wood dye and Brown shoe polish on the balsa wood,
the spike has been painted with some enamel Gunmetal paint.
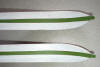
Attaching the pole baskets
14.  15.
15.  16. 16.
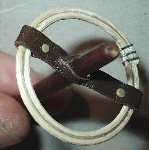
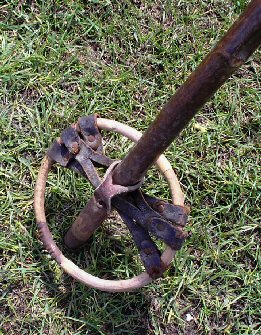
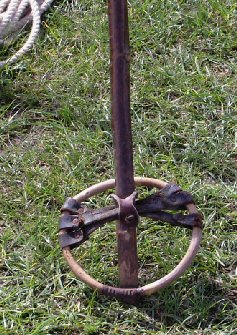
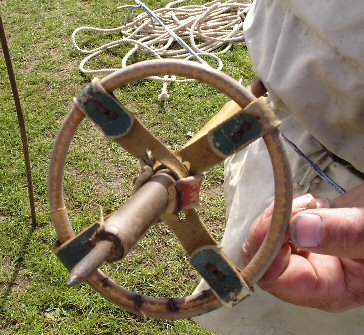
 Looking
at the reference pictures at the top of the page, I have used on my baskets here
two thin strips of leather material to make the cross straps. In picture
14. it shows one of the leather straps laid
over the cane ring, making sure that it is long enough to wrap around the ring
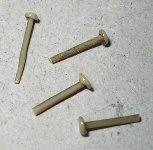
edges. Picture 15. are some of the plastic
rivets that I made from
stretched sprue on my Lift Dots page. Looking
at the reference pictures at the top of the page, I have used on my baskets here
two thin strips of leather material to make the cross straps. In picture
14. it shows one of the leather straps laid
over the cane ring, making sure that it is long enough to wrap around the ring
edges. Picture 15. are some of the plastic
rivets that I made from
stretched sprue on my Lift Dots page.
Picture 16.
shows the one strap fitted onto the cane ring, the rivets were pushed through
the holes I made, and by squeezing the material together I cut the length of the
rivet down slightly and then used some heat to flatten the end. I also cut a
slit in the middle of the leather strap so that I can push the ski pole through
it. I then did the same for the other strap to form the 'X' shape.
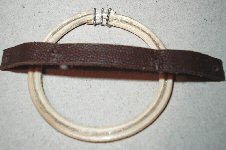
On the right are the finished ski baskets which
have been slid down the poles, and to keep them in place I have used another
piece of leather strap with a slit in the centre. This was then slid down onto
the top of the baskets and each end was wrapped over the 'X' straps.
I then made a hole in both ends of the top strap
and through the ski pole, I then made another longer rivet to go through the
straps and pole. I again placed some heat onto the other end to flatten it, and
now this has trapped the basket in the position I wanted.
To finish the baskets off I am going to sand the
rivets ends slightly to get them flat, they will then be painted with enamel
Gunmetal paint. I will also give the leather straps a covering of some Model
Color 540 Matt Medium paint to lose the shine.
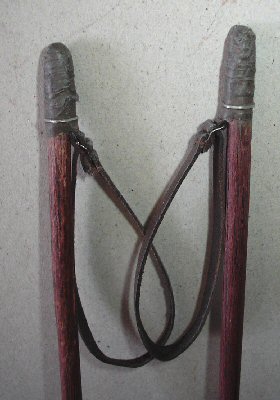
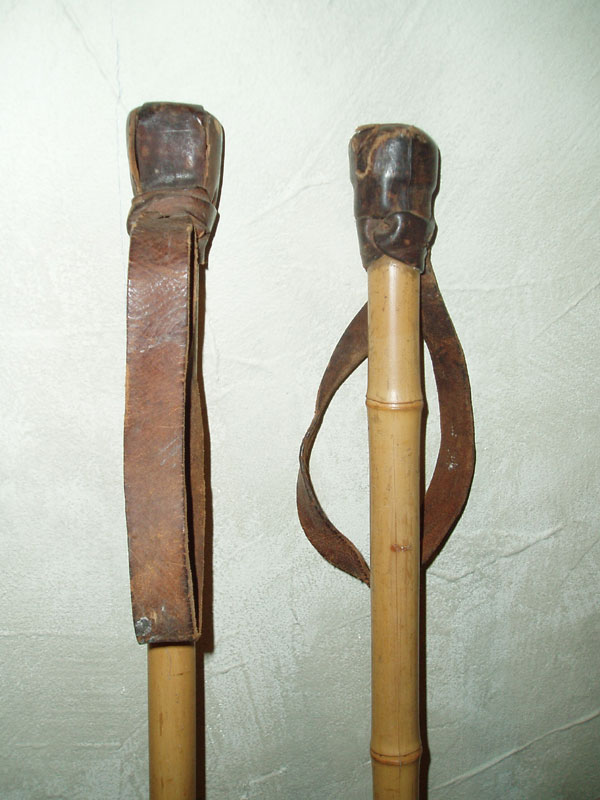
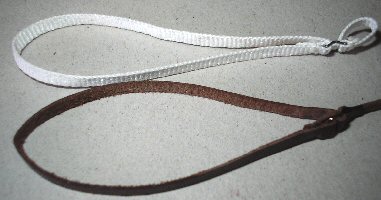
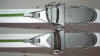
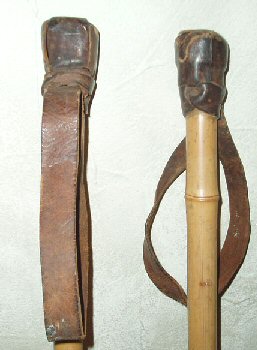 Making the pole hand straps Making the pole hand straps
The last parts I have to make to finish off the
ski poles are the hand straps, and I have found these to be the hardest part to
make. And based on the reference picture on the right, in picture
17. I not only had to replace the straps
from the Dragon ski poles, I had to make them again out of some thin leather
material.
17.
Also I had to try to work out how I was to fix the
straps onto the poles, so once I had made the new straps from leather using the
Dragon buckle. I decided in pictures 18. &
19. to use some masking tape to wrap the end
of the strap to the pole, and then with the 'Poly Mix' glue in picture
20. I spread it over the
top of the tape to seal it all in place.
18.
 19. 19. 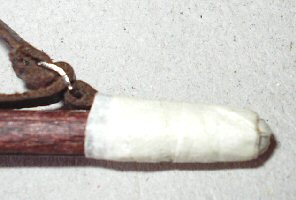 20.
20. 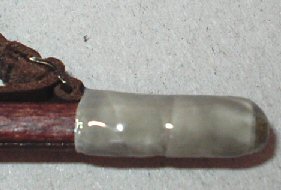
 As I want to try to replicate how the straps are
held in place in my reference picture above, and as it dried I added another
coat of the 'Mix' to make sure it was sealed tight. And once the poles had been
left to dry overnight I gently sanded the cover slightly to smooth it, and I
them repainted it with a Brown acrylic colour along with the strap as well so it
all matched. Once all of this was dry I then painted a strip of masking tape
with Gunmetal enamel paint, when dry I cut a thin strip out and wrapped it
around the bottom of the pole covers. As I want to try to replicate how the straps are
held in place in my reference picture above, and as it dried I added another
coat of the 'Mix' to make sure it was sealed tight. And once the poles had been
left to dry overnight I gently sanded the cover slightly to smooth it, and I
them repainted it with a Brown acrylic colour along with the strap as well so it
all matched. Once all of this was dry I then painted a strip of masking tape
with Gunmetal enamel paint, when dry I cut a thin strip out and wrapped it
around the bottom of the pole covers.
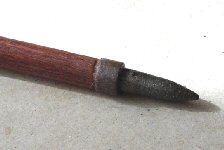
The picture on the right shows the finished pole
end and hand strap, once the glue had dried I added the creases to the pole
cover by hand. I also used a staple wrapped around the pole and cut to length.
The strap and cover were then given a wash of diluted Black acrylic paint, and
once dry I gave it all a drybrush with some Tamiya Light Sand weathering
powders. I also did the same to the basket at the bottom of the ski pole.
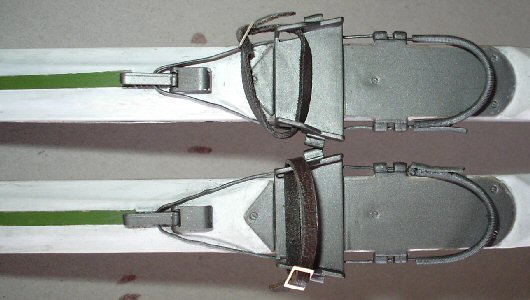
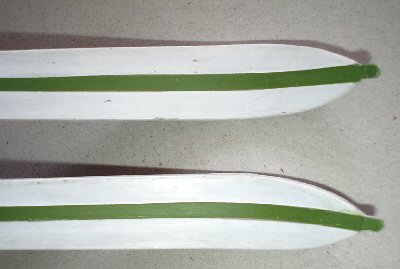
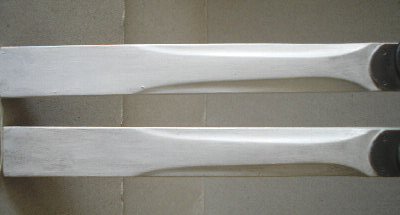
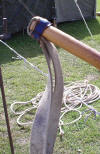
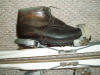
Various pictures of the skis
and poles


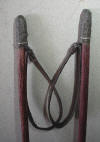
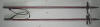
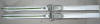
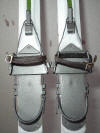
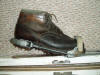
Reference pictures of the skis
and poles


Many thanks to the
85th Gebirgsjager Living History Group
for all of their help.
And a special thank you to
Heeresbergführer for all of the superb pictures and the
detailed help with my Gebirgsjager figures.
Many thanks to Ludger Zikking
for kindly sharing his information about the ski's
|