This page I have made up after reading an excellent article by Sylvain Branchu,
on how he repainted the wooden stocks on his 1/6th scale rifles. The first
section below is about how I repainted a GPMG machine gun, the second section below
that is the repaint of the M1A1 folding carbine rifle. The third section is a
repaint of the DiD PPSH 41 weapon.
GPMG Machine Gun Repaint M1A1 Carbine Repaint
Russian PPSH 41 Repaint
GPMG Machine Gun Repaint
I finally got up the courage to try a weapon repaint, but not being the brave
sort and by only using the paint I had to hand, which was Acrylic and Enamel.
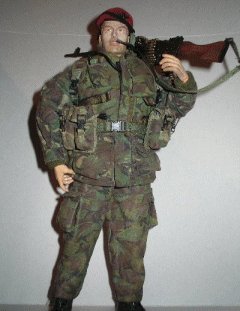
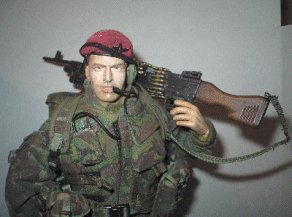
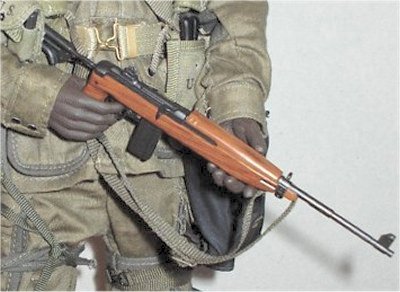
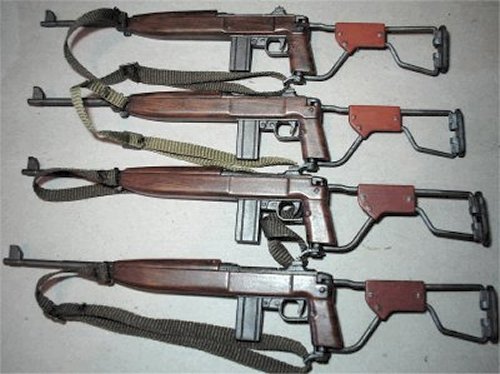
The images above are of the figure I have made up for Tez
('The Bhoy'), and after I had finished the figure the only thing left unpainted
was the stock on the GPMG. This had been bugging me for some days about how I
would repaint it, and then I thought about using some acrylic paint. The reason
for using this paint, is that if I totally foobarred it, at least I would be
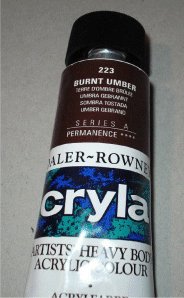
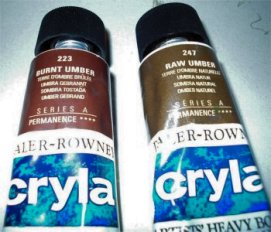
able to recover the original paint job from DML. The paint I used was
Daler-Rowney Artists Acrylic paint numbered 223 Burnt Umber, shown above right.
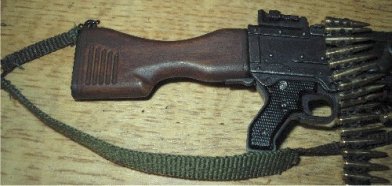
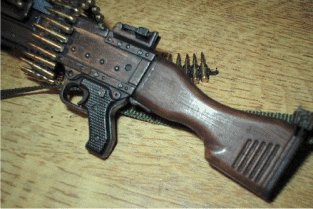
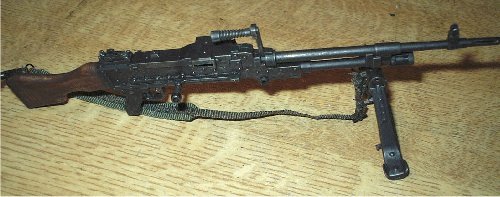
To be perfectly honest about the repaint, this was a lot of
trial and error to get the stock as it is shown above.
The only way to describe how I did it is as follows. I got
my saucer of water, and put a small pea sized bit of paint on the side near to
the water. This I find makes it easier to mix, I then put the paintbrush into
the water, and spread some of the paint until it was runny, and brushed it onto the
wooden part of the gun. This I allowed to dry slightly by blowing onto it, and
then wiped the brush dry, and tried to add the 'grain' into the paint. This is
where a lot of the trial and error comes into it, as by using a combination of
runny paint, letting it dry, and then using the neat paint, I ended up with the
stock as it is above.
I also used a fine soft cotton cloth when the paint was
almost dry, to rub along the 'grain' to remove some of it to add streaks.
Note: You must go along
the stock from trigger to the butt end in a straight line to add the streaks. I
let that dry, and then rubbed again, to remove some more of the paint, this
allows the original base colour to come through, and to finally colour it
I used some more of the watered down paint to add some more depth to the wood. As I
have said above, this was a matter of trial and error to get this stock painted,
and I am very happy with the way it has turned out. Especially, as I only had
the acrylic paint to hand, and this was a major experiment for me.
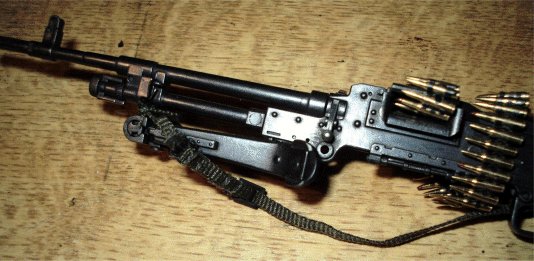
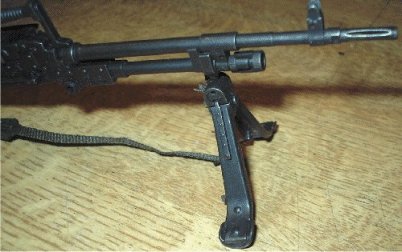
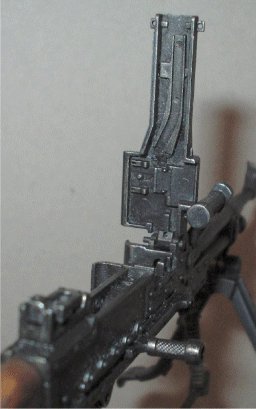
The picture above shows the metal parts of the gun
repainted with Humbrol Metalcote Gunmetal.
This is a paint that I have been using for years, and at
this scale I have found it a god send for adding detail to weapons, and as it
can be polished with a soft cotton cloth. I find I can add a shine where I want
it on my model weapons.
Comment from SteveM regarding the shine
and colour of the metal parts.
I have been told by SteveM on the OSS forum, that I have
made a mistake with repainting the GPMG gun as above. The fact is that the
weapon is not shiny as I thought it should be, but it is as he says -
"Real ones are a parkerised black finish and only show
metal at wear points".
So as a result, I have given the gun a wash of
black acrylic paint to dull it down again as shown above, and used a tissue to
rub off the paint on the parts that would see wear. And I must admit it has
improved the whole weapon.
M1A1 Carbine Repaint
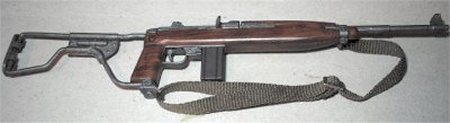
This section is about how I have repainted the M1A1 carbine rifle, I believe
that this came supplied with the DML Danny figure. The picture above left is how
it came from my spares box, and the picture above right is after I have
repainted the whole weapon apart from the magazine.
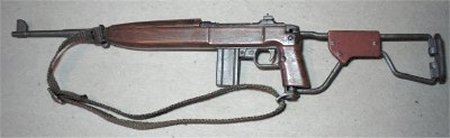
The above pictures are of both sides of the rifle to show how the repaint has
changed it, the paints I used for this project were again Acrylic as I find
these a lot more forgiving while you are working with them. The one's that I
have used are from Vallejo Acrylic Model Colour range and a chart of all the colours is
here.
The first thing I did was to get some Model Colour Matt Varnish No 520, and I
gave all the wooden parts of the gun a re- paint of this to take the shine from
it. This was then set aside to dry, once I was happy with that I then made up a
small mix of the matt Varnish and a very small drop of Model Colour Black No
70950 on the side of my saucer I use. I added a little water to the mix to
dilute it a little and I then gave the wooden parts a wash with this paint.
This I found has two benefits, one is that the matt reduces any shine that was
present, and the second is that the black paint darkens off the wooden parts
nicely. This again was set aside to dry off fully, because I would have to
handle this part while I am repainting the metal parts of the weapon. I removed
the magazine before starting as generally it is a different colour to the gun
anyway, I gave all the metal parts a coat of a mix of Humbrol Gunmetal No 53 and
Matt Black No 33 . I prefer to use the paint in this way, as I have found that
the Gunmetal on it's own is too bright and the black dulls it down slightly.
Once that is dry I then give the metal parts a wash of the Acrylic Matt Varnish
mix to add some depth, this again is set aside to dry. When I am happy that the
colours look right, I then use the
Tamiya Weathering Powders
in this case I have used the Gunmetal and Silver from the set lettered C. All I
do with this is use the brush supplied and lightly brush the Gunmetal on first
and then very lightly use the Silver on the raised edges and the magazine.
The last part I repainted was the pad on the folding stock, this was give a
light coat of Daler-Rowney Cryla Acrylic Artists paint Burnt Sienna No 221, I
also added a tiny part of black to the paint so that all the pads looked
different.
 Russian PPSH 41 Repaint
This section is about how I have repainted the
DiD PPSH 41 machine pistol this came supplied with the DiD Rurik Russian figure.
To be honest this did surprise me with how easy it was to do. Mainly because the
stock itself is made of wood, and it took the artists acrylic paints shown right
a lot better than some plastic rifles.
The colours I used were the Daler-Rowney artists acrylics numbered 223 Burnt
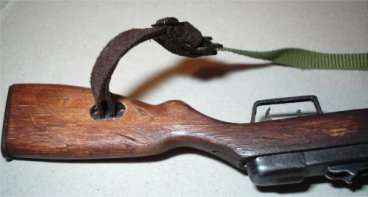
Umber and 247 Raw Umber. The first thing I did with the gun was to remove the
sling from the stock, this was just a case of carefully using my tweezers to
lever out the metal clip as shown below right.
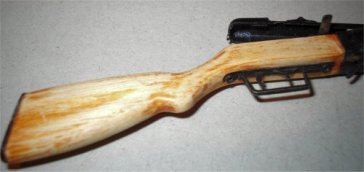
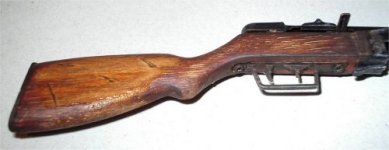
The picture below left is how
it came from the boxed figure, and I have given the whole stock a light sanding
with some fine sandpaper. The picture below right is after I have
started to repaint the stock with alternate coats of the diluted paints.
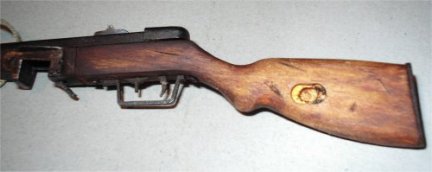
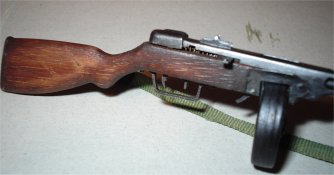
The group of pictures below show how I have firstly added some 'chips' or lines
in the stock with my model knife to represent damage. With the paint I have let
it dry slightly, and then used a wide brush with just water to spread a grain
pattern into the stock. The colour of the wood has come about from using a
mixture of the paints both diluted and a tiny piece of neat paint.
Again always making sure that I went along the 'grain', so that the paint would
spread the colour unevenly so as to represent the grain effect. In all I think I
gave this about four coats of the paint in alternative colours and mixes to get
this effect. Note: The darker colour near
the magazine came about from where I left the darker paint in place to dry, so
it would look like in-grained dirt.

When I was happy with the effect I left the weapon aside to dry completely, and
I then just rubbed the stock between my fingers to press the paint into the
wood, and to get a slight shine to it as well. The canvas part of the sling was
then repainted with some acrylic Olive Green paint, left to dry and the sling
connector was gently pressed back into the stock.
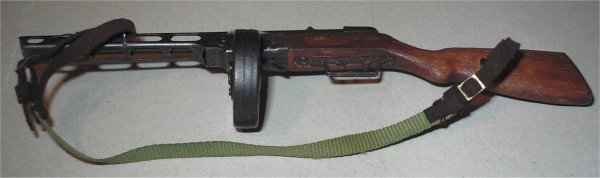
In the picture above I have given all the metal parts of the gun, a light brush
over of the Tamiya Gunmetal weathering powder to finish it.
This section is continued on
Page Two
