|
Welcome
To My Hermann Weber Page.
This figure is the new one that
has been released by DiD of the Hitler Youth figure, and this is a very welcome
and nice model. As the thinner and shorter body will make a nice change from the
standard 6 foot plus figures.
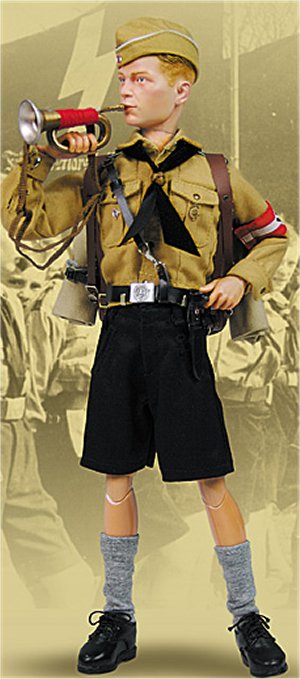
The original figure is shown here -
http://www.onlinedid.com/products/wwii/80043/ and the pictures below are of
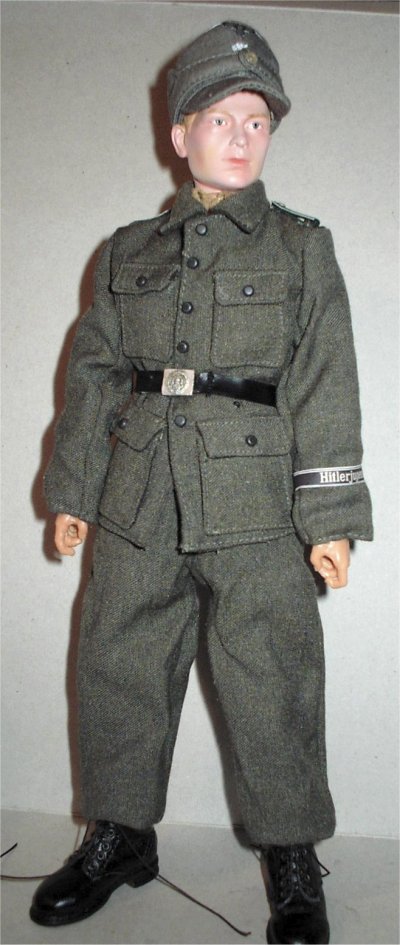
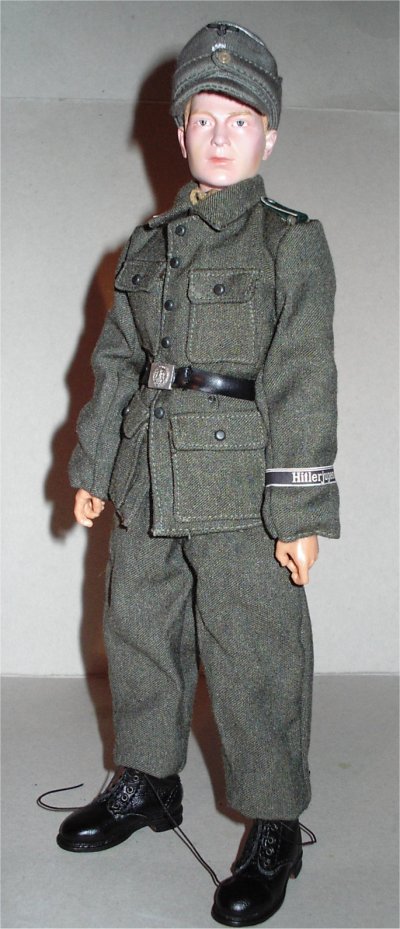
the original figure left, and my kitbash with the German uniform.
With this model I did not want
to keep him as he came from the box, as the political uniforms just don't appeal
to me. And because I could not get just the nude figure I had to buy it as a
complete figure, this is because I have found that a lot of the uniform it came
with, cannot be used with any other figure and a lot of suppliers don't want to
end up with parts they cannot sell.
So with my figure I had already
purchased the uniform I wanted him in. Because I have seen a picture for
reference purposes that I am going to use of a boy in the 12th SS Panzer
Division, standing next to a US military policeman and I thought that this would
make a nice diorama with the height differences. Especially as I intend to bulk
out the MP to try to make him look a giant compared with this figure.
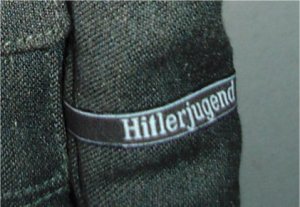
I have also made a new
German insignia page on
how I have fitted the shoulder tabs and the cuff title to my figure.
Figure Assembly
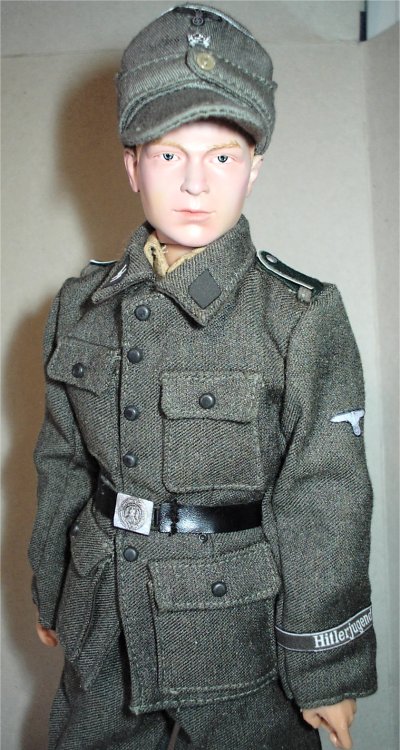
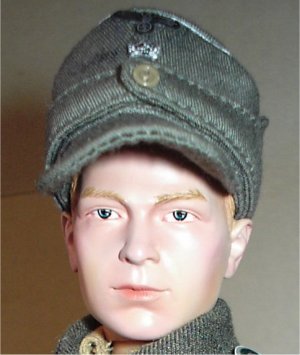
The uniform I chose for this particular
model was the DiD Herbert Zeller one along with the cap which has the raised SS
detail on it, the only drawback to it is the green shoulder boards as I may have
to repaint the fabric part black. The boots came from the DiD
Richard Schlemm figure, and although they
do look good on this model I may fit some gaiters over the top of them to see
what they look like. The armband above right, was made from an image I had of it
which I resized and printed out on self adhesive cotton printer paper.
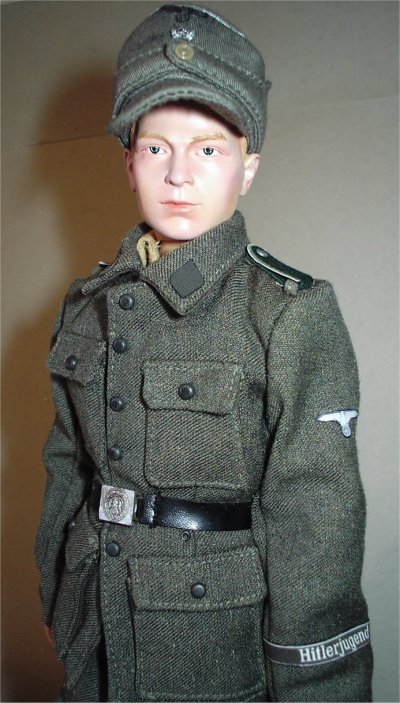
Uniform Fitting
The Zeller cap had the front
paper insert removed, and then placed on the head as it is a tight fit with the
front hair moulding and just squashed down slightly. Be careful of the badges as
they can come off.
The jacket and trousers were
put into boiled water 3 times to shrink them slightly, and then put on over the
top of the supplied shirt and shorts. The jacket sleeves were the main problem I
found, as they ended up way too long for the arms. So get around this I pulled
the jacket sleeves up and the shirt sleeves down, so that they were level. And
then I put a couple of stitches into the ends of them to keep them level, this
allows the jacket sleeves to crease up nicely, making sure that I did not allow
the stitches to show through the outside of the material.
The trousers were pulled up as
far as they would go and then done up over the top of the shorts, this kept the
trousers up as they were quite loose on the waistband. Plus it saved me having
to either sew the waistband tighter, or use some fine string to pull it tighter.
As this would be hidden under the jacket, so it didn�t really matter how I did
it. The trouser legs were then pushed into the boot tops and bloused out over
the top of the boots, depending on how you do this you can end up with some nice
creases in the trouser legs.
With the supplied belt that
came with the figure, I adjusted it out as far as it would go to get it to fit
around the figure. On the inside of the belt lock is a two pronged spring clip
that goes through the belt, free the prongs and pull the belt material through.
And by trial and error place the prongs back down into the material until the
belt fits.
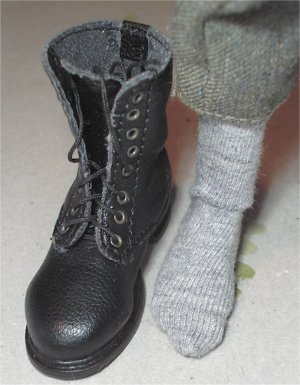
With
the boots I have used with this model, they do come up big on this figure, and
at the moment I just have them on him with the socks and no alterations. But
what I am hoping to do is place some tissue into the toes of the boots to push
the foot backwards, plus tape the foot and ankle slightly to bulk it out a bit.
Then do up the laces over all of this to help the boot creases look right. As it
is the back of the boots that just don�t look right at the moment.
At the moment this figure is
finished apart from dirtying him up a bit, and I will update this page when I
get around to making the diorama of him with the US MP.
 Backpack Backpack
The M39 backpack that came with
the figure is a very nice piece and very well detailed inside. And I became
curious as to what it was exactly used for, as I know very little regarding
German packs and equipment. So in having a look around the internet, I came
across the pictures on the
Sixth
Army Forum taken by one the members. The interesting one is the picture of
the German medic.
I have also found these links
showing the detailing of the backpack.
M34 Backpack -
http://www.germanmilitaria.com/Heer/photos/H048656.html
M34 Backpack -
http://www.germanmilitaria.com/Heer/photos/H003457.html
M34 Backpack -
http://www.germanmilitaria.com/Heer/photos/H045057.html
M39 Backpack -
http://www.germanmilitaria.com/Heer/photos/H018157.html
M39 Backpack -
http://www.fieldgear.org/pouches.htm
HJ Backpack -
http://aboutww2militaria.com/June2006/hjbackpack.html
Hitler Jugend Belt Buckle Image -
http://aboutww2militaria.com/November2006/HJbuckle1.JPG
Hitler Jugend Belt Buckle Image -
http://aboutww2militaria.com/November2006/HJbuckle2.JPG
Making The Boots Fit
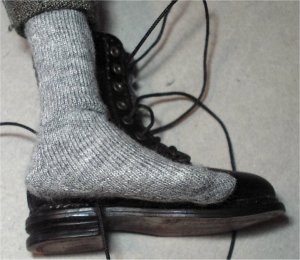
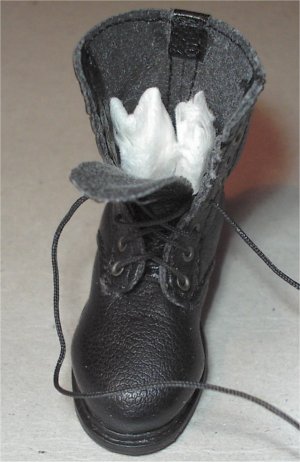
The pictures above show the sizes between the
figure's foot and the boot, and it is only when I had them lined up like this
did I realise the amount of difference that there is. This shows how the creases
in the heel just did not look right, plus I had slight problem with getting the
figure to stand right because of the lack of ankle support.
To get around this problem I used some tissue
paper to bulk out the boot around the foot, I firstly pushed some gently into
the toe area inside the boot. The purpose of this is to push the heel back so
the foot sits neater, making sure that I did not distort the outer shape of the
boot. Then as shown above right, I rolled up two pieces of tissue to go either
side of the ankle to hold the leg and foot in place.
Note: Put the
foot into the boot first and then add the tissue down each side of the ankle
with tweezers, making sure that it reaches the bottom of the inside of the boot.


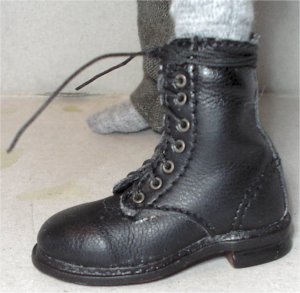

The pictures above show the tissue in place and
the laces done up, and in the picture above right with the trousers legs pulled
down and bloused I have lost the clown look to them.
| 